SIDE FLAIL ASSEMBLIES Current as of 01/18/2012 Massey Ferguson 5455 PARTS LISTING WITH MOUNTING AND OPERATING INSTRUCTIONS Tiger Corporation 3301 N. Louise Ave. Sioux Falls, SD 57107 1-800-843-6849 1-605-336-7900 www.tiger-mowers.
TO THE OWNER / OPERATOR / DEALER All implements with moving parts are potentially hazardous. There is no substitute for a cautious, safe-minded operator who recognizes the potential hazards and follows reasonable safety practices. The manufacturer has designed this implement to be used with all its safety equipment properly attached to minimize the chance of accidents. BEFORE YOU START!! Read the safety messages on the implement and shown in this manual.
FORWARD This manual contains information about many features of the Tiger mowing and roadside maintenance equipment. Some of these include: Safety precautions, Assembly instructions, Operations, Maintenance and Parts. This manual will also assist you in the proper break-in, daily care, and troubleshooting of your new mower. We recommend that you read carefully the entire manual before operating the unit.
TABLE OF CONTENTS SAFETY SECTION_____________________________________ 1 ASSEMBLY / MOUNTING SECTION______________________ 2 OPERATION SECTION_________________________________ 3 MAINTENANCE SECTION______________________________ 4 PARTS SECTION______________________________________ 5 COMMON PARTS SECTION____________________________ 6 WARRANTY INFORMATION_____________________________ 7 This symbol means: CAUTION – YOUR SAFETY IS AT RISK! When you see this symbol, read and follow the associated
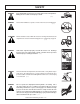
SAFETY SAFETY SECTION Side & Rear flail Safety Section 1-1
SAFETY General Safety Instructions and Practices A safe and careful operator is the best operator. Safety is of primary importance to the manufacturer and should be to the owner / operator. Most accidents can be avoided by being aware of your equipment, your surroundings, and observing certain precautions. The first section of this manual includes a list of Safety Messages that, if followed, will help protect the operator and bystanders from injury or death.
SAFETY Si no lee Ingles, pida ayuda a alguien que si lo lea para que le traduzca las medidas de seguridad. (SG-3) DANGER! Never operate the Tractor or Implement until you have read and completely understand this Manual, the Tractor Operator’s Manual, and each of the Safety Messages found in the Manual or on the Tractor and Implement. Learn how to stop the tractor engine suddenly in an emergency. Never allow inexperienced or untrained personnel to operate the Tractor and Implement without supervision.
SAFETY DANGER! Never allow children or other persons to ride on the Tractor or Implement. Falling off can result in serious injury or death. (SG-10) DANGER! Never allow children to operate or ride on the Tractor or Implement. (SG-11) WARNING! Do not mount the tractor while the tractor is moving. Mount the tractor only when the tractor and all moving parts are completely stopped. (SG-12) DANGER! Start tractor only when properly seated in the tractor seat.
SAFETY WARNING! The operator and all support personnel should wear hard hats, safety shoes, safety glasses, and proper hearing protection at all times for protection from injury including injury from items thrown by the equipment. (SG-16) CAUTION! PROLONGED EXPOSURE TO LOUD NOISE MAY CAUSE PERMANENT HEARING LOSS! Tractors with or without an Implement attached can often be noisy enough to cause permanent hearing loss.
SAFETY WARNING! Never attempt to lubricate, adjust, or remove material from the Implement while it is in motion or while tractor engine is running. Make sure the tractor engine is OFF before working on the Implement. (SG-20) WARNING! Periodically inspect all moving parts for wear and replace when necessary with authorized service parts. Look for loose fasteners, worn or broken parts, and leaky or loose fittings. Make sure all pins are properly secured.
SAFETY DANGER! NEVER use drugs or alcohol immediately before or while operating the Tractor and Implement. Drugs and alcohol will affect an operator’s alertness and coordination and therefore affect the operator’s ability to operate the equipment safely. Before operating the Tractor or Implement, an operator on prescription or over-the-counter medication must consult a medical professional regarding any side effects of the medication that would hinder their ability to operate the Equipment safely.
SAFETY DANGER! WARNING! The rotating parts of this machine have been designed and tested for rugged use. However, the blades could fail upon impact with heavy, solid objects such as metal guard rails and concrete structures. Such impact could cause the broken objects to be thrown outward at very high velocities. To reduce the possibility of property damage, serious injury, or even death, never allow the cutting blades to contact such obstacles.
SAFETY DANGER! Flail Mowers are capable under adverse conditions of throwing objects for great distances (100 yards or more) and causing serious injury or death. Follow safety messages carefully.
SAFETY DANGER! Always disconnect the main PTO Driveline from the Tractor before performing service on the Mower. Never work on the Mower with the tractor PTO driveline connected and running. Blades or Drivelines could turn without warning and cause immediate entanglement, injury or death. (SRM-3) WARNING! WARNING! DANGER! WARNING! WARNING! Do not let the Blades turn when the Mower Deck is raised for any reason, including clearance or for turning.
SAFETY DANGER! WARNING! The flail cutter shaft is designed for standard rotation (same rotation as the tractor wheels during forward travel). Never operate the cutter shaft in the reverse rotation. Operating this mower in reverse rotation may cause objects to be thrown out the front of the mower head. The rotating parts of this machine continue to rotate even after the PTO has been turned off.
SAFETY PART NO.
SAFETY PART NO. LOCATION 10” x 5.5” 31522 MOWER DECK 18.
SAFETY PART NO.
SAFETY PART NO.
SAFETY PART NO.
SAFETY 34852 HYDRAULIC TANK 06550054 ON MOWER HEAD Side & Rear flail Safety Section 1-17
SAFETY ITEM PART NO. QTY. DESCRIPTION 1 50023 00776031 33997 AVAIL 1 1 * * * AVAIL 1 1 1 4 MANUAL CANISTER COMPLETE ROUND MANUAL CANISTER DECAL, SHEET, MANUAL CANISTER DECAL DECAL DECAL SPECIFIC PRODUCT MANUAL E M I SAFETY MANUAL FRONT ADHESIVE PAD REAR ADHESIVE PAD ZIP TIE 14” LONG 2 3 4 5 6 7 8 9 * 33753 34296 34297 6T1823 NOTE: The manual canister can be bolted, zip tied or adhered to a variety of surfaces. Locate a protected area within the view of the operator.
SAFETY FEDERAL LAWS AND REGULATIONS This section is intended to explain in broad terms the concept and effect of federal laws and regulations concerning employer and employee equipment operators. This section is not intended as a legal interpretation of the law and should not be considered as such. Employer-Employee Operator Regulations U.S. Public Law 91-596 (The Williams-Steiger Occupational and Health Act of 1970) OSHA This Act Seeks: “...
SAFETY Side & Rear flail Safety Section 1-20
MASSEY 5455 SIDE FLAIL ASSEMBLY SECTION Assembly Section 2-1
ASSEMBLY Before attempting to mount your Tiger mower, it is important to read an understand all of the Safety Messages in the Safety section of this manual. Check complete shipment list against the packing list to make sure there are no shortages. Make certain the tractor model is the appropriate one for the mower received! Always use a floor jack, hoist or fork lift to lift and raise heavy parts. Read and understand the entire assembly section instructions before attempting to mount your Tiger mower.
ASSEMBLY FRONT PUMP MOUNTING Install the pump mounting bracket on the front of the tractor with capscrews and washers as shown in the Parts Section illustration. DO NOT tighten fasteners at this time. Slide the pump drive shaft into the crankshaft adapter. The end with the external threads should be inserted into the adapter. Slide the splined drive shaft coupler onto the pump drive shaft. Install the pump onto the mounting bracket.
ASSEMBLY RELOCATING TRACTOR EXHAUST The existing MF5455 exhaust will interfere with the mast section of the Tiger main frame. To make room for the main frame the exhaust must be moved forward. Remove the heat shield, the support and the exhaust from the engine of the tractor. The exhaust tube will be replaced with a Tiger Exhaust Relocation Tube. The Exhaust Support will be replaced with a Tiger Exhaust Support.
ASSEMBLY WEATHER-PACK/METRI-PACK ASSEMBLY These instructions apply to both Weather-Pack and Metri-pack connectors. NOTE: Use the specific tool for the type of connector you are assembling. (ASM-C-0009) RETURN LINE INSTALLATION The return port is located by the rear hydraulic remotes, refer to the image below. Remove the cap on the tractor rear remotes for the return line. Refer to the parts section for the adapters and hose needed for the return line.
ASSEMBLY PRESSURE LINE INSTALLATION The Tiger lift valve used needs to access the pressure, return and power beyond ports of the tractor. The tractor comes with a factory tube connecting the tractor pump(pressure port) and the tractor rear remotes(power beyond port). To locate the ports, refer to the images below. For hardware used and additional placement information refer to the parts section. Please note the hose lengths and the fittings. Remove the factory tube between the pump and the remotes.
ASSEMBLY LIFT VALVE MOUNTING Attach the valve mounting plate to the mounting brackets. Align the holes on the plate to the holes on the brackets. Use the hardware shown in the Parts Section to attach the plate to the valve mounting brackets. Finally, place the valve on the valve mounting plate as shown in the Parts Section. Align the holes on the valve assembly to the holes on the plate. Use the hardware provided to secure the valve to the plate.
ASSEMBLY CABLE CONTROL LEVER STAND Preassemble the cable control boxes to the cable control bracket as shown in the parts section. Use the image below for positioning the cable control bracket. Place the front corner of the support bracket 4” from the inside right window and the rear corner from the back side as shown below. The base will sit on top of the floor mat. Be sure that the location of the stand will allow clearance between the cable control box handles and all existing interior levers, etc.
ASSEMBLY MANUAL SWITCH BOX WIRING Route the green wires and the red wire (with the 10amp fuse) from the switchbox to the front console panel. Refer to the parts section for wiring diagram to hook up the switch box. Cover the wires from the switch box with plastic wire wrap provided. Remove the console panel under the steering wheel to access wires. Locate the neutral safety wire. Using a test light or meter, verify this wire is the neutral safety wire.
ASSEMBLY SIDE MOWER HYDRAULIC DIAGRAM (ASM-C-0090) SIDE HYDRAULIC TANK INSTALLATION Install all fittings and tubes into tank and tank filter as shown in the Parts Section illustration. Insert tank sight glass into front side of tank. Place the tank in the mounting bracket on the main frame as shown in the Parts Section. Secure the tank with the tank channel mount by placing the channel mount on top of the tank and the washers over the holes.
ASSEMBLY FILLING HYDRAULIC RESERVOIR Refer to the maintenance section for filling specifications and hydraulic oil requirements. NOTE: Starting or running your Tiger mower before filling reservoir will cause serious damage to hydraulic pump. (ASM-C-0004hydro resrv) INSTALLING O-RING FITTINGS Installing straight, 45º and 90º O-rings requires that the O-ring and washer be up against the swivel body.
ASSEMBLY CONTINUOUS DUTY SOLENOID SWITCH Mount the solenoid switch, drill holes to match if necessary, in a dry and well protected area. Secure as shown in the parts section with provided 3/8” x 1” capscrews, lockwashers, and hex nuts. Route wires to and from the Continuous Duty Solenoid Switch as shown below. A.) ORANGE 10 GA. wire from terminal (A) to +12V battery fusible link. B.) RED 14 GA. wire from terminal (C) to tractor plug in cab. C.) BLACK 14 GA. wire from terminal (B) to -12V battery post. D.
ASSEMBLY AXLE BRACE INSTALLATION With the tractor on jack-stands, remove the existing hardware on the rear axle where the axle braces will be mounted. Use a hoist to raise the axle braces to the correctly matching mounting holes on the rear axle and the main frame. Use the hardware shown in the parts section to attach the braces to the tractor, DO NOT tighten until the main frame has been positioned onto the axle braces. The main frame hardware will not be tightened at this time.
ASSEMBLY COMBO LIFT DRAFT BEAM INSTALLATION Install ½” O-ring breather into butt port of inboard cylinder. Install fittings in the rod end of the cylinder according to the diagram in the commons section. These fittings should be positioned to face the butt end of the cylinder. Next turn the clevis onto the rod of the cylinder until it is tight against the shoulder and lock into place with locking bolt on clevis.
ASSEMBLY LIMIT SWITCH MOUNTING ASSEMBLING LIMIT SWITCH Mount bracket 1-5/8” down from top edge on the inside of the rear arm of the draft beam, (Fig. A) square with inside corner as shown with the square corners against arm. Weld plate no more than 5/8” x 1/4” on top as shown. Assemble limit switch with wheel on body side of arm and with the rear of arm mount aligned with fourth notch on arm as shown in Fig. C.
ASSEMBLY LIMIT SWITCH (ASM-C-0029) TRAVEL LOCK MOUNTING Install the travel lock bracket with pin and clip on the draft beam. Slide the draft beam and align the travel lock bracket hole with the mounting hole on the main frame. Install the capscrew, lockwasher and hex nut as shown in the picture. Raise the deck/flail to it’s upright position (Deck ear touches to stop bolt as shown in the picture). Drill a 13/16” hole to the deck/flail ear through the draft beam as shown below.
ASSEMBLY TRAVEL LOCK INSTALLATION Your side flail bonnet(s) may have come without the travel lock hook welded on. This is done after assembly to ensure a proper fit to your equipment. Follow the following steps to attach the travel lock. Make sure to wear the proper personal protection equipment. 1. Mount the left and/or right travel lock brackets loosely to each side of the mast frame. Refer to the Parts Section in this manual for part information. 2. Raise flail bonnets up to their highest position. 3.
ASSEMBLY MOWER MOUNTING Check that all grease zerks have been installed in the draft beams pivot arm, left linkage arm, right linkage arm, and cylinder mounting ears. Using a clevis pin and roll pins, connect the pivot arm to clevis on draft beam. NOTE: Make sure the longer distance between the cutout and the end of the pivot arm is closest to the draft beam pivot ears on the center tube as shown in the diagram below. Also make sure the cutout on the pivot arm faces into tube of draft beam.
ASSEMBLY DECK / MOTOR FEEDLINE Install the 1” hoses from the motor to the solenoid valve. Refer to the parts section for detailed information about hoses and fittings for this application. Install split hoses around hydraulic hoses where they contact sharp edges, or any other edges that may rub hoses. Be sure that all grease zerks are installed in the draft beam pin bosses. Grease all areas of the draft beam according to the instructions in the maintenance section. Re-check all fittings for tightness.
ASSEMBLY CABLE LIFT DRAFT BEAM INSTALLATION Install ½” O-ring breather into butt port of inboard cylinder. Install fittings in the rod end of the cylinder according to the diagram in the commons section. These fittings should be positioned to face the butt end of the cylinder. Next turn the clevis onto the rod of the cylinder until it is tight against the shoulder and lock into place with locking bolt on clevis.
ASSEMBLY DECK MOUNTING AND LIFT ASSEMBLY Install the upper sheave bracket on the outboard cylinder and tighten securely against piston rod shoulder. Tighten the set screw, and align the draft beam. Install the lower sheave bracket on the draft beam with a ¾” cap-screw and two hex nuts as shown in the diagram on the next page. Align the deck with the draft beam mounting hole and install the outer draft beam pin.
ASSEMBLY 2WD FRONT AXLE ADJUSTMENT In order to prevent interference with mounted equipment, the front axle on a 2WD MF5455 tractor will have to be adjusted outwards by 3 holes on each side (see illustration below). Double check the wheel spacing after adjustment by oscillating and turning the tires fully to check for interference.
ASSEMBLY FINAL PREPARATION FOR OPERATION Place operators safety and operation decals on the steering column and side counsel where they are clearly visible to the operator. These decals should be understood by each operator of the machine in conjunction with the safety and operation section of this book. The decals are to be maintaned in good condition as a reminder to the operator, and should be replaced if damaged.
ASSEMBLY Assembly Section 2-24
OPERATION SECTION Operation Section 3-1 © 2012 Alamo Group Inc.
OPERATION TIGER SIDE AND REAR FLAIL MOWER OPERATING INSTRUCTIONS OPERATION Tiger Side and Rear flail mowers are manufactured with quality material by skilled workers. These mowers are designed for cutting grass and small weeds. The mower is equipped with protective deflectors to prevent objects being thrown from the mower by the blades, however, no shielding is 100% effective. All shields, guards, and deflectors equipped on the mower must be maintained in good operational condition.
OPERATION 1. OPERATOR REQUIREMENTS Safe operation of the unit is the responsibility of a qualified operator. A qualified operator has read and understands the implement and tractor Operator’s Manuals and is experienced in implement and tractor operation and all associated safety practices. In addition to the safety messages contained in this manual, safety signs are affixed to the implement and tractor.
OPERATION 2. TRACTOR REQUIREMENTS The tractor used to operate the mower must have the power, capacity and required equipment to safely operate the mower at a ground speed between 2 and 5 MPH. Operating the mower with a tractor that does not meet the following requirements may cause tractor or mower damage and could be a potential danger to the operator and passersby. OPERATION Tractor Requirements and Capabilities • • • • ASAE approved Roll-Over Protective Structure (ROPS) or ROPS cab and seat belt.
OPERATION 2.4 Front End Weight Maintain a minimum of 20% total tractor weight on the tractor front end at all times. Front end weight is critical to maintain steering ability and to prevent the front end from rearing up. Consult your authorized tractor dealer for front weights and carriers. 2.
OPERATION 3.1 Boarding the Tractor Use both hands and equipped handrails and steps for support when boarding the tractor. Never use control levers for support when mounting the tractor. Seat yourself in the operator’s seat and secure the seat belt around you. OPERATION Never allow passengers to ride on the tractor or attached equipment. Riders can easily fall off and be seriously injured or killed from falling off and being ran over.
OPERATION 4. STARTING THE TRACTOR The operator must have a complete understanding of the placement, function, and operational use of all tractor controls before starting the tractor. Review the tractor operator’s manual and consult an authorized dealer for tractor operation instructions if needed. Essential Tractor Controls: • Conduct all pre-start operation inspection and service according to the tractor operator’s manual. • Make sure all guards, shields, and other safety devices are securely in place.
OPERATION Always shut the Tractor completely down, place the transmission in park, and set the parking brake before you or anyone else attempts to connect or disconnect the Implement and Tractor hitches. (S3PT-15) OPERATION 5.1 Connecting the Rear Flail to the Tractor 1. Make sure the tractor is equipped with the correct PTO shaft. Change shafts if needed. 2. Shorten or remove the tractor drawbar to avoid interference when raising and lowering the mower. 3. Board the tractor and start the engine.
OPERATION 5.2 Connecting the Side Flails to the Tractor 1. 2. 3. Install the Draft Beam onto the Main Frame. Raise the Draft Beam to line up with the the ‘ears’ on the Side Flail and install Pins and hardware. Connect the Linkage and Cylinder to the Side Flail for a Combo Lift set-up or route and connect the cable to the Side Flail if it’s a Cable Lift set-up. 4. Route and connect the hydraulic lines to the cylinders and from the Brake Valve to the Side Flail motor.
OPERATION 6. SETTING THE MOWER OPERATION Properly setting the cutting height is essential for efficient and safe operation. A properly set mower will make a more uniform cut, distribute clippings more evenly, require minimal tractor work, and follow the contour of uneven terrain. NOTE: Avoid very low cutting heights, striking the ground with the blades gives the most damaging shock loads and will cause damage to the mower and drive.
OPERATION Set cutting height according to procedures above for remaining two cutter sections. Make sure that all three rollers are set at the same height to ensure an even cut across the entire width of the mower. 6.2 Leveling Rear Flail Deck Adjust Top Link to level mower roller adjustment. Side Skid Shoes should always be parallel to ground throughout the full adjustment range. Adjust cutting height of machine by raising or lowering rear roller as specified in Operation Section.
OPERATION When attaching the Implement input driveline to the Tractor PTO, it is important that the connecting yoke spring activated locking collar slides freely and the locking balls are seated securely in the groove on the Tractor PTO shaft. Push and pull the driveline back and forth several times to ensure it is securely attached. A driveline not attached correctly to the Tractor PTO shaft could come loose and result in personal injury and damage to the Implement. (S3PT-17) OPERATION 7.
OPERATION Shorten the driveline profiles as follows: • • • • Engagement Check Procedure • With the driveline attached, position the mower to the point where the telescoping driveline is at its maximum extension. Completely shut down the tractor and secure in position. • Mark the inner driveline shield 1/8” from the end of the outer shield. • Disconnect the driveline from the tractor and separate the two driveline halves. • Measure the distance from the mark to the end of the inner profile.
OPERATION DO NOT allow any person under a folded wing unless wing is securely locked up or supported. DO NOT approach the Implement unless the Tractor is turned off and all motion has ceased. Never work under the frame work, or any lifted component unless the implement is securely supported or blocked up. A sudden or inadvertent fall by any of these components could cause serious injury or even death.
OPERATION 8.2 Mower Pre-Operation Inspection/Service Before each mower use, a complete inspection and service is required to ensure the mower is in a good and safe working condition. Damaged and/or broken parts should be repaired and/or replaced immediately. To ensure the mower is ready for operation, conduct the following. OPS-R-0007 Replace bent or broken blades with new blades.
OPERATION • • • OPERATION • • • • • • • • Ensure rubber deflectors are in position and not damaged. Replace worn, broken, and missing sections immediately. Ensure the rollers are in good condition and rotate freely. Ensure the driveline integral shield is in good condition and rotate freely. Inspect that all bolts and screws are in position and are properly torqued. OPS-F- 0004 Inspect the condition of the side mowers and rear mower drive belts.
OPERATION • • • Side and Rear Flail © 2012 Alamo Group Inc. Operation Section 3-17 OPERATION Inspect cutter knives and knife pins for looseness and excessive wear. Make sure the mower is securely blocked up before crawling beneath. Replace damaged, worn, and missing knives as complete sets to maintain cuttershaft balance. Remove any grass or other debris which may be wrapped around the cuttershafts. Inspect the condition of deck skid shoes and hardware.
OPERATION OPERATION Flail Mower PRE-OPERATION Inspection Mower ID#________________ Make ____________________ Date: Shift ________________ ____________________ Before conducting the inspection, make sure the tractor engine is off, all rotation has stopped and the tractor is in park with the parking brake engaged. Make sure the mower is resting on the ground or securely blocked up and all hydraulic pressure has been relieved. Table 1: Condition at Start of Shift Item Specific Comments if not O.K.
OPERATION Tractor PRE-OPERATION Inspection Mower ID#________________ Make ____________________ Date: Shift ________________ ____________________ Condition at Start of Shift Item Specific Comments if not O.K.
OPERATION 9. DRIVING THE TRACTOR AND IMPLEMENT OPERATION Safe tractor transport requires the operator possess a thorough knowledge of the model being operated and precautions to take while driving with an attached implement. Ensure the tractor has the capacity to handle the weight of the implement and the tractor operating controls are set for safe transport. To ensure safety while driving the tractor with an attached implement, review the following.
OPERATION 9.1 Starting the Tractor The procedure to start the tractor is model specific. Refer to the tractor operator’s manual for starting procedures for your particular tractor. Consult an authorized dealer if the starting procedure is unclear. Ensure the 3-point control lever is in the lowered position and the PTO is disengaged before starting the tractor. OPS-U-0033 Make sure the tractor brakes are in good operating condition.
OPERATION OPERATION Using the tractor 3-point hitch control lever, raise the mower off the ground about 6”, or just high enough to clear any ground obstacles. When raising the mower, make sure all connection points are securely attached and at least 1” clearance is maintained between the driveline and the deck. If necessary, place an upper lift strip on the 3-point hitch control lever to limit the height the mower can be raised to avoid driveline damage. 9.
OPERATION 9.4 Crossing Ditches and Steep Inclines Damage resulting from over-collapse of the driveline’s inner profile and its outer housing may allow the driveline to come loose from the Tractor which could cause bodily injury to the operator or bystanders and/or extensive damage to the Tractor or Implement. OPS-R-0020 When confronted with an incline or ditch, do not approach from an angle which is perpendicular or straight on as damaged to over collapse of the driveline may occur.
OPERATION OPERATION Inclines and ditches should be approached along a line which is at an angle as shown. This type of path will reduce the possibility of over-collapse of the driveline and resulting damage. If the gradient is so steep that such an approach increases the possibility of a tractor roll-over, select an alternate crossing path.
OPERATION Many varied objects, such as wire, cable, rope, or chains, can become entangled in the operating parts of the mower head. These items could then swing outside the housing at greater velocities than the blades. Such a situation is extremely hazardous and could result in serious injury or even death. Inspect the cutting area for such objects before mowing. Remove any like object from the site. Never allow the cutting blades to contact such items. (SGM-06) 10.
OPERATION Flail Mowers are capable under adverse conditions of throwing objects for great distances (300 feet or more) and causing serious injury or death. Follow safety messages carefully.
OPERATION 10.4 PTO RPM and Ground Speed Ground speed for mowing will depend upon the height, type, and density of vegetation to be cut. Recommended speed for efficient mower performance is between 2 and 5 mph(3-8 kph). Operate the mower at its full rated PTO speed to maintain blade speed for a clean cut. Refer to the tractor operator’s manual or the tractor instrument panel for the engine speed and gear to provide the required PTO and desired ground speed.
OPERATION OPERATION Do not mow with two machines in the same area except with Cab tractors with the windows closed. (SGM-11) Mow only in conditions where you have clear visibility in daylight or with adequate artificial lighting. Never mow in darkness or foggy conditions where you cannot clearly see at least 300 feet (90 m) in front and to the sides of the tractor and mower.
OPERATION 10.6 Shutting Down the Implement To shut down the implement, first bring the tractor to a complete stop. Then slow down the implement by reducing the engine speed before disengaging the PTO. Wait for all motion to stop before proceeding to drive or shut down the tractor. 11. DISCONNECTING THE MOWER FROM THE TRACTOR Before disconnecting the mower, the PTO must be disengaged and all motion at a complete stop. Move the mower to a level storage location and lower both side mowers to the ground.
OPERATION OPERATION Always shut the Tractor completely down, place the transmission in park, and set the parking brake before you or anyone else attempts to connect or disconnect the Implement and Tractor hitches. (S3PT-15) Never stand or allow another person to stand between a running Tractor and the Mower when disconnecting the Implement from the Tractor 3-point hitch. Always shut the Tractor off completely and set the parking brake before attempting to disconnect the Mower pins from the Tractor hitch.
OPERATION 12. MOWER STORAGE It is recommended that the mower be stored with the center section and both side mowers fully lowered to ground level. If the mower is stored with the side mowers in the raised position, select a level area and engage travel locks and travel lock pins to prevent the side mowers from falling BEFORE disconnecting the mower rear mower.
OPERATION 13. TRANSPORTING THE TRACTOR AND IMPLEMENT OPERATION Inherent hazards of operating the tractor and implement and the possibility of accidents are not left behind when you finish working in an area. Therefore, the operator must employ good judgement and safe operation practices when transporting the tractor and implement between locations. By using good judgement and following safe transport procedures, the possibility of accidents while moving between locations can be substantially minimized.
OPERATION Before transporting the tractor on a public roadway or boarding a trailer for transport, the tractor brake pedals should be locked together. Locking the pedals ensures that both wheels brake simultaneously while stopping, especially when making an emergency stop. If the tractor’s hydraulic pump is not independent of the tractor PTO, or if the tractor PTO has to be run to have hydraulic power, disconnect the mower driveline from the tractor PTO output shaft.
OPERATION OPERATION Make certain that the “Slow Moving Vehicle” (SMV) sign is installed in such a way as to be clearly visible and legible. When transporting the Equipment use the Tractor flashing warning lights and follow all local traffic regulations. (SG-6) The SMV (Slow-Moving Vehicle) emblem is universal symbol used to alert drivers of the presence of equipment traveling on roadways at a slow speed.
OPERATION Reduce speed before turning or applying the brakes. Ensure that both brake pedals are locked together when operating on public roads. OPS-U- 0023 Before transporting a loaded tractor and implement, measure the height and width dimensions and gross weight of the complete loaded unit. Ensure that the load will be in compliance with the legal limits set for the areas that will be traveled through.
OPERATION OPERATION Side and Rear Flail © 2012 Alamo Group Inc.
MAINTENANCE SECTION Maintenance Section 4-1 ©2012 Alamo Group Inc.
MAINTENANCE General Instructions Tiger Mowers are designed for high performance and rugged durability, yet with simplified maintenance. The purpose of this section of the manual is to help the operator in the regular servicing of the mower. Regular maintenance at the intervals mentioned will result in the maximum efficiency and long life of the Tiger Mower. MAINTENANCE When you purchase a Tiger Mower you also acquire another valuable asset, Tiger’s parts organization.
MAINTENANCE Always disconnect the wire leads from the mower pump solenoid before performing service on the Tractor or Mower. Use caution when working on the Tractor or Mower. Tractor engine must be stopped before working on Mower or Tractor. The Mower Blades could inadvertently be turned on without warning and cause immediate dismemberment, injury or death. (SBM-12a) The intervals at which regular servicing should be done are based on hours of operation.
MAINTENANCE MAINTENANCE ITEM SERVICE COMMENTS Hydraulic Fluid Level Check Add if required per fluid recommendations Rear Flail Drive (if applicable) Bearing Flange and Shaft Coupler Lubricate Grease as instructed in detailed maintenance section Cutter Shaft Lubricate Grease as instructed in detailed maintenance section Ground Roller Bearings Lubricate Grease as instructed in detailed maintenance section WEEKLY OR EVERY 50 HOURS ITEM SERVICE COMMENTS In Tank Hyd.
MAINTENANCE YEARLY OR EVERY 500 HOURS SERVICE Hydraulic Tank Fluid Change In Tank Hydraulic Fluid Filter (10 micron filter) Change In-Line HP Filter (10 micron filter) Change Hydraulic Tank Breather Change Side and Rear Flail ©2012 Alamo Group Inc. COMMENTS or Maintenance Section 4-5 Change when indicated by restriction indicator.
MAINTENANCE TROUBLESHOOTING SYMPTOMS CAUSE REMEDY Vibration 1. Loose Bolts 1. Check all bolts and tighten to recommended torque specs. 2a. Check for damaged blades, disc or cuttershaft. Replace if needed. 2b. Check for wire, rope, etc. entangled in the cutter assembly MAINTENANCE 2. Cutter assembly Unbalanced Mower will not lift Mower will not start or run 1. Hyd. Fluid Low 2. Leaks in line 3. Faulty relief valve 4. Kinked or blocked 5. Faulty cylinder 1. Check and refill hydraulic fluid 2.
MAINTENANCE 5c. Remove large nut on side of large valve block. Remove spring, and use needle nose vise grip to pull spool from block. Check block and spool for contaminates and scratches. Clean parts or replace if scratched. 1. 2. 3. Bring oil to proper level. Inspect, repair, or replace hoses. Disable and repair. Motor runs but will not cut. 1. Belts 1. 2. Tensioner 2. Inspect belts and pulleys. Replace belts and repair as needed. Adjust tensioner nut until flatwasher is flush with top of guide. 1.
MAINTENANCE These are intended to be general specifications. See tractor operators or service manual for exact specifications for your unit.
MAINTENANCE TORQUE SPECIFICATIONS MAINTENANCE Side and Rear Flail ©2012 Alamo Group Inc.
MAINTENANCE MAINTENANCE RECOMMENDED FILLING INSTRUCTIONS FOR HYDRAULIC RESERVIORS When filling or checking the oil level, the unit should be parked on a level surface., shut ”OFF”, and allow sufficient time to cool to ambient temperature. Use caution when removing the pressurized breather. Do not place face over opening when removing breather. If your reservoir has two sight glasses: The reservoir should be filled to the top of the lower sight glass on the side of the tank. Do not over-fill.
MAINTENANCE REPLACEING HIGH PRESSURE HYDRAULIC FILTER ELEMENT: WARNING: bowl will be full of oil! Pour the oil from the bowl into a container, this oil should be considered contaminated due to the flow direction through the element is outside-in. Clean the inside of the bowl if “dirt” is present. Remove the old element from the filter head by pulling with a rotation motion. Dispose of the used element properly. Remove the new element from the packaging.
MAINTENANCE GREASING THE UPPER AND LOWER SHEAVES MAINTENANCE Locate the grease zerks on the ends of the upper and lower sheave pins. Mnt-R-0018 Inject LithiumComplex Extreme Pressure grease conforming to NLGI2-ISO 320 specifications into each pin until it protrudes from the ends. These should also be greased daily or for every 8 hours of service. GREASING P.T.O. SHAFTS After bringing the tractor to a complete stop, shut off the engine and remove he PTO shaft from the tractor.
MAINTENANCE GREASING THE REAR DRIVE BEARING AND EXTENSION COUPLER SHAFT Locate the grease zerks for the rear flail drive extension shaft. Make sure the zerks are clean before injecting grease. One pump of grease into flange zerk and shaft coupler once every day or for every 8 hours of service. GREASING PUMP DRIVE SHAFT COUPLER With engine stopped, ensure drive shaft alignment by grasping coupler and sliding back and forth. Coupler should slice freely with approximately 1/8” of end play.
MAINTENANCE DRIVE SHAFT YOKE, U-JOINT STUB SHAFT MAINTENANCE With engine stopped, inject Lithium-Complex extreme pressure grease conforming to NLGI2-ISO 320 specifications into universal joints and slip yoke until grease appears at the seal. Grease them daily or every 8 hours. ADJUSTING THE CABLE LIFT Extend the outboard cylinder until the mower deck touches its stop on the draft beam as shown.
MAINTENANCE ADJUSTING THE CUTTING HEIGHT ADJUSTING STANDARD DUTY CUT HEIGHT To adjust the cutting height of the standard duty flail head the two nuts on the roller shaft brackets must be taken off and moved to the desired location/ height. Be sure that both sides of the shaft are adjusted to corresponding holes so the shaft remains level. BALL VALVES The ball valve at the hydraulic reservoir may need to be closed during certain maintenance or repair procedures.
MAINTENANCE MAINTENANCE GREASING CUTTER SHAFT-FLAIL MOWERS Locate grease zerks on each end of cutter shaft(s). These are located on the bearing cover. Normal conditions require one or two pumps in each bearing, using Lithium-Complex Extreme Pressure grease conforming to NLGI2-ISO 320 specifications. This is to be done with a standard grease gun daily or at 8 hour intervals. CAUTION: Over greasing may cause premature seal failure.
MAINTENANCE IDLER TENSION For standard cut on the mechanically driven rear flail mower, adjust so that the spring washer is flush with the spring guide. MntP-R-0095 Side and Rear Flail ©2012 Alamo Group Inc. Maintenance Section 4-17 MAINTENANCE Locate the idler tensioning rod for each flail. Loosen the locking nut. Turn the adjusting nut until the washer between the spring and nuts are flush with the spring housing or guide. Tighten locking nut securely.
MAINTENANCE ROSTA TENSIONER STANDARD DUTY REAR FLAILS Remove the shield guard over the belt shield. Next, remove the belt shield that covers the tensioner, belt and sheaves. MAINTENANCE BELT SHIELD SHIELD GUARD Place a straight edge over both sheaves and measure the belt tension (See TENSIONER MEASUREMENT PROCEDURE). To adjust the Rosta Tensioner, first, loosen the Rosta Stop and Rosta Bolt that secures the Rosta to the flail.
MAINTENANCE TENSIONER MEASUREMENT PROCEDURE Measure the Belt Span (SEE SKETCH). 2. Position the bottom of the Large “O” Ring on the Span Scale at the measured Belt Span. 3. Set the Small “O” Ring on the Deflection Force Scale to Zero. 4. Place the tension gauge squarely on the belt at the center of the belt span. Apply a force on the plunger perpendicular to the belt span until the bottom of the Large “O” Ring is even with the bottom of a straight edge laid across the sheaves. 5.
MAINTENANCE REVERSING MOWER ROTATION OF SIDE FLAIL MOWERS MAINTENANCE To reverse the rotation of the side and hydraulically driven Heavy Duty rear flail, a different idler arm is needed only for side flail. Part No. TF4346 is used in standard rotation. Part No. TF4345 is used in reverse rotation. Before attempting this procedure be sure all dirt is cleaned away from the motor and around all hose connections. This will prevent the oil from becoming contaminated.
MAINTENANCE Remove the shield guard and belt shield. Next, remove the Rosta stop and loosen the Rosta Tensioner (CAUTION: the Rosta Tensioner is under belt pressure. Sudden release of this pressure may cause serious injury). Remove the Rosta Tensioner and relocate to the Reverse Rotation Tensioner location. Using the Rosta wrench, tention the belt, then tighten the Rosta bolt. Check the tension and adjust as needed.
MAINTENANCE REVERSING MOWER ROTATION REAR MECHANICAL DRIVEN FLAIL MOWERS MAINTENANCE Remove the rear shaft guard and disconnect the chain coupling to the shaft. Disconnect the P.T.O. drive shaft from the right angle gear box. Remove the gear box from the flail frame and lay down flat so that gear oil does not leak not. Switch the top breather vent plug with the drain plug on the bottom. Remove the input shaft guard.
MAINTENANCE Flail Blades Inspection Inspect the Blades daily for abnormal wear. REPLACE ALL BLADES on the carrier IMMEDIATELY if any blades have: Failure to replace worn or damaged blades may lead to catastrophic failure of the blades and ejection of the broken part with tremendous force which may cause serious bodily injury or death. Always replace blades in sets • • Blades that are damaged may indicate severe service or abuse.
MAINTENANCE Blade Pins and D-Ring Inspection Blade Pins and D-Rings daily for wear or damage as follows: MAINTENANCE Inspect the Blade pins and D-Rings daily for abnormal wear. Make sure the cotter pins are in place and properly spread.
MAINTENANCE Flail Axe Blades Inspection Inspect the Blades daily for abnormal wear.
MAINTENANCE Flail Axe Blade Bolt Inspection Inspect Blade Bolts daily for wear or damage as follows: MAINTENANCE Inspect the Blade Bolt daily for abnormal wear. REPLACE ALL BLADE BOLTS on the carrier IMMEDIATELY if any bolts have: • Visible cracks or • If the blade bolt is worn or any recessed area is visible on the bolt, or • If Blade Bolt has gouges or chipped areas. or • If Bushing fits loose in the Rotor Shaft.
MAINTENANCE 50” FLAIL KNIFE BLADE REPLACEMENT If knives are damaged or badly worn, they will need to be replaced as a set. Replacing a single knife can cause severe knife can cause severe vibration and possible damage to the mower. The knife should not be welded on for any reason. 2. Always replace the knife bolts when replacing the knives. DO NOT REUSE THE KNIFE BOLTS OR NUTS. 3. Assemble knives, bushings, bolts and nuts as shown in part section of the manual. 4.
MAINTENANCE RECOMMENDED FILLING INSTRUCTIONS FOR REAR FLAIL GEARBOX MAINTENANCE When filling or checking the fluid level, the unit should be parked on a level surface with rear flail down on surface, shut “OFF”, and cold, (at ambient temperature). Remove the fluid level plug located on the side of the gear box. The gear box should be filled to the bottom of the fluid level hole. If necessary, use 7590 wt. PAO Synthetic Extreme Pressure Gear Lube to raise level to bottom of the hole. Do not over-fill.
MAINTENANCE PAGE INTENSIONALLY LEFT BLANK MAINTENANCE Side and Rear Flail ©2012 Alamo Group Inc.
MAINTENANCE CUTTERSHAFT BEARING REPLACEMENT 1. 2. 3. 4. MAINTENANCE 5. 6. 7. 8. Remove existing cuttershaft, bearings and string guards. Make sure that the end knives on each end of the cuttershaft are orientated as shown. Apply anti-seize on cuttershaft as shown on next page. Install non-drive side bearing first. Install the top of the string guard on the non-drive side first. Use loctite-271 or equvalent and torque (95 ft-lb or 104ft-lb if you use an extension).
MAINTENANCE MAINTENANCE Side and Rear Flail ©2012 Alamo Group Inc.
MAINTENANCE DAILY MAINTENANCE SCHEDULE The following services should be performed daily or every 8 hours of service, following the detailed maintenance instructions in the operators manual. _______ Pump Drive Shaft: Check for end play in driveshaft / coupler and lubricate at zerks. MAINTENANCE _______ Crankshaft adapter: If equipped with rubber grommets check condition, replace if missing or damaged. _______ Pivot points: Inject grease until it appears at ends.
MF 5455 SIDE FLAIL PARTS SECTION
PART NAME INDEX PARTS ORDERING GUIDE......................................................................................................................................................................... 3 TRACTOR MOUNT KIT.............................................................................................................................................................................. 4 TRACTOR MOUNT KIT - HYDRAULICS................................................................................
PARTS ORDERING GUIDE MF 5455 TSF ©2012 Alamo Group Inc.
TRACTOR MOUNT KIT MF 5455 TSF ©2012 Alamo Group Inc.
TRACTOR MOUNT KIT Continued... ITEM PART NO. QTY.
TRACTOR MOUNT KIT - HYDRAULICS MF 5455 TSF ©2012 Alamo Group Inc.
TRACTOR MOUNT KIT - HYDRAULICS Continued... ITEM PART NO. QTY. DESCRIPTION 1 ------ - VALVE,BRAKE *REFER TO TRACTOR MNT KIT PAGE 2 ------ - PUMP *REFER TO TRACTOR MNT KIT PAGE 3 ------ - TANK,RES,ASSY *REFER TO TRACTOR MNT KIT PAGE 4 32382 1 BRACKET,HOSE 5 35131 1 CLAMP.HOSE 6 35271 1 CLAMP PLATE,MID 7 21732 1 CAPSCREW,1/2" X 1-3/4",NC 8 21727 1 NYLOCK NUT,1/2",NC 9 TF4852 2 KIT, FLANGE, #20 10 24860 1 CAPSCREW,20MM X 40MM,2.
BATTERY RELOCATION MF 5455 TSF ©2012 Alamo Group Inc.
BATTERY RELOCATION Continued... ITEM PART NO. QTY.
2 SPOOL CABLE CONTROL MOUNT MF 5455 TSF ©2012 Alamo Group Inc.
2 SPOOL CABLE CONTROL MOUNT Continued... ITEM PART NO. QTY. DESCRIPTION 1 31923 1 BRKT,CTRL,CBL 2 6T1251 2 CABLE CONTROL BOX 3 34496 1 BRKT,SWITCHBOX,UNI 4 06510102 1 SWITCHBOX,SIDE,GND 5 21639 3 CAPSCREW,3/8" X 3-1/4",NC 6 41794 3 SPACER 7 21627 3 NYLOCK NUT,3/8",NC 8 21542 3 CAPSCREW,1/4" X 4",NC 9 22014 3 FLATWASHER,1/4" 10 21525 3 HEX NUT,1/4",NC 11 32359 2 SCREW,MACHINE,8-32 X 3/4" 12 34623 2 CBL,CNTRL,122" MF 5455 TSF ©2012 Alamo Group Inc.
CABLE (MANUAL) LIFT VALVE - 2 SPOOL MF 5455 TSF ©2012 Alamo Group Inc.
CABLE (MANUAL) LIFT VALVE - 2 SPOOL Continued... ITEM PART NO. QTY.
TRACTOR PRESSURE, RETURN & POWER BEYOND ITEM PART NO. QTY. DESCRIPTION 1 06503140 1 ELBOW,22MM MOR X 5/8"MJ 2 06503139 1 ELBOW,18MM MOR X 5/8"MJ 3 33463 1 ADAPTER,22MM MOR X 1/2"MJ MF 5455 TSF ©2012 Alamo Group Inc.
COMMON SIDE FLAIL - SUPER DUTY PARTS SECTION
PART NAME INDEX PARTS ORDERING GUIDE......................................................................................................................................................................... 3 COMBO DRAFT BEAM............................................................................................................................................................................... 4 63IN SIDE FLAIL - STANDARD ROTATION...........................................................................
PARTS ORDERING GUIDE COMMON SIDE FLAIL - SD ©2012 Alamo Group Inc.
COMBO DRAFT BEAM COMMON SIDE FLAIL - SD ©2012 Alamo Group Inc.
COMBO DRAFT BEAM Continued... ITEM PART NO. QTY. DESCRIPTION 1 32143 1 COMBO DRAFT BEAM -STD DTY FLAIL 2 6T0151R 1 HYD. CYLINDER 3” X 10” 3 32215 1 HYD.
63IN SIDE FLAIL - STANDARD ROTATION COMMON SIDE FLAIL - SD ©2012 Alamo Group Inc.
63IN SIDE FLAIL - STANDARD ROTATION Continued... ITEM PART NO. QTY.
63IN SIDE FLAIL - REVERSE ROTATION COMMON SIDE FLAIL - SD ©2012 Alamo Group Inc.
63IN SIDE FLAIL - REVERSE ROTATION Continued... ITEM PART NO. QTY.
75IN SIDE FLAIL - STANDARD ROTATION COMMON SIDE FLAIL - SD ©2012 Alamo Group Inc.
75IN SIDE FLAIL - STANDARD ROTATION Continued... ITEM PART NO. QTY.
75IN SIDE FLAIL - REVERSE ROTATION COMMON SIDE FLAIL - SD ©2012 Alamo Group Inc.
75IN SIDE FLAIL - REVERSE ROTATION Continued... ITEM PART NO. QTY.
SIDE FLAIL DRIVE ASSEMBLY COMMON SIDE FLAIL - SD ©2012 Alamo Group Inc.
SIDE FLAIL DRIVE ASSEMBLY Continued... ITEM PART NO. QTY. DESCRIPTION 1 ------ - BONNET *REFER TO HEAD PARTS 2 28679B 1 MOTOR CHANNEL 3 21700 2 HEX NUT, 1/2", NF 4 TF3620A 1 SPRING,TENSIONER 5 27938 1 BUSHING,MACH,1ODX1/2IDX14GA. 6 40496 1 ROD,THREADED,1/2NFX8 7 PT3611A 1 CLEVIS,6" 8 06504013 1 MOTOR, M350-1 3/4 GEAR 9 TF3044 1 SHEAVE,8.0 10 TF3013 1 BUSHING,QD,SK 1-1/4,1/4 KEY 11 TF3040 1 SHEAVE,6.
3IN X 10IN HYDRAULIC CYLINDER BREAKDOWN ITEM PART NO. QTY. DESCRIPTION ------ 6T0151R - HYD.
3IN X 12IN HYDRAULIC CYLINDER BREAKDOWN ITEM PART NO. QTY. DESCRIPTION ------ 32215 - HYD.
PUMP AND GRILL GUARD OPTIONS ITEM PART NO. QTY. DESCRIPTION 1 32430 1 UNIVERSAL PUMP GUARD 2 32737 1 UNIVERSAL GRILL GUARD 3 21833 4 CAPSCREW,3/4" X 2-1/4",NC 4 22021 2 FLATWASHER,3/4" 5 21993 4 LOCKWASHER,3/4" 6 21825 4 HEX NUT,3/4",NC COMMON SIDE FLAIL - SD ©2012 Alamo Group Inc.
RESERVOIR TANK FILTER ASSEMBLY ITEM PART NO. QTY. DESCRIPTION ------ 06505044 - FILTER ASSY SAE 10 MICRON 1 28583 4 CAPSCREW,8MM X 25MM(1.25 PITCH) 2 06505045 1 COVER 3 06505046 1 SEAL KIT 4 06505047 1 SPRING 5 06505048 1 BYPASS 6 35259 1 FILTER,10 MIC,RETURN LINE 7 06505049 1 CAN/BODY COMMON SIDE FLAIL - SD ©2012 Alamo Group Inc.
CABLE (MANUAL) LIFT VALVE BREAKDOWN - 30198 COMMON SIDE FLAIL - SD ©2012 Alamo Group Inc.
CABLE (MANUAL) LIFT VALVE BREAKDOWN - 30198 Continued... ITEM PART NO. QTY.
CABLE (MANUAL) LIFT VALVE BREAKDOWN - 31752 COMMON SIDE FLAIL - SD ©2012 Alamo Group Inc.
CABLE (MANUAL) LIFT VALVE BREAKDOWN - 31752 Continued... ITEM PART NO. QTY.
CABLE (MANUAL) LIFT VALVE BREAKDOWN - 31320 COMMON SIDE FLAIL - SD ©2012 Alamo Group Inc.
CABLE (MANUAL) LIFT VALVE BREAKDOWN - 31320 Continued... ITEM PART NO. QTY.
CABLE (MANUAL) LIFT VALVE BREAKDOWN - 31322 COMMON SIDE FLAIL - SD ©2012 Alamo Group Inc.
CABLE (MANUAL) LIFT VALVE BREAKDOWN - 31322 Continued... ITEM PART NO. QTY.
CABLE (MANUAL) LIFT VALVE BREAKDOWN - 06502040 COMMON SIDE FLAIL - SD ©2012 Alamo Group Inc.
CABLE (MANUAL) LIFT VALVE BREAKDOWN - 06502040 Continued... ITEM PART NO. QTY.
CABLE (MANUAL) LIFT VALVE BREAKDOWN - 06502042 COMMON SIDE FLAIL - SD ©2012 Alamo Group Inc.
CABLE (MANUAL) LIFT VALVE BREAKDOWN - 06502042 Continued... ITEM PART NO. QTY.
FRONT HYDRAULIC PUMP BREAKDOWN COMMON SIDE FLAIL - SD ©2012 Alamo Group Inc.
FRONT HYDRAULIC PUMP BREAKDOWN Continued... ITEM PART NO. QTY.
FLAIL MOTOR BREAKDOWN COMMON SIDE FLAIL - SD ©2012 Alamo Group Inc.
FLAIL MOTOR BREAKDOWN Continued... ITEM PART NO. QTY.
COOLER ASSEMBLY ITEM PART NO. QTY. DESCRIPTION 1 21530 10 CAPSCREW,1/4 X1 NC 2 21986 10 LOCKWASHER,1/4 3 22014 10 FLATWASHER,1/4 4 35176 10 1/4 U-NUT 5 06370015 1 SCREEN,COOLER,FRNT 6 06380006 1 MNT,COOLER,BUMPER TANK,RH 7 06380007 1 MNT,COOLER,BUMPER TANK,LH 8 06510026 1 COOLER,FRONT MNT 9 21629 4 CAPSCREW,3/8 X 3/4 NC 10 21988 4 LOCKWASHER,3/8 11 22016 4 FLATWASHER,3/8 12 34117 2 ELBOW,1MOR X 1MJ90,FORGED COMMON SIDE FLAIL - SD ©2012 Alamo Group Inc.
BRAKE VALVE ASSEMBLY ITEM PART NO. QTY. DESCRIPTION --- 06510083 1 BRAKE VALVE, ASSY 1 34092 1 BRAKE VALVE, BLANK 2 34094 2 LOGIC ELEMENT 3 34095 1 RELIEF VALVE, 3000 PSI 4 06510095 1 METRI PAK COIL 5 34093 1 CARTRIDGE, 2 POSITION, 3 WAY (WITH NUT & WASHER) 6 34091 1 RELIEF VALVE, 2600 PSI --- 34096 2 RELIEF SEAL KIT ---- 34097 1 SOLENOID SEAL KIT --- 34098 2 ELEMENT SEAL KIT COMMON SIDE FLAIL - SD ©2012 Alamo Group Inc.
BRAKE VALVE HYDRAULIC SCHEMATIC COMMON SIDE FLAIL - SD ©2012 Alamo Group Inc.
SIDE FLAIL TRAVEL LOCK ITEM PART NO. QTY. DESCRIPTION 1 ------ - BONNET *REFER TO FLAIL ASSEMBLY 2 30531A 1 BRACKET, TRAVEL LOCK 3 TF4248 1 PLATE, TRAVEL LOCK 4 23745 1 TRAVEL LOCK HOOK 5 21783 2 CAPSCREW,5/8”X2” NC 6 21992 2 LOCKWASHER, 5/8” 7 21775 2 HEX NUT, 5/8” NC 8 TF4250 1 PIN, TRAVEL LOCK COMMON SIDE FLAIL - SD ©2012 Alamo Group Inc.
DRAFT BEAM TRAVEL LOCK ITEM PART NO. QTY.
SWITCH BOX ITEM PART NO. QTY. DESCRIPTION 1 06514013 1 SWBX,ALUM,BLK,06510102 2 35226 1 SWITCH,MOWER,COLEHERSEE 3 33811 1 SWITCH,MASTER/DECK FLOAT 4 6T3923 1 INDICTATOR LIGHT,ON,RED 5 06514014 1 BREAKER,10A,SWBX 6 34540 1 STRAIN RELIEF,3/4,BLACK,NYLON 7 06550018 1 DECAL,SWTCHBX,TM/TSF,CG 8 35227 1 RELAY,DP,DT,12V,LY2F,35226 COMMON SIDE FLAIL - SD ©2012 Alamo Group Inc.
SWITCH BOX SCHEMATIC COMMON SIDE FLAIL - SD ©2012 Alamo Group Inc.
FIRE SUPPRESSION SYSTEM COMMON SIDE FLAIL - SD ©2012 Alamo Group Inc.
FIRE SUPPRESSION 3-POINT MOUNT COMMON SIDE FLAIL - SD ©2012 Alamo Group Inc.
FIRE SUPPRESSION 3-POINT MOUNT Continued... ITEM PART NO. QTY.
FIRE SUPPRESSION FRONT MOUNT COMMON SIDE FLAIL - SD ©2012 Alamo Group Inc.
FIRE SUPPRESSION FRONT MOUNT Continued... ITEM PART NO. QTY.
FIRE SUPPRESSION SYSTEM ELECTRICAL SCHEMATIC COMMON SIDE FLAIL - SD ©2012 Alamo Group Inc.
WETCUT COMMON SIDE FLAIL - SD ©2012 Alamo Group Inc.
WETCUT 50 GALLON TANK - 3PNT MOUNT ITEM PART NO. QTY. DESCRIPTION 1 06370128 1 MNT,3PNT,UNI 2 06370136 1 MNT,TANK,50GAL,WETCUT 4 06520342 1 TANK,50GA.,WETCUT 7 RD1032 3 PIN,LYNCH 1/4" X 2" 8 TB1036 1 PIN,SEC BOOM SWIV 1X4-11/16" 9 06520343 4 ANCHOR,STRAP,WETCUT 10 06520344 4 BOLT,STRAP,TANK,WETCUT 11 06520345 2 STRAP,TANK,WETCUT COMMON SIDE FLAIL - SD ©2012 Alamo Group Inc.
WETCUT 100 OR 150 GALLON TANK - 3PNT MOUNT ITEM PART NO. QTY. DESCRIPTION 1 06370128 1 MNT,3PNT,UNI 2 06370138 1 MNT,TANK,100GAL,WETCUT ------ 06370139 - MNT,TANK,150GAL,WETCUT 4 06520372 1 TANK,100GA.,WETCUT ------ 06520373 - TANK,150GA.
WETCUT 3PNT PLUMBING - 50IN MOWERS COMMON SIDE FLAIL - SD ©2012 Alamo Group Inc.
WETCUT 3PNT PLUMBING - 50IN MOWERS Continued... ITEM PART NO. QTY.
WETCUT 3PNT PLUMBING - LARGE MOWERS COMMON SIDE FLAIL - SD ©2012 Alamo Group Inc.
WETCUT 3PNT PLUMBING - LARGE MOWERS Continued... ITEM PART NO. QTY.
WETCUT FRONT PLUMBING - 50IN MOWERS COMMON SIDE FLAIL - SD ©2012 Alamo Group Inc.
WETCUT FRONT PLUMBING - 50IN MOWERS Continued... ITEM PART NO. QTY.
WETCUT FRONT PLUMBING - LARGE MOWERS COMMON SIDE FLAIL - SD ©2012 Alamo Group Inc.
WETCUT FRONT PLUMBING - LARGE MOWERS Continued... ITEM PART NO. QTY.
WETCUT 50IN SPRAYER HEAD ASSEMBLY COMMON SIDE FLAIL - SD ©2012 Alamo Group Inc.
WETCUT 50IN SPRAYER HEAD ASSEMBLY Continued... ITEM PART NO. QTY.
WETCUT 60IN SPRAYER HEAD ASSEMBLY COMMON SIDE FLAIL - SD ©2012 Alamo Group Inc.
WETCUT 60IN SPRAYER HEAD ASSEMBLY Continued... ITEM PART NO. QTY.
WETCUT CABLES COMMON SIDE FLAIL - SD ©2012 Alamo Group Inc.
COMMON SIDE FLAIL - EXTREME DUTY PARTS SECTION
PART NAME INDEX CABLE DRAFT BEAM ASSEMBLY........................................................................................................................................................ 70 COMBO DRAFT BEAM ASSEMBLY...................................................................................................................................................... 72 60IN CABLE SIDE FLAIL - STANDARD ROTATION...............................................................................................
CABLE DRAFT BEAM ASSEMBLY COMMON SIDE FLAIL - XD ©2012 Alamo Group Inc.
CABLE DRAFT BEAM ASSEMBLY Continued... ITEM PART NO. QTY. DESCRIPTION 1 6T0103E - DRAFT BEAM (EXTENDED 6” 4WD) ------- 6T0105 - DRAFT BEAM (STD WITH TRAVEL LOCK) ------ 6T0108 - DRAFT BEAM (30 LB CHANNEL, 45 3/8”) 2 6T0150 1 CYLINDER 3” X 18” 3 6T0151R 1 HYD.
COMBO DRAFT BEAM ASSEMBLY COMMON SIDE FLAIL - XD ©2012 Alamo Group Inc.
COMBO DRAFT BEAM ASSEMBLY Continued... ITEM PART NO. QTY. DESCRIPTION 1 28955D 1 COMBO DRAFT BEAM -HVY DTY FLAIL 2 6T0151R 1 HYD. CYLINDER 3” X 10” 3 25343 1 HYD.
60IN CABLE SIDE FLAIL - STANDARD ROTATION ITEM PART NO. QTY.
60IN CABLE SIDE FLAIL - STANDARD ROTATION Continued... ITEM PART NO. QTY.
60IN CABLE SIDE FLAIL - REVERSE ROTATION ITEM PART NO. QTY.
60IN CABLE SIDE FLAIL - REVERSE ROTATION Continued... ITEM PART NO. QTY.
60IN COMBO SIDE FLAIL - STANDARD ROTATION ITEM PART NO. QTY. DESCRIPTION 1 33913 1 BONNET 60" COMBO 2 TF1802A 1 BAFFLE,FLAIL,60" HD,STC --- TF1807A 1 CUTTERSHAFT,ASSY,60" HD,STC 3 21677 32 NYLOCK NUT,7/16 NC COMMON SIDE FLAIL - XD ©2012 Alamo Group Inc.
60IN COMBO SIDE FLAIL - STANDARD ROTATION Continued... ITEM PART NO. QTY.
60IN COMBO SIDE FLAIL - REVERSE ROTATION ITEM PART NO. QTY. DESCRIPTION 1 33913 1 BONNET 60" COMBO --- TF1807A - CUTTERSHAFT,ASSY,60" HD,STC 3 21677 32 NYLOCK NUT,7/16 NC 4 33714 64 KNIFE,FLAIL,STANDARD 5 34011 32 CAPSCREW,7/16X3 7/16,NC GR8 6 TF1807 1 CUTTERSHAFT,60" HD 7 TF1020 32 KNIFE MTG CLEVIS,FLAIL 8 30277 1 GROUND ROLLER 60” 9 TF1045B 2 STUB SHAFT,GROUND ROLLER 10 6T2330 8 CAPSCREW,SKT HD,7/16X1-1/2NC COMMON SIDE FLAIL - XD ©2012 Alamo Group Inc.
60IN COMBO SIDE FLAIL - REVERSE ROTATION Continued... ITEM PART NO. QTY.
75IN CABLE SIDE FLAIL - STANDARD ROTATION ITEM PART NO. QTY.
75IN CABLE SIDE FLAIL - STANDARD ROTATION Continued... ITEM PART NO. QTY.
75IN CABLE SIDE FLAIL - REVERSE ROTATION ITEM PART NO. QTY.
75IN CABLE SIDE FLAIL - REVERSE ROTATION Continued... ITEM PART NO. QTY.
75IN COMBO SIDE FLAIL - STANDARD ROTATION ITEM PART NO. QTY. DESCRIPTION 1 21499A 1 BONNET,75,HD 2 TF1402A 1 BAFFLE,FLAIL,75HD,STD ROT --- TF1002A - CUTSHFT ASSY,75HD,STD KNIVES 3 21677 40 NYLOCK NUT,7/16 NC COMMON SIDE FLAIL - XD ©2012 Alamo Group Inc.
75IN COMBO SIDE FLAIL - STANDARD ROTATION Continued... ITEM PART NO. QTY.
75IN COMBO SIDE FLAIL - REVERSE ROTATION ITEM PART NO. QTY. DESCRIPTION 1 21499A 1 BONNET,75,HD --- TF1002A - CUTSHFT ASSY,75HD 3 21677 40 NYLOCK NUT,7/16 NC 4 33714 80 KNIFE,FLAIL,STANDARD 5 34011 40 CAPSCREW,7/16X3 7/16,NC GR8 6 TF1002 1 CUTTERSHAFT,75,HD 7 TF1020 40 KNIFE MTG CLEVIS,FLAIL 8 28738 1 GROUND ROLLER,75 9 TF1045B 2 STUB SHAFT,GROUND ROLLER 10 6T2330 8 CAPSCREW,SKT HD,7/16X1-1/2NC COMMON SIDE FLAIL - XD ©2012 Alamo Group Inc.
75IN COMBO SIDE FLAIL - REVERSE ROTATION Continued... ITEM PART NO. QTY.
90IN CABLE SIDE FLAIL - STANDARD ROTATION ITEM PART NO. QTY.
90IN CABLE SIDE FLAIL - STANDARD ROTATION Continued... ITEM PART NO. QTY.
90IN CABLE SIDE FLAIL - REVERSE ROTATION ITEM PART NO. QTY.
90IN CABLE SIDE FLAIL - REVERSE ROTATION Continued... ITEM PART NO. QTY.
90IN COMBO SIDE FLAIL - STANDARD ROTATION ITEM PART NO. QTY. DESCRIPTION 1 22083A 1 BONNET,90,HD,ASSY 2 TF1502A 1 BAFFLE,FLAIL,90HD,STD ROT --- TF1102A - CUTSHFT ASSY,90HD 3 21677 48 NYLOCK NUT,7/16 NC COMMON SIDE FLAIL - XD ©2012 Alamo Group Inc.
90IN COMBO SIDE FLAIL - STANDARD ROTATION Continued... ITEM PART NO. QTY.
90IN COMBO SIDE FLAIL - REVERSE ROTATION ITEM PART NO. QTY. DESCRIPTION --- 22083A - BONNET,90,HD,ASSY 1 22084A 1 BONNET 90” --- TF1102A - CUTSHFT ASSY,90HD,STD KNIVES 3 21677 48 NYLOCK NUT,7/16 NC 4 33714 96 KNIFE,FLAIL,STANDARD 5 34011 48 CAPSCREW,7/16X3 7/16,NC GR8 6 TF1102 1 CUTTERSHAFT,90,HD 7 TF1020 48 8 27972A 1 GROUND ROLLER,90 9 TF1045B 2 STUB SHAFT,GROUND ROLLER KNIFE MTG CLEVIS,FLAIL COMMON SIDE FLAIL - XD ©2012 Alamo Group Inc.
90IN COMBO SIDE FLAIL - REVERSE ROTATION Continued... ITEM PART NO. QTY.
FRONT FLAP - STANDARD ROTATION MOWERS COMMON SIDE FLAIL - XD ©2012 Alamo Group Inc.
FRONT FLAP - STANDARD ROTATION MOWERS Continued... ITEM PART NO. QTY.
CABLE SIDE FLAIL DRIVE ASSEMBLY COMMON SIDE FLAIL - XD ©2012 Alamo Group Inc.
CABLE SIDE FLAIL DRIVE ASSEMBLY Continued... ITEM PART NO. QTY. DESCRIPTION 1 ------ - BONNET *REFER TO FLAIL PARTS 2 TF4852 2 KIT,FLANGE,#20 3 34227 1 PREFORMED TUBE 4 ------ - HOSE (RETURN FOR STANDARD ROTATION) 5 06504013 1 MOTOR 6 ------ - HOSE (PRESSURE FOR STANDARD ROTATION) 7 21725 4 HEX NUT,1/2,NC 8 21990 4 LOCKWASHER,1/2 9 21732 4 CAPSCREW,1/2 X 1-3/4,NC 10 21992 2 LOCKWASHER,5/8 11 31293 1 SHEAVE,IDLER,ASSY,4.4 O.D.
COMBO SIDE FLAIL DRIVE ASSEMBLY COMMON SIDE FLAIL - XD ©2012 Alamo Group Inc.
COMBO SIDE FLAIL DRIVE ASSEMBLY Continued... ITEM PART NO. QTY. DESCRIPTION 1 ------ - BONNET *REFER TO FLAIL PARTS 2 06504013 1 MOTOR,TSF 3 TF3040 2 SHEAVE,6.3 4 TF3011 1 BUSHING,QD,SK,2-3/16" 5 TF3013 1 BUSHING,QD,SK 1-1/4" 6 TF4346 1 IDLER ARM (STANDARD ROTATION) ------ TF4345 - IDLER ARM (REVERSE ROTATION - NOT SHOWN) 7 TF3620A 1 SPRING,TENSIONER 8 22018 1 FLATWASHER,1/2",WIDE 9 21700 3 HEX NUT, 1/2", NF 10 31293 1 SHEAVE,IDLER ASSY, 4.4 O.D.
CABLE LIFT ARM ASSEMBLY COMMON SIDE FLAIL - XD ©2012 Alamo Group Inc.
CABLE LIFT ARM ASSEMBLY Continued... ITEM PART NO. QTY.
3IN X 12IN HYDRAULIC CYLINDER BREAKDOWN ITEM PART NO. QTY.
3IN X 18IN HYDRAULIC CYLINDER BREAKDOWN ITEM PART NO. QTY.
CABLE (MANUAL) LIFT VALVE BREAKDOWN - 31752 COMMON SIDE FLAIL - XD ©2012 Alamo Group Inc.
CABLE (MANUAL) LIFT VALVE BREAKDOWN - 31752 Continued... ITEM PART NO. QTY.
CABLE LIFT BEAM TRAVEL LOCK ITEM PART NO. QTY.
COMBO LIFT BEAM TRAVEL LOCK ITEM PART NO. QTY.
NOTES 1 COMMON SIDE FLAIL - XD ©2012 Alamo Group Inc.
WARRANTY SECTION Warranty Section 7-1
.
WARRANTY INFORMATION Tiger Corporation, 3301 N. Louise, Sioux Falls, South Dakota, warrants to the original Retail Customer, the new Tiger equipment is free of defects in material and workmanship. Any part of equipment that in Tiger’s judgement, show evidence of such defects will be repaired or replaced without charge, provided that the failure of part(s) shall have occurred within twelve (12) months from the date of delivery of said equipment to the Retail Customer.
ONE LAST WORD This manual cannot possibly cover all of the potentially hazardous situations you will encounter. By being familiar with the safety rules, operating and maintenance instructions in this manual you can help prevent accidents. The objective of this manual is to help make you a better operator. Remember, SAFETY IS YOU! Your safety and the safety of those around you depends on YOU. Common sense should play a large role in the operation of this machine.
TO THE OWNER / OPERATOR / DEALER To keep your implement running efficiently and safely, read your manual thoroughly and follow these directions and the Safety Messages in this manual and on the machine. The table of contents clearly identifies each section where you can easily find the information you need. The Occupational Safety and Health Act (OSHA 1928.51 subpart C) makes the following minimum requirements for tractor operators. OWNER REQUIREMENTS: 1. 2. 3. 4.
Printed in USA © Tiger Corporation