B706-49-880 Issue D Instruction Manual Seiko Seiki STP200/300/400 (P001) Turbomolecular Pump System (Document number MT-01E-0A3-C) Manor Royal, Crawley, West Sussex, RH10 2LW, UK Telephone: +44(0)1293 528844 Fax: +44(0)1293 533453 http://www.bocedwards.
MT-01E-0A3-C STP-200/300/400 Series Turbomolecular Pump (CE Marking Compatible Product) INSTRUCTION MANUAL (Third Edition- c) Read through the Safety Precautions and each section of this Manual carefully before using the STP pump. Keep this Manual in a place where you can quickly access it at any time. BOC Edwards Japan Limited Dec. 2003 Copyright 2003 BOC Edwards Japan Limited. All rights reserved. Printed in Japan.
STP-200/300/400 Series Instruction Manual SAFETY PRECAUTIONS The Safety Precautions in this Manual constitute guidelines to protect operators, the STP pump and its peripheral equipment. To avoid personal injury and prevent product and/or peripheral equipment damage, observe the Safety Precautions as well as the general safety rules (your country’s laws, regulations, safety standards and so on).
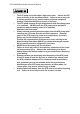
STP-200/300/400 Series Instruction Manual ◇ ◇ ◇ ◇ ◇ ◇ The STP pump is provided with a high-speed rotor. Secure the STP pump according to the specified method. Failure to do so may lead to serious personal injury, product and/or peripheral equipment damage if any abnormality/error occurs in the rotor. The STP pump operates at high temperatures while the baking heater is in operation. NEVER touch the STP pump and its peripheral equipment while the baking heater is in operation.
STP-200/300/400 Series Instruction Manual ◇ ◇ ◇ ◇ ◇ NEVER use any gas that is not specified as usable in this Manual. The use of such gas may corrode the STP pump and damage it. Always check the STP pump has stopped, then turn OFF the primary power (Switch the breaker "OFF") before proceeding to any of the following operations. Failure to do so may cause the STP pump to rotate accidentally, which may injure operators seriously or result in electric shock.
STP-200/300/400 Series Instruction Manual ◇ ◇ ◇ ◇ ◇ ◇ ◇ ◇ ◇ ◇ Use the STP connection cable that has a label affixed STP-200/300/400 Series The use of a different cable may result in product damage. Connect the cables securely. NEVER bend nor place heavy objects on the cable. Doing so may result in electric shock or product damage. Always use the power voltage specified on the name plate for the primary power voltage of the STP control unit. Wire the power cable securely.
STP-200/300/400 Series Instruction Manual INTRODUCTION Thank you very much for purchasing BOC Edwards’ turbomolecular pump. The turbomolecular pump is designed to be installed in the vacuum equipment to exhaust gases from it.
STP-200/300/400 Series Instruction Manual PRECAUTIONS 1) No part of this manual may be reproduced in any form by any means without prior written permission from BOC Edwards. 2) BOC Edwards pursues a policy of continuing improvement in design and performance of this product. The right is, therefore, reserved to vary specifications and design without notice. Understand that the product you purchased and its contents including specifications described in this manual may differ.
STP-200/300/400 Series Instruction Manual LIMITED WARRANTY This WARRANTY applies to the customer to whom BOC Edwards has delivered this product. 1. WARRANTY PERIOD: BOC Edwards warrants this product against defects for a period of two (2) years from the date of delivery or during the period specified in the agreement made by and between the customer and BOC Edwards. 2. ITEM WARRANTED: 1) This warranty applies only to the product delivered from BOC Edwards to the customer.
STP-200/300/400 Series Instruction Manual 13) Deterioration in the basic performance due to the use of the product beyond limits of the use; 14) Any direct, incidental or consequential damage resulting from the use of the product; 15) When continuously operated without overhaul after the WARNING indication ("WARNING" message) on the LCD display; 16) Overhaul and replacement of maintenance parts; 4.
STP-200/300/400 Series Instruction Manual SAFETY PRECAUTIONS The Safety Precautions in this Manual constitute guidelines to protect operators, the STP pump and its peripheral equipment. To avoid personal injury and prevent product and/or peripheral equipment damage, observe the Safety Precautions as well as the general safety rules (your country’s laws, regulations, safety standards and so on).
STP-200/300/400 Series Instruction Manual ◇ ◇ ◇ ◇ ◇ ◇ The STP pump is provided with a high-speed rotor. Secure the STP pump according to the specified method. Failure to do so may lead to serious personal injury, product and/or peripheral equipment damage if any abnormality/error occurs in the rotor. The STP pump operates at high temperatures while the baking heater is in operation. NEVER touch the STP pump and its peripheral equipment while the baking heater is in operation.
STP-200/300/400 Series Instruction Manual ◇ ◇ ◇ ◇ ◇ NEVER use any gas that is not specified as usable in this Manual. The use of such gas may corrode the STP pump and damage it. Always check the STP pump has stopped, then turn OFF the primary power (Switch the breaker "OFF") before proceeding to any of the following operations. Failure to do so may cause the STP pump to rotate accidentally, which may injure operators seriously or result in electric shock.
STP-200/300/400 Series Instruction Manual ◇ ◇ ◇ ◇ ◇ ◇ ◇ ◇ ◇ ◇ Use the STP connection cable that has a label affixed STP-200/300/400 Series The use of a different cable may result in product damage. Connect the cables securely. NEVER bend nor place heavy objects on the cable. Doing so may result in electric shock or product damage. Always use the power voltage specified on the name plate for the primary power voltage of the STP control unit. Wire the power cable securely.
STP-200/300/400 Series Instruction Manual INTRODUCTION Thank you very much for purchasing BOC Edwards’ turbomolecular pump. The turbomolecular pump is designed to be installed in the vacuum equipment to exhaust gases from it.
STP-200/300/400 Series Instruction Manual PRECAUTIONS 1) No part of this manual may be reproduced in any form by any means without prior written permission from BOC Edwards. 2) BOC Edwards pursues a policy of continuing improvement in design and performance of this product. The right is, therefore, reserved to vary specifications and design without notice. Understand that the product you purchased and its contents including specifications described in this manual may differ.
STP-200/300/400 Series Instruction Manual LIMITED WARRANTY This WARRANTY applies to the customer to whom BOC Edwards has delivered this product. 1. WARRANTY PERIOD: BOC Edwards warrants this product against defects for a period of two (2) years from the date of delivery or during the period specified in the agreement made by and between the customer and BOC Edwards. 2. ITEM WARRANTED: 1) This warranty applies only to the product delivered from BOC Edwards to the customer.
STP-200/300/400 Series Instruction Manual 13) Deterioration in the basic performance due to the use of the product beyond limits of the use; 14) Any direct, incidental or consequential damage resulting from the use of the product; 15) When continuously operated without overhaul after the WARNING indication ("WARNING" message) on the LCD display; 16) Overhaul and replacement of maintenance parts; 4.
STP-200/300/400 Series Instruction Manual TABLE OF CONTENTS SAFETY PRECAUTION INTRODUCTION LIMITED WARRANTY 1 Precautions for Safe Operation of the STP Pump.............................................. 1-1 1.1 1.2 1.3 Usable Gases...................................................................................................................... 1-1 Maintenance and Inspection Precautions........................................................................... 1-1 Labels................................
STP-200/300/400 Series Instruction Manual 5.6.1 5.6.2 5.6.3 5.6.4 Powering ON.......................................................................................................... 5-6 Starting/Stopping the STP Pump ........................................................................... 5-7 Starting the STP Pump after Stopping................................................................... 5-7 Powering OFF ..........................................................................................
STP-200/300/400 Series Instruction Manual 14 Disposal ........................................................................................................... 14-1 14.1 14.2 14.3 The STP Pump.................................................................................................................. 14-1 The STP Control Unit ........................................................................................................ 14-1 The Battery......................................................
STP-200/300/400 Series Instruction Manual TABLES Table 3.1 Table 3.2 Table 3.3 Table 4.1 Table 5.1 Table 6.1 Table 6.2 Table 6.3 Table 6.4 Table 8.1 Table 8.2 Table 8.3 Table 8.4 Table 8.5 Table 10.1 Table 15.1 Table 15.2 Table 15.3 Table 15.4 Table 15.5 Table 16.1 Table 16.2 Table 16.3 Table 16.4 Table 16.5 Tightening torque of bolt .................................................................................................
STP-200/300/400 Series Instruction Manual FIGURES Figure 3.1 Figure 3.2 Figure 3.3 Figure 3.4 Figure 3.5 Figure 3.6 Figure 3.7 Figure 3.8 Figure 4.1 Figure 4.2 Figure 4.3 Figure 4.4 Figure 4.5 Figure 4.6 Figure 4.7 Figure 7.1 Figure 8.1 Figure 8.2 Figure 9.1 Figure 9.2 Figure 9.3 Figure 11.1 Figure 16.1 Figure 16.2 Figure 16.3 Figure 16.4 Figure 16.5 Figure 16.6 Configuration of the STP Pump ......................................................................................
STP-200/300/400 Series Instruction Manual 1 Precautions for Safe Operation of the STP Pump 1.1 Usable Gases Chlorine or fluorine system gases can be used in chemical specific pumps (STP-200C/300C/400C or other models). When you use gases including alkaline metals, but excluding Li, gases including Ga, Hg, In, or Sn, or HBr, contact BOC Edwards. Confirm the characteristics of the gas to be used, referring to the Material Safety Data Sheet (MSDS) you obtain from the gas supplier. ◇ ◇ ◇ 1.
STP-200/300/400 Series Instruction Manual 1.3 Labels The following labels are affixed to the STP pump and STP control unit. Read the contents of the labels before operation. For the positions of the labels, see Figures 16. 4 to 16.6. 1) STP Pump Caution Label This label describes precautions for operating the STP pump. Follow these precautions. 2) STP Control Unit Caution Label This label describes precautions for operating the STP control unit. Follow these precautions.
STP-200/300/400 Series Instruction Manual 4) STP Pump Installation Warning Label This label describes installation of the STP pump. Install the STP pump according to the precautions of Section 3, "Installation of the STP Pump." 5) Connector Caution Label i. This label describes lock of the connector. ii. This label instructs operators to prevent the connectors from being disconnected while the STP pump is in operation.
STP-200/300/400 Series Instruction Manual 7) High Voltage Device Caution Label The STP control unit is equipped with a high voltage device. warns operators to pay attention to the high voltage device. This label 8) Battery Instruction Label This label instructs operators to replace batteries once a year. The next replacement date of batteries is specified upon delivery of the STP pump. Record the next replacement date (after one year) of batteries in the blank of the label when replacing them.
STP-200/300/400 Series Instruction Manual 10) Voltage Rating Label This label describes the rated voltage of the STP control unit. Use voltage specified in this label. 200V 100V 200 V specification 100 V specification 220V 110V 220 V specification 110 V specification 240V 120V 240 V specification 120 V specification 11) Hot Surface Warning Label This label instructs operators so as not to touch the hot surface of the STP pump.
STP-200/300/400 Series Instruction Manual 2 Unpacking 2.1 Unpacking the STP Pump Check the following before unpacking the STP pump. 1) Check the package for bruises, breakage, wetness, and other. If there is any abnormality/error or it is judged necessary to return the product, contact BOC Edwards or the selling agency. 2) Check the contents of the package. See Section 16.3, "Accessories." ◇ ◇ Be careful not to scratch the flange of the STP pump.
STP-200/300/400 Series Instruction Manual 2.2 Unpacking the STP Control Unit Check the following before unpacking the STP control unit. 1) Check the package for bruises, breakage, wetness, and other. If there is any abnormality/error or it is judged necessary to return the product, contact BOC Edwards. 2) Check the contents of the package. See Section 16.3, "Accessories." ◇ ◇ ◇ ◇ ◇ ◇ The net mass of the STP control unit is approx. 27 kg.
STP-200/300/400 Series Instruction Manual 3 Installation of the STP pump 3.1 Name and Function of Each Part (See Figure 3.1.) (1) Inlet Port Flange (ICF*1 , VG*2, ISO, and other) ・ Connected to the vacuum equipment (at the high vacuum side). ◇ A splinter shield is attached to the inlet port flange to prevent foreign materials from falling into the STP pump. NEVER remove it. (2) Outlet Port Flange (KF*2 25) ・ Connected to the inlet port side of the backing pump.
STP-200/300/400 Series Instruction Manual (1) Inlet Port Flange (2) Outlet Port Flange (4) Ground Terminal (3) STP Connector (5) Purge Port Chemical Specific Type C Only Figure 3.
STP-200/300/400 Series Instruction Manual 3.2 Precautions Before Installation 3.2.1 Operating Environment ◇ ◇ Chlorine or fluorine system gases can be used in chemical specific pumps (type C). When you use gases including alkaline metals, but excluding Li, gases including Ga, Hg, Sn, or HBr, contact BOC Edwards. NEVER use corrosive gases (chlorine, fluorine, or other system gases) in the STP-200/STP-300/STP-400 pump or other models without anti-corrosion treatment (See Section 1.1, "Usable Gases").
STP-200/300/400 Series Instruction Manual 3.2.2 Installation Area Leave enough space for the following in addition to that for the STP pump: • • ◇ 3.2.3 Space for maintenance and inspection Space for connecting cables The minimum bending radius of the STP connection cable is 150 mm (See Figures 16.1 and 16.2, "External Appearance of the STP Pump" [bending dimensions of the STP connection cable]). DO NOT excessively bend the cables and beware of any obstacles when installing the STP pump.
STP-200/300/400 Series Instruction Manual ◇ *1: The screw hole for leg for securing the STP pump is M8*1, and the depth is 16 mm (4 positions). For the external appearance of the STP pump, see Figures 16.1 and 16.2, "External Appearance of the STP Pump.
STP-200/300/400 Series Instruction Manual 3.3 How to Install the STP Pump Install the STP pump to the vacuum equipment as shown in Figure 3.2. The STP pump can be installed through the damper (optional accessory) Vacuum Equipment Inlet Port Inlet Port Flange Vacuum Valve To Power Supply Dry Pump, and other Power Cable Auxiliary Pump Front STP Panel Control Unit STP Connection Cable Ground Cable Outlet Port Flange Remote Cable To Vacuum Equipmemt Control Circuit Figure 3.
STP-200/300/400 Series Instruction Manual ◇ ◇ ◇ 3.3.1 The STP pump cannot be used with the outlet port open to atmospheric air. Always use the backing pump (dry pump or similar one). Use a backing pump with a pumping speed of 160 L/min or more for the STP-200 series, or 240 L/min or more for the STP-300/400 series. Depending upon the type of the backing pump used, oil vapor may contaminate the inside of the STP pump.
STP-200/300/400 Series Instruction Manual 3.3.2 STP Pump Installation Positions The STP pump can be installed vertically, horizontally, upside-down and slanted (See Figure 3.3, "STP Pump Installation Positions"). Upside-down Horizontal Vacuum Equipment Slanted Vertical Figure 3.
STP-200/300/400 Series Instruction Manual 3.3.3 How to Secure the STP Pump ◇ ◇ The STP pump is provided with a high-speed rotor. The worst-case failure may result in a jump in rotational torque leading to personal injury or peripheral equipment damage. The method of securing the STP pump will depend on the installation requirements. Secure the STP pump to the vacuum equipment as follows: Design and secure the mounting for the STP pump so that it can withstand the maximum rotational torque.
STP-200/300/400 Series Instruction Manual 1) When securing the inlet port with bolts Refer to Table 3.2 for torque in pump abnormality and recommended securing bolts. Secure the inlet port flange with all of the boltholes of the size specified in the Inlet Port Flange Standard. Secure the base with all 8 screw-holes for legs or all 8 attached legs. Follow "CAUTION" on page 3-9 about legs and bolts for securing the base.
STP-200/300/400 Series Instruction Manual 2) When securing the inlet port flange with claw clamps Refer to Table 3.2 for rotational torque. When securing the inlet port flange with only the claw clamp, the vacuum equipment cannot withstand the maximum rotational torque generated by the worst-case failure. To make the vacuum equipment withstand abnormal torque, secure the base with all 8 screw-holes for legs or all 8 attached legs. Follow "CAUTION" on page 3-9 about legs and bolts for securing the base.
STP-200/300/400 Series Instruction Manual 3) When installing the damper in the inlet port flange Refer to Table 3.2 for rotational torque. In case of using a damper, secure the base with all 8 screw-holes for legs or all 8 attached legs. Follow "CAUTION" on page 3-9 about legs and bolts for securing the base. When the base cannot be secured because of the equipment design, install the pump with a torque restraint like the one shown in Figure 3.7 (b).
STP-200/300/400 Series Instruction Manual 3.3.4 Vacuum Piping ◇ ◇ DO NOT open the STP pump through the flange to atmospheric air while the STP pump is running. If atmospheric air flows into the STP pump, it may not function normally. Depending upon the type of the backing pump used, atmospheric air may reverse flow into the STP pump when the backing pump stops.
STP-200/300/400 Series Instruction Manual 6) Depending upon the type of the backing pump used, oil vapor may contaminate the inside of the STP pump. Some oil viscosity could cause a malfunction when there is a strong reverse flow of oil. Take the following measures to ensure the correct flow of oil: • Attach a vacuum valve to the middle of the piping between the STP pump outlet port flange and the backing pump. • Attach an absorption trap adjacent to the vacuum valve.
STP-200/300/400 Series Instruction Manual 3.3.5 Connecting the Ground Cable Connect the ground cable (yellow/green) between the ground terminal of the STP pump and the ground terminal of the STP control unit. When the resistance between the ground terminals is lower than 0.1 Ω, it is not necessary to connect the ground cable after installing the STP pump and the STP control unit. ◇ 3.3.6 When the resistance between the ground terminals is over 0.1 Ω, always connect the ground cable.
STP-200/300/400 Series Instruction Manual 4 Installation of the STP Control Unit 4.1 Name and Function of Each Part 4.1.1 Front Panel (See Figure 4.1.) (1) "POWER ON/OFF" Switch (illuminated alternate push button switch, green LED) ・ Press this switch to power ON/OFF the STP pump (valid in MANUAL operation only). ・ The POWER ON/OFF built-in lamp lights when the power is ON.
STP-200/300/400 Series Instruction Manual (8) "FAILURE" Lamp (red LED) ・ Lights when any of the following abnormalities occurs: a) When the inside of the STP control unit overheats (75 °C or more inside the heat sink). b) When the motor or electromagnet overheats (100 °C or more). c) When an abnormality occurs inside the inverter (overload, overspeed). d) When the battery is thoroughly worn out and cannot be charged. e) When the STP connection cable is not connected.
STP-200/300/400 Series Instruction Manual 4.1.2 Rear Panel (See Figure 4.2.) (11) AC POWER Connector (CON30) ・ For primary power input. (12) MAIN POWER Breaker ・ Switches ON/OFF the primary power. ・ A metal fitting is attached to secure the breaker at the OFF position. (13) P. CONNECTOR (CON20) ・ For connection of the STP connection cable. (14) REMOTE CONNECTOR (CON40) ・ For remote control. For details of the REMOTE CONNECTOR (14), see Section 8, “Remote Input/Output Signal Connector.
STP-200/300/400 Series Instruction Manual (18) (14) (15) (16) (12) (11) (17) (13) Figure 4.
STP-200/300/400 Series Instruction Manual 4.1.3 Inside of the STP Control Unit (See Figure 4.3.) (19) Fuses 2 to 5 ・ These fuses protect as follows: F2 F3 F4 F5 : 125 V, 8 A (for control power protection) : 250 V, 3 A (for inverter and air cooling fan protection) : 250 V, 5 A (for control power protection) : 125 V, 10 A (for internal and external batteries protection) (20) Inverter ・ This is a three-phase transistor-inverter which starts/stops the STP pump.
STP-200/300/400 Series Instruction Manual (19) (20) (21) (22) Figure 4.
STP-200/300/400 Series Instruction Manual 4.2 4.2.1 Precautions Before Installation Operating Environment Install the STP control unit in a place meeting the following requirements: Ambient Temperature 0 °C to 40 °C Ambient Relative Humidity 30 to 95% (no dew condensing) Environment • • • • • • • • • • • • Installation Condition A place free of exposure to direct sunlight. A place free of high humidity. A place free of dust. A place free of salty air. A place free of dripping water.
STP-200/300/400 Series Instruction Manual 4.2.2 Installation Area Leave enough space for the following in addition to that for the STP control unit (See Figure 4.4, "Peripheral Space of the STP Control Unit.") ◇ The minimum bending radius of the STP connection cable is 150 mm (See Figure 16.3, "External Appearance of the STP Control Unit" [Cable Space]). DO NOT excessively bend the cables and beware of any obstacles when installing the STP pump.
STP-200/300/400 Series Instruction Manual 4.3 Attaching the STP Control Unit to a Rack The dimensions of the STP control unit front panel conform to EIA standard. Therefore, this panel can be attached to any type of commercially-available racks. Attach the STP control unit to the rack according to the following steps: 1) When attaching the STP control unit to a rack: • Attach the front panel to a rack using the screw holes for the front panel.
STP-200/300/400 Series Instruction Manual 4.4 Cable Connection 4.4.1 Name and Dimensions of Each Cable (unit : mm) STP Pump Side STP Control Unit Side Ground Terminal ( ・ ) Ground Cable Crimp-Type Terminal Lug Crimp-Type Terminal Lug (M4 * 1 ) Yellow/Green Wire L≦20m:4mm2 L>20m:10mm2 64 φ4.3 (L≦20m) φ6.5 (L>20m) 41 Pin (receptacle) STP-200/300/400 Series 24.5 φ39 φ14 34 Pin (plug) 72.5 STP Connection Cable Ground Terminal ( ・ ) (M4 *1 ) 62.
STP-200/300/400 Series Instruction Manual 4.4.2 How to Connect the Cables ◇ ◇ ◇ ◇ ◇ When connecting/disconnecting cables, always power OFF the STP pump (Switch the breaker "OFF"). Failure to do so may result in electric shock or product damage. With each connector, align the position of the guide key and insert the pin vertically so as not to bend it. If the pin is bent, not only may the connector not function normally, but may make the pins contact each other, resulting in a malfunction.
STP-200/300/400 Series Instruction Manual 2) Connecting the STP Connection Cable Connect the receptacle side of the STP connection cable to the STP connector of the STP pump and connect the plug side to "P.CONNECTOR CON20" of the STP control unit. ◇ ◇ Always use the STP pump, STP control unit and the STP connection cables of the same model name, serial number and cable length. Failure to do so may result in product damage.
STP-200/300/400 Series Instruction Manual 3) Connecting the Power (Primary Side) Cable Connect the primary power cable to the "AC POWER CON30" on the STP control unit rear panel as shown in Table 4.1. Table 4.1 Connecting the Power Cable CON30 Pin No.
STP-200/300/400 Series Instruction Manual STP Control Unit (Top View) AC POWER CON30 Power Cable Connector Secure with two screws (M3*1) Cable Fitting Tool STP Control Unit (Right Side) *1 Figure 4.
STP-200/300/400 Series Instruction Manual 5 How to Start/Stop the STP Pump ◇ ◇ ◇ 5.1 NEVER connect or disconnect any cables while the power is ON. NEVER turn the primary power OFF (Switch the breaker "OFF") while the STP pump is in rotation. DO NOT release the inlet port flange or outlet port flange into the atmosphere while the STP pump is in rotation.
STP-200/300/400 Series Instruction Manual 5.3 Start Procedures Start the backing pump before or simultaneously with start of the STP pump. Open the vacuum valve located at the outlet port flange side after starting the backing pump. ◇ 5.4 DO NOT open the vacuum valve without operating the backing pump. Depending upon the type of the backing pump, doing so may cause a reverse flow of oil, which could contaminate the inside of the STP pump.
STP-200/300/400 Series Instruction Manual There are two methods of operating the STP pump: MANUAL and REMOTE. Select one which fits your vacuum equipment. 5.5 Manual Operation Slide the "MANUAL/REMOTE" changeover switch on the rear panel to "MANUAL." 5.5.1 Powering ON 1) Switch "ON" the breaker on the rear panel. (A metal fitting is attached to the breaker to lock the breaker at the "OFF" position. Loosen the screw, lower the metal fitting, switch "ON" the breaker, then tighten the screw.
STP-200/300/400 Series Instruction Manual 5.5.3 Stopping the STP Pump 1) Press the "MOTOR STOP" switch on the front panel to stop the STP pump. The STP pump starts to decelerate and stops. The "NORMAL OPERATION" lamp or the "ACCELERATION" lamp goes out (BRAKE state). 2) The number of rotations goes down to approx. 3,000 rpm or less in approx. 15 minutes. This decrease in rpm is indicated by the ROTATION meter on the front panel showing a full-scale deflection to the red. ◇ ◇ ◇ 5.5.
STP-200/300/400 Series Instruction Manual 5.5.5 Powering OFF 1) When both the "ACCELERATION" and "NORMAL OPERATION" lamps are off and the ROTATION meter shows a full-scale deflection to the red: i. Press the "POWER ON/OFF" switch. The switch pops up into the unlocked position, the magnetic bearing stops, and the rotor lands (POWER OFF state). The "POWER ON/OFF" switch built-in lamp goes out. ii. Switch "OFF" the breaker on the rear panel.
STP-200/300/400 Series Instruction Manual 5.6 Remote Operation (Read through Section 8, "Remote Input/Output Signal Connector" before use.) Slide the "MANUAL/REMOTE" changeover switch on the rear panel to "REMOTE." 5.6.1 Powering ON 1) Switch "ON" the breaker on the rear panel. (A metal fitting is attached to the breaker to lock the breaker at the "OFF" position. Loosen the screw, lower the metal fitting, switch "ON" the breaker, then tighten the screw.
STP-200/300/400 Series Instruction Manual 5.6.2 Starting/Stopping the STP Pump Table 5.1 describes how to start or stop the STP pump during remote operation. Table 5.1 Starting/Stopping the STP Pump during Remote Operation Connector Remote Connector (CON40) ◇ ◇ ◇ 5.6.3 Starting the Pump Input 24 V DC between (3)-(15) (MOTOR START) for 0.3 seconds or more ((3): "+" side; (15): "-" side).
STP-200/300/400 Series Instruction Manual 5.6.4 Powering OFF The POWER OFF signal has priority over the START signal. 1) When both the "ACCELERATION" and "NORMAL OPERATION" lamps are off and the ROTATION meter shows a full-scale deflection to the red: i. Input 24 V DC between (2)-(14) (POWER OFF) of the REMOTE CONNECTOR (CON40) for 0.3 seconds or more ((2): "+" side; (14): "-" side). The magnetic bearing stops, and the rotor lands (POWER OFF state). The "POWER ON/OFF" switch built-in lamp goes out. ii.
STP-200/300/400 Series Instruction Manual 6 Safety Functions When an Abnormality/Error Occurs The STP pump is provided with safety functions for various abnormalities/errors (See Table 6.4, "Safety Functions.") For troubleshooting, see Section 6.2, "Restarting after Any Safely Function Operates" and Section 15, "Troubleshooting." 6.1 Safety Functions 6.1.1 Power Failure <Ⅰ. Operation at a Power Failure> When the power voltage drops below approx.
STP-200/300/400 Series Instruction Manual Table 6.1 shows the states of lamps and REMOTE output signals at a power failure. Table 6.1 States of Lamps and REMOTE Output Signals at a Power Failure LED lamps REMOTE output signals Power failure time Number of rotations "BATTERY OPERATION" "EMERGENCY OPERATION" "POWER ON" signal "BATTERY OPERATION" signal "EMERGENCY OPERATION" signal Approx. 50msec. or more 3,000rpm or more Lights ON ON Less than 3,000rpm Goes out OFF OFF Less than approx.
STP-200/300/400 Series Instruction Manual ◇ Establish a sequence so that power can be supplied to the STP control unit immediately after a power recovery. Tables 6.2 and 6.3 show operations of the STP pump after a power recovery. Table 6.2 Power failure time Approx. 50msec. or more Approx. 35msec. to less than 50msec. Less than approx. 35msec.
STP-200/300/400 Series Instruction Manual Table 6.3 Power failure time Operations of the STP Pump after a Power Recovery (during REMOTE OPERATION) Number of rotations after a power recovery 3,000rpm or more Approx. 50msec. or more Approx. 35msec. to less than 50msec. Less than approx. 35msec. 6.1.
STP-200/300/400 Series Instruction Manual 6.1.3 Excessive Vibration When serious vibration or mechanical shock causes the rotor to touch the touch down bearing (due to external vibration/impact, intrusion of atmosphere or foreign materials into the STP pump or rotor imbalance ) the STP pump enters the STOP operation. The "EMERGENCY OPERATION" lamp lights. 6.1.4 Inverter Overload When the STP pump does not attain the rated speed within approx.
STP-200/300/400 Series Instruction Manual 6.1.8 Abnormal Battery Voltage When the battery voltage is 21 V DC or less due to deterioration in the battery or incorrect connection while the power is ON, the STP pump does not rotate even if the STP pump START operation is performed. The "FAILURE" lamp lights. ◇ NEVER disconnect the internal or external battery connection cable while the STP pump is under POWER ON state.
STP-200/300/400 Series Instruction Manual 6.2 Restarting after Any Safety Function Operates 1) In case of a power failure: Establish a sequence so that power can be supplied to the STP control unit immediately after a power recovery.
STP-200/300/400 Series Instruction Manual Table 6.4 Abnormality /Error Operation state of safety functions Power failure Failure time: approx. 50 msec or more (for details, see Section 6.1.1, "Power Failure"). Abnormal magnetic bearing Rotor descends onto the touch down bearing. Safety Functions (1/2) Lamp indication REMOTE output signal State of the STP pump "BATTERY OPERATION" "EMERGENCY OPERATION" "BATTERY OPERATION" "EMERGENCY OPERATION" Levitation continues by battery. The STP pump stops.
STP-200/300/400 Series Instruction Manual Table 6.4 Lamp indication Safety Functions (2/2) REMOTE output signal State of the STP pump Probable causes of an abnormality/error Abnormality /Error Operation state of safety functions Overheating inside the STP pump Temperature of the STP pump motor: 90°C or more "OVER "OVER TEMPERATURE" TEMPERATURE" Decelerates down to 40,000 rpm.
STP-200/300/400 Series Instruction Manual 7 Baking, Cooling and Gas Suction of the STP Pump 7.1 Baking the STP Pump To attain a lower pressure in a shorter time and reduce the exhaust time, bake the vacuum equipment and STP pump. ◇ The surfaces of the STP pump and its peripheral equipment will become extremely hot when performing baking. NEVER touch them with bare hands. ◇ When baking the STP pump, always cool it to prevent overheating (For the cooling method, see Section 7.
STP-200/300/400 Series Instruction Manual 7.1.1 Attaching a Baking Heater 1) Attach a baking heater (optional accessory) as near as possible to the inlet port flange (See Figure 7.1, "Attaching Positions of the Cooling Unit and Baking Heater"). 2) Affix the "Hot Surface Warning Label" to the surface of the STP pump so that the operator can see it clearly at any time (See Figure 7.1, "Attaching Positions of the Cooling Unit and Baking Heater").
STP-200/300/400 Series Instruction Manual 7.2 Cooling the STP Pump (See Figure 7.1.) There is a method using an air cooling unit. When performing baking, always cool the STP pump. Also, when pumping gases, cool the STP pump. 7.2.1 Air Cooling Method Use the air cooling unit (optional accessory). Attach the air cooling unit using 4 screws at screw holes for legs (4-M8*1, depth 16 mm). (For the positions of the screw holes for legs, see Figures 16.1 and 16.2, "External Appearance of the STP Pump.
STP-200/300/400 Series Instruction Manual 7.3 Gas Suction ◇ When pumping gases, they may remain in the STP pump. Introduce a purge gas and then exhaust all gasses. Residual gases in the STP pump may cause an accident when the STP pump is removed. Confirm the characteristics of gases to be used, referring to the Material Safety Data Sheet (MSDS) you obtain from the gas supplier. ◇ Chlorine or fluorine system gases can be used in the chemical specific STP-200C/300C/400C (type C).
STP-200/300/400 Series Instruction Manual This label is attached to the baking heater. Baking Heater (Optional Accessory) Air Cooling Unit (Optional Accessory) Used for air cooling Figure 7.
STP-200/300/400 Series Instruction Manual 8 Remote Input/Output Signal Connector The remote input/output signal connector (REMOTE CONNECTOR CON40) is used to input and output remote signals. This connector is of GP-IB type*1 (24-pin, receptacle). Four abbreviations are used in Tables 8.1 and 8.2: N.O :Normal Open IN :Input Pin 8.1 N.C :Normal Close OUT :Output Pin Remote Input Signals Remote input signals function during REMOTE operation only. Use input signals according to Table 8.1 and Figure 8.1.
STP-200/300/400 Series Instruction Manual REMOTE CONNECTOR : Remote Input/Output Signal Connector (1) + Ratings of CR1 and 2 POWER ON CR1 Rated coil voltage Rated excitation current Rated power consumption Inductance DC 24V IN : 24 V DC±10% - : 15 mA : 360 mW : at ON, 3.0H : at OFF, 2.1H (13) (2) + DC 24V IN (3) MOTOR START CR3 DC 24V IN : 24 V DC±10% - START signal input pins (15) : 22.9 mA (4) + : 550 mW : at ON, 2.06H : at OFF, 1.
STP-200/300/400 Series Instruction Manual 8.2 Remote Output Signals Remote output signals function during MANUAL or REMOTE operation. Use output signals according to Table 8.2 and Figure 8.2. Table 8.2 Remote Output Signals Description Pin (17) REMOTE (5) N.O OUT (18) POWER N.O (6) OUT (19)EMERGENCY (7) OPERATION N.O OUT (20) FAILURE (8) N.O OUT (21)OVER OPERATION N.O Pins for outputting the EMERGENCY OPERATION state signal.
STP-200/300/400 Series Instruction Manual N.O : Normal Open N.C : Normal Close REMOTE CONNECTOR : Remote Input/Output Signal Connector (5) REMOTE (17) N.O OUT (6) POWER (18) N.O OUT (7) EMERGENCY OPERATION (19) N.O OUT (8) FAILURE (20) N.O OUT (9) OVER TEMPERATURE (21) N.O OUT (10) BATTERY OPERATION (22) N.O OUT (11) ACCELERATION (23) N.O OUT (11) NORMAL OPERATION (24) N.O OUT SW1 CR5 CR6 CR7 CR8 CR9 CR10 CR11 Figure 8.
STP-200/300/400 Series Instruction Manual Table 8.3 shows the rated contacts for switch SW1 (See Figure 8.2). Table 8.3 Rated Contacts for Switch SW1 Resistance Load (cos φ=1) 250 V AC 125 V AC 30 V DC Rated Current 3A 6A 4A Recommended Minimum Voltage and Current 2 V, 0.1 A AC/DC Minimum Cut-Off Voltage and Current 1 V, 10 mA AC/DC Table 8.4 shows rated contacts for relays CR5 to 11 (See Figure 8.2). Table 8.
STP-200/300/400 Series Instruction Manual 8.3 Remote Cables (Optional Accessories) Remote cables are provided as optional accessories. Remote cables are available in two types: single-side connector type and both-side connector type. or details, contact Service office. Table 8.5 shows connections of remote cables of single-side connector type. Table 8.5 Remote Cable Connections (Single-Side Connector Type) Connector Pin No. Cable Color Connector Pin No.
STP-200/300/400 Series Instruction Manual 9 Internal Battery Two batteries (PORTALAC Series Small-Sized Sealed Lead-Acid Batteries, PE12V 7F1 : 12 V, 7 Ah, manufactured by Japan Storage Battery Co., Ltd.) (hereinafter referred to as the internal battery) are inserted into the STP pump for backup during a power failure. These are rechargeable.
Allowable Shelf Life of the Internal Battery (Month) STP-200/300/400 Series Instruction Manual Life of the Internal Battery (Year) 10 5 4 3 2 1 0.5 10 20 30 40 9.3 40 30 20 10 5 2 10 Ambient Temperatures ( ℃) Figure 9.1 50 20 30 40 Ambient Temperatures ( ℃) Life of the Internal Battery Figure 9.2 Allowable Shelf Life of the Internal Battery How to Charge the Internal Battery The battery is charged while the power is "ON," regardless of the operation state of the STP pump.
STP-200/300/400 Series Instruction Manual 9.4 How to Replace the Internal Battery ◇ ◇ ◇ ◇ ◇ ◇ ◇ Turn OFF the primary power (Switch the breaker "OFF"), before replacing the battery. Failure to do so may result in product damage or a problem due to electric shock or short-circuiting of the internal circuit. The battery terminal is exposed. DO NOT touch the terminal with a metallic part (such as a screwdriver).
STP-200/300/400 Series Instruction Manual 9.4.1 How to Replace the Battery Case 1) Stop the STP pump, and turn OFF the primary power (Switch the breaker "OFF"). 2) Unscrew the 4 screws attached to front panel (1) and bring the front panel down towards you. 3) Disconnect internal battery connector (2) (CON85). 4) Unscrew battery case screws (3) and pull out battery case (4) from the STP control unit. 5) Replace battery case (4) containing a new battery.
STP-200/300/400 Series Instruction Manual (1) STP Control Unit Front Panel (2) Internal Battery Connector (3) Battery Case Screw (4) Battery Case (5) Top Panel Screw (6) Top Panel of Battery Case (7) Lug Terminal (8) Battery Instruction Label (2) (6) (3) (2) (1) (8) (7) (5) (4) Affix this label to the front panel. Figure 9.
STP-200/300/400 Series Instruction Manual 9.5 How to Dispose of the Internal Battery Dispose of or collect worn-out batteries in accordance with the guidelines given by each national and/or local government. If you procure batteries, dispose of them in accordance with the guidelines given by the battery manufacturer. ◇ ◇ ◇ ◇ ◇ Pay attention to short-circuiting or leakage of the batteries when disposing of them.
STP-200/300/400 Series Instruction Manual 10 External Battery ◇ ◇ ◇ ◇ ◇ DO NOT use (an) external batteries when internal batteries are inserted. Failure to do so may result in product damage or a problem. It could cause a problem, such as product damage. DO NOT connect batteries in parallel. Replace batteries with new ones before the end of their life.
STP-200/300/400 Series Instruction Manual 10.1 Specifications for the External Battery When you use external batteries, select one in accordance with the specifications given in Table 10.1. ◇ If you use external batteries which do not conform to the specifications, battery backup will not function during a power failure which could result in damage to the STP pump. Table 10.1 Specifications for the External Battery Item Specifications Capacity (Ah) 4.
STP-200/300/400 Series Instruction Manual 10.2 Installation of the External Battery ◇ ◇ ◇ ◇ ◇ Turn OFF the primary power (Switch the breaker "OFF"), before connecting the battery. Failure to do so may result in product damage or a problem due to electric shock or short-circuiting of the internal circuit. After disconnecting the internal battery connector (CON85), connect the external battery connector (CON90). Having both connected simultaneously may result in damage to the STP control unit.
STP-200/300/400 Series Instruction Manual 10.3 How to Charge the External Battery The STP control unit is equipped with a constant voltage (27.3 V) circuit and a constant current (0.3 A) circuit for charging the battery. The battery is charged while the power is "ON," regardless of the operation state of the STP pump. After a power failure, charge the battery for approx. 12 times the BATTERY BACKUP time. For example, if the BATTERY BACKUP time is 15 minutes, it takes approx. 3 hours to charge the battery.
STP-200/300/400 Series Instruction Manual 11 Operation Principle of the STP Pump (See Figure 11.1.) The STP-200/300/400 is a series of magnetically-levitated turbomolecular pumps, featuring the following: • • • Oil free Low vibration High reliability The STP pump is configured so that rotor blade (1) and stator blade (2) are aligned alternately in the axial direction. Gas molecules are pumped from the inlet port to the outlet port by the high speed rotation of the rotor.
STP-200/300/400 Series Instruction Manual (7) Touch down bearing (1) Rotor blade (2) Stator blade (3) Radial sensor (4) Radial electromagnet (6)Axial electromagnet (8) Touch down bearing (5)Axial sensor Figure 11.
STP-200/300/400 Series Instruction Manual 12 Maintenance and Inspection ◇ ◇ ◇ ◇ 12.1 Stop the STP pump, and turn OFF the primary power (Switch the breaker "OFF"), before performing maintenance of the STP control unit (battery replacement/fuse replacement). Failure to do so may result in an accident such as electric shock. Stop the STP pump, and turn OFF the primary power (Switch the breaker "OFF"), before performing inspections of the STP pump (for deposit).
STP-200/300/400 Series Instruction Manual 12.3 Replacing the Fuses ◇ ◇ ◇ Remove the probable causes of the blown fuse before replacing the fuse. Always use specified and rated fuses. If fuses are blown frequently even after they are replaced, contact Service office. The following are protective fuses used in the STP control unit (See Section 4.1.3, "Inside of the Control Unit").
STP-200/300/400 Series Instruction Manual 12.4 Inspecting for Deposit ◇ When inspecting for deposit, exhaust gases inside the STP pump thoroughly. Residual gases may cause an accident when removing the STP pump. Confirm the characteristics of gas to be used, referring to the Material Safety Data Sheet (MSDS) you obtain from the gas supplier. Wear personal protective equipment if necessary. Leaving the STP pump without removing the deposit may cause the STP pump to be corroded beyond repair.
STP-200/300/400 Series Instruction Manual 12.5 Overhaul The recommended maintenance intervals for different process applications are tabulated below: Etching*1 Process Metal Etch Period 1 year Remarks Ensure that TMS (Temperature Management System) is fitted and operational to prevent accumulation of by-product deposition in the pump.
STP-200/300/400 Series Instruction Manual 12.6 Transporting for Repair or Overhaul ◇ ◇ ◇ When removing the STP pump from the vacuum equipment, exhaust gases inside the STP pump thoroughly. Residual gases may result in an accident when removing the STP pump. Confirm the characteristics of gas to be used, referring to the Material Safety Data Sheet (MSDS) you obtain from the gas supplier.
STP-200/300/400 Series Instruction Manual 13 Storage 13.1 The STP Pump When the STP pump is left unused over the specified period (more than a few months), follow the precautions below: 1) 2) 3) 4) Close the inlet port of the STP pump and vacuum it using a backing pump. Introduce dry N2 gas or dry air from the outlet port or the purge port. Close the outlet port and purge port.
STP-200/300/400 Series Instruction Manual 13.2 The STP Control Unit If the STP control unit (including cables) is not used for a long period (more than a few months), follow the precautions below: 1) Remove the internal battery from the STP control unit (See Section 9, "Internal Battery"). NOTICE ◇ Always remove the battery when the STP control unit is not used for a long period. 2) Store the STP control unit in a horizontal position.
STP-200/300/400 Series Instruction Manual 14 Disposal 14.1 The STP Pump Dispose of the STP pump as industrial waste according to the guidelines given by each national and/or local government. 14.2 ◇ When disposing of the STP pump, exhaust gases inside the STP pump thoroughly. Residual gases may result in an accident when disposing of the STP pump. If the STP pump has been used with reactive or corrosive gasses, always clean thoroughly before disposing of it to avoid any injury.
STP-200/300/400 Series Instruction Manual 14.3 The Battery Dispose of or collect worn-out batteries in accordance with the guidelines given by each national and/or local government. If you procure batteries, dispose of them in accordance with the guidelines given by the battery manufacturer. ◇ ◇ ◇ ◇ ◇ Pay attention to short-circuiting or leakage of the battery at their disposal. To prevent the battery from short-circuiting, remove lead wires and connectors from the battery.
STP-200/300/400 Series Instruction Manual 15 Troubleshooting If an abnormality/error is found when using the STP pump, check it and take measures in accordance with the following procedures. If you cannot trace it or if the STP pump does not function normally after troubleshooting, fill in the necessary information in the "Malfunction information" and fax it to Service office. ◇ 15.
STP-200/300/400 Series Instruction Manual 15.2 Abnormalities When Powering ON (When any "Abnormality/Error Warning" lamp lights, see Section 15.5, "When any Abnormality/Error Warning Lamp Lights.") Table 15.1 Troubleshooting after Powering ON No. Symptom 1 The "POWER ON/OFF" switch built-in lamp (green LED) does not light, when powering ON. 15.3 Probable Cause Countermeasures Referred Section Incorrect connection of the power cable. Connect the power cable correctly. 4.4.2 Blown fuses F2, F4.
STP-200/300/400 Series Instruction Manual 15.4 Abnormalities While the STP Pump Is Rotating (When any "Abnormality/Error Warning" lamp lights, see Section 15.5, "When any Abnormality/Error Warning Lamp Lights.") Table 15.3 Troubleshooting While the STP Pump Is Rotating (1/2) No. 1 2 Symptom The "NORMAL OPERATION" lamp does not light approx. 30 minutes after performing start operation. The STP pump stops. Probable Causes Countermeasures Referred Section Insufficient pressure at the inlet port.
STP-200/300/400 Series Instruction Manual Table 15.3 Troubleshooting While the STP Pump Is Rotating (2/2) No. Symptom 3 Rotor falls during operation. 4 Ultimate pressure is insufficient. Probable Causes Countermeasures Referred Section Failure of the STP connection cable. Inspection is needed. Contact Service office. 4.4.2 Failure of the battery. Inspection is needed. Contact Service office. 9 Failure of the backing pump.
STP-200/300/400 Series Instruction Manual 15.5 When any Abnormality/Error Warning Lamp Lights When any Abnormality/Error Warning lamp lights, check which lamp is being lit and see Table 15.4 for which procedure No. to follow. Then, follow the steps of that procedure No. (shown in Table 15.5) to remove the problem (For the names and positions of the "Abnormality/Error Warning" lamps, see Figure 4.1). Table 15.
STP-200/300/400 Series Instruction Manual Table 15.5 Troubleshooting When any of Abnormality/Error Warning Lamp Lights (1/2) Procedure No. Lamp Being Lit Probable Causes No.1 "OVER TEMPERATURE" "FAILURE" "EMERGENCY OPERATION" Incorrect connection of the STP connection cable. No.2 "OVER TEMPERATURE" "FAILURE" Overheat inside the STP pump: Countermeasures Referred Section Connect cables correctly. If the cable connector is not locked, lock it securely. 4.4.2 1) Overheat during baking.
STP-200/300/400 Series Instruction Manual Table 15.5 Troubleshooting When any of Abnormality/Error Warning Lamp Lights (2/2) Procedure No. No.4 No.5 Lamp Being Lit "FAILURE" "EMERGENCY OPERATION" Probable Causes Countermeasures Referred Section Overheating inside the STP control unit: 1) Ambient temperature. 1) Set the ambient temperature to 40 °C or less. 4.2.1 2) Insufficient cooling of the STP control unit 2) Remove obstacle from the ventilation port. 4.2.
STP-200/300/400 Series Instruction Manual 16 Specifications and Accessories 16.1 Specifications for the STP Pump Table 16.
STP-200/300/400 Series Instruction Manual 16.2 Specifications for the STP Control Unit Table 16.2 Specifications for the STP Control Unit (1/2) Item Input voltage Input power Specifications 200±10%, 220±10%, 240±10%, 100±10%, 110±10%, 120±10% (Depends on voltage spec.
STP-200/300/400 Series Instruction Manual Table 16.2 Specifications for the STP Control Unit (2/2) Item Specifications Input/output terminal • • • • Input/output cables • Power cable • STP connection cable • Ground cable Safety functions • Magnetic bearing abnormality/error • • • • • • 16-3 AC POWER CON30 P.CONNECTOR CON20 REMOTE CONNECTOR CON4 EXT.
STP-200/300/400 Series Instruction Manual 16.3 Accessories Table 16.
STP-200/300/400 Series Instruction Manual 16.4 Recommended Spare Parts Table 16.5 Recommended Spare Parts Item Model and Manufacturer Specifications Fuse for F2 MGB-8A, 8 A, 125 V (Mfr.: HAMAI ELECTRIC LAMP CO., LTD.) 8 A, 125 V, Normal acting fuse Φ6.35×30 mm Fuse for F3 MGB-3A, 3 A, 250 V (Mfr.: HAMAI ELECTRIC LAMP CO., LTD.) 3 A, 250 V, Normal acting fuse Φ6.35×30 mm Fuse for F4 MGB-5A, 5 A, 250 V (Mfr.: HAMAI ELECTRIC LAMP CO., LTD.) 5 A, 250 V, Normal acting fuse Φ6.
16-6 D C 1 50 18 8 A MIN 240 φ180 A φ140 φ146 IS O 10 0 2 48 130 171 12 Depth 16 (4 pcs.
C 1 50 18 16-7 D 25 A MIN 240 A φ140 φ180 φ146 φB I SO 1 00 248 13 0 17 1 12 Depth 16 (4pcs.
508 10 112.6 10 7.1 33.3 68.1 Figure 16.3 346.4 416 482.6 430 (Cable space) 10 35 26.3 11.15 50 41.8 External Appearance of the STP Control Unit 16 68.1 33.3 19 (150) 470 3 132.6 30 440 21.9 88.8 21.9 3.3 126 3.3 27.3 78 10 16-8 41.8 :J IS 26.3 11.15 309 111 Screw holes for rubber foot M4 *1 (4 pcs.) 430 482.6 346.4 460.3 *1 18 c 27.
STP-200/300/400 Series Instruction Manual 次回交換日/ Next exchange date ◇バッテリーは1年毎に交換してく ◇ Change batteries every year . ◇ Do not use external batteries ださい。 in combination with internal ◇内部バッテリーと外部バッテリー batteries . を同時に使用しないでください。 ・ CAUTION 取扱注意 kg 重量物 Handle with caution. G kg Heavy product ・ CAUTION ・注意 SAFETY INSTRUCTIONS Read instruction manual before operation.
STP-200/300/400 Series Instruction Manual ・警告 ・WARNING Hot surface. Can burn hands. Do not touch. 高温部 やけどします。 触らないでく ださい。 This lavel is attached to the heater. Baking Heater Air Cooling Unit AIR COOLING UNIT VOLTS AC SEIKO SEIKI V MADE IN JAPAN Figure 16.
UNIT CONVERSION TABLE Length m cm mm 1 100 1.00x10 1 10.0 0.394 0.10 1 39.4x10 2.54 25.4 1 0.01 1x10 -3 25.4x10 -3 inch 3 Weight g kg 1.00x10 1 1x10 3 lb. -3 2.20x10 1 2.20 0.454 1 Pa Torr kgf/cm 1 7.50x10 133 454 -3 Pressure 9.81 x 10 4 -3 2 1.02x10 -5 1 1.36x10 -3 736 1 39.
For more information, contact to the nearest Service Office. Manufacture: BOC Edwards Japan Limited 2-4-1, Shibakoen, Minato-ku, Tokyo 105-0011 JAPAN Telephone: Domestic 03-5470-6530 International +81-3-5470-6530 Facsimile: Domestic 03-5470-6521 International +81-3-5470-6521 Copyright 2003 BOC Edwards Japan Limited. All rights reserved.
Form HS1 Return of BOC Edwards Equipment - Procedure INTRODUCTION Before returning your equipment, you must warn BOC Edwards if substances you used (and produced) in the equipment can be hazardous. This information is fundamental to the safety of our Service Centre employees and will determine the procedures employed to service your equipment. Complete the Declaration (HS2) and send it to BOC Edwards before you dispatch the equipment.
Form HS2 Return of BOC Edwards Equipment - Declaration Return Authorisation Number: You must: • Know about all of the substances which have been used and produced in the equipment before you complete this Declaration • Read the Return of BOC Edwards Equipment - Procedure (HS1) before you complete this Declaration • Contact BOC Edwards to obtain a Return Authorisation Number and to obtain advice if you have any questions • Send this form to BOC Edwards before you return your equipment SECTION 1: EQ
UNITED KINGDOM CANADA ISRAEL CORPORATE HEADQUARTERS BOC EDWARDS Manor Royal Crawley West Sussex RH10 9LW Tel +(44) 1293 528844 Fax +(44) 1293 533453 BOC EDWARDS 5975 Falbourne Street Mississauga, Ontario L5R3W6 Canada Tel +(1) 905 501 2558 Fax +(1) 905 501 1632 EDWARDS ISRAEL VACUUM LTD.