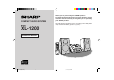
COMPACT AUDIO SYSTEM Thank you for purchasing this SHARP product. To obtain the best performance from this product, please read this manual carefully. It will guide you in operating your SHARP product. XL-1200 Compact Audio System consisting of XL-1200 (main unit) and CP-XL1200U (speaker system). MODEL XL-1200 OPERATION MANUAL XL1200(FRONT) 1 01.2.
CAUTION: TO REDUCE THE RISK OF ELECTRIC SHOCK, DO NOT REMOVE COVER (OR BACK). NO USER-SERVICEABLE PARTS INSIDE. REFER SERVICING TO QUALIFIED SERVICE PERSONNEL.
Important Safeguards 1 Heed Warnings - All warnings on the appliance and in the operating instructions should be adhered to. 12 Outdoor Antenna Grounding - If an outside antenna is connected to the receiver, be sure the antenna system is grounded so as to provide some protection against voltage surges and built-up static charges. Section 810 of the National Electrical Code, ANSI/NFPA No.
Contents Page „ General Information Precautions . . . . . . . . . . . . . . . . . . . . . . . . . . . . . . . . . . . . . . . . 5, 6 Accessories . . . . . . . . . . . . . . . . . . . . . . . . . . . . . . . . . . . . . . . . . 6 Controls and Indicators . . . . . . . . . . . . . . . . . . . . . . . . . . . . 7 - 10 „ Preparation for Use „ Basic Operation General Control . . . . . . . . . . . . . . . . . . . . . . . . . . . . . . . . . . . . . 15 Sound Control . . . . . . . . . . . . . . . . . . . . . . .
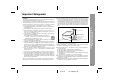
Precautions „ General z Please ensure that the equipment is positioned in a well-ventilated area and that there is at least 4" (10 cm) of free space along the sides and back. There must also be a minimum of 12" (30 cm) of free space on the top of the unit. 4" (10 cm) 12" (30 cm) 4" (10 cm) z Do not remove the outer cover, as this may result in electric shock. Refer internal service to your local SHARP service facility. z Use the unit on a firm, level surface free from vibration.
General Information - Precautions / Accessories - Precautions (continued) Accessories „ Care of compact discs Please confirm that the following accessories are included. Compact discs are fairly resistant to damage, however mistracking can occur due to an accumulation of dirt on the disc surface. Follow the guidelines below for maximum enjoyment from your CD collection and player. z Do not write on either side of the disc, particularly the non-label side from which signals are read.
Controls and Indicators 10 8 1 11 9 2 3 1 „ Display 5 4 1. Timer Play Indicator 2. Sleep Indicator 3. CD Random Play Indicator 4. Memory Indicator 5. FM Stereo Mode Indicator 6. CD Play Indicator 7. CD Repeat Play Indicator 8. FM Stereo Receiving Indicator 6 2 3 4 Reference page 1. CD Compartment . . . . . . . . . . . . . . . . . . . . . . . . . . . . . . 15, 18 2. Volume Up and Down Buttons . . . . . . . . . . . . . . . . . . . . . . 16 3. Power Button . . . . . . . . . . . . . . . . . . . .
Controls and Indicators (continued) - Controls and Indicators - General Information „ Rear panel 5 1 6 2 7 Reference page 1. Headphone Jack . . . . . . . . . . . . . . . . . . . . . . . . . . . . . . . . . . 28 2. AM Antenna Terminal . . . . . . . . . . . . . . . . . . . . . . . . . . . 12, 13 3. Antenna Earth Terminal . . . . . . . . . . . . . . . . . . . . . . . . . 12, 13 4. FM 75 Ohms Antenna Jack . . . . . . . . . . . . . . . . . . . . . . 12, 13 5. CD Digital Output Jack . . . . . . . . . . .
6 7 8 9 10 11 12 13 14 15 16 17 20 18 21 19 22 23 24 25 26 Reference page 1. Remote Control Transmitter . . . . . . . . . . . . . . . . . . . . . . . . . . 11 2. Power Button . . . . . . . . . . . . . . . . . . . . . . . . . . . . . . . . . . . . . 15 3. CD Button . . . . . . . . . . . . . . . . . . . . . . . . . . . . . . . . . . . . . . . 18 4. Tuner Button . . . . . . . . . . . . . . . . . . . . . . . . . . . . . . . . . . . . . . 22 5. Timer Button . . . . . . . . . . . . . . . . . . . . . .
Controls and Indicators (continued) Placing the speaker system: There is no distinction between the right and the left speakers. - Controls and Indicators - General Information Speaker grilles are removable: Make sure nothing comes into contact with the speaker diaphragms when you remove the speaker grilles. 1 Left speaker Right speaker 3 2 4 Notes: z The speakers are magnetically shielded. Therefore, they do not affect the display even if you use them near the TV.
Remote Control 1 2 3 Remove the battery cover. Insert the batteries according to the direction indicated in the battery compartment. When inserting or removing the batteries, push them toward the battery terminals. Replace the cover. Check the remote control after checking all connections have been made correctly. (See pages 12 - 14.) Face the remote control directly to the remote sensor on the unit. The remote control can be used within the range shown below: Press the POWER button.
System Connections FM antenna AM loop antenna Left speaker Speaker with a built-in amplifier (This speaker is not included.) - System Connections - Preparation for Use Right speaker VCR, DVD, etc. not supplied not supplied AC outlet (AC 120 V, 60 Hz) MD recorder not supplied 12 01/2/19 XL-1200(U)2.
„ Antenna connection Outdoor FM or AM antenna: Use an outdoor FM or AM antenna if you require better reception. Consult your dealer. Supplied FM antenna: Connect the FM antenna wire to the FM 75 OHMS jack and position the FM antenna wire in the direction where the strongest signal can be received. Outdoor FM antenna Outdoor AM antenna AM loop antenna 25 feet (7.5 m) Ground rod Notes: z Placing the antenna on the unit or near the AC power cord may cause noise pickup.
System Connections (continued) „ Speaker connection „ Subwoofer connection Connect the wire with the white line to the minus (-) terminal and the black wire to the plus (+) terminal. When a commercially available speaker with a built-in amplifier is connected to this unit, you can enjoy sound with emphasized bass. Connect an RCA cord from a commercially available speaker with a built-in amplifier to the SUBWOOFER OUT jack.
General Control „ To turn the power on Press the POWER button to turn the power on. To set the unit to stand-by mode: Press the POWER button again. „ To change the display brightness (2 levels) Brightened „ Opening and closing the CD compartment The CD compartment cover is motorized. When the power is turned on, you can open or close the CD compartment cover by pressing the (OPEN/CLOSE) button.
Sound Control „ Adjusting the volume Press the VOLUME button to increase the volume and the VOLUME button for decreasing. MIN 1 2 ..... 28 29 MAX - Sound Control - Basic Operation „ Adjusting the bass Main unit operation: 1 Press the BASS/TREBLE button until "BASS" appears on the display. 2 Within 5 seconds, press the VOLUME ( or ) button to adjust the bass. Remote control operation: Press the BASS ( or ) button to adjust the bass. -5 ... 0 ...
Setting the Clock 3 Within 1 minute, press the PRESET ( or ) button to adjust the hour and then press the MEMORY button. This may be operated only with the remote control. In this example, the clock is set for the 12-hour (AM 12:00) display. 1 Press the CLOCK button and within 3 seconds, press the MEMORY button. Within 1 minute, press the PRESET ( or ) button to adjust the minutes and then press the MEMORY button. z The hour will not advance even if minutes advance from "59" to "00".
Listening to a CD 1 2 Press the POWER button to turn the power on. Press the FUNCTION button until "CD STOP" or "NO DISC" appears on the display. 3 Press the partment. 4 Place a CD on the spindle, label side up. (OPEN/CLOSE) button to open the CD com- Be sure to place 3" (8 cm) disc in the middle of a disc holder. - Listening to a CD - CD Playback When operating with the remote control, press the CD button. 5" (12 cm) 5 Press the (OPEN/ CLOSE) button to close the CD compartment.
button. To stop playback: Press the button. To remove the CD: While in the stop mode, press the (OPEN/CLOSE) button. Press the CD eject button and remove the CD. CD Eject Button CD Playback button again. Caution: z Do not open or close the CD compartment cover manually. It may cause malfunctions to the unit. z Be careful not to jam your fingers in the CD compartment cover. z If the power fails while the compartment is open, wait until the power is restored.
CD Playback - Listening to a CD / Repeat or Random Play - Listening to a CD (continued) Repeat or Random Play „ To locate the beginning of a track You can select one of the CD playback mode; "Repeat play", "Random play" and "Normal play". To move to the beginning of the next track: Press the button for less than 0.5 seconds during playback. z You can skip to any track by pressing the button repeatedly until the desired track number appears.
Programmed Play Press the MEMORY/SET (MEMORY) button to save the track number. Playback order 1 While in the stop mode, press the MEMORY/SET (MEMORY) button to enter the programming save mode. 2 Within 30 seconds, press the the desired track. or button to select Total playback time 4 Repeat steps 2 - 3 for other tracks. Up to 20 tracks can be programmed. 5 Press the ( ) button to start playback.
Listening to the Radio 1 2 Press the POWER button to turn the power on. Press the FUNCTION button until "FM" or "AM" appears on the display. When operating with the remote control, press the TUNER button, and then the BAND button to select "FM" or "AM". 22 Press the TUNING ( sired station. or ) button to tune in to the de- Manual tuning: Press the TUNING button as many times as required to tune in to the desired station.
To receive an FM stereo transmission: Press the FUNCTION (BAND) button to display the "ST" indicator. z " " will appear when an FM broadcast is in stereo. FM stereo mode indicator Radio z If the FM reception is weak, press the FUNCTION (BAND) button to extinguish the "ST" indicator. The reception changes to monaural, and the sound becomes clearer. After use: Press the POWER button to enter the power stand-by mode. - Listening to the Radio - FM stereo receiving indicator 23 01/2/19 XL-1200(U)3.
Listening to the Memorized Station „ Memorizing a station Radio - Listening to the Memorized Station - You can store 30 AM and FM stations in memory and recall them at the push of a button. (Preset tuning) 1 Perform the steps 1 - 3 in "Listening to the Radio" on page 22. 2 Press the MEMORY/SET (MEMORY) button to enter the preset tuning saving mode. 3 Within 5 seconds, press the PRESET ( or ) button to select the preset channel number.
Timer and Sleep Operation „ Timer playback Sleep operation: The radio and compact disc can all be turned off automatically. Before setting timer: 1 Press the CLOCK button to check that the clock is on time. 2 Load a disc to be played. 1 2 Press the POWER button to turn the power on. Press the CD or TUNER button to select the desired function. When you selected the TUNER, tune in to the desired station. 3 Adjust the volume using the VOLUME buttons. Do not turn the volume up too high.
Timer and Sleep Operation (continued) 6 Within 1 minute, press the PRESET ( or ) button to specify the minutes to start, then press the MEMORY button. Advanced Features - Timer and Sleep Operation - z The timer playback starting time, function, and volume will be displayed, and then the unit will enter the stand-by mode automatically. z " " will appear and the current time will be displayed. Notes: z Once the time is set, the setting will be retained until a new time is entered.
„ Sleep operation Play back the desired sound source. Example: To fall asleep and wake to the same radio station You can play back the same source only (the function cannot be switched). Press the SLEEP button. To change the sleep time: Press the SLEEP button repeatedly to select the desired sleep time. The time will decrease as follows. The amount of sleep time can also be changed while in the sleep mode. Set the sleep time (see left, steps 1 - 2).
Enhancing Your System The connection cord is not included. Purchase a commercially available cord as shown below. „ Listening to the playback sounds from VCR, DVD, etc. 1 VCR, DVD, etc. To the line output jacks - Enhancing Your System - Advanced Features 2 3 4 White Red Red Use a connection cord to connect the VCR, DVD, etc. to the VIDEO/AUX IN jacks. When using video equipment, connect the audio output to this unit and the video output to a television. Press the POWER button to turn the power on.
Troubleshooting Chart Symptom z The clock is not on time. z When a button is pressed, the unit does not respond. z No sound is heard. Possible cause z Did a power failure occur? Reset the clock. (Refer to page 17.) z Set this unit to the power stand-by mode and then turn it back on. z If the unit still malfunctions, reset it. (Refer to step 3 under "If trouble occurs" on page 30.
References - Troubleshooting Chart / Maintenance - Troubleshooting Chart (continued) Maintenance „ If trouble occurs „ Cleaning the CD pickup lens When this product is subjected to strong external interference (mechanical shock, excessive static electricity, abnormal supply voltage due to lightning, etc.) or if it is operated incorrectly, it may malfunction. Do not touch the laser pickup lens. If fingerprints or dust accumulate on the pickup, clean it gently with a dry cotton swab.
Specifications Power source AC 120 V, 60 Hz Power consumption 33 W Dimensions Width: 9-1/16" (230 mm) Height: 5-1/16" (128 mm) Depth: 11-9/16" (293 mm) Weight 5.5 lbs. (2.5 kg) Type Compact disc player Signal readout Non-contact, 3-beam semiconductor laser pickup D/A converter 1-bit D/A converter Frequency response 20 - 20,000 Hz Dynamic range 90 dB (1 kHz) „ Tuner Frequency range FM: 87.
CONSUMER LIMITED WARRANTY SHARP ELECTRONICS CORPORATION warrants to the first consumer purchaser that this Sharp brand product (the “Product”), when shipped in its original container, will be free from defective workmanship and materials, and agrees that it will, at its option, either repair the defect or replace the defective Product or part thereof with a new or remanufactured equivalent at no charge to the purchaser for parts or labor for the period(s) set forth below.