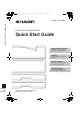
mxc400p_us_qck.book 0 ページ 2009年10月5日 月曜日 午後3時42分 MODEL: MX-C400P MX-C400P Quick Start Guide IN CHINA M KS1 4633FCZZ DIGITAL FULL COLOR PRINTER Quick Start Guide Before using the machine Functions of the machine and procedures for loading paper. Printing Basic procedures for using the machine. System settings Configuring settings to make the machine easier to use. Troubleshooting Frequently asked questions and how to clear paper misfeeds.
mxc400p_us_qck.book 0 ページ 2009年10月5日 月曜日 午後3時42分 OPERATION MANUALS AND HOW TO USE THEM Three printed manuals and a manual in PDF format are provided with the machine.
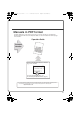
mxc400p_us_qck.book 1 ページ 2009年10月5日 月曜日 午後3時42分 Manuals in PDF format Detailed explanations of the functions that can be used on the machine are provided in the Operation Guide in PDF format. The Operation Guide can be downloaded from the Web pages in the machine. Operation Guide For detailed information Download the Operation Guide from the Web pages in the machine. For the downloading procedure, see "Downloading the Operation Guide" (page 4).
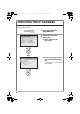
mxc400p_us_qck.book 2 ページ 2009年10月5日 月曜日 午後3時42分 CHECKING THE IP ADDRESS To check the IP address of the machine, print out the all custom setting list in the system settings. SYSTEM SETTINGS (1) BACK 1 Press the [SYSTEM SETTINGS] key. 2 Select the all custom setting list. (1) Select the [List Print (User)] key. OK (2) (2) Select the [Print] key to the right of "All Custom Setting List". The IP address is shown in the list that is printed.
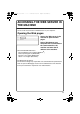
mxc400p_us_qck.book 3 ページ 2009年10月5日 月曜日 午後3時42分 ACCESSING THE WEB SERVER IN THE MACHINE When the machine is connected to a network, the machine's built-in Web server can be accessed from a Web browser on your computer. Opening the Web pages Access the Web server in the machine to open the Web pages. Start a Web browser on a computer that is connected to the same network as the machine and enter the IP address of the machine. Recommended Web browsers • Internet Explorer: 6.
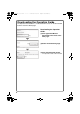
mxc400p_us_qck.book 4 ページ 2009年10月5日 月曜日 午後3時42分 Downloading the Operation Guide The Operation Guide, which is a more detailed manual, can be downloaded from the machine's Web pages. Downloading the Operation Guide. (1) (2) (1) Click [Operation Manual Download] in the menu of the Web page. (2) Select the desired language. (3) Click the [Download] button. The Operation Guide is downloaded.
mxc400p_us_qck.book 5 ページ 2009年10月5日 月曜日 午後3時42分 TABLE OF CONTENTS CHECKING THE IP ADDRESS. . . . . . . . . . . . . . . . . . . . . . . . . . . . . . . . . . 2 ACCESSING THE WEB SERVER IN THE MACHINE . . . . . . . . . . . . . . . . 3 Before using the machine PART NAMES AND FUNCTIONS. . . . . . . . . . . . . . . . . . . . . . . . . . . . . . . . 8 SUPPLIES . . . . . . . . . . . . . . . . . . . . . . . . . . . . . . . . . . . . . . . . . . . . . . . . . . 9 OPERATION PANEL. . . . . . . . . . . . . . . .
mxc400p_us_qck.
mxc400p_us_qck.book 7 ページ 2009年10月5日 月曜日 午後3時42分 Before using the machine This section provides general information about the machine, including the names and functions of the parts of the machine and its peripheral devices, and the procedures for loading paper. X PART NAMES AND FUNCTIONS . . . . . . . . . . . . . . . . . . . . 8 X SUPPLIES . . . . . . . . . . . . . . . . . . . . . . . . . . . . . . . . . . . . . . 9 X OPERATION PANEL . . . . . . . . . . . . . . . . . . . . . . . . . . . . .
mxc400p_us_qck.book 8 ページ 2009年10月5日 月曜日 午後3時42分 PART NAMES AND FUNCTIONS (4) (3) (2) (1) (5) (1) Output tray (center tray) Jobs are delivered to this tray. (When a finisher is installed, the output tray (center tray) cannot be used.) (2) Operation panel (3) Finisher* This can be used to staple output. (4) Main power switch This is used to power on the machine. (6) (7) (5) Tray 1 Up to 500 sheets of paper (21 lbs. (80 g/m2)) can be loaded in each tray.
mxc400p_us_qck.book 9 ページ 2009年10月5日 月曜日 午後3時42分 (11) (8) (9) (8) Front cover Open to replace a toner cartridge. (9) Bypass tray Special types of paper and envelopes can be fed from the bypass tray. (10) (10) USB connector (B type) Supports USB 2.0 (Hi-Speed). A computer can be connected to this connector to use the machine as a printer. (11) LAN connector Connect the LAN cable to this connector when the machine is used on a network.
01-1_Quick(General).fm 10 ページ 2009年10月6日 火曜日 午前9時1分 OPERATION PANEL Display Select the displayed items to perform various operations. 2010/04/04 2010/04/04 [PRINT] key When you wish to print a print hold job, press this key to switch to print mode. You can hold down the [PRINT] key to check the total pages used, remaining toner, and machine display. BACK PRINT JOB STATUS SYSTEM SETTINGS LOGOUT [SYSTEM SETTINGS] key Press to display the system settings menu screen.
01-1_Quick(General).fm 11 ページ 2009年10月6日 火曜日 午前9時1分 [OK] key / [BACK] key / Arrow keys [OK] key Press to enter a setting that has been selected. [BACK] key Press to return to the previous screen level. Arrow keys Press to move the selection frame that selects setting keys and items in the display. Print mode indicators READY indicator Print data can be received when this indicator is lit. DATA indicator This blinks while print data is being received and lights steadily while printing is taking place.
mxc400p_us_qck.book 12 ページ 2009年10月5日 月曜日 午後3時42分 USING THE OPERATION PANEL This section explains the procedures for selecting setting items in the screen. Selecting setting items Selection frame 2010/04/04 2010/04/04 [BACK] key BACK OK [OK] key Arrow keys Base screen The frame that appears in the display is the selection frame. Move the selection frame to the item that you wish to select and press the [OK] key. The selection frame is moved with the arrow keys ( ).
mxc400p_us_qck.book 13 ページ 2009年10月5日 月曜日 午後3時42分 Press the [BACK] key to return to the previous screen level. 2010/04/04 2010/04/04 When the [BACK] key is pressed in the operation selection screen, you return to the base screen.
mxc400p_us_qck.book 14 ページ 2009年10月5日 月曜日 午後3時42分 ITEMS IN THE DISPLAY Useful items in the display are explained below. Messages appear here. Numbers in the format "1/2" indicate that there are more items. These numbers mean "current screen / total number of screens". 14 Settings appear here. If you press the key when the selection frame is on the bottom setting, the next screen will appear. An operation hint appears here.
01-1_Quick(General).fm 15 ページ 2009年10月14日 水曜日 午後1時59分 Important operations to know (1) When a checkbox is selected and the [OK] key is pressed, a checkmark will appear to indicate that the setting is enabled. (2) You can select "Basic Menu" to return to that screen. (3) can be used to increase or decrease a value. To make the value change quickly, hold down the [OK] key. (1) (2) (3) Job status screen To show the job status screen, press the [JOB STATUS] key on the operation panel.
mxc400p_us_qck.book 16 ページ 2009年10月5日 月曜日 午後3時42分 USER AUTHENTICATION When user authentication is enabled, you must log in before using the machine. User authentication is initially disabled. When you have finished using the machine, log out. User authentication methods There are two methods for performing user authentication: login by user number and login by login name and password. Ask the administrator of the machine for the information that is required to log in.
mxc400p_us_qck.book 17 ページ 2009年10月5日 月曜日 午後3時42分 Logging out When you have finished using the machine, log out. Logging out prevents unauthorized use of the machine. How to log out You can log out from any mode of the machine by pressing the [LOGOUT] key. If a preset duration of time elapses after the machine is last used, the auto clear function will activate. When auto clear activates, logout automatically takes place.
mxc400p_us_qck.book 18 ページ 2009年10月5日 月曜日 午後3時42分 CHANGING PAPER IN A TRAY Names of the trays The names of the trays are shown below.
mxc400p_us_qck.book 19 ページ 2009年10月5日 月曜日 午後3時42分 Loading paper in a tray To change the paper in a tray, load the desired paper in the tray and then change the tray settings in the machine to specify the loaded paper. The procedure for changing the tray paper size is explained below. As an example, the paper in tray 1 is changed from 8-1/2" x 11" (A4) size plain paper to 5-1/2" x 8-1/2" (A5) size recycled paper. Gently pull out the paper tray. If paper remains in the tray, remove it.
mxc400p_us_qck.book 20 ページ 2009年10月5日 月曜日 午後3時42分 Changing the tray settings When you change the paper in a tray, the tray settings in the system settings must also be changed. SYSTEM SETTINGS 1 Press the [SYSTEM SETTINGS] key. 2 Configure the tray settings. (1) Select the [Paper Tray Settings] key. Select with (1) BACK and press [OK]. OK (2) Select the [Tray Settings] key. Select with (2) BACK 20 OK and press [OK].
mxc400p_us_qck.book 21 ページ 2009年10月5日 月曜日 午後3時42分 Configure the tray settings. (Continued) Tray 1 1 Plain 5 Auto-Inch (3) Select the [Change] key in "Tray 1". Select with and press [OK]. (3) BACK OK (4) Select [Recycled] from the "Type" select box. (6) (4) (5) Recycled Auto-Inch Letter(8 1/2x11),Executive(7 1/4x10 1/2), Invoice(5 1/2x8 1/2),Legal(8 1/2x14) Approving Feeding BACK Select with Select with OK and press [OK].
mxc400p_us_qck.book 22 ページ 2009年10月5日 月曜日 午後3時42分 Loading paper in bypass tray The side to be printed on must be face down! Load the paper in the horizontal orientation. When loading 8-1/2" x 11" size paper, pull out the tray extension. The maximum number of sheets that can be loaded in the bypass tray is approximately 100 for plain paper and approximately 20 for envelopes. Example: Loading an envelope Place paper that is 7-1/4" x 10-1/2" (A5) or smaller in the horizontal orientation.
mxc400p_us_qck.book 23 ページ 2009年10月5日 月曜日 午後3時42分 PRINTING This section explains the basic procedure for printing using the printer driver of the machine. The settings that can be selected in the printer driver are also introduced. The explanations of screens and procedures are primarily for Windows Vista® in Windows® environments, and Mac OS X v10.4 in Macintosh environments. The window varies depending on the operating system version, the printer driver version, and the application. X PRINTING . . .
mxc400p_us_qck.book 24 ページ 2009年10月5日 月曜日 午後3時42分 PRINTING This section explains the basic procedures for printing. Windows The following example explains how to print a letter size document from WordPad, which is a standard accessory program in Windows. To install the printer driver and configure settings in a Windows environment, see "2 - SETUP IN A WINDOWS ENVIRONMENT" in the Software Setup Guide.
mxc400p_us_qck.book 25 ページ 2009年10月5日 月曜日 3 午後3時42分 Select print settings. (1) Click the [Paper] tab. (2) Select [Letter]. (3) Click the [OK] button. (1) (2) (3) 4 Click the [Print] button. Printing begins. In Windows 98/Me/NT 4.0, click the [OK] button. When removing printed output... Remove the output horizontally so that it does not get caught on the actuator for output tray full detection.
mxc400p_us_qck.book 26 ページ 2009年10月5日 月曜日 午後3時42分 Using printer driver help When selecting settings in the printer driver properties window, you can display Help to view explanations of the settings. (Only in Windows) 1 (1) Select the printer driver of the machine. (2) Click the [Preferences] button. (1) (2) In Windows 2000, the [Preferences] button does not appear. Click the tabs in the "Print" dialog box to adjust the settings on the tabs. In Windows 98/Me/NT 4.0, click the [Properties] button.
mxc400p_us_qck.book 27 ページ 2009年10月5日 月曜日 午後3時42分 To view Help for a specific setting Click the setting that you wish to learn about and press the [F1] key. Help for that setting will appear. * To view Help for a particular setting in Windows 98/Me/NT 4.0/2000/XP/ Server 2003, click the button in the upper right-hand corner of the printer driver window and then click the setting.
03-1_Quick(Printer).fm 28 ページ 2009年10月8日 木曜日 午後5時36分 Macintosh The following example explains how to print a letter size document from "TextEdit" ("SimpleText" in Mac OS 9), which is a standard accessory program on Macintosh computers. In a Macintosh environment, the PS3 expansion kit must be installed to use the machine as a network printer. To install the printer driver and configure settings in a Macintosh environment, see "3 - SETUP IN A MACINTOSH ENVIRONMENT" in the Software Setup Guide.
03-1_Quick(Printer).fm 29 ページ 2009年10月7日 水曜日 午後4時19分 Printing a file 1 (1) Execute printing from TextEdit. (1) Open the [File] menu. (2) Select [Print]. In Mac OS 9, select [Print] from the [File] menu of SimpleText. (2) 2 Select print settings and click the [Print] button. (1) (2) (3) (1) Make sure the correct printer is selected. The machine name that appears in the "Printer" menu is normally [SCxxxxxx]. In Mac OS X v10.6, it is normally [RDVxxxxxx].
mxc400p_us_qck.book 30 ページ 2009年10月5日 月曜日 午後3時42分 CANCELING PRINTING (AT THE MACHINE) You can cancel a job if you cancel before printing actually begins. JOB STATUS (1) 1 Press the [JOB STATUS] key. 2 Select settings. (1) Change the job status mode to [Spool] or [Job Queue]. User_1 User_2 (2) BACK OK Select either of the keys with the keys and press the [OK] key. The mode changes each time the [OK] key is pressed. (2) Select the key of the job that you wish to cancel.
mxc400p_us_qck.book 31 ページ 2009年10月5日 月曜日 午後3時42分 Configure the tray settings. (Continued) (4) Select the [Yes] key. Select with and press [OK].
mxc400p_us_qck.book 32 ページ 2009年10月5日 月曜日 午後3時42分 SELECTING PRINT SETTINGS To use the print function of the machine, the settings in the printer driver properties window must be configured. See "PRINTING" (page 24) for the procedure for opening the printer driver properties window and the basic procedure for printing. Windows The procedure for selecting settings in the printer driver is explained below using "Fitting the print image to the paper (Fit To Paper Size)" as an example.
mxc400p_us_qck.book 33 ページ 2009年10月5日 月曜日 午後3時42分 Macintosh The procedure for selecting printer driver settings is explained below using "Printing multiple images on one page (N-Up Printing)" as an example. This function reduces the size of each page to let you print multiple pages on one sheet of paper. The example of printing two pages on one sheet of paper with borderlines is explained. The procedures for configuring printer driver settings vary by setting.
mxc400p_us_qck.book 34 ページ 2009年10月5日 月曜日 午後3時42分 CONVENIENT PRINTER FUNCTIONS Printing on both sides of the paper (2-sided printing) Use this function to print on both sides of the paper. You can use 2-sided printing to reduce the number of printed sheets when you are printing a large number of pages or when you wish to conserve paper. 12 34 1 3 Fitting the print image to the paper (Fit To Paper Size) Use this function to enlarge or reduce the print image to fit the paper size.
mxc400p_us_qck.book 35 ページ 2009年10月5日 月曜日 午後3時42分 Printing multiple images on one page (N-Up Printing) Use this function to print multiple pages on a single sheet of paper by reducing the size of the print images. This is convenient when you wish to show an overall view of multiple pages or conserve paper. 12 34 1 2 3 4 Stapling printed pages (Staple) Use this function to staple printed output. (When a finisher is installed.
mxc400p_us_qck.book 36 ページ 2009年10月5日 月曜日 午後3時42分 The machine also has these functions For information on each of these functions, see "CONVENIENT PRINTING FUNCTIONS" and "RETENTION (PRINT HOLD) FUNCTION" in "Chapter 2 - PRINTING" in the Operation Guide.
mxc400p_us_qck.book 37 ページ 2009年10月5日 月曜日 午後3時42分 System settings The system settings let you adjust the operation of the machine to suit the needs of your workplace. This section briefly introduces several of the system settings. For detailed explanations of the system settings, see "Chapter 3 - SYSTEM SETTINGS" in the Operation Guide. X SYSTEM SETTINGS . . . . . . . . . . . . . . . . . . . . . . . . . . . . .
mxc400p_us_qck.book 38 ページ 2009年10月5日 月曜日 午後3時42分 SYSTEM SETTINGS Various settings related to the machine such as the date and time setting and paper tray settings can be configured in the system settings screen. The procedure for opening the system settings screen and the items in the screen are explained below. For detailed explanations of the system settings, see "Chapter 3 - SYSTEM SETTINGS" in the Operation Guide.
mxc400p_us_qck.book 39 ページ 2009年10月5日 月曜日 午後3時42分 What you can do in the system settings Settings Description Display Contrast (Operation panel only) The display contrast can be adjusted. Total Count This displays the total number of pages printed . Default Settings This lets you set the clock and change the software keyboard used for text entry. List Print (User) This lets you print lists showing the machine status and settings.
mxc400p_us_qck.
mxc400p_us_qck.book 41 ページ 2009年10月5日 月曜日 午後3時42分 Troubleshooting This sections contains answers to frequently asked questions and explains how to remove paper misfeeds. X FREQUENTLY ASKED QUESTIONS . . . . . . . . . . . . . . . . 42 X REMOVING MISFEEDS . . . . . . . . . . . . . . . . . . . . . . . . . . .
mxc400p_us_qck.book 42 ページ 2009年10月5日 月曜日 午後3時42分 FREQUENTLY ASKED QUESTIONS Printing on envelopes The procedure for printing on an envelope is explained below. Only the name and address side of an envelope can be printed on. It is recommended that you do a test print to check the print result before using an envelope. 1 Place paper in the bypass tray. Print on the name and address side 2 Tray Settings.
mxc400p_us_qck.book 43 ページ 2009年10月5日 月曜日 午後3時42分 3 Select settings in the printer driver. (1) (2) (3) (1) Select the size of the envelope in "Paper Size". (2) Select "Bypass Tray" from "Paper Source" in "Paper Selection". (3) Select [Envelope] in "Paper Type". If needed, select the "Rotate 180 degrees" checkbox ( ) in "Image Orientation" on the [Main] tab. (4) Click the [OK] button.
mxc400p_us_qck.book 44 ページ 2009年10月5日 月曜日 午後3時42分 Changing the paper size used for a job When the size of paper is not loaded in any of the machine's paper trays, follow the steps below to change the paper size. Paper Empty 1 Check details on the job. Press the [JOB STATUS] key on the operation panel to display the job status screen. (1) Select the job whose status is [Paper Empty]. (1) (2) Select the [Detail] key. To delete the job, you can select the [Stop/Delete] key.
mxc400p_us_qck.book 45 ページ 2009年10月5日 月曜日 午後3時42分 2 Change the paper size used for the job. Select the paper size on which you wish to print the job from the set paper sizes. To avoid cutting off part of the image, select a paper size that is larger than the paper size specified for the job.
mxc400p_us_qck.book 46 ページ 2009年10月5日 月曜日 午後3時42分 REMOVING MISFEEDS When a paper misfeed occurs, the message "A misfeed has occurred." will appear in the display and printing will stop. In this event, select the [Information] key in the display. When the key is selected, instructions for removing the misfeed will appear. Follow the instructions. When the misfeed is cleared, the message will automatically clear. The blinking mark in the image at left indicates the approximate position of the misfeed.
mxc400p_us_qck.
mxc400p_us_qck.
mxc400p_us_qck.book 49 ページ 2009年10月5日 月曜日 午後3時42分 Please note • For information on your operating system, please refer to your operating system manual or the online Help function. • The explanations of screens and procedures in a Windows environment are primarily for Windows Vista®. The screens may vary depending on the version of the operating system or the software application. • The explanations of screens and procedures in a Macintosh environment are based on Mac OS X v10.4 in the case of Mac OS X.
00-0_Quick(cover4).fm 2 ページ 2009年10月12日 月曜日 午後3時54分 MX-C400P DIGITAL Quick Start Guide Qu SHARP ELECTRONICS CORPORATION 1 Sharp Plaza, Mahwah, New Jersey 07495-1163. www.sharpusa.com SHARP ELECTRONICS OF CANADA LTD. 335 Britannia Road East, Mississauga, Ontario, L4Z 1W9 PRINTED IN CHINA This manual has been printed using a vegetable-based soy oil ink to help protect the environment.