e Stellen Sie die Minuten mit der & oder =) Taste oder mit den turnerischen Tasten ein. (Einstellung auf 28) Drucken Sie die BLOCK-Taste. 28" leuchtet auf und “01” for den Tag beginnt zu blinken. {Wenn die Angabe fUr die Minuten eine einstellige Zahl ist muB vorher (@ {(Null)y eingegeben werden.) Stellen Sie den Tag mit der D oder oder mit den numerischen Tasten eln. (Einstellung auf 17.) Drinstecken Sle die BLOCK-Taste. “17” leuchtet auf und “01” fir den Monat beginnt zu blinken.
DIGITALE FUNKTION Mit der Fernbedienung kennen Sie jetzt digitale Bilder erzeugen, bisher aufgrund technischer Bedingungen nicht dargestellt werden konnten. Es gibt sechs verschiedene Möglichkeiten, die digitale Funktion zu nutzen. 1. DIGITAL STILL: Das Bild einer Sendung oder ein Wiedergabebild vom Videorecorder kann “eingefroren” werden. Auf diese Weise kann zum Beispiel ein Kochrezept oder eine auf dem Bildschirm gezeigte Adresse notiert werden. 2.
Multi-Einzelbild-Vorlauf: Mit dieser Funktion kennen die Details von schnellen Bewegungen eines Wiedergabebildes Standbild fir Standbild betrachtet werden. @ Drinstecken Sie die wahrend der Wiedergabe. Das Fernsehbild wird angehalten. © Drinstecken Sie die M-FAD-Taste der Feinbedienung. Elz.m>o " suchtet auf dem Videorecorder auf und zeigt an, dab der Videorecorder in der Multi-Einzelbiid-Vorlauf-Betriebsart ist. © Das Standbild erscheint in der oberen linken Ecke des Bildschirmes.
@ Drinstecken Sie die PRO-Taste. “03” angezeigt und “RATE" “DALAI" und “WEHKLAGE” beginnen ken. a @ Drucken die RATE-Taste {Nr. 7) fair eine einmalige Aufnahme, die DALAI-Taste (Nx. 8} fur taugliche Aufnahmen und die WEHKLAGE-Taste {Nr. 9 f0r wöchentliche Aufnahmen zur gleichen Zeit. In diesem Beispiel drucken Sie die Dateitaste (N£. 7). © Drucken Sie die PRO-Taste. “RATE” wird angezeigt und “10” beginnt fair die Startzeit zu blinken. Geben Sie die Stunde der Startzeit {09) mit der & bzw.
KINDER-SICHERUNG (C-LOCKE) hinleite Betriebsart des Videorecorder kann gesichert werden, um ein hes Umschalten auf eine andere Betriebsart zu verhindern, indem einfach die C-LOCKE-Taste am Fernbedienungsgenbar gestrickt wi Alle Betriebsarten (einschließlich Ausschalten der Spannungsversorgung) bleiben gesichert, bis die Kinder-Sicherung deaktiviert wird. Drinstecken Sie C-LOCKE. Beispiel: Einstellen der Kindersicherung wehrend der Wiedergabe © Drucken Sie die BLOCK-Taste auf der Bedienung fOr ca.
pi=e s [Sle g gy o] Format: Zeitrafferaufnahmen: Videosignalsystem: Maximale Aufnahmezeit: Bandbreite: Bandgeschwindigkeit: Antenne: Empfangskanäle: HD-Ausgangssignal; Spannungsversorgung: Leistungsaufnahme: Betriebstemperatur: Lagertemperatur: Video Eingang: Ausgang: Audi Eingang: Ausgang: Abmessungen: Gewicht: Mitgeliefertes Zubehör: VHS PAL Standard welle rotierende Kopfe, Schlagspurabtastung PAL Fahrbund Monochrom-Signale; 625 Zeilen 480 Min.
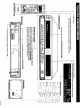
. =31 « HQ {High Quality} « Digital Playback Function + IMPORTANT SAFEGUARDS AND PRECAUTIONS . . (2-Picture, 9-Picture Channel Search/Variable Speed Multi Strobe/ * MAJOR COMPONENTS OF YOUR VCR Multi Frame Advance, Variable Speed Strobe, Digital Still (VCR) « CONNECTIONS « Maximum 8-hour recording/playback « ADJUSTING THE VIDEO CHANNEL . + Programmable Remote Control with LCD « REMOTE CONTROL . « APED — VHS Index Search System (index Search, Interval Search, ¢ SETTING THE CLOCK .
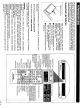
Disconnecting TV Cable Disconnect the antenna cable from the back of your TV set, ~ back panel © ANTENNA IN Connected to outdoor of Indoor antenna o cable Connecting Antenna Cable to VCR ANTENNA IN terminal of your VCR. Connect the antenna cable to the ANTENNA IN VGR rear Connecting VCR to TV Connect the supplied coaxial cable to the RF OUT terminal of the VCR. Plug the other end into your TVs ANTENNA IN terminal.
is equipped with a 24-hour clock, When it Is first plugged in, the clock will flash *0:00" until it is set. The same thing may happen if prows has been interrupted for more their 20 minutes. Controls for Setting the Clock The clock can be set ably by using the remote control (and not by the VCR). Press TRANSFER button.
The 128 Pruned Station Signals And Their Corresponding Real Channel Numbers Station Real Channel Station Real Channel Signals Numbers Signals Numbers E2 CHINTZ M 1st C Cot E3 CHOC M2/52 Rocco v . M10/S10 CG . . unis CC Ei2 CH us10/s20 CC H Ae CH 8214 CcC21 Be CH C 8224 cc F Ce CH . . Dse CH CH S41a CC Fe CH T Miro CC Ge CH . . He CH v M70 CC B2 CH Bootee Crag v E22 CH B70 CC H « . S01/821 A CH . . S02/S22.
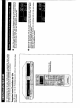
A=) 1ol 4 TVIVCR switch Cassette compartment LOAD/EJECT . “ TRACKING PAUSE/STILL Inserting a Video Cassette Push the video cassette into the cassette compartment. The VOR will turn on automatically. If the video cassette is inserted incur erectly, the loading system will not function. Do not force the cassette into the VOR, When the cassette has been properly loaded, the tape running indicators will appear on the display. To remove a cassette, press the EJECT button.
BLUE MUTE/AUDIO MUTE BLUE MUTE When the Blue Mute is operating the TV picture becomes a solid blue, and sound is muted. This function does away with the unpleasant “snowy” picture and audio static that are created when there is no active broadcast or recorded signal during playback, To use Blue Mute, set the COLOR MODE switch (inside the dun) to the BLUE MUTE position, (The switch is factory preset to BLUE MUTE) Blue Mute is engaged in the following three cases: 1.
Channel Number Indicating Function As a special feature, all the screens shown the Channel Search show their channel numbers (position numbers), in their upper right hand comers, 80 you will recognize the channel number of your chalice. NOTES: * During Channel Search, sound is muted. * Channels not preset will be skipped over and will not appear during Channel Search. * When fewer than 9 channels are preset, the Eam_g_sm spaces will tum blue.
RECORDING A TV PROGRAMMER Cassette Erase Protection ERASURE A étM cassette has a removable fab to prevent PROTECTION accidental erasure of recorded material. Removing TAB the tab prevents recording. To record on a video cassock T besotted with the tab removed, place adhesive tape over the tab opening. Recording a TV Programmer €@ Tum on your TV and select the video channel. @ Press the OPERATE button on the VCR o ON.
With these features you can quickly locate the desired section of the tape. There are thee kinds of APED; {A) Index Search (B} Interval Search {C) Counter Search Select. the best one according to your tape's recorded contents. Perform all settings using the remote control. NOTES: * The clock must be set io use the search mode. * The start of the desired selection may be shifted slightly.
RECORDING WITH THE TIMER The Timer can be set for automatic recording of 8 programmed over a 365 day @ Load the cassette, ensuring the erasure protection hole is covered. The period. _% WNW" of Ew be set ..-m a amfi A_u_‘ VCR power will automatically turn ON. weekly basis up to the limit of the tape. The Timer rec ing setting controls the tape inserted is already recorded and the FULL AUTO switch Is in are situated on the remote control.
@ Press the PRIG button, The transfer symbol [TRANSFER] and “PRIG POSIT 1" flash. Confirm the entered recording times, point ihe remote control at the VCR, and then press the TRANSFER button unfit the VCR's display changes and an electronic beep is heard from the VCR. [VCR display} RS S ezl [ LB NS When the TRANSFER button is released, the remote control display automatically changes 1o the present time of day and TIMER flashes.
(B) Function On Screen Display In addition to the mutuality-function display, the On Screen Display Is available. With this feature, the indications of the functions clack, operation modes; courier nurturer, etc can be displayed on your TV screen. This enables you to operate the VCR more easily and enjoyably while watching the TV. @ Tum on the VCR and TV, and select the video channel. @ Press the FUN. ON SCREEN button on the remote control.
FULL AUTO FUNCTION (RECORD) When the FULL AUTO switch is set to position {II) the following convenient functions are available in the recording mode (=ADVANCED FULL AUTO FUNCTION), : {A) Instruction signal for engaging the timer recording (B} Auto power-off function (C) Automatic return to the starting point after timer recording and SRT (Simple Recording Timer) (A) Instruction Signal for Engaging the Timer After having set the timer and inserting a blank tape, the display tiles you to press the TIMER ON/OF
RANDOM REPEAT Press REPEAT button. With this features, a desired programmer or’ scene can be played back repeatedly. @ During playback, press the REPEAT button at the stark of the desired programmer. “ & " flashes. o the REPEAT button at the end of the desired programmer. “ > * its. © The action of the tape between the first press and second press of the REPEAT button is played back repeatedly. NOTE: Pressing the STOP button during random repeat cancels it. START END F1 aa Press REPEAT. Crass REPEAT again.
' BEFORE CALLING FOR SERVICE The following conditions do not always denote trouble. Therefore, perform the checks described below before calling for service. *Cassette cannot be ejected. »Press the TIMER button and disengage the timer, Problem Suggested Solution Problem m:wmomfin Solution *No power. » Make sirs the power cord is plugged in, * Make sure there Is no other cassette inside. OPERATE indicator | » Check the outlet, fuse or circuit breaker.