VL-AH130U/hyou; 00/12/14/18:00 Valid for warranty service in the U.S.
Thank you for purchasing this VIEWCAM from SHARP. The VIEWCAM will enhance your home video enjoyment and allow you to capture those special moments. Please read this operation manual to familiarize yourself with the VIEWCAM’s features, so that you will get the most out of it. The video techniques section will help you fully enjoy the many features this VIEWCAM offers, and expand your video world. Important Information for Consumers in the U.S.
WARNING—FCC Regulations state that any unauthorized changes or modifications to this equipment not expressly approved by the manufacturer could void the user’s authority to operate this equipment. This device complies with Part 15 of the FCC Rules. Operation is subject to the following two conditions: (1) This device may not cause harmful interference, and (2) this device must accept any interference received, including interference that may cause undesired operation.
IMPORTANT SAFEGUARDS iii 1. Read Instructions—All the safety and operating instructions should be read before the product is operated. 2. Retain Instructions—The safety and operating instructions should be retained for future reference. 3. Heed Warnings—All warnings on the product and in the operating instructions should be adhered to. 4. Follow Instructions—All operating and use instructions should be followed. 5. Cleaning—Unplug this product from the wall outlet before cleaning.
15. Power Lines—An outside antenna system should not be located in the vicinity of overhead power lines or other electric light or power circuits, or where it can fall into such power lines or circuits. When installing an outside antenna system, extreme care should be taken to keep from touching such power lines or circuits as contact with them might be fatal. 16.
Precautions • When the VIEWCAM is not in use, remember to remove the cassette tape, turn off the power, and disconnect the VIEWCAM from the power source. • Always respect prohibitions or restrictions on the use of electronic equipment on commercial flights or in other sensitive areas. • Do not aim the lens at the sun. Do not allow direct sunlight to strike the VIEWCAM lens or LCD monitor screen, whether or not recording is in progress, as it may damage the CCD sensor or LCD screen surface.
About Your VIEWCAM Recording Format Hi8 is a high-performance extension of the ordinary 8 mm format. It uses advanced technology to achieve even higher resolution and picture quality. Use a video cassette with the mark for high-quality recording and playback, or with the mark to enjoy ordinary 8 mm recording and playback. • When you load a Hi8 tape, recording is in Hi8 format. (The indicator appears on the LCD screen.) When you load a normal 8 mm tape, recording is in ordinary 8 mm format.
Supplied Accessories Battery pack *BT-H22 AC adapter *UADP-0312TAZZ Infrared remote control RRMCG0084TASA Audio/video cable QCNW-1448TAZZ or QCNW-1295TAZZ CR2025 type lithium battery Shoulder strap UBNDS0010TASA Lens cap GCOVH1225TASA AA battery for remote control 2 * Note: The part numbers for the AC adapter and battery pack supplied with this VIEWCAM are valid only in the U.S. and Latin America. If this VIEWCAM was purchased outside of these areas, the part numbers may be different.
Optional Accessories Standard type battery pack BT-H22 Extended type battery pack BT-H32 Sun hood VR-60BFN Accessory shoe adapter VR-30ADN Tripod adapter for 180° recording VR-33FAN Note: The listed model names are for U.S. accessories. For optional and additional accessories, contact your local dealer, call the Sharp Accessories and Supply Center at 1-800-642-2122, or visit SHARP’s website (http://www.sharp-usa.com). viii VL-AH130U/pp. i-viii; 00/12/14/18:00 G. K .
Contents Operation Summary Part Names .......................................................... 3 Quick Reference Index ........................................ 5 Warning Indicators ............................................... 6 Preparation Inserting and Removing the Battery Pack ........... 7 Charging the Battery Pack ................................... 8 Powering the VIEWCAM from an AC Outlet........... 9 Inserting and Removing a Cassette ..................
Useful Features Advanced Features • Guía de operación rápida en español .......................................................... 58 Playback Useful Information .............................................. 50 Demonstration Mode .......................................... 54 Before Requesting Service ................................ 55 Specifications ..................................................... 57 Basic Operations References Basic Operations Digital Picture Effects .........................
Operation Summary Operation Summary Part Names For details on the use of each part, refer to the page number indicated in the brackets. Front view Terminal cover Microphone Zoom lens AUDIO/VIDEO jack [pp. 22, 49] DC IN jack [pp. 8, 9] Speaker When the cassette compartment door is open Cassette holder [p. 10] Lens hood [p. 32] Shoulder strap loop [p. 17] Lithium battery holder [p. 11] Cassette compartment door [p. 10] Cassette compartment door release [p. 10] 3 V L - A H 1 3 0 U / p p .
Operation Summary Rear view RECord START/STOP button [p. 18] Power Zoom Wide angle/ Telephoto control [p. 19] VOLume control [p. 21] LCD monitor screen Shoulder strap loop [p. 17] Remote sensor [p. 39] FADE button [p. 27] CHARGE indicator [p. 8] MENU button [p. 24] Hand strap [p. 17] Power switch (CAMERA/VCR select switch) [pp. 18, 21] Operation buttons [p. 24] DISPLAY button [p. 24] Bottom view Battery compartment door release [p. 7] Battery compartment door [p.
Operation Summary Operation Summary Quick Reference Index This index lists some example uses of the VIEWCAM’s features. • To record with a Hi8 tape in normal 8 mm format. Recording Format) —See page vi ( • To quickly check what you have just recorded. —See page 28 (Quick Review) • To quickly return the tape to the end of the last recorded scene after playback. —See page 29 (Quick Return) • To locate the point on the tape where to begin recording while in Camera mode.
Operation Summary Warning Indicators Displayed for the first 3 seconds Displayed after 3 seconds Description of warning The video cassette is defective and should be removed (see page 10). Dew has formed inside the VIEWCAM. Wait for a few hours until the dew disappears (see page 51). About 10 seconds after this warning appears, the VIEWCAM automatically turns off. The battery is almost depleted. Replace it with a fully charged battery pack (see page 7).
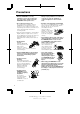
Preparation Preparation Inserting and Removing the Battery Pack 4 Close the door, pressing it firmly in the center until it clicks. Preparation Inserting the Battery Pack 1 Make sure that the Power switch is set to OFF. Removing the Battery Pack Power switch 2 Slide the battery compartment door release on the bottom of the VIEWCAM in the direction of the arrow to open the battery compartment door. 1 2 Perform steps 1 and 2 above. Press the battery release as shown to remove the battery pack.
Charging the Battery Pack Power switch 1 Insert the battery pack into the VIEWCAM (see page 7). Make sure that the Power switch is set to OFF. • The battery pack will not charge when the Power switch is set to CAMERA or VCR. 2 Insert the AC plug of the AC adapter into a power outlet. 3 Open the terminal cover on the VIEWCAM and insert the DC plug of the AC adapter into the DC IN jack on the VIEWCAM. • The CHARGE indicator will light up in red. Terminal cover Max.
Preparation Powering the VIEWCAM from an AC Outlet Preparation Caution: • The supplied AC adapter is specially designed for use with this VIEWCAM, and should not be used as a power supply for other camcorders. Cautions: • BEFORE REMOVING THE DC PLUG, ALWAYS STOP THE TAPE AND TURN THE POWER OFF. If you remove the DC plug during recording or playback, the tape will remain wound around the video head drum, potentially causing damage to the tape.
Inserting and Removing a Cassette Inserting a Cassette Wait for the cassette holder to fully retract. Close the compartment door by pressing the center until it clicks into place. Supply power to the VIEWCAM, then slide the release and open the cassette compartment door. Preparation 1 4 • The cassette holder extends and opens automatically. Cassette compartment door release Removing a Cassette Perform step 1 above, then take out the cassette.
Preparation Installing the Lithium Memory Battery 5 Close the cassette compartment door by pressing the center until it clicks into place. Preparation The supplied lithium battery is used to store the memory of the date and time settings. 1 Slide the cassette compartment door release and open the cassette compartment door. Cassette compartment door release Removing the Lithium Battery Perform steps 1 and 2 above, then lift out the battery from the battery holder.
Selecting the Language for the On-screen Display This VIEWCAM allows you to choose from among English, French or Spanish for the onscreen display language. Changing the Language In Recording Standby mode, press the appears. MENU button until 2 Press the PAGE (PAGE or PAGINA) button ( ) to display MENU 1. 3 Press the or button (Q) to select “LANGUAGE” (“LANGUE” or “IDIOMA”), then press the SET (REGLAGE or AJUSTE) button (B) (W). Power switch Preparation 1 • The language selection screen appears.
Preparation English On-screen Displays Preparation The following on-screen displays appear when “ENGLISH” is selected as the on-screen display language (see page 12). Camera Mode PIC EFF GAMA Q K REW EFF MENU 1 NORMAL AUTO ON OF F F ADE REMOT E DEMO MODE L ANGUA GE COUNTER SET P I CTURE PAGE MENU 2 WH I T E EXPO SURE BA L.
French On-screen Displays The following on-screen displays appear when “FRANÇAIS” is selected as the onscreen display language (see page 12). Preparation Camera Mode ME NU IMAGE E F F . R EVU G AMM RAP. MENU 1 FONDU T E L E COM. MODE DEMO L ANGUE COMP T E UR NORMAL AUTO ON OFF RE GL AGE IMAGE PAGE MENU 2 F OCU S EXPO BAL. BL ANC S I T .
Preparation Spanish On-screen Displays Preparation The following on-screen displays appear when “ESPAÑOL” is selected as the onscreen display language (see page 12). Camera Mode EF. IMA. EF. R E V. GAM. RA P. MENU 1 NORMAL AUTOMAT I C O D I S TA NC I A E N C END I DO MODO DEMOS. AP AGADO I D I OMA DESVANECE R CONT AD. A JUS IMA- PA TE GEN G I NA MENU 2 ENFOQUE BAL . BCO EXPO. F E C H A / HORA V I SUA L I . SE L E C C I ON AJ USTE 1 2H / 2 4H T I - RE TULO TOR.
Setting the Date and Time 4 Example: Setting the date to June 2, 2001 (JUN. 2. 2001) and the time to 10:30 am (10:30 AM). JUN 1 2 0 0 0 1 2 0 0 AM 5 Press the or button to select “2” (day), and press the SET button. JUN 2 2 0 0 0 1 2 0 0 AM Power switch 6 Preparation Note: • Check that the lithium memory battery has been installed before setting the date and time. Press the or button (C or D) to select “JUN” (month), and press the SET button.
Preparation Using the Hand Strap and the Lens Cap Preparation 1 Open the hand strap flap (Q) and grip strap (W), and pass the grip strap through the loop at the end of the lens cap cord (E). Notes: • Always replace the lens cap on the lens when the VIEWCAM is not in use. • Attach the lens cap to the hand strap so it will not get in the way during recording. Hand strap flap Grip strap 2 Pass your hand through the hand strap and put your thumb close to the Power Zoom control.
Basic Operations Camera Recording Easy Camera Recording with Full Auto Mode Before you start recording, perform the operations described on pages 7 through 17 to prepare your VIEWCAM for recording. REC START/STOP button Note: • When recording at the beginning of a tape, advance the tape about 15 seconds before you begin recording. This will prevent the beginning of the recording being cut off when it is played back. To Pause Recording Press the REC START/STOP button again.
Basic Operations Camera Recording Zooming Tips on Recording Positions Zooming allows you to move visually closer to or farther from a subject without physically changing your position. The rotating LCD monitor screen lets you enjoy easy video recording in a more relaxed posture without having to hold the VIEWCAM up to your eye. The LCD monitor also makes it easier to record high-angle and low-angle shots.
Remaining Recording Time Display Remaining Battery Power Display When the VIEWCAM is recording in Camera mode, about 10 minutes before the tape reaches the end, an on-screen indicator displays the approximate remaining recording time. When using the VIEWCAM with the battery pack as the power source, you can turn on and off the remaining battery power display by pressing the DISPLAY button. If the battery power becomes very low, a warning indicator will appear. Replace the battery pack. Approx.
Basic Operations Playback Playback To Stop Playback The LCD monitor screen makes it possible to play back and see what you have just recorded. Nothing needs to be connected, allowing instant on-screen playback with the sound through the built-in speaker. Power switch LCD monitor screen Press the STOP button (A). REW P L A Y F F S T OP S T I L L Notes: • If you wish to turn the Operation button indicators on or off, press the DISPLAY button.
Watching the Playback on a TV 3 • When connecting to a TV via a VCR, turn on the VCR and set it to the “AV” or “LINE” input channel. Operate the TV as you normally do to see the signal from the VCR. (See the operation manuals of your TV and VCR.) You can also connect the VIEWCAM to a TV to allow a larger audience to enjoy video playback. 1 Lift up the terminal cover on the VIEWCAM (Q) and rotate it to the right (W). Turn on the TV and set it to the “AV” or “VIDEO” channel.
Basic Operations Playback Video Search Still The video search function makes it easy to search for a desired scene on the tape. The still function makes it possible to pause playback. Searching for a Scene Near the Current Tape Position During playback, press the STILL button ( ). 1 During playback, press the Forward Search (B) (or Reverse Search [C]) button. REW P L A Y F F S T OP S T I L L • The playback picture fast forwards (or reverses).
Useful Features Useful Features Operations of the On-screen Controls Selecting the Mode/Menu Screens Using the Control Buttons You can use the mode screens to select various functions and the menu screens to adjust various settings. Follow the procedure below to display the mode/menu screen with the indicator of the desired function/setting. The following buttons on the VIEWCAM can be used to control the various functions, settings and on-screen displays.
Useful Features Adjusting the Menu Settings 5 Press the SET button (B) to select the desired setting. • Each time you press the SET button, the setting changes. Follow the procedure below to adjust the desired menu settings. Example Camera mode MENU 1 1 2 Hold down the Lock button and slide the Power switch to CAMERA. SET F ADE NORMAL AUTO ON REMOT E Press the MENU button until appears.
Recording the Date and Time When “AUTO” is selected, the date/time is displayed and recorded for 10 seconds at the beginning of the first recording of each day. When “ON” is selected, the date/time is continuously displayed and recorded. When “OFF” is selected, the date/time is neither displayed nor recorded. Follow the procedure shown below to record the date and time, or the date only, along with the subject.
Useful Features Fade In and Fade Out The fade function allows you to gradually bring the image and sound in or out at the beginning or end of a scene to create a scene transition. This VIEWCAM features one normal and two animated fade modes. Selecting Fade Mode 1 In Recording Standby mode, press the (MENU 1) MENU button until appears. MENU 1 F ADE REMOT E DEMO MODE L ANGUA GE Type of Fade Modes NORMAL: The picture fades in from and out to white.
2 Press the REC START/STOP button to begin recording. Quick Review • The picture and sound fade in with the selected fade mode. The quick review function lets you check the last 5 seconds of tape just recorded without switching to VCR mode, to make sure that the recording has come out right. 1 In Recording Standby mode, press the appears. MENU button until HA P P Y B I R THD AY ! PIC EFF F ADE PIC EFF 3 GAMA Q K REW EFF 2 Press the QK. REW button ( ).
Useful Features Quick Return Edit Search When you have been playing back what you have recorded, and wish to quickly return to recording again from the end of the last recorded scene, use the quick return function. The edit search function lets you search, without switching from Camera mode to VCR mode, for the point on the tape where you wish to start recording next. 1 In Recording Standby mode, press the appears.
Gamma Brightness Compensation To obtain a brighter picture Press the GAMA EFF. button (A) again. • The When the subject is backlit, the image will be darkened if it is recorded normally. The gamma brightness compensation function improves the picture by increasing the brightness of the subject while leaving the brighter portions of the image unaffected. indicator appears. GAMA E F F. GAMMA PIC EFF 1 Press the MENU button until appears (Camera mode). 2 Press the GAMA EFF. button (A) once.
Useful Features Gain-up (Cat’s Eye) To cancel the gain-up function When you are recording in a dark or poorlyilluminated location, “LIGHT” is displayed on the screen. Use the gain-up function to record a brighter picture. 1 Press the MENU button until appears (Camera mode). 2 Press the GAMA EFF. button (A) once. Press the GAMA EFF. button until “GAMMA” disappears. Notes: • The Gain-up mode will disengage and the indicator will disappear automatically if the VIEWCAM is moved to a bright location.
Wide Screen (16:9) Macro Shots The wide screen function lets you record scenes with the wide-screen feel of a movie shown in a theater. The top and bottom of the picture are masked with black bands to produce an effective screen aspect ratio of 16:9. This VIEWCAM lets you shoot close-up images of small objects such as flowers and insects, or make title frames for your videos. When you want to record a magnified image of a subject which is within approximately 5 feet (1.
Useful Features Self Recording The LCD monitor can be rotated 180° vertically so that the monitor screen faces the subject. This lets you record yourself while watching your image on the screen. You can enjoy recording a portrait of yourself, or recording yourself and your friends together at a party, using the remote control. 3 Press the Power Zoom control to obtain the desired angle of view. 4 Press the REC START button (B) to begin recording.
3 Self-recording Message In Self Recording mode, you can record a short video message for somebody. This feature is convenient for editing video letters. • Complete steps 1 to 3 of “Normal Self Recording” on page 33, then perform the procedure below. When the remaining recording time reaches 5 seconds, “EXTEND” will begin flashing. • When you want to extend the recording time, press the EXTEND button (A) within 5 seconds. You may record continuously for 10 more seconds.
Useful Features Setting the VIEWCAM to Full Auto Mode 4 This VIEWCAM is equipped with auto focus, auto white balance, and auto exposure functions. For easy, high-quality camerarecording, record subjects in Full Auto mode. If “EXPOSURE” is displayed in yellow, press the EXPOSURE button ( ) to display the exposure setting screen, then press the AUTO button (B). • The exposure setting screen turns off and “EXPOSURE” returns to blue.
3 Program Search Press the REW (C) (or FF [B]) button. • The tape rewinds (or fast forwards) to the beginning of a scene immediately before (or after) the current tape position; playback then starts automatically. The program search function automatically finds and plays back the beginning of a number of previously recorded scenes. Up to 10 different scenes can be found on one tape.
Useful Features Camera mode Tape Counter Feature The tape counter shows elapsed playback or recording time in hours, minutes and seconds. (The counter continues to count internally even while it is not being displayed.) This feature can be set and used in both VCR and Camera modes. Using the Counter Press the MENU button until appears. SEARCH GAMA COUE F F . NT ER 2 Press the COUNTER button (D) to display the tape counter. Tape counter 0 11 20 GAMA COU - MEM- RE - SEE F F .
Using the Counter Memory 5 Press the REW button (C). • The tape will automatically stop when the counter reaches 0:00.00. Use the counter memory feature when you want to return to the beginning of a particular scene. The position where the counter was reset (0:00.00) is stored in memory to make it easier to return to that point on the tape. VCR mode 1 M 0 11 24 REW P L A Y F F S T OP S T I L L REW P L A Y F F S T OP S T I L L During playback, press the MENU appears.
Useful Features 1 2 Open the battery compartment cover. Insert the two supplied AA (R6 or UM/ SUM-3) batteries with the battery poles positioned as indicated. 1 Remote sensor 16 ft ) Installing the Batteries in the Remote Control Aim the remote control at the remote sensor of the VIEWCAM, and press the control buttons for operation.
Advanced Features Digital Picture Effects To cancel the digital picture effect These digital picture effects let you record the subject with a more dramatic effect. Type of Digital Picture Effects Select “PIC. EFF.” in step 2 above. Note: • The digital picture effect will be canceled if the power source is interrupted. B/W EFF.: The picture is recorded in blackand-white. SEPA EFF.: The picture is recorded in sepia color similar to that of an old photograph.
Advanced Features Scene Menu (Program AE) To cancel the scene setting Select “SCENE MENU” in step 2 above. You can set the VIEWCAM to the shooting mode that will create the best results for a specific type of shooting situation. Just select one of the four scene settings shown below. The VIEWCAM will automatically set the exposure, white balance, and shutter speed to produce the optimum picture quality for the selected situation.
3 Superimposing a Title Use the title feature to superimpose titles on your videos when recording. There are eight titles preset for your convenience which you can choose from. 1 Press the or button (Q) to select the desired title, then press the SET button (B) (W) to superimpose it. SET In Recording Standby mode, press the appears.
Advanced Features 4 Changing the Preset Titles You can make a new title of your own by changing any of the eight preset titles. The maximum number of title characters is fifteen. • The selected character will appear at the top of the screen and the cursor will automatically move to the right. Example: Changing “WEDDING DAY” to “IN HAWAII”. 1 Press the MENU button until appears, and then press the TITLE button (C) to display the title selection screen.
Auto/Manual Focus 1 In Recording Standby mode, press the appears. MENU button until Auto Focus The auto focus function is designed to focus on most types of subjects. In Auto Focus mode, the VIEWCAM automatically focuses on whatever is in the center of the scene. Always keep the subject in the center of the screen. 2 Notes: • If no subject is in the center of the screen, the focus area will expand and the subject nearest the center will be focused on.
Advanced Features 3 White Balance Lock • “WHITE BAL.” changes from blue to yellow and begins flashing. The color of the subject on the screen tends to look different depending on the lighting condition. The VIEWCAM is preset to Auto White Balance mode, which automatically adjusts the hue of the picture for the current lighting condition. The auto white balance may not work properly for the following subjects. In this case, use the white balance lock function.
3 Manual Exposure Press the or button to select the desired exposure level. • The bar indicates the selected exposure The VIEWCAM is preset to Auto Exposure mode, which automatically chooses the optimal aperture. When there is too much contrast in brightness between the subject and background, however, you may not be able to record a clear image. In this case, use the manual exposure function to correct the exposure level. level.
Advanced Features 3 Picture/Backlight Adjustments Press the or button to adjust the picture or backlight to the desired setting. If the monitor picture is difficult to see due to ambient lighting, etc., adjust the picture settings. This feature can be adjusted in both Camera and VCR modes. • The example screens for this feature are for Camera mode. 1 Press the MENU button until (Camera mode) or (VCR mode) appears.
Gamma Playback The gamma playback function improves the picture by increasing the brightness of the subject while leaving the brighter portions of the image unaffected. 1 During playback, press the MENU button until appears. SEARCH GAMA COUE F F . NT ER 2 Turning Off the LCD Monitor Backlight The LCD monitor uses a fluorescent lamp for backlighting (see page 52). In order to reduce battery consumption, you can turn off the lamp when backlighting is not necessary (e.g.
Advanced Features Editing Video editing lets you refine your videos by removing unwanted sequences from your tape, or transposing one sequence with another. This VIEWCAM lets you monitor the source program on the built-in LCD monitor without having to connect it to an external TV or video monitor. Connect the VIEWCAM to a VCR with the supplied audio/video cable, as shown.
References Useful Information Hints for Better Shooting • Position the subject in the center of the screen. When you are using auto focus, whatever is in the center of the screen is kept in focus. Lighting For clear, good-quality recording, 500 to 100,000 lux is needed. Recording is possible with less light, but the picture quality may suffer. Adequate lighting is also essential for correct white balance. Brightness (Lux) Situation (Lux) Blue sky 100,000 ○ Position the subject in the center.
References Dew Formation • What is “dew formation”? When cold water is poured into a glass, dew drops form on the glass. This clinging of water drops is called dew formation. • When dew forms in your VIEWCAM. Dew will gradually form on the head drum of your VIEWCAM and make the video tape stick to the head. This causes damage both to the head and the tape. When dew formation occurs, recording and playback may not function properly.
Replacing the Fluorescent Lamp This VIEWCAM uses a fluorescent lamp to backlight the LCD monitor. If the monitor becomes dark or difficult to view, the fluorescent lamp may need to be replaced. Contact the nearest SHARP service center or your dealer for further advice. How to use the battery pack cover • When storing a fully charged battery pack, put the cover on it so that the “CHARGE” mark printed on the label is seen through the window, as shown.
References Cleaning Video Cassette Tapes Use only tapes with the with this VIEWCAM. or mark To protect recordings against erasure When a previously recorded cassette is used again for recording, the previously recorded material is erased. To protect a recording against accidental erasure, slide the tab on the cassette to cover the opening. (A red mark will be exposed.) To record, slide the tab to open the opening. Notes: • Do not insert anything into the erasure-protection opening in the cassette.
Demonstration Mode Canceling Demo Mode You can watch a brief demonstration of the special VIEWCAM features in Demo mode. If the demonstration appears on the screen when you turn on the VIEWCAM for the first time, cancel the Demo mode to use your VIEWCAM. 1 During the demonstration, perform step 3 above. 2 Press or button (Q) to select “DEMO MODE”, then press the SET button (B) (W) to select “OFF”.
References Before Requesting Service Before calling for service, please check the following troubleshooting table. Symptom Possible cause Power No power. CAMERA mode REC START/STOP button does not work. VCR mode Power source is not properly connected. Connect power source properly (pp. 7, 9). Battery pack is not charged. Charge battery pack sufficiently (p. 8). Dew in VIEWCAM. Wait until dew dries (p. 51). Safety function is in effect.
VCR mode Symptom Possible cause Cannot play back, rewind Position at beginning or end of tape. or fast forward tape. Rewind or fast forward tape to desired point (p. 21). Video noise in image. Dirty video heads. Call for service (p. 57). Old or worn tape. Use a new cassette. Power source is not properly connected. Connect power source properly (pp. 7, 9). Battery pack is not charged. Charge battery pack sufficiently (p. 8). VIEWCAM is recording. Stop tape and try again (p. 18).
References Specifications VIEWCAM Signal System: Recording System: Cassette: Recording/Playback Time: Tape Speed: Pickup Device: Lens: Lens Filter Diameter: Monitor: Microphone: Color Temperature Compensation: Minimum Illumination: Video Output Level: Audio Output Level: Speaker Output: Power Requirement: Power Consumption: Operating Temperature: Operating Humidity: Storage Temperature: Dimensions (approx.): Weight (approx.
Guía de operación rápida en español Inserción y extracción de la batería 4 Cierre la puerta presionándola firmemente en el centro hasta que haga un ruido seco. Inserción de la batería 1 Asegúrese de que el interruptor de alimentación esté en la posición OFF.
Guía de operación rápida en español Carga de la batería Interruptor de alimentación Selección de idioma para la visualización en pantalla Esta VIEWCAM le permite elegir el idioma inglés, francés o español para la visualización en pantalla. Interruptor de alimentación Indicador CHARGE 1 Inserte la batería en la VIEWCAM (consulte la página 58). Asegúrese de que el interruptor de alimentación esté en la posición OFF.
Inserción y extracción de un videocasete Inserción de un videocasete 1 4 Espere a que el portavideocasete se pliegue completamente. Cierre la puerta del compartimiento presionando sobre la parte central hasta que se coloque en su lugar haciendo un ruido seco. Suministre alimentación a la VIEWCAM, y luego deslice el control de abertura y abra la puerta del compartimiento del videocasete. • El portavideocasete se extiende y abre automáticamente.
Guía de operación rápida en español Grabación sencilla con videocámara en el modo completamente automático Nota: • Cuando grabe al principio de una cinta, avance la cinta unos 15 segundos antes de empezar a grabar. Esto impedirá que el principio de la grabación quede cortado al hacer la reproducción. Antes de empezar a grabar, realice las operaciones descritas en las páginas 58 a 60 para preparar su VIEWCAM para la grabación.
Reproducción Para detener la reproducción La pantalla del monitor LCD hace posible reproducir y ver lo que usted acaba de grabar. No es necesario conectar nada, pudiéndose realizar la reproducción instantánea en pantalla oyendo el sonido a través del altavoz incorporado. Interruptor de alimentación Pantalla del monitor LCD Pulse el botón STOP (A). REW P L A Y F F S T OP S T I L L Notas: • Si desea encender o apagar los indicadores de los botones de operación, pulse el botón DISPLAY.
VL-AH130U/hyou; 00/12/14/18:00 Valid for warranty service in the U.S.