
Quick Start Manual


8
Logo print
The programming procedure for inputting logo messages on the XEA 201 and 401 is a 2
step process.
1.) The customer must tell the cash register what type of logo message they wish to
program.
2.) The customer actually programs the logo message.
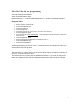
Step 1
page 51 of the XEA 201 and XEA-401 manuals
Program the type of logo message format you want. The procedure is as follows:
• Press #/TM/SBTL
• Press 11 (this is the job number)
• Press the @/for key
• Choose the type of logo message (you have 5 choices) They are as follows:
0.) Header 3 line message without graphic logo
1.) Graphic logo only (thank you – here is your receipt)
2.) Footer 3-line message with graphic logo
3.) Header 6-line message
4.) Header 3-line message with graphic logo
5.) Header 3-line message and footer 3-line message
• Press the #/TM/SBTL key
• CA/AT/NS key
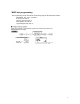
Step 2
page 43 of the XEA 201 manual and page 44 in the XEA 401 manual)
• Press #/TM/SBTL key
• Press the 4 key (on the key pad – not department key 4)
• Press the decimal point key (.)
• Select the line that you are programming (1 – 6)
• If you are programming the header your choices are lines 1,2 and 3. If you are
programming the footer your line choices are 4,5 and 6.
• Press the @/for key
• Press appropriate keys to get required message (see key layout)
• Press #/TM/SBTL
• (If another line is required select next line here if finished…
•
Press CA/AT/NS key
If you reverse these steps you will get an error message. Ex: If you try to program the actual message and
you haven’t told the cash register the type of message you will get an error.