
XG-PH50X/NL Operation-Manual GB

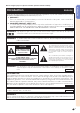
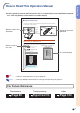
Table Of Contents
- Introduction
- Quick Start
- Setup
- Connections
- Connections
- Samples of Cables for Connection
- Connecting to a Computer
- Connecting to Video Equipment
- Connecting to Video Equipment That Has an HDMI Output Terminal with a DVI to HDMI Cable
- Connecting to Video Equipment That Has a DVI Output Terminal with a DVI Digital Cable
- Connecting to RGB Video Equipment with a 5 RCA RGB Cable
- Connecting to Video Equipment That Has Component Output Terminals
- Connecting with an S-video Cable or a Composite Video Cable
- Controlling the Projector by a Computer
- Connecting to a Monitor That Has an RGB Input Terminal
- Connecting to an Amplifier or Other Audio Equipment
- Basic Operation
- Turning the Projector On/Off
- Image Projection
- Shifting the Lens
- Using the Adjustment Feet
- Adjusting the Focus
- Adjusting the Projected Image Size
- Correcting Trapezoidal Distortion
- Switching the Input Mode
- Adjusting the Volume
- Turning off the Sound Temporarily
- Displaying an Enlarged Portion of an Image
- Freezing a Moving Image
- Selecting the Picture Mode
- Resize Mode
- Displaying the Black Screen
- Displaying and Setting the Break Timer
- Useful Features
- Menu Items
- Using the Menu Screen
- Picture Adjustment (“Picture” menu)
- Color Management System (“C. M. S.”menu)
- Computer Image Adjustment (“Fine Sync”menu)
- Audio Adjustment (“Audio”menu)
- Using the “Options (1)” Menu
- Displaying Dual Pictures (Pict in Pict)
- Setting the Resize Mode
- Shifting the Projected Image Vertically (Digital Shift)
- Setting On-screen Display
- Setting the Video System
- Capturing Projected Images
- Selecting the Background Image
- Selecting the Startup Image
- Eco Mode
- Detecting the Input Signals Automatically
- Auto Power Off Function
- System Lock Function
- Helpful Functions Set during Installation (“Options (2)” menu)
- Setting a Password
- Checking the Lamp Life Status
- Setting the Lamp Mode
- Reversing/Inverting Projected Images
- Controlling Multiple Projectors with the One Remote Control
- Shortcut to Make Projector Stack Settings
- Locking the Operation Buttons on the Projector
- Bypassing Unused Input Selections
- Selecting the Transmission Speed (RS-232C)
- Monitor Output Settings
- LAN/RS232C Setting
- Service Mode
- Returning to the Default Settings
- Using the Other Menus (“Language”and “Status”menus)
- Appendix

-6
Contents
The optional lenses are introduced on page 12. Please purchase the lens for your desired
usage.
Reference
Appendix
Maintenance ................................................. 90
Maintenance Indicators ............................... 91
Regarding the Lamp .................................... 93
Lamp ................................................................. 93
Caution Concerning the Lamp .......................... 93
Replacing the Lamp .......................................... 93
Removing and Installing the Lamp Unit ............ 94
Resetting the Lamp Timer ................................. 96
Computer Compatibility Chart .................... 97
Troubleshooting ........................................... 99
For SHARP Assistance .............................. 101
Specifications ............................................. 102
Glossary ...................................................... 103
Index ............................................................ 104