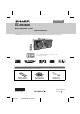
ENGLISH MODEL XL-DH259N MICRO COMPONENT SYSTEM OPERATION MANUAL XL-DH259N Micro Component System consisting of XL-DH259N (main unit) and CP-DH259N (speaker system). CD USB MICR T NEN MPO O C O XL-DH259 SYST EM iPod is a trademark of Apple Inc., registered in the U.S. and other countries. Accessories Please confirm that only the following accessories are included.
Special Note Supply of this product does not convey a license nor imply any right to distribute content created with this product in revenue-generating broadcast systems (terrestrial, satellite, cable and/or other distribution channels), revenue-generating streaming applications (via Internet, intranets and/or other networks), other revenue-generating content distribution systems (pay-audio or audio-ondemand applications and the like) or on revenuegenerating physical media (compact discs, digital versatile
System connections Make sure to unplug the AC power cord before making any connections.
General control To turn the power on Auto power on function The first time the unit is plugged in, the unit will enter the demonstration mode. You will see words scroll. When you press any of these buttons during stand-by mode, the unit turns on. ● / button on the main unit : The unit turns on and playback of the last function will start (iPod, CD, TUNER, USB, AUDIO IN). ● iPod button on the remote control : The unit turns on and iPod function is activated.
Listening to the iPod (continued) To insert iPod adaptor 1 Open the iPod cover by pulling up the tip. pull up 2 Insert the iPod adaptor into the iPod dock and connect your iPod. CD USB iPod iPod (bottom) Dock connector To remove iPod adaptor iPod adaptor (not supplied) Insert the tip of a screwdriver (“–” type, small) into the iPod adaptor hole as shown and lift upward to remove. iPod dock iPod connector To disconnect iPod iPod playback Simply remove the iPod from the iPod dock.
Listening to the iPod (continued) Listening to a CD or MP3/WMA disc Watching videos on a TV connected to iPod 1 Press the DISPLAY (TV OUT) button for more than 2 seconds. “TV DISP” will appear on display. 2 Press the ENTER button to start playback. Notes: ● If the TV Out setting is already turned on at video menu, the video is automatically displayed on the TV screen when ENTER key is pressed. ● To return to watching video on iPod screen, press the MENU button to enter video menu.
Listening to a CD or MP3/WMA disc (continued) Direct track search Random play By using the Direct Search buttons, the desired tracks on the current disc can be played. Use the Direct Search buttons on the remote control to select the desired track while playing the selected disc. ● The Direct Search buttons allow you to select up to number 9. ● When selecting number 10 or higher, use the “10+” button. A. For example, to choose 13 The tracks on the disc can be played in random order automatically.
Listening to a CD or MP3/WMA disc (continued) Procedure to playback MP3/WMA disc with folder mode on Programmed play (MP3/WMA) 1 While in the stop mode, press the MEMORY button to To play back CD-R/RW. enter the programing save mode. 1 Press the CD button, and load an MP3/WMA disc. After disc is loaded, disc info will be displayed. 2 Press the TUNING ( or ) button on the remote control to select the desired folder.
Listening to USB mass storage device/MP3 player To playback USB/MP3 player with folder mode on 1 Press the USB button on the remote control or FUNCTION button repeatedly on main unit to select USB function. Connect the USB memory device that has MP3/WMA format files on the unit. When the USB memory is connected to the main unit, the device information will be displayed. 2 Press the FOLDER button, and press the TUNING ( or ) button to select desired playback folder.
Listening to the radio Listening to USB mass storage device/MP3 player (continued) ● Folders with non playable files are also counted. ● The display playback time may not be displayed correctly when playing back a variable bitrate file. ● The ID3TAG information supported are TITLE, ARTIST and ALBUM only. Title name, artist name and album name can be displayed by pressing the DISPLAY button during file playback or pause mode.
Listening to the radio (continued) Setting the clock (Remote control only) Presetting a station You can store 40 AM and FM stations in memory and recall them at the push of a button. (Preset tuning) 1 Perform steps 1 - 3 in “Tuning”. 2 Press the MEMORY button. CD USB 3 Within 30 seconds, press the PRESET ( or ) button to select the preset channel number. Store the stations in memory, in order, starting with preset channel 1.
Timer and sleep operation (Remote control only) Once timer: Once timer play works for one time only at a preset time. Timer playback Daily timer: Daily timer play works at the same preset time every day. For example, set the timer as a wake-up call every morning. Before setting timer: ● Check that the clock is set to the correct time (refer to page 10). If it is not set, you cannot use the timer function. ● For timer playback: Plug in USB or load disc or dock iPod to be played.
Timer and sleep operation (Remote control only) (continued) Sleep operation 12 When the timer end time is reached, the system will enter the power stand-by mode automatically. The radio, compact disc, iPod and USB can all be turned off automatically. Once timer: The timer will be canceled. Daily timer: The timer operates at the same time every day. It will continue until the daily timer setting is canceled. Cancel the daily timer when it is not in use.
Enhancing your system Troubleshooting chart Many potential problems can be resolved by the owner without calling a service technician. If something is wrong with this product, check the following before calling your authorized SHARP dealer or service center. The connection cord is not included. Purchase a commercially available cord as shown below. Portable audio player, etc. General Audio cable (not supplied) Symptom ● Did a power failure occur? Reset the clock.
Troubleshooting chart (continued) USB Factory reset, clearing all memory Symptom ● Device cannot be detected. ● Playback does not start. ● Wrong time display. ● Wrong file name display.
Specifications As part of our policy of continuous improvement, SHARP reserves the right to make design and specification changes for product improvement without prior notice. The performance specification figures indicated are nominal values of production units. There may be some deviations from these values in individual units. General Power source AC 120 V ~ 60 Hz Power consumption 55 W Dimensions Width: 6-1/2" (165 mm) Height: 8-2/3" (220 mm) Depth: 9-1/4" (235 mm) Weight 9 lbs. (4.