HI FI COMPONENT SYSTEM MODEL XL-HF200PH(S) XL-HF200PH(BK) OPERATION MANUAL Thank you for purchasing this SHARP product. To obtain the best performance from this product, please read this manual carefully. It will guide you in operating your SHARP product. ● XL-HF200PH(S) Hi Fi Component System consisting of XL-HF200PH(S) (main unit) and CP-HF200H (speaker system). ● XL-HF200PH(BK) Hi Fi Component System consisting of XL-HF200PH(BK) (main unit) and CP-HF200H (speaker system).
Special Notes WARNINGS ● When the ON/STAND-BY button is set at STAND-BY position, mains voltage is still present inside the unit. When the ON/ STAND-BY button is set at STAND-BY position, the unit may be brought into operation by the timer mode or remote control. ● This unit contains no user serviceable parts. Never remove covers unless qualified to do so. This unit contains dangerous voltages, always remove mains plug from the socket before any service operation and when not in use for a long period.
Precautions ■ ● The AC power plug is used as a disconnect device and shall always remain readily operable. ● Do not remove the outer cover, as this may result in electric shock. Refer internal service to your local SHARP service facility. ● The ventilation should not be impeded by covering the ventilation openings with items, such as newspapers, tablecloths, curtains, etc. ● No naked flame sources, such as lighted candles, should be placed on the apparatus.
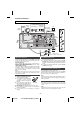
Controls and indicators (continued) ■ 1 Page 1. Remote Control Transmitter . . . . . . . . . . . . . . . . . 5 2. On/Stand-by Button . . . . . . . . . . . . . . . . . 6, 8, 9, 18 3. Tuner (Band) Button . . . . . . . . . . . . . . . . . . . 14, 15 4. RDS ASPM Button . . . . . . . . . . . . . . . . . . . . . . . . 15 5. Mute Button . . . . . . . . . . . . . . . . . . . . . . . . . . . . . . 6 6. Direct Search Buttons . . . . . . . . . . . . . . . . . . . . . 10 7. iPod/iPhone Display (TV OUT) Button . . . .
System connections Make sure to unplug the AC power lead before making any connections.
System connections (continued) Remote control ■ ■ Using other subwoofer You can connect a subwoofer with an amplifier to the SUBWOOFER PRE OUT socket. 1 Open the battery cover. 2 Insert the supplied batteries according to the direction Commercially available subwoofer (amplifier built in) Audio cable (commercially available) Battery installation indicated in the battery compartment. When inserting or removing the batteries, push them towards the (–) battery terminals. 3 Close the cover.
General control ■ X-Bass control When the power is first turned on, the unit will enter the extra bass mode which emphasises the bass frequencies, and “X-BASS” will appear. To cancel the extra bass mode, press the X-BASS button on the remote control. Volume Illuminator ■ Bass control 1 Press the BASS/TREBLE button to select “BASS”. 2 Within 5 seconds, press the VOLUME (+ or –) button to adjust the bass. ■ Treble control 1 Press the BASS/TREBLE button to select “TREBLE”.
Setting the clock (Remote control only) (continued) ■ iPod and iPhone adaptor connection Notes: ● Please use the adaptor supplied with your iPod or iPhone unit. ● You can use an audio cable to connect your iPod to the AUDIO IN socket if: 1. your iPod adaptor does not fit into the iPod dock on the main unit. 2. you have an iPod that does not have an iPod adaptor. 3. you have an iPod that does not have an iPod 30 pin connector. 5 To adjust the hour, press the or button and then press the ENTER button.
Listening to the iPod or iPhone (continued) ■ Watching videos on a TV connected to iPod or iPhone 1 Press the DISPLAY (TV OUT) button for more than 2 seconds. “TV Display” will appear on display. 2 Press the ENTER button to start playback. Notes: ● If the TV Out setting is already turned on at video menu, the video is automatically displayed on the TV screen when ENTER key is pressed. ● To return to watching video on iPod or iPhone screen, press the MENU button to enter video menu.
Listening to a CD or MP3/WMA disc ■ Disc playback 1 Press the ON/STAND-BY button to turn the power on. 2 Press the CD button on the remote control or FUNCTION button repeatedly on the main unit to select CD function. 3 Press the OPEN/CLOSE button to open the disc tray. 4 Place the disc on the disc tray, label side up. 5 Press the OPEN/CLOSE button to close the disc tray. 6 Press the / (CD/USB / ) button to start playback. After the last track is played, the unit will stop automatically.
Advanced CD or MP3/WMA disc playback ■ Random play The tracks on the disc can be played in random order automatically. To random play all tracks: Press and hold down PLAY MODE button on the remote control until “Random” appears. Press the / (CD/USB / ) button. To cancel random play: Press the PLAY MODE button until “RDM” indicator disappears. RRMCGA225AWSA RRMCGA225 ■ Direct track search By using the Direct Search buttons, the desired tracks on the current disc can be played.
Advanced CD or MP3/WMA disc playback (continued) MP3/WMA folder mode (only for MP3/ WMA files) ■ To play back MP3/WMA (Windows Media Audio) file There are many music sites on the internet that you can download MP3/WMA (Windows Media Audio) music files. Follow the instructions from the website on how to download the music files. You can then play back these downloaded music files by burning them to a CD-R/RW disc. ● Your downloaded song/files are for personal use only.
MP3/WMA folder mode (only for MP3/ WMA files) (continued) Listening to USB mass storage device/MP3 player RRMCGA225AWSA ■ Procedure to playback MP3/WMA disc with folder mode on To play back CD-R/RW. RRMCGA225AWSA RRMCGA22 1 Press the CD button, and load an MP3/WMA disc. Press the FOLDER button and disc info will be displayed. MP3 indicator WMA indicator Note: This USB mass storage device or MP3 player is not compatible with MTP and AAC file systems.
Listening to USB mass storage device/MP3 player (continued) ■ ● This product can play WMA and MP3 files. It will automatically detect the file type being played. If unplayable file is played on this product, “Not Support” is indicated and the file will be automatically skipped. This will take a few seconds. If abnormal indications appear on the display due to the unspecified file, turn off the unit and then turn it on again. ● This product relates to USB mass storage devices and MP3 players.
Listening to the radio ■ Memorising a station You can store 40 AM and FM stations in memory and recall them at the push of a button. (Preset tuning) 1 Perform steps 1 - 3 in “Tuning”. 2 Press the MEMORY button. 3 Within 30 seconds, press the PRESET ( or ) button to select the preset channel number. Store the stations in memory, in order, starting with preset channel 1. 4 Within 30 seconds, press the MEMORY button to store that station in memory.
Using the Radio Data System (RDS) RDS is a broadcasting service which a growing number of FM stations provide. These FM stations send additional signals along with their regular programme signals. They send their station names, and information about the type of programme such as sport, music, etc. When tuned to an RDS station, “RDS” and the station name will be displayed.
Using the Radio Data System (RDS) (continued) ■ ■ Notes for RDS operation To recall stations in memory To specify programmed types and select stations (PTY search): You can search a station by specifying the programme type (news, sports, traffic programme, etc. ... see page 17) from the stations in memory. If any of the following events occur, it does not mean that the unit is faulty: ● “PS”, “No PS” and a station name appear alternately, and the unit does not operate properly.
Using the Radio Data System (RDS) (continued) Descriptions of the PTY (Programme Type) codes, TP (Traffic Programme) and TA (Traffic Announcement) You can search for and receive the following PTY, TP and TA signals. NEWS AFFAIRS INFO SPORT EDUCATE DRAMA CULTURE SCIENCE VARIED POP M ROCK M EASY M LIGHT M CLASSICS OTHER M WEATHER FINANCE CHILDREN SOCIAL RELIGION PHONE IN Short accounts of facts, events and publicly expressed views, reportage and actuality.
Timer and sleep operation (Remote control only) ■ Timer playback Before setting timer: ● Check that the clock is set to the correct time (refer to page 6). If it is not set, you cannot use the timer function. ● For timer playback: Plug in USB or load discs or dock iPod to be played. 1 Press the ON/STAND-BY button to turn the power on. RRMCGA225AWSA RRMCGA22 2 Press and hold the CLOCK/TIMER button. 3 Within 10 seconds, press the or button to select “Once” or “Daily”, and press the ENTER button.
Timer and sleep operation (Remote control only) (continued) ■ 13 When the timer end time is reached, the system will enter the power stand-by mode automatically. Once timer: The timer will be cancelled. Daily timer: The timer operates at the same time every day. It will continue until the daily timer setting is cancelled. Cancel the daily timer when it is not in use. Sleep operation The radio, compact disc, iPod, USB, Audio In and Line In can all be turned off automatically.
Enhancing your system Troubleshooting chart The connection lead is not included. Purchase a commercially available lead as shown below. Many potential problems can be resolved by the owner without calling a service technician. If something is wrong with this product, check the following before calling your authorised SHARP dealer or service centre. ■ General Symptom Portable audio player, etc. ● Did a power failure occur? Reset the clock.
Troubleshooting chart (continued) ■ If such a problem occurs, do the following: USB 1 Set the unit to the stand-by mode and turn the power on Symptom ● Device cannot be detected. ● ● ● ● ● Playback does not start. ● Wrong time display. ● Wrong file name display. ■ ● ● ● ● 2 If the unit is not restored in the previous operation, unplug and plug in the unit again, and then turn the power on. Note: If neither operation above restores the unit, clear all the memory by resetting it.
Specifications As part of our policy of continuous improvement, SHARP reserves the right to make design and specification changes for product improvement without prior notice. The performance specification figures indicated are nominal values of production units. There may be some deviations from these values in individual units. ■ ■ USB host interface ● Complies with USB 1.1 (Full Speed)/2.0 Mass Storage Class. ● Support Bulk only and CBI protocol.
SHARP CORPORATION TINSEA324AWZZ XL-HF200PH(S)(BK)_AUS_Back.