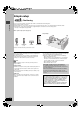
8291en.book Page 1 Wednesday, June 8, 2005 10:56 AM MIC LEVEL MIC MIN Operating Instructions DVD Home Theater Sound System Model No. SC-HT335 MAX Advanced progressive scan 6 page Provides a smoother and sharper image. Compatible with a variety of page media formats 9 DVD-RAM, DVD-Audio, DVD-Video, DivX and more. Region number The player plays DVD-Video marked with labels containing the region number “2” or “ALL”.
8291en-p01-02.fm Page 2 Monday, June 13, 2005 2:08 PM Dear customer Thank you for purchasing this product. For optimum performance and safety, please read these instructions carefully. System SC-HT335 Main unit SA-HT335 Front speakers SB-FS335 Operations in these instructions are described mainly with the remote control, but you can perform the operations on the main unit if the controls are the same.
8291en-p03-09.fm Page 3 Monday, June 13, 2005 2:09 PM Table of contents Safety precautions . . . . . . . . . . . . . . . . . . . . . . . . . . . . . . .2 Glossary . . . . . . . . . . . . . . . . . . . . . . . . . . . . . . . . . . . . . . .3 Simple setup STEP 1 Positioning . . . . . . . . . . . . . . . . . . . . . . . . . . . 4 STEP 2 Speaker connections . . . . . . . . . . . . . . . . . . 5 STEP 3 Video connections. . . . . . . . . . . . . . . . . . . . . 6 STEP 4 Antennas and AC mains lead . . . . .
8291en-p03-09.fm Page 4 Monday, June 13, 2005 2:09 PM Simple setup 1 STEP Positioning Positioning How you set up your speakers can affect the bass and the sound field. Note the following points: ≥Place speakers on flat secure bases. ≥Placing speakers too close to floors, walls, and corners can result in excessive bass. Cover walls and windows with thick curtains. ≥Place the front, center, and surround speakers at approximately the same distance from the seating position.
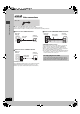
8291en.book Page 5 STEP Wednesday, June 8, 2005 2 10:56 AM Speaker connections Attach the speaker-cable stickers to make connection easier.
8291en-p03-09.fm Page 6 Monday, June 20, 2005 3 STEP 8:54 AM Video connections Video connections Video cable ≥Do not connect through the video cassette recorder. Due to copy guard protection, the picture may not be displayed properly. ≥Turn the television off before connecting, and refer to the television’s operating instructions.
Page 7 Wednesday, June 8, 2005 10:56 AM 4 Antennas and AC mains lead STEP AC mains lead AM loop antenna FM indoor antenna ≥Connect the AC mains lead after all other connections are complete. ≥Optional antenna connections (➜ page 21). FM indoor antenna Affix this end of the antenna where reception is best. Adhesive tape AM loop antenna Stand the antenna up on its base. Place the antenna where reception is best. Keep loose antenna cable away from other wires and cables.
291en-p03-09.fm Page 8 STEP Monday, June 13, 2005 6 2:11 PM QUICK SETUP The QUICK SETUP screen assists you to make necessary settings. Turn on the television and select the appropriate video input on the television. QUICK SETUP/Control reference guide 1 2 3 SHIFT DVD/CD 4 5 SETUP FUNCTIONS Select 6 RETURN SHIFT SETUP FUNCTIONS ENTER ENTER Register Turn on the unit. Select “DVD/CD”. Show the QUICK SETUP screen. Follow the messages and make the settings.
8291en.book Page 9 Wednesday, June 8, 2005 10:56 AM Discs that can be played Logo Indication in these operating instructions [RAM] Recorded with devices using Version 1.1 of the Video Recording Format (a unified video recording standard), such as DVD video recorders, DVD video cameras, personal computers, etc. [JPEG] Recorded with the Panasonic SD multi cameras or DVD video recorders using the DCF (Design rule for Camera File system) Standard Version 1.0.
8291en.book Page 10 Wednesday, June 8, 2005 10:56 AM Basic play Basic play Using the main unit 1 Turn the unit on. 3 Open the disc tray. 2 Select “DVD/CD”. 4 Load the disc. INPUT SELECTOR OPEN/CLOSE ≥Load double-sided discs so the label for the side you want to play is facing up. ≥[RAM] Remove the disc from its cartridge before use.
8291en.book Page 11 Wednesday, June 8, 2005 10:56 AM If you are experiencing problems, refer to troubleshooting (➜ page 30, 31).
8291en.
Page 13 SUBTITLE SHIFT Wednesday, June 8, 2005 10:56 AM PLAY MODE Changing subtitles 5 [DVD-V] [DivX] (with multiple subtitles) [VCD] (SVCD only) Press [SHIFT]i[SUBTITLE] several times to select the subtitle language. ≥On iR/iRW, a subtitle number may be shown for subtitles that are not displayed. To display/clear the subtitles Press [2, 1] to select “On” or “Off”.
8291en.book Page 14 Wednesday, June 8, 2005 10:56 AM Using navigation menus TV TUNER/ BAND TV/VCR SLEEP TV/AV ADVANCED PLAY SPEED DISC REVIEW QUICK REPLAY AUDIO CH SELECT Numbered buttons 1 2 GROUP SUBTITLE 4 5 FL DISPLAY TEST 3 ZOOM MANUAL SKIP 6 PROGRESSIVE 7 ≥Press [SHIFT]i[ANGLE/PAGE] to skip page by page in the group or content field. ≥To enjoy listening to WMA/MP3 contents while showing a JPEG image on the screen Select a JPEG file first, and then select audio contents.
TOP MENU Page 15 MENU Tuesday, June 21, 2005 8:58 AM 2 Playing HighMATTM discs [WMA] [MP3] [JPEG] 1 2 Press [TOP MENU]. 3 Press [3, 4, 2, 1] to select the item, then press [ENTER]. New Playlist Item Long Name Display Te Menu: Takes you to the next menu which shows play lists or another menu Play list: play starts PAG E 1 / 3 Menu1 P l ay l i s t 1 Menu2 P l ay l i s t 2 Menu3 P l ay l i s t 3 3Return Next 1 2 Prev Selecting from the list During play e.g. Playlist No.
8291en.book Page 16 Wednesday, June 8, 2005 10:56 AM Using on-screen menus TV TUNER/ BAND TV/VCR SLEEP TV/AV ADVANCED PLAY SPEED DISC REVIEW QUICK REPLAY AUDIO CH SELECT Numbered buttons 1 2 GROUP SUBTITLE 4 5 FL DISPLAY TEST 3 Main menu ZOOM MANUAL SKIP 6 PROGRESSIVE 7 Items shown differ depending on the type of disc.
8291en.book Page 17 Wednesday, June 8, 2005 10:56 AM Other Settings ∫ Audio Menu Dolby Pro Logic II ∫ Play Menu (Only when the elapsed play time can be displayed. [JPEG]: Works with all JPEG content.) Repeat (➜ page 13, Repeat play) A-B Repeat Except [JPEG] [RAM] [DVD-RW[‹VR›] (Still picture part) [MPEG4] [DivX] To repeat a specified section Press [ENTER] at the starting and ending points. Press [ENTER] again to cancel.
8291en.book Page 18 Wednesday, June 8, 2005 10:56 AM Changing the player settings TV TUNER/ BAND TV/VCR SLEEP TV/AV ADVANCED PLAY SPEED DISC REVIEW QUICK REPLAY AUDIO CH SELECT Numbered buttons 1 2 GROUP SUBTITLE 4 5 SETUP FUNCTIONS SHIFT FL DISPLAY TEST 2 ZOOM MANUAL SKIP 6 ANGLE/PAGE 8 9 0 S10 If you have not set QUICK SETUP (➜ page 8), the QUICK SETUP screen appears. REPEAT Select Select the tab.
8291en.book Page 19 Wednesday, June 8, 2005 10:56 AM ≥Automatic ≥Field: The picture is not blurred, but picture quality is lower. ≥Frame: Overall quality is high, but the picture may appear blurred. Still Mode Specify the type of picture shown when paused. NTSC Disc Output Choose PAL 60 or NTSC output when playing NTSC discs (➜ page 9, Video systems) Picture/Video Output Change the video signal format to be output for JPEG, MPEG4 and DivX video if picture output is not smooth during playback.
8291en.book Page 20 Wednesday, June 8, 2005 10:56 AM The radio TV TUNER/ BAND TV/VCR SLEEP TV/AV AUDIO CH SELECT Numbered buttons 1 2 GROUP SUBTITLE 4 5 ZOOM MANUAL SKIP 6 ANGLE/PAGE 8 REPEAT 9 PLAY MODE QUICK OSD TV CH SLOW / SEARCH CH MENU DIRECT NAVIGATOR PLAYLIST Press the numbered buttons to select the Alternatively, press [X CH W]. To select a 2-digit number e.g. 12: [S10] ➜ [1] ➜ [2] CANCEL TOP MENU Press [TUNER/BAND] to select “FM” or “AM”. channel.
8291en-p20-25.fm Page 21 Tuesday, June 21, 2005 9:01 AM ∫ AM frequency step Main unit only The step is factory-set to 9 kHz, but you can change it to receive broadcasts allocated in 10-kHz steps. 1 Press [INPUT SELECTOR] to select “FM”. 2 Press and hold [INPUT SELECTOR]. After a few seconds, the display changes to show the current minimum frequency. Continue to hold the button down. The minimum frequency changes and the step is changed. To return to the original step, repeat the above steps.
8291en.book Page 22 Wednesday, June 8, 2005 10:56 AM Sound field and sound quality TV TUNER/ BAND TV/VCR SLEEP TV/AV 1 2 GROUP SUBTITLE 4 5 (Discs where the dialogue is recorded in the center channel) You can make the sound of the center speaker seem like it is coming from within the television. FL DISPLAY TEST 3 ZOOM MANUAL SKIP TEST 6 PROGRESSIVE ANGLE/PAGE 8 7 DVD/CD ADVANCED PLAY SPEED DISC REVIEW QUICK REPLAY AUDIO CH SELECT CH SELECT Center Focus C.FOCUS DVD/CD Press [C.
8291en.book Page 23 Wednesday, June 8, 2005 SUBWOOFER LEVEL 10:56 AM ∫ To adjust speaker level during play Subwoofer level (Effective when playing multi-channel audio or when Dolby Pro Logic II is on.) You can adjust the amount of bass. The unit automatically selects the most suitable setting according to the type of playing source. 1 L #C #R #RS #LS #SW ^--------------------------------------------------} SW: Subwoofer Press [SUBWOOFER LEVEL].
8291en-p20-25.fm Page 24 Thursday, June 16, 2005 3:10 PM Connecting other equipment ∫ Connection example Television (not included) AUDIO OUT VIDEO IN L R 1 2 Video cassette recorder (not included) To show video from the video cassette recorder Select “VIDEO 2” input on your television in this example.
8291en-p20-25.fm Page 25 Monday, June 20, 2005 9:11 AM Other useful functions TV TUNER/ BAND TV/VCR SLEEP TV/AV SLEEP AUDIO CH SELECT AUDIO 1 2 GROUP SUBTITLE 4 5 Main unit only FL DISPLAY TEST 3 ZOOM MANUAL SKIP 6 PROGRESSIVE ANGLE/PAGE 8 7 Using headphones DVD/CD ADVANCED PLAY SPEED DISC REVIEW QUICK REPLAY 1 REPEAT 9 PLAY MODE QUICK OSD S10 0 Reduce the volume and connect the headphones (not included). TV CH SLOW / SEARCH CH Headphone plug type: 3.
8291en.book Page 26 Wednesday, June 8, 2005 10:56 AM Other speaker setup options ∫ Attaching to a wall 30–35 mm You can attach all of the speakers to a wall. 1 Drive a screw (not included) into the wall. 2 Fit the speaker securely onto the screw(s) with the hole(s). ‰3.0–4.0 mm ‰7.5–9.4 mm 4.0–7.0 mm Wall or pillar ≥The wall or pillar on which the speakers are to be attached should be capable of supporting 10 kg per screw.
8291en.book Page 27 Wednesday, June 8, 2005 10:56 AM About DivX VOD content DivX Video-on-Demand (VOD) content is encrypted for copyright protection. In order to play DivX VOD content on this unit, you first need to register the unit. Follow the online instructions for purchasing DivX VOD content to enter the unit’s registration code and register the unit. For more information about DivX VOD, visit www.divx.com/vod.
8291en.
8291en.
8291en.book Page 30 Wednesday, June 8, 2005 10:56 AM Troubleshooting guide Before requesting service, make the following checks. If you are in doubt about some of the check points, or if the solutions indicated in the chart do not solve the problem, consult your dealer for instructions. Power No power. The unit is automatically switched to the standby mode. Page ≥Insert the AC mains lead securely. ≥The Sleep timer was working and had reached the set time limit.
8291en-p26-32.fm Page 31 Thursday, June 16, 2005 3:13 PM Picture abnormal or unviewable Picture distorted. Picture size doesn’t fit the screen. Picture stops. [DivX] The television may display incorrectly or colors appear faded. Menu is not displayed correctly. Auto zoom function does not work well. The picture on the television disappears or stripes appear on the screen. ≥Ensure that the unit is connected directly to the television, and is not connected through a video cassette recorder.
8291en.book Page 32 Wednesday, June 8, 2005 10:56 AM Accessories Please check and identify the supplied accessories.