
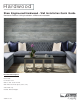
Instructions / Assembly


5
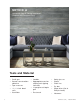
shawfloors.com
|
1-800-4
11-
7
429
METHOD A - Floor
to
Ceiling Installation
(
c
ont.)
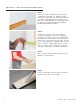
STEP
5
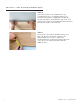
Measure the wall
to determine if
the
first r
o
w
of planks will need
to
be cut
down to avoid a
Small piece on the finish row.
Remember
to
lea
v
e
the
engineered hardwood
½ inch away from
the
finish floor
/
subfloor
.
When working
from
the
floor
up,
the tongue of the engineered hardwood
should face toward the ceiling.
STEP
6
Using a tape measure, pencil
and chalk
line
,
establish
a
starting
line. If you are
starting
a
t
The
floor
,
you can measure from
the
floor
up
the
point where
the
first
row will end
(remember
t
o
allow for
the ½ inch
expansion
gap
at
the
floor),
if
you are
starting from
the
ceiling
you will need
t
o
measure from
the
ceiling down.
Do this on
both
ends of the wall. Using a chalk line, pop a
line
using these
two
marks to
establish
a
starting
line
.
STEP
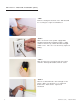
8
Make sure
to
visually inspect
each plank for
an
y
damage
or visual
def
ects.
STEP
9
Using a
construction adhesive
put an
s-bead
of
adhesive
on the back of the
planks.