
User's Manual

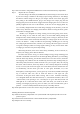

Step 2. Insert two AAA re-chargeable Ni-MH batteries as shown inside the battery compartment.
Step 3. Replace the cover carefullyt .
First time using of the AAA (7#) Ni-MH batteries, Please charge it first. Please check
if your local voltage is suitable for the charger,s input voltage, otherwise, it will damage
the batteries and the charger too. Plug in your charger with the local electric plug, then
after putting in the Ni-MH batteries, plug in the charger,s D/C output plug with the
charging hole,just front of the mouse. Suggest first time charging time is over 2 hours. To
possibly lengthen the life circle of the batteries, we do not use fast charging mode. So,
we,ve carefully designed stable current and voltage charging circuit, therefore, you do not
need to worry about the over-charging of the batteries. When not using the mouse, please
set the mouse in charging mode.
Besides, we,ve designed low voltage warning circuit. During using of the mouse,
when the voltage is low, under the roller, there,s one blue LED flashing through the
transparent roller, which reminds you of low voltage, please re-charge it, otherwise, the life
circle of the batteries will be shortened; meanwhile, low voltage signal will be sent to the
receiver, the marked COM,, red LED will keep flashing, reminding you of receiving
low voltage signal from the mouse, until there,s no warning code of the signal received. If
a long time uncharged, while low voltage signal alarming, you may use the mouse while
re-charging it, no need to worry about stop working.
When using the mouse, if the cursor moves slowly, abnormally, or has no reaction, etc,
maybe it,s low voltage, please check the batteries.
To achieve best electric saving, we choose intelligent energy saving technology. The
red LED at the bottom of the mouse will be most light during movement, it,s full loading;
when the mouse stop moving, the red LED will dim out to save more electric; 8 minutes
after stopping work, LED will turn off automatically, the mouse stops working totally, it,s
called sleep status, then there,s almost no Electric cost, you can put it aside, not worrying
the electric will be used out; to the sleep mode, we have carefully designed an awakening
circuit, it can feel your touch to the upper cover of the mouse, then the red LED will turn
on automatically, and the mouse gets back to work again; meanwhile, we,ve also
developed key awakening function, you may press any one of the left, middle and the right
key, or scroll the roller once, then to awake the mouse to work again. For your
convenience to bring the mouse while traveling, and to avoid accidental awakening,
we`ve designed instant mice shut down function, i.e, at the bottom of themice, there`s one
“connect”button, when pressing it over 3 seconds,you can get it shut down,and the red
LED light off. It is called shut down status, and in this mode, you cannot let the mice
working, even though you press any part of it. And if you want to end this status, just to
press the “connect” button (bottom of the mice) once(<2 seconds), then ok!
Tip: All the optical mouse can save more electric using on a lighter pad other than a black one .
Installing the Batteries into the Keyboard
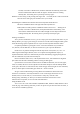
Step 1.Remove the battery compartment cover (on the bottom of the keyboard) as the arrow in the
picture to open it.
Step 2.Insert the AA alkaline batteries as shown inside the battery compartment.
Step 3.Replace the cover carefully.