Smart Projector HOLATEK-A2 User Manual
HOLATEK Home Theatre Instructions Content Safety Instructions Operation Instructions About Lamp Other Instructions Summary Packaging List Control Positions and Functions Top/Front/Left Bottom Back Control Panel Remote Control Functions Projection Image Installation Adjusting Projection Size Projection Instructions Basic Operations Starting and Stopping the Machine Turning on the Power Turning off the Power Selecting Language Selecting Input Source Adjusting Image Correcting Keystone Auto Correcting Keystone
Safety Instructions Thank you for using HOLATEK Product. Read carefully the following Safety Instructions before using this product. Keep the User Manual after reading for future reference. Safety Symbol The User Manual use graphical symbols in order to avoid injury to persons or property. The definitions of graphical symbols are as follows: Danger Warning Caution This symbol indicates information that, if ignored, could possibly result in personal injury or even death due to incorrect handling.
2. 3. Unplug the power plug. Contact your dealer or HOLATEK service center. ●Power Cord Misusing the power cord may cause the fire and electric shock. Take the following precautions: 1. 2. Use AC voltage and make sure outplace voltage is corresponding to the rated voltage of the machine. Do not overload the electrical outlet by using too many devices on it. Damaged power cord may cause the fire and electric shock.
● Disassembling and Modifying Do not disassemble or modify the machine in any way. The high voltage parts in the machine may cause electric shock and scalding. Notice that the malfunctions that caused by dismantling or modifying the machines by yourself are not in the scope of warranty, HOLATEK do not provide free repair. Make sure refer all the internal checking, debugging and repair works to your dealer or HOLATEK service center.
● Remote Control Never disassemble or modify the remote control in any way. Otherwise cause electric shock, scalding and personal injury may result. Make sure refer all the internal checking, debugging and repair works to your dealer or HOLATEK service center. Do not wet the remote control. Fire and electric shock may result. ● Wi-Fi Emitted from Radio Module Never use the product in the airplane or medical facility, or any other place that forbid the use of the device.
power cord from the outlet. ● Important Data Backup Backup all the data reserved in the machine memory. The data reserved in the machine memory may be lost because of malfunctions, repair and so on. ● Refraction Effects No fish tank or any other object that has refracting effects in front of the lamp. Fire may result. ●Lens Do not touch the lens with hand.
● Exhausted Batteries Take out the batteries as soon as they run out. z Take out the batteries if the remote control will not be used for a long period. ● Batteries Discarding Discard the used batteries according to the local laws and rules. Others If the interior of the machine has not been cleaned for a long time, dust may build up, which may cause fire and malfunctions. Contact the dealer or HOLATEK service center one time every year for cleaning the interior of the machine.
z z z z z High humidity areas Areas where temperature may change suddenly Areas where is a lot of dust Shaky, slant or unstable areas Areas where may be got wet ● Do not use the machine in the following areas, otherwise may cause the malfunctions and damages on the machine.
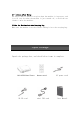
● Cautions After Using The outlet and its around is very hot when the machine is in process, and is still very hot when the machine is just turned off, so hold the two flanks to move the machine. ●Take the Machine into the Carrying Bag Make sure the machine is not hot before taking it into the carrying bag. OpenPackage Unpack the package box, and check below items is complete.
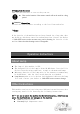
Software Installation Computer software driver can be downloaded on the HOLATEK website. Download link: http://www.holatek.cn/supports.html ControlPositionsandFunctions [Top/Front/Left] Power On/Off Inlet Control Inlet USB2.
Support [Back] VGA HDMI USB Speaker Speaker Speaker Input VGA Input AV-IN Infrared remote sensor [Control Panel]
Menu Enter Source Disk Wi-Fi signal RemoteControlFunctions ① Power On/Off PC and Projector Enter ② Source Menu setup Right ESC
③ Left ④ Mute ⑤ Down ⑥ Volume ⑦ 3D module menu ⑧ 3D Left/Right Eye Switching ⑨ Up ⑩ Power On/Off Machine Remote Control Range Both in the front and back of the machine have infrared remote (IR) sensors. Hold the remote control; take the angel with IR sensor less than 30 angle to make it effective. The distance between the remote control and IR sensor cannot be longer than 8 m (about 26 inch) Do not place any barrier that blocks the IR between the IR sensors on the remote control and that on the machine.
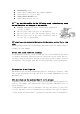
ProjectionImage Installation Adjusting Projection Size Longer the distance between the home theater projector and the wall, bigger the machine image size. Refer to the table below to obtain the best size image 屏幕 screen 投影屏尺寸 projection screen size 镜头中心 lens center 投影距离 distance *The height from the lens center to the bottom of the projection image (A: when move the lens at its top height) 单位 units Distance Units: m Screen Size Min Distance Max Distance 40 80 100 150 200 250 300 1.2 2.3 2.
There may be a slight different between the designed value and practical value in the table. NOTE! z z The lens of the machine is adjustable, the max tilt is up 40 angle (+40°),and max tilt down 40 angle(—40°) Auto correcting keystone range record is 0±40 angle. If the image tilts downward, use the manual correcting keystone to adjust the image.
Outlet Inlet Inlet Reserve enough space; do not block the inlet and outlet. z z z z z z z The outlet is extreme hot when the machine is in process. Do not touch it with hand. It is also extreme hot near the outlet. Never place the plastic or any other object that are sensitive to heat near or below the machine. The heat may cause deformation and color change. Do not place the machine on the unstable or shaky surface. Never place the machine on the carpet, blanket, towel or any other soft object.
z z Airflow from the air conditioner will blow the heat exhausted by the lens, which cause heat wave in the image. Adjust the air conditioner or move the machine if this situation turns up. Do not place it on one of its side to use the machine, malfunctions may result.
z z z z z Do not share the outlet with other devices. Make sure the rated current corresponds to power consumption of this machine if using extension cord. Do not use the bundled power cord Do not place objects on the power cord or step on it. Do not pull the power cord. Hold the plug when disconnecting it from the outlet. Use the close and easy-using outlet in order to unplug the power cord at any time when it is necessary Connect the power inlet with attached AC power cord.
SelectingLanguage Chinese is the default language when the first time to turn on the machine, follow the steps if you need to change into other languages. Use the control panel or remote control, press [MENU], and press[∨] or [∧] to select [Machine setup1], then press [ENTER] to select the language, and then press [MENU] to confirm the selection. SelectingInputSource When turning on the machine, the input source selected at last time will be the first choice.
Set the menu “Machine setup1→Auto correcting keystone” to “On”, and machine checks main body of the image in vertical direction, then auto adjust the shape to oblong. z The range of Auto correcting keystone is ±40° Manual Correcting Keystone [KEYSTONE+] or [KEYSTONE-] on the remote control to correct keystone. Use the control pane, press [MENU] and press[∨] or [∧] to select [Image setup], then press [Keystone], and [<] or [>]to adjust , and then press [MENU] to logoff the operation.
Switching 3D Left/Right Eye If you feel uncomfortable or the images have no 3D effect when watching 3D film, use [3DL/R] on the remote control to adjust. Turning off 3D Press [3D] on the remote control to select TO 3D function. [2D], and press [ENTER] to turn off 2D Settings When the machine in process, press [MENU] to display the settings on the projection. Settings applies to setups of different machines.
Machine Setup2 Operation Information All restore to default Focus Input signal Signal name Horizontal Frequency Vertical Frequency Scanning system Lamp running time Software version Restore menu default UserMaintenance AboutLamp If the lamp does not turned on, contact you dealer or HOLATEK service center and refer them to change.
Indicator Troubleshooting Check the following items if the machine has any problem: The machine does not turn on Cause Indictor Display lit orange lit blue lit white lit white flashing lit white lit white flashing The power cord is not alive. No image appear Cause Not selecting correct input signal The machine does not connect with the input signal device correctly. Video signal source does not turn on or error connection Solution Meaning AC power is connected and ready for start.
Images are fuzzy Cause Lens does not focus correctly Machine and screen are not aligned. Remote control failure Cause Low batteries There is object between remote control and machine Too far from the machine Solution Use the remote control to adjust the lens focus Adjust the projection angle and direction, or adjust the height if necessary.
Specification The specification may be changed without further notice. Optical Parameters Brightness (lumina) Machine system DLP chip (Texas Instruments) Light source 1000 DLP Size:0.45 inch Pixel: WXGA (1280× 800) LED PC Parameters CPU Intel D2550 dual core 1.86GHZ, four threads, 1MB L2 Cache Graphics card 640MHz Intel GMA 3650 graphics card (shared memory 128/224MB) RAM 4GB DDR3-1333/1066 Disc 64GB solid disc WLAN Support 802.11b/g/n Input ports Video input USB Control Mini VGA×1 HDMI1.
Output ports Video outplace Speaker Audio signal Mini VGA×1 (stereo)2W× 2 PC audio interface×1 WarrantyandCopyrightInformation Limited Warranty HOLATEK supply warranty to any material or artificial defect of this product under circumstance of abnormal using and storing. Be sure to supply the purchase date certificate when repairing the product, if defect is found during the warranty period, HOLATEK has the only obligation and measures to change the defect part (including sanction fee).
WARRANTY CERTIFICATE Thank you for purchasing HOLATEK product According to this warranty statement, during the applicable warranty period, HOLATEK provides free repairs to all the malfunctions that are caused by product quality under circumstance of normally use.
Warranty Statement Member Warranty Register on the official website (www.holatek.cn) 7 days after purchasing the product to obtain 1 year warranty service。 Product Warranty Strategy: According to Microcomputer Commodity Repair, Replace, Refund Responsibility Regulations, refer as to “Three guarantees”, customer can obtain repair, replace or refund service with invoice and three guarantees certificate. Refer to “Three guarantees” for details.
4. According to “Three guarantees” , for those products which are in the range of being replaced, HOLATEK Ltd. Co. will offer the same model and the same specification product to replace free of charge. Service hotline:400-622-0138 Original NO. Product Name: Product Model No.: Serial No.: Purchase Date: Store Telephone: Dealer Seal: Customer Name: Customer Address: Customer Phone: Code: ID No.
Stick the invoice on this page to prevent it being lost or missing, it increases the troubles when you go to repair if the invoice is lost or missing. Taking this manual by hand must be convenient for repairs and inquiry.
FCC Caution: Any changes or modifications not expressly approved by the party responsible for compliance could void the user's authority to operate this equipment. This device complies with Part 15 of the FCC Rules. Operation is subject to the following two conditions: (1) This device may not cause harmful interference, and (2) this device must accept any interference received, including interference that may cause undesired operation.