USER MANUAL 716
Preface Thank you for buying this MID. Please read and retain all the operating instructions before operating the unit. 错误!未找到引用源。I. Note 1. Avoid the unit being dropped. Avoid the display been shake seriously, or the display will be damaged or unusual. 2. Do not use metal object to touch the device to prevent it from short circuit. 3. Please backup your data in case your important data is lost, especially before you upgrade the firmware. 4. Do not disassemble.
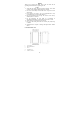
6. 7. 8. 9. 10. Power on/off Back Camera TF-CARD interface Loudspeaker MIC III. Operation Instruction 1. Basic Operation 1.1. Power on/Power off Power on Press and hold the power switch for 5 seconds; the unit displays the start-up logo and enters the working mode. Power off Press and hold the power switch for 5 seconds to turn the unit off. Sleep While the device is at working status, press the power switch, it enters the sleeping mode, and the screen will be off then.
2. Settings Click “Settings” in the main interface to enter the setting interface. Click the corresponding setting items to operate. 2.1.Date and Time Setting Click “Date & time” in the setting interface to set the date and time. You may set the date, time zone, time, time format and date format etc. in the menu. 2.2. Brightness Select “Display” in the setting interface. Click “Brightness” to enter, and slide the bar to adjust the brightness. 2.3.
You may use the corresponding third party software management tool or the installed application management software of the device to install applications. Select “Setting/Apps” to select the installed applications and check the attribute of it or uninstall it. 5. Connect to internet 5.1. After connecting with WIFI, open the browser and input the web address, you can browse the web then. icon to enter the bookmark to view the browse 5.2. Click the history. Click the web page you want to open it. 6.
8.1 Camera If the cursor is at Click position, the device is at Camera mode. to take picture. to set the scene mode, Picture size, Picture quality, and Click colour effect. 8.2 DV If the cursor is at position, the device is at DV mode. Click to take picture. Click to set the colour effect or restore to default settings. 9. Connect with external device 9.1. Connect with PC Connect the device with the PC via the USB cable. The PC appears two new disk symbols after connected successfully.
VI. Specifications Item Display Touch panel OS Input method Capacity External Capacity Audio Video E-book Wireless network Language OTG Temperature Battery 716 1024X600 Capacitive touch screen Android 5.1 Soft keypad 16GB(Take the object as the standard) TF-CARD, up to 32GB MP3,WMA,FLACC and etc MPEG4,divx,AVI,H.
FCC Warning Statement Changes or modifications not expressly approved by the party responsible for c ompliance could void the user’s authority to operate the equipment. This equipment has been tested and found to comply with the limits for a Class B digital device, pursuant to Part 15 of the FCC Rules. These limits are designe d to provide reasonable protection against harmful interference in a residential i nstallation.