Pico Projector User Manual 0
Contents 1. Brief Introduction ............................................................................................... 2 2. Important safety Instructions ............................................................................. 3 3. Standard accessory........................................................................................... 6 4. FCC Information ................................................................................................ 7 5. Location of parts and controls ...
1. Brief Introduction This product use TI 0.3 inch DMD chip, cooperate with RGB LED display technology. LED light source, using LED RGB trichromatic LED chips, the life up to 20000 hours, in terms of 6 hours watching TV every day, life is about 10 years, much higher than general projector bulb lamp life 3000 hours. Its brightness to 80 lumens, making the products in the field of video, games, entertainment and mobile commerce, have got well.
2. Important safety Instructions All of the safety and operating instructions should be read, adhered to and followed before the unit is operated. CAUTION • TO REDUCE THE RISK OF ELECTRIC SHOCK, DO NOT REMOVE COVER. THERE ARE NO SERVICEABLE PARTS INSIDE. • TO REDUCE THE RISK OF FIRE OR ELECTRIC SHOCK, DO NOT EXPOSE THIS UNIT TO RAIN OR MOISTURE.
DANGER To reduce the risk of electric shock, burns, fire or injury: 1. 2. 3. 4. 5. Do not use while bathing or in a shower. Do not place or store unit where it can fall or be pulled into a tub or sink. Do not place in, drop or submerge in water or other liquid. Do not reach for unit that has fallen into water. Unplug it immediately. Care should be taken so that objects do not fall and liquids are not spilled onto the unit. WARNING 1.
amplifiers) that produce heat. Avoid placing on top of stereo equipment that radiates heat. 8. Never block the air openings of the unit with materials such as clothing, plastic bags or papers, or place it on a soft surface such as a bed or couch, where the air openings may be blocked. 9. Do not overload electrical outlet. Use only the power source as indicated. 10. Do not carry this unit by cord or use cord as handle. 11.
WARNING! this product contains A rechargeable battery • Do not store this product in high temperatures, damp areas or in direct sunlight. • Never disassemble the product. • Never dispose of the product in fire or water, which may result in explosion and/or injury. • Keep product out of reach of children. • Do not touch product with damp hands. • Dispose of the product properly. • The product must not be discarded with ordinary household waste. • Contact your local recycling center for proper disposal. 3.
4. FCC Information This device complies with Part 15 of the FCC Rules. Operation is subject to the following two conditions: 1) This device may not cause harmful interference. 2) This device must accept any interference received including interference that may cause undesired operation. Warning: Changes or modifications to this unit not expressly approved by the party responsible for compliance could void the user's authority to operate the equipment.
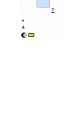
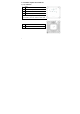
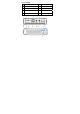
5. Location of parts and controls 1.
2.
3.
6. Projector installation place 1. To install, after a vote of the geometry distortion in image will not appear in trapezoidal state, the projector should be placed in a horizontal position (e.g., flat on the table), and perpendicular to the center of the screen (90° right-angle direction). 2. The Projector can display media just about anywhere! However, for the best quality, we suggest you find a light colored wall (preferably smooth and white) and place the Projector with its lens facing the location.
8. Charging the Projector 1. The projector is charged using the included AC Adapter. 2. The LED Indicator Light will illuminate Red to indicate that the projector is currently charging and then revert to LED OFF when the projector is fully charged. Important: It takes approximately 3 to 5 hours to fully charge the projector for the first use, and the approximate working time is 2.5~3 hours. 3. A low battery icon will show on the screen when the projector battery is low.
2. Press the Power button to turn the projector on. 3. Press direction key, Select the video icon , touch M button. SEARCH the TF card OR USB disk you want, touch OK to confirm. Then select the video you want to play, touch OK to confirm. Note: Please insert a variety of signal source in shutdown condition. Video format support: RM,RMVB,MPEG,MKV,AVI,MP4,MOV, FLV,H.263,H.264,3GP,DAT,VOB,TS,WMV 11. Audio display 1. Insert U disk or micro SD card into the projector corresponding socket. 2.
12. Adjusting volume Long press the panel on the down, up KNOB to adjust the volume 13. Connect input source 1. The project off, connect the HDMI cable (included) to the HDMI port and the other end to your device. 2. Press direction key, select the SOURCE icon , press M key, followed by HDMI in and AV in. Note: 1. You may need an adapter to connect your device to the HDMI cable. 2. If you are using one of the following devices, you will see your device's screen displaying (mirroring) on the wall.
14.
15. Trouble shooting Q. The Projector will not show the video on the wall. A. Recharge your device's battery. Also, check to see if the HDMI cable is fully inserted into the Projector and your device. Q. The video showing on my wall is blurry. A. Adjust the Focus Wheel on the Projector to fine-tune the picture. It may also depend on the surface on which you are attempting to show your video. Try moving to a location with a smoother wall surface. Q.
16. Specification Native Resolution 854 - 480 (WVGA) Display Technology TI DLP,0.3’’DMD EM LED Brightness 80 ANSI Lumens LED Lamp Life Approximately 20000 hours Contrast Ratio 1000:1 Image Size 100inch Screen Aspect Ratio 16:9 Throw Ratio 1.19:1 Color Gamut (typical) 100% of NTSC Uniformity 85% Speaker 1W*2 Speakers Power 7.4V 2000 MAH Rechargeable Battery Battery Life ≥2.
18