
Users Manual Part 2

9 Using the QC Program
Operator’s Manual 9 - 11
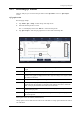
3. Tap the “QC Table” button to enter the QC table screen of the corresponding QC file.
4. Select the QC record(s) you want to export.
The selected QC records are highlighted.
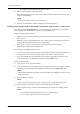
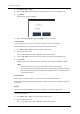
5. Tap “Export”.
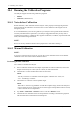
The following dialog box displays.
6. Tap to select “Selected records” and then tap “OK” to export the selected records.
Export all QC records:
1. Tap “Menu > QC > Setup” to enter the QC file setup screen.
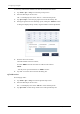
2. Tap the “QC Table” button to enter the QC table screen of the corresponding QC file.
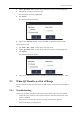
3. Tap “Export”.
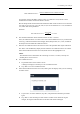
The following dialog box displays.
4. Tap to select “All records” and then tap “OK” to export all records from the QC Table.
9.3 When QC Results are Out of Range
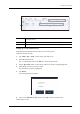
If a QC result falls outside the control range, the “QC” button on the software screen lights in
orange.
9.3.1 Troubleshooting
When a QC result falls outside the control range, follow below steps to solve the problem.
• Analyze the cause of outliers, take corrective measures, and verify effectiveness of the
corrective measures.
• If the corrective measures fail, report it according to the laboratory protocol.
• Contact Customer Service Department.