Color TFT LCD Monitor User's Manual Important Notice: Please read this manual carefully.
Precaution Read all of these instructions and save this manual for later use. Follow all warnings and instructions on the product. 1. Do not cover or block the ventilation holes in the case. 2. Do not insert sharp objects or spill liquid into the LCD monitor through the cabinet slots; this may cause accidental fire, electric shock or failure. 3. Unplug the unit when not in use for an extended period of time. 4.
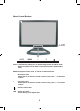
Introduction Product Description Thank you for choosing the Flat Panel TFT-LCD Color Monitor. It combines the features of a MONITOR with a THIN FILM TRANSISTOR Liquid crystal display (TFT-LCD). This new generation of TFT-LCD incorporates a high quality display in a lightweight module. Unlike CRT displays, the LCD panel has a fixed format over a set area. So. for best performance the "native resolution" setting is recommended.
Menu Operating Instructions Your LCD monitor allows you to easily adjust the characteristics of the image being displayed. All of these adjustments are made using the control buttons on the front bottom of the monitor. While you use these buttons to adjust the controls, the OSD (On Screen Display) shows you their numberic values as they change. Instructions of each button on the LCD monitor, please see Menu Control Buttons on the next page. Direct Access Features 1. Push "AUTO" to get the optimal image. 2.
Menu Control Buttons LED AUTO MENU + - AUTO : Automatically adjusts for an optimal image (when no OSD is used). Returns to upper level of OSD, or exits the main menu (when OSD is used). MENU: Displays the main menu, or selects command function. - : Decreases value. When OSD is not active or visible on the screen, push " - " to decrease volume. + : Increases value. When OSD is not active or visible on the screen, push " + " to increase volume. : Power on/off control. LED : Power On: Green.
On Screen Display (OSD) Functions Instruction 1. Color Menu It enables you to adjust image Color. OSD ther Color Contrast 50 - + Picture Brightness 50 - + Function Color Temp OSD Menu Color Adjust Misc Exit 9300 6500 User Exit Contrast To adjust image contrast. Brightness To adjust image brightness. Color Temp To set the Color temperature: 9300, 6500, User. Color Adjust To enter Color Adjust submenu. You can adjust Color components Red, Green and Blue manually.
2. Picture Menu It enables you to adjust picture. OSD ther Color H.Position 50 - + Picture V.Position 50 - + Function Phase 73 - + OSD Menu Clock 50 - Misc Sharpness Exit Exit + 1 2 3 4 5 H.Position To adjust horizontal position of picture. V.Position To adjust vertical position of picture. Phase To adjust the phase of picture. Clock To adjust the clock of picture. Sharpness To adjust the sharpness of picture: from level 1 to 5.
3. Function Menu It enables you to use Auto Adjust and Auto Color function. OSD ther Color Auto Adjust YES NO Picture Auto Color YES NO Function Exit OSD Menu Misc Exit Auto Adjust To do auto picture adjusting. Auto Color To do auto Color adjusting. After adjusting, choose Exit or press AUTO repeatedly to exit.
4. OSD Menu It enables you to adjust OSD menu properties. Color Language Picture Exit Function OSD ther OSD Menu Misc Exit Language Select Language to enter language setting submenu (see below). OSD ther Color English Italiano Picture Francais 繁體中文 Function Deutsch 简体中文 OSD Menu Espanol ~ 日本语 Misc 한국어 Portugues Exit Use "+", "-" buttons to choose the language you need. After adjusting, choose Exit or press AUTO repeatedly to exit.
5. Misc Menu It enables you to choose input source, do reset, etc. OSD ther Color Input Picture Reset Function Volume OSD Menu Exit YES NO 50 - Misc Exit Input To select input source: VGA, DVI (see below). Color OSD ther VGA Picture DVI Function Exit OSD Menu Misc Exit Reset To reset all the settings to factory default. Volume To adjust the volume. After adjusting, choose Exit or press AUTO repeatedly to exit.
Display Modes For 17" Wide Mode Mode Resolution 1 2 3 4 5 6 7 8 9 10 11 12 13 14 15 16 17 18 720 x 400 720 x 400 640 x 480 640 x 480 640 x 480 800 x 600 800 x 600 800 x 600 1024 x 768 1024 x 768 1024 x 768 1024 x 768 1280 x 1024 1280 x 1024 1280 x 768 1280 x 768 1440 x 900 1440 x 900 Vertical Frequency (Refresh Rate) 60Hz 70Hz 60Hz 72Hz 75Hz 60Hz 72Hz 75Hz 60Hz 70Hz 72Hz 75Hz 60Hz 75Hz 60Hz 75Hz 60Hz 75Hz To set the display mode 1.
Connection to PC 1. Please connect to the 100–240V AC socket. 2. Please connect signal cable to the PC.
Specification Item Display Size Active Area Maximum Resolution Pixel Pitch Aspect Ratio Display Colors Description 17" wide 367(H) x 229(V) mm 1440 x 900 0.255 mm 16:10 262,144 Brightness (Typ.
Cleaning 1. Gently wipe the screen with a clean, soft, lens brush or a soft clean, lint-free cloth. This removes dust and other particles that can scratch the screen. 2. Do not apply pressure to the screen surface when wiping it clean. 3. Do not pour or spray any liquid directly onto the screen or case of the LCD monitor. Chemical cleaners may damage the screen of LCD monitor. Troubleshooting LCD pixel statement The LCD unit is produced with high-precision manufacturing techniques.
• Image too bright / too dark A: Adjust brightness and contrast by OSD. • Irregular Image A: 1. Check the signal connection between the computer and LCD monitor. 2. Perform Auto Adjust. • Distorted Image A: Reset the LCD monitor (Perform "Reset" function by OSD). • Image is not centered / Size is not appropriate. A: 1. Use OSD Picture Menu to adjust H.Position and V.Position. 2. Check image size setting. 3. Perform Auto Adjust. • No sound. A: 1.