Discover your phone Speaker 262K TFT LCD Back of the phone: Camera lens +/- Volume & zoom key Right softkey Left softkey Navigation and , keys On/off and hang up key Pick up key Camera key Alphanumeric keypad Input method key Symbol input and lock/unlock key Microphone USB Port/ charger & headset connector Philips continuously strives to improve its products. Therefore, Philips reserves the rights to revise this user guide or withdraw it at any time without prior notice.
How to... Switch the phone On/Off Long press ). Enter your PIN code Enter your PIN code using the keypad and press , to confirm. Lock/Unlock the keypad Long press *. Make a call Enter the phone number using the keypad and press (. Answer a call When the phone rings, press (. End a call Press ). Activate/Deactivate handsfree mode During a call, press R. Access Contacts Press R Contacts on idle screen.
Softkeys Business Contacts The soft keys L and R allow you to select the options above them on the screen. Such options are contextual: they vary according to current context. page 31 page 27 page 47 Bluetooth Calls Settings page 45 page 44 page 48 Profiles Main menu The main menu gives you access to all the different features of your mobile phone. The table below summarizes the functional icons on the main menu. To find more information about their functions, refer to the pages.
Hot keys 0 1 # Shortcuts Long press to enter “+” when making international calls. Long press to access the voice mailbox. Long press to select Silent mode for incoming calls and messages. . You can configure the navigation keys +, -, <, > to access your favorite features directly. On idle screen, press the keys to access the features. Go to Settings > General > Fast keys to check the default settings of the navigation keys +, -, <, >. To change the default settings, 1. 2. Select the item to be changed.
To remove a shortcut, • Select it, and press LOptions > Delete, or Disable.
Table of contents Table of contents 1 Getting Started 8 Inserting the SIM card 8 Charging the battery 9 Setting clock 10 Displaying local and international clocks 11 Insert the micro-SD card 11 4 Messaging Creating messages Organizing your messages Defining your message settings E-mail Broadcast messages 20 20 22 23 26 28 2 Text Entry Selecting text entry methods Entering text 13 13 13 3 Calling Making a call Answering and ending a call Options during a call Handling multiple calls (Network-dependent)
Table of contents 6 Business Using your business organizer Create your to-do list Check your calendar Using your business assistant Alarm Business card reader Text reader Sound recorder Change clock display Others 32 32 32 33 33 33 34 34 34 35 35 7 Browser Managing your browser Accessing web sites 36 36 36 8 Camera Using the camera 37 37 6 Using the video recorder 37 9 Fun Getting fun from Java applications Listening to the FM radio Editing your photos Editing your ring tones STK 38 38 38 40 41 41
Table of contents Setting audio files as ringtones 46 Display Call settings Network settings Security 51 52 53 53 12 Calls 47 13 Bluetooth About Bluetooth Connecting to a Bluetooth device Getting connected by a Bluetooth device Other Bluetooth connections 48 48 48 49 49 14 Profiles Adjust ring settings to different scenes Define your profile Apply a profile 50 50 50 50 Specific Absorption Rate Information 70 15 Settings General 51 51 Table of contents Icons & Symbols 54 Precautions 56 Trou
1 Getting Started Please read the safety instructions in the "Precautions" section before use. To use your phone, you must insert a valid SIM card supplied by your GSM operator or retailer. The SIM card contains your subscription information, your mobile telephone number, and a memory in which you can store phone numbers and messages. 2. As shown, take out the battery. Inserting the SIM card Follow the steps below to insert your new SIM card.
3. As shown, align your SIM card with the SIM card slot, clipped corner facing you and gold contact downwards. Insert your SIM card under the metal clip holder. 5. As shown, slide the back cover along the slots until it is locked. Remove the protective film covering the screen and the camera lens before using the phone. 4. As shown, align the metallic connectors on the battery and battery slot. Press the battery down until it is locked.
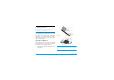
To charge the battery, plug in the connector as shown below. Then plug the other end into a power socket. If you do not intend to use your phone for several days, we recommend that you remove the battery. You can use the phone while it is charging. If the battery is completely flat, the battery symbol will only reappear after a few minutes of charging. Setting clock During charging, the battery symbol scrolls. It takes about X hours to fully recharge the battery.
2. On idle screen, press L Menu and go to Settings > General > Time & date. Set time/date: Enter the time and date by using the numeric keypad. Set format: Select the time (12-hour or 24-hour clock) and date format by pressing the navigation keys +, -, <, > and LOK. Clock type: To display time and date on the idle screen, press + or - show the time in a clock (Analog clock) or digits (Digital clock). Press LOK to confirm. Clock status: Press>, +, or - to turn on the international clock.
3. As shown, align your micro-SD card with the slot. Put it in place. 4. Press down the card holder and pull it until it is locked.
2 Text entry editing screen. When you access the editor again, it will automatically select the last input method you have used. Your mobile phone supports a number of text entry modes, including T9 input, multi-tap input, numeric input and symbol input. Entering text Selecting text entry methods 1.
RClear Short press to clear a letter, long press to clear all entries. If necessary, press R to exit the input mode first. T9® input T9 ® predictive text input is an intelligent editing mode for messages, which includes a Tegic Euro. Pat. comprehensive dictionary. It App. 0842463 allows you to quickly enter text. You need to press only once on the key corresponding to each letter needed to spell a word: keystrokes input are analyzed and the word suggested by T9 ® is displayed at the popup window.
over-down) as well as a special stroke. When the stroke you need does not correspond to the 5 basic strokes, replace it with the special stroke.
3 Calling For IP calls (China only), select L Options > Dial > IP call. You can preset your IP service number under Settings > Call settings > IP number. Making a call 3. Press ) to hang up. From the idle screen Speed dial 1. Enter the phone number. On the idle screen, you can call a contact in your phonebook by long pressing a numeric key. To assign a speed dial key to a contact: 2. Press ( to dial the number. or press LOptions > Dial. 3. Press ) to hang up.
Answering and ending a call Options during a call When you receive a call, the number of the caller may be displayed, depending on whether or not the calling party has chosen to display his or her ID. If the number is stored in the phonebook, then the corresponding name is displayed. During a call, you can press R to select Handsfree or Handheld mode. Press LOptions to access the following options: • Answer the call: Press (. • Divert the call: Press LOptions and select Deflect.
Sound recorder In most countries, recording of telephone conversation is subject to legislation. We advise you to notify the caller if you intend to record the conversation and only do so if they agree. You should also ensure confidentiality of the recordings. To record a conversation during a call, select Options and select Sound recorder. Recorded sound is saved in *.amr format and stored in Audio of My files menu. (see "Finding your files" on page 42).
• Conference to introduce the caller into a conference call. • End single to disconnect one party from the call. • End all to disconnect all party from the call. • Transfer to connect the two calls. You are disconnected when the transfer is completed. • New call to make a new call • Phonebook to add or view contacts • Messaging to send or receive messages • Sound recorder to record the phone conversation. • Mute to deactivate the microphone.
4 Messaging Creating messages SMS SMS enables you to send text messages to the other party, using Short Messaging Service (SMS). You can use the SMS menu to send messages to another handphone or a device that is capable of receiving SMS. To compose and send an SMS, follow the steps below: 1. Select Create message > SMS, and write your message. 2. Press LOptions to access the following options: Use template 20 Select to insert a preset message. Then press LOK. Insert phonebook No.
steps described below to compose and send an MMS. 1. Select Create Message > MMS. Press + or to select: To Press LEdit to enter the number or e-mail of the recipient. Cc Press LEdit to enter the number or e-mail of other recipients to whom you wish to send a copy of the message. Bcc Press LEdit to enter the number or e-mail of the recipients to whom you wish to send a copy of the message, by which the recipients in the Bcc list will be invisible to other recipients.
Send options Set Validity period, Delivery report, Read report, Priority. Exit Exit Copyright protected pictures and sound cannot be sent by MMS. Use templates for messages You can use ready-made messages as new messages. 10 SMS and 5 MMS messages are preset in the Templates folder. You can also save a message as a template. 1. Select Templates > SMS or MMS. 2. Select your desired templates. 3. Press LOptions, and select Create message. The ready-made messages appears on the edit screen.
Edit Edit and message. Save as template Save the selected message as a preset message. Use details, Use number, Use URL Extract the number of the sender or in the message to create messages, make a call, or save to the phonebook. Extract the URL in the message to connect to the website, add as a bookmark Delete Delete the selected message. Delete all Delete all messages in the folder. Move to archive Save the selected message in the SIM memory.
In Settings > SMS, Account settings Profile name: Edit the name of the current profile. SC address: Select your default SMS center. If not available on your SIM card, you must enter your SMS center number. Validity period: Select the length of time your messages will be stored in the SMS centre. This is useful when the recipient is not connected to the network (and thus cannot receive your message immediately). This feature dependent.
Preferred storage location Select where is your message stored, your SIM card or phone. Before the memory is full, all your messages will be stored in the selected location. To check the memory status, select Memory status. Send and save settings Press Lto select On or Off. Pref. bearer This option allows you to set the preferred transmission mode. You can select Preferred GPRS, Preferred GSM or GSM only. For further details, please contact your network operator.
Server profile Set network configuration. Please contact your network provider for more information. Memory status View the memory status of your MMS. E-mail If not included in your mobile phone contract, you will need to subscribe to an e-mail service in order to send and receive e-mails. In this case, all parameters are communicated to you by your operator. This menu allows you to send e-mails to one or several recipients at a time, including with an attachment such as a JPEG picture.
while it takes place, the e-mail content is deleted without being stored. Enter a folder and select a desired message. Press LOptions to access the following options:: Send and receive E-mail Reply Reply to the senders. This menu allows you to send E-mails from your phone to the Internet, and receive e-mails from the Internet to the mailbox you have preset on your phone. Reply without content Reply to the sender without the email history. Reply all Reply to all senders.
Delete Mark the E-mail to be deleted (select this option again to unmark it). When you exit the e-mail menu, you will be asked to confirm deletion of the selected item(s) from the e-mail server. Read message Read messages when there are received broadcast messages. Languages Set language for the broadcast message to be received. Channel settings Define the channel for broadcast messages Broadcast messages Broadcast messages are public messages broadcasted to a group of mobile users.
1. In Contacts > Advanced > Choose contact list, 5 Contacts Contacts are stored in one of the two available phonebooks: SIM phonebook (located on your SIM card, by which the number of entries you can store depends on the card capacity) or the Smart Phonebook (located on your phone, which allows you to store up to 1000 names). New contacts will only be added to the phonebook you have selected.
4. Save the entries when finish editing. Searching for a contact Add a contact to SIM phonebook 1. In Contacts > View contacts, enter the contact information in full or part. Press # repeatedly to select an input method. 2. Press , to start searching. 1. In Contacts > Advanced > Choose contact list, Default contacts list Press + or - and LOK to select Sim contacts. Default contact location Press + or - and LOK to select To SIM. 2.
Copy all contacts Special numbers 1. Go to Contacts > Advanced. 2. Press + or - and LOK to select Copy all to SIM (available if the phone is the default contact location) or Copy all to phone (available if the SIM card is the default contact location). This menu allows you to keep a list of useful numbers such as own numbers, service numbers, voicemail and emergency numbers. Delete all contacts 1. Go to Contacts > Advanced > Delete all. 2.
6 Business 3. To keep following: Create your to-do list 1. In Business > To do list, press LOptions > Add to add a kind of task. You can also add a task in Business > Calendar: select a date in the calendar, press LOptions > Add task. 2. When setting a task, specify the date and time. 32 reminded, do the Note Add a note about the task. Alarm Press < or > once or more to turn the alarm on, have it sound 15 or 30 minutes before the specified time, or turn the alarm off.
4. For an existing task, you can do the following in the Business > To do list > LOptions: Edit Edit an existing task. Send vCalendar Send the task as a message. Check your calendar After creating your to-do lists, you can check your calendar in day, weekly, or monthly views. In Business > Calendar, press LOptions or ,View. You can also create your to-do list in the calendar of different views. Using your business assistant Such features provide you with convenience.
Select Snooze: The alarm will sound again five minutes later. You can select Snooze three times. The alarm clock will ring even if your mobile phone is switched off, but the alarm will not ring or vibrate if the Profiles menu is set to Silent. Business card reader This menu allows you to collect the business cards information by directly scanning the business card contents into Contacts. 1.
2. 3. Press LOptions > Record to start recording, Lto pause/resume recording, and RStop to stop recording. Press LOptions > Save to save the recording. Edit or append recording to a file 1. 2. Select the desired file. Press LOptions to select your options. Send an audio file 1. 2. Select the desired file. Press LOptions > Send to send the audio file via the MMS, E-mail, or Bluetooth. Change clock display As you travel from one time zone to another, you may need to change your local clock settings.
7 Browser You can use this function to browse the Internet. Consult your network operator for the service subscription and WAP settings. Home: Save a web page as your homepage. Enter address: Enter a web site address. Bookmarks: Save a website as a bookmark. In this way, you save and quickly access your favorite websites, and forward them in your messages (see "Creating messages" page 20). History: Access a web site you visited before. Offline pages: Access web pages you saved.
8 Camera Your mobile phone features a digital camera that allows you to take pictures (up to 3.0 Mega pixels) and record short video clips, store them in your phone or transfer them to your PC via a data cable, use them as wallpaper or send them to your friends via the MMS.
Listening to the FM radio 9 Fun Tune to a radio station To tune to a radio station, always plug the supplied earphone into your phone. Getting fun from Java applications Your mobile phone features a Java run-time environment, which allows you to run Java applications, such as games downloaded from the network. Contact your network operator to subscribe services and set your Java network in Fun > Java > Settings.
> to start auto search for the next available station from current frequency. Edit the channel list You can assign a preset to a certain location. When pressing the numeric key on the radio playback screen, you tune to the station immediately. 1. In Fun > FM radio, press LOptions > Channel list to select a location for your preset (Location 1 to 9 corresponding to numeric keys 1 to 9). 2. Press LOptions > Edit: Channel name: Name or rename the channel. Frequency: Enter your desired frequency.
Channel effect: Select sound effects for your radio. 4. On the radio playback screen, press , to stop or resume radio playback. Editing your photos You can edit your photos before sending them via the MMS or saving them for other purposes. Add to or clip from photos 1. Go to Fun > Photo editor > Photo artist, and select your desired photo from My files > (Photo or Memory card) > Picture > Photos. 2.
Editing your ringtones You can edit your ringtone files in My files > Audio. 1. In Fun > Melody composer, select the ringtone to be edited. 2. Press LOptions to select your playback options, and save the edited ringtone as a new file. STK The availability of the features in this menu depends on whether or not your SIM card supports STK. If your SIM card supports STK function, the STK menu will be displayed on the screen.
10 Music Save MP3 music files under the Audio folder of the micro-SD card.You can play the music on your phone. Creating your music library Edit music files on your PC 1. Run Windows Media Player (or other music management program) on your PC. 2. To add music files, click Media Library on the left menu, and then click Add on the top menu. 3. On the left pane, select All Music. On the right pane, all the music files you added are displayed. 4. Click Title, Artist, Album to edit them as desired.
Album: songs sorted by album. Artist: songs sorted by artist. Play music files 1. Select your desired song in a folder. Playback starts from the song. On the playback screen show the file information and selected playback settings. 2. To select your plackback settings, Press LOptions > Settings: Shuffle: Turn it on to play music files in the folder randomly. Repeat 1: Play current file repeatedly. Repeat All: Play all the files in the folder repeatedly.
11 My files 3. If necessary, press LOptions to select your view settings: Browse style: Show files as icons or a list Sort: Show files in the order of name, type, time or size. On the phone, all the files are stored under the folders of the phone memory or memory card. Managing your files Finding your files Create sub-folders 1. Go to My files. 2. Select Phone or Memory card, if you have install a memory card on your phone.
Manage your files You can copy and move files within a folder, delete, or rename your files. 1. Select a file under a folder. 2. Press LOptions to select your desired option: Rename, Copy, Move, Delete, Delete all files. 3. To copy or move a file, select the desired sub-folder, and press LOptions: Done: Move or copy the file to current subfolder. Open: Open a sub-folder under current subfolder, and move or copy the file to it.
Set a photo as screensaver You can set a photo as the screensaver of your phone. After the set time span in idle mode, the screensaver appears, hiding the information on the idle screen of your phone. To edit the audio file, see see "Editing your ringtones" on page 41. 1. Select a photo under My files > Picture > Photos. 2. Press LOptions > Set as screensaver. Print a photo 1.
12 Calls You are provided with the records about your incoming and outgoing calls, and received and sent Internet data. Go to Calls to check your call history. Depending on your network, rounding-off for billing purposes, taxes, and others, the actual time invoiced for calls and services by your service provider may vary. The Call costs function is network-dependent.
Connecting to a Bluetooth device 13 Bluetooth About Bluetooth Your phone supports Bluetooth wireless technology, allowing connection to a compatible Bluetooth device within 10 meters. The Bluetooth connection can be subject to interference from obstructions such as walls or other electronic devices. Before you can apply Bluetooth, make sure the other device supports Bluetooth function by contacting the device’s manufacturer or its accompanied documentation. 48 1. Go to Bluetooth > Power.
Getting connected by a Bluetooth device 1. Go to Bluetooth > Settings: Visibility: Turn it on to make your phone visible to other Bluetooth devices My name: your phone name to be identified by other Bluetooth devices. Press L to edit it. Authentication: Turn it on if a password (0000 by default) is required to accept the connection request. FTP settings or BIP settings: file folder to receive files shared with other Bluetooth device.
To change the settings: 14 Profiles Adjusting ring settings to different scenes The profiles are defined for several scenes. They consist of the settings for ringtones, ring volume, answer mode, and others. With preset profiles, you can easily adjust incoming calls and messages as desired. Define your profiles 1. In Profiles, select the profile to be changed. 2. Press LOptions > Modify. 3. Select your desired option and make changes as desired. Apply a profile 1.
15 Settings Auto update of date and time: Update the time and date of your phone according to the signals sent by the network. (dependent on the network). Display General Time & date: Set the clock of the phone (see "Setting clock" on page 10). Auto power On/Off: Set time for your phone to be turned on or off automatically. Language: Select a language for your phone. Auto keypad lock: Set an idle time span for the keypad to be locked.
Call settings Caller ID: Set how to show your number to the called party (network-dependent). Call waiting: Get informed of an incoming call when on phone (see "Answer a second call" on page 19). Call divert: Divert incoming calls to your voice mailbox or to another phone number (regardless of whether or not the number is in your phonebook) (see "Answer a second call" on page 19). This feature is subscription dependent. Call barring: Set limits to your incoming and outgoing calls.
Line switching: Swap phones when handling multiple calls. (see "Handling multiple calls (Networkdependent)" on page 18). Network settings Select network: Select the network for your phone. Preferred network: Select your preferred network GPRS connection: Select GPRS connection mode. Data account: Check or create your data account. Fixed dial: Restrict your outgoing calls to certain numbers. Barred dial: Prohibit some outgoing calls. Change password: Change your PIN, PIN2, phone passwords as desired.
Icons & Symbols Battery - The bars indicate the battery level In idle mode, several symbols can be displayed simultaneously on the main screen. When pressing some of the status icons, the corresponding menu will be displayed on the screen. (4 bars = full, 1 bar = low). If the network symbol isn’t displayed, the network is currently not available. You may be in a bad reception area, moving to a different location may help. Alarm clock is activated.
Home zone - A zone designated by your network operator. Subscription dependent, contact your service provider for details. GSM network: your phone is connected to a GSM network. EDGE attach - Your phone is connected to the EDGE network. Memory card - Indicates the memory card is in use. Reception quality: the more bars are shown the better the reception is. Tap on the icon to switch between the flight mode and normal mode. SIM memory full - The SIM memory is full. Delete old items to store new ones.
Precautions Radio Waves Your cellular mobile phone is a low power radio transmitter and receiver. When it is operating, it sends and receives radio waves. The radio waves carry your voice or data signal to a base station that is connected to the telephone network. The network controls the power at which the phone transmits. • Your phone transmits/receives radio waves in the GSM frequency (900 / 1800 / 1900 MHz). • The GSM network controls transmission power (0.01 to 2 watts).
follow all local recommendations and regulations when using your cellular phone both at home and when away. Regulations on the use of cellular phones in vehicles and aircraft are particularly stringent. Public concern has been focused for some time on the possible health risks for users of cellular phones. The current research on radio wave technology, including the GSM technology, has been reviewed and safety standards have been drawn up to ensure protection from exposure to radio wave energy.
In areas where you are requested to turn off radio transmitting devices, such as quarries or other areas where blasting operations are in progress. Check with the vehicle manufacturer that electronic equipment used in your vehicle will not be affected by radio energy. Pacemakers If you have a pacemaker: • Always keep the phone more than 15 cm from your pacemaker when the phone is switched on, in order to avoid potential interference. • Do not carry the phone in a breastpocket.
• Treat the phone with care. Any misuse will void the International Guarantee. • Do not immerse the phone in any liquid; if your phone is damp, switch it off, remove the battery and let them dry for 24hrs before using them again. • To clean the phone, wipe it with a soft cloth. • Placing and receiving calls consumes the same amount of battery energy. However, the mobile consumes less energy in idle screen when kept in the same place.
are replaced with genuine Philips replacement parts. Your mobile phone and your car Studies have shown that speaking on the telephone while driving lowers your concentration, which can be dangerous. Adhere to the following guidelines: • Give your full attention to driving. Pull off the road and park before using the phone. • Respect the local regulations in countries where you drive and use your GSM phone.
Philips has marked the battery and packaging with standard symbols designed to promote the recycling and appropriate disposal of your eventual waste. Disposal of your old product The labelled packaging material is recyclable. Your product is designed and manufactured with high quality materials and components, which can be recycled and reused. A financial contribution has been made to the associated national packaging recovery and recycling system.
FCC Compliance Statement This equipment has been tested and found to comply with the limits for a Class B digital device, pursuant to Part 15 of the FCC Rules. These limits are designed to provide reasonable protection against harmful interference in a residential installation. This equipment generates, uses and can radiate radio frequency energy and, if not installed and used in accordance with the instructions, may cause harmful interference to radio communications.
Troubleshooting The phone does not switch on Remove/reinstall the battery. Then charge the phone until the battery icon stops scrolling. Unplug the charger and try to switch the mobile on. The display shows BLOCKED when you switch on the phone Somebody tried to use your phone but didn’t know the PIN code nor the unblocking code (PUK). Contact your service provider. The display shows IMSI failure This problem is related to your subscription. Contact your operator.
the operation of the phone. Take the phone to a warmer place and try again. In other cases please contact your phone supplier. Your battery seems to over heat You might be using a charger that was not intended for use with your phone. Make sure you always use the Philips authentic accessory shipped with your phone. Your phone doesn’t display the phone numbers of incoming calls This feature is network and subscription dependent.
The display shows SIM failure Check that the SIM card has been inserted correctly. If the problem persists, your SIM card may be damaged. Contact your operator. When attempting to use a feature in the menu, the display shows NOT ALLOWED Some features are network dependent. They are only available, therefore, if the network or your subscription supports them. Contact your operator for detailed information on this subject.
Your phone is not charging If the battery is completely flat, it might take several minutes of pre-charge (up to 5 minutes in some cases) before the charging icon is displayed on the screen. The picture captured with the phone camera is not clear Make sure that the camera lens on both sides is clean.
Deluxe headset Philips Authentic Accessories Some accessories, such as a standard battery, headset, USB cable and a charger, are included as standard accessories in your mobile phone package. Additional accessories may also be provided or sold separately. Package contents may therefore vary. To maximise the performance of your Philips mobile phone and not to void the warranty, always purchase Philips Authentic Accessories that are specially designed for use with your phone.
USB This feature allows you to connect your phone to a PC via USB cable. You can carry out the following operations: Mass Storage Acts as a mass storage for your mobile phone data on the computer and recover the data saved in the computer, upload and download files, access the internal memory and micro SD card (if present) and the size of transfer is unlimited until your memory is full. Webcam Acts as a webcam for your PC. COM port Acts as a modem for your phone and PC connnection.
Trademark Declaration Tegic Euro. Pat. App. 0842463 T9 ® is a trademark of Tegic Communications Inc. PHILIPS and PHILIPS’ Shield Emblem are registered trademarks of Koninklijke Philips Electronics N.V. manufactured by Shenzhen Sang Fei Consumer Communications Co., Ltd. under license from Koninklijke Philips Electronics N.V. JAVA is a trademark of Sun Microsystems, Inc. In-Fusio and the games engine Exen are trademarks of In-Fusio France.
Specific Absorption Rate Information International standards THIS MOBILE PHONE MEETS THE INTERNATIONAL RECOMMENDATIONS FOR EXPOSURE TO RADIO WAVES Your mobile phone is a radio transmitter and receiver. It is designed and manufactured not to exceed the limits for exposure to radio frequency (RF) energy defined by the international standards.
operate at multiple power levels so as to use only the power required to reach the network. In general, the closer you are to a base station antenna, the lower the power output. While there may be differences between the SAR levels of various phones and at various positions, they all meet the international protection standards for exposure to radio waves. The highest SAR value for this Philips Xenium X620 model phone when tested for compliance against the standard was 0.
Limited Warranty 1. 2. 72 What Does This Limited Warranty Cover? Philips warrants to the original retail purchaser (“Consumer” or “You”) that this Philips cellular product and all accessories originally provided by Philips in the sales package (“Product”) are free from defects in materials, design and workmanship under normal use in accordance with the operating instructions and pursuant to the following terms and conditions.
4. Repair or replacement of Product, at Philips’ option is your exclusive remedy.
b) 6. 74 The SIM card must be removed from the Product before it is given to Philips. Philips assumes no liability for damaged or loss of the SIM card or the data contained therein.
HOWEVER IN NO EVENT SHALL PHILIPS BE LIABLE FOR ANY PUNITIVE, SPECIAL, INCIDENTAL, INDIRECT OR CONSEQUENTIAL DAMAGES (INCLUDING BUT NOT LIMITED TO THE LOSS OF USE, LOSS OF TIME, INCONVENIENCE, COMMERIAL LOSS, LOST PROFITS, LOST BUSINESS OPPORTUNITIES, COST OF SUBSTITUTION OF GOODS OR SERVICES, INVESTMENTS, DAMAGE TO GOODWILL OR REPUTATION, OR LOSS OF DATA AND CLAIMS BY THIRD PARTIES) RESULTING FROM PURCHASE OR USE OF THE PRODUCT, TO THE FULLEST EXTENT ALLOWED BY LAW, WHETHER OR NOT PHILIPS HAS BEEN ADVISED
Declaration of Conformity We, Shenzhen Sang Fei Consumer Communications Co., Ltd. 11 Science and Technology Road, Shenzhen Hi-tech Industrial Park, Nanshan District, Shenzhen 518057 China declare under our sole responsibility that the product Philips X620 Philips GSM/GPRS 900/1800/1900 TAC number: 35364802 to which this declaration relates, is in conformity with the following Standards: SAFETY : EN 60950-1: 2001+A11:2004 HEALTH: EN50360: 2001 EMC: ETSI EN301 489-7 v 1.2.1; ETSI EN 301 489-17 v1.2.