Phantom 75 LED Spot ORDERCODE 40188 Highlite International B.V.
Congratulations! You have bought a great, innovative product from Showtec. The Showtec Phantom 75 LED Spot brings excitement to any venue. Whether you want simple plug-&play action or a sophisticated DMX show, this product provides the effect you need. You can rely on Showtec, for more excellent lighting products. We design and manufacture professional light equipment for the entertainment industry. New products are being launched regularly. We work hard to keep you, our customer, satisfied.
Showtec Showtec Phantom 75 LED Spot ™ Product Guide Warning ...............................................................................................................................................................................2 Safety Instructions .........................................................................................................................................................2 Operating Determinations ...........................................................................
Warning FOR YOUR OWN SAFETY, PLEASE READ THIS USER MANUAL CAREFULLY BEFORE YOUR INITIAL START-UP! Unpacking Instructions Immediately upon receiving this product, carefully unpack the carton and check the contents to ensure that all parts are present, and have been received in good condition. Notify the dealer immediately and retain packing material for inspection if any parts appear damaged from shipping or the carton itself shows signs of mishandling. Save the carton and all packing materials.
IMPORTANT: The manufacturer will not accept liability for any resulting damages caused by the nonobservance of this manual or any unauthorized modification to the device. Never let the power-cord come into contact with other cables! Handle the power-cord and all connections with the mains with particular caution! Never remove warning or informative labels from the unit. Never use anything to cover the ground contact.
Operating Determinations • This device is not designed for permanent operation. Consistent operation breaks will ensure that the device will serve you for a long time without defects. • The minimum distance between light-output and the illuminated surface must be more than 1 meter. • The maximum ambient temperature ta = 45°C must never be exceeded. • The relative humidity must not exceed 50 % with an ambient temperature of 45° C.
Mounting a clamp to the underside of the Phantom moving head Improper installation can cause serious damage to people and property ! Connection with the mains Connect the device to the mains with the power-plug. Always pay attention, that the right color cable is connected to the right place.
Return Procedure Returned merchandise must be sent prepaid and in the original packing, call tags will not be issued. Package must be clearly labeled with a Return Authorization Number (RMA number). Products returned without an RMA number will be refused. Highlite will not accept the returned goods or any responsibility. Call Highlite 0031-455667723 or mail aftersales@highlite.nl and request an RMA prior to shipping the fixture.
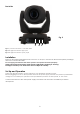
Description of the device Features The Showtec Phantom 75 LED Spot is a moving-head with high output and great effects. • LED source the shutter is electronic not mechanical. • Focus is motorized and the Phantom 75 has a manual zoom.
Backside Fig. 2 3 4 5 3) IEC power connector + Fuse F3A 250V 4) DMX signal connector (IN) 3-pin 5) DMX signal connector (OUT) 3-pin Installation Remove all packing materials from the Phantom 75 LED Spot. Check that all foam and plastic padding is removed. Connect all cables. Do not supply power before the whole system is set up and connected properly. Always disconnect from electric mains power supply before cleaning or servicing. Damages caused by non-observance are not subject to warranty.
Control Modes There are 4 modes: • Stand-alone (built-in programs) • Sound-controlled • Master/Slave • DMX512 (14 Channels ADVANCED or 8 channel BASIC) One Phantom (Built-in Programs) 1. 2. 3. 4. Fasten the effect light onto firm trussing. Leave at least 1 meter on all sides for air circulation. Always use a safety cable (ordercode 70140 / 70141). Plug the end of the electric mains power cord into a proper electric power supply socket.
Multiple Phantoms (DMX Control) 1. 2. 3. 4. Fasten the effect light onto firm trussing. Leave at least 1 meter on all sides for air circulation. Always use a safety cable (ordercode 70140 / 70141). Plug the end of the electric mains power cord into a proper electric power supply socket. Use a 3-p XLR cable to connect the Phantoms and other devices. 5. Link the units as shown in (figure 4), Connect a DMX signal cable from the first unit's DMX "out" socket to the second unit's "in" socket.
Fixture Linking You will need a serial data link to run light shows of one or more fixtures using a DMX-512 controller or to run synchronized shows on two or more fixtures set to a master/slave operating mode. The combined number of channels required by all the fixtures on a serial data link determines the number of fixtures the data link can support. Important: Fixtures on a serial data link must be daisy chained in one single line.
Control Panel Fig. 5 A. LCD Display B. MODE/ESC button C. Up Button D. Down Button E. ENTER Button Control Mode The fixtures are individually addressed on a data-link and connected to the controller. The fixtures respond to the DMX signal from the controller. (When you select the DMX address and save it, the controller will display the saved DMX address the next time.
Menu Overview 13
Main Menu Options DMX address Built-in Programs Slow/Fast/Sound-control/Slave Pan/Reverse Pan Tilt/Reverse Tilt Display/Reverse Display Advanced 14 channels/ Basic 8 channels Pan 540º, 360º, 180º Tilt 270º, 180º, 90º Reset Load factory default settings DMX Addressing With this menu you can set the DMX address. 1. Press Mode/Esc, until the display shows . 2. Press Enter to confirm. You can choose 512 different DMX addresses. Use the Up / Down buttons to select the required address from . 3.
Built-in Programs Mode You can select 4 different Programs when using the Phatom. Press MODE until the display shows ,then press the UP / DOWN buttons to select all 4 programs. Built-in Program Slow When the display shows : ,then press ENTER. The display will show The device is now in a slow built-in program mode. . Built-in Program Fast When the display shows : ,then press ENTER. The display will show The device is now in a fast built-in program mode. .
Tilt Mode When the display shows : , the Tilt is 270º. When you press Up/Down and the display shows , the Pan is 180º. When you press Up/Down and the display shows , the Pan is 90º. Reset When the display shows : and you press ENTER the device will reset. Default Settings When the display shows : settings. and you press ENTER the device will return to the factory default Password Change This is a Service Function. Press and hold MODE/ESC for 10 seconds. The display will show 0000.
DMX Channels 14 Channels Channel 1 – Horizontal movement (Pan) Push the slider up, in order to move head horizontally (PAN). Gradual head adjustment from one end of the slider to the other (0-255, 128-center). The head can be turned by 540° and stopped at any position you wish. Channel 2 – Vertical movement (Tilt) Push the slider, up in order to move head vertically (TILT). Gradual head adjustment from one end of the slider to the other (0-255, 128-center).
Channel 9 – Rotating Gobo-wheel + Gobo Shake 0-7 8-15 16-23 24-31 32-39 40-47 48-55 56-63 64-71 72-79 80-87 88-95 96-103 104-111 112-119 120-127 128-191 192-255 Open / White Gobo 1 (Glass) Gobo 2 (Glass) Gobo 3 (Metal) Gobo 4 (Metal) Gobo 5 (Metal) Gobo 6 (Metal) Gobo 7 (Metal) Gobo Shake 7 from slow to fast Gobo Shake 6 from slow to fast Gobo Shake 5 from slow to fast Gobo Shake 4 from slow to fast Gobo Shake 3 from slow to fast Gobo Shake 2 from slow to fast Gobo Shake 1 from slow to fast Open / White Cl
Channel 13 – Prism 0-7 8-12 13-130 131-247 248-255 Open 3-facet Prism Effect Clockwise rotation (CW) prism effect from slow to fast Counter-clockwise rotation (CCW) prism effect from slow to fast 3-facet Prism Effect Channel 14 – Focus 0-255 0-255 Continuous adjustment from far to near 8 Channels Channel 1 – Horizontal movement (Pan) Push the slider up, in order to move head horizontally (PAN). Gradual head adjustment from one end of the slider to the other (0-255, 128-center).
Channel 6 – Rotating Gobo-wheel + Gobo Shake 0-7 8-15 16-23 24-31 32-39 40-47 48-55 56-63 64-71 72-79 80-87 88-95 96-103 104-111 112-119 120-127 128-191 192-255 Open / White Gobo 1 (Glass) Gobo 2 (Glass) Gobo 3 (Metal) Gobo 4 (Metal) Gobo 5 (Metal) Gobo 6 (Metal) Gobo 7 (Metal) Gobo Shake 7 from slow to fast Gobo Shake 6 from slow to fast Gobo Shake 5 from slow to fast Gobo Shake 4 from slow to fast Gobo Shake 3 from slow to fast Gobo Shake 2 from slow to fast Gobo Shake 1 from slow to fast Open / White Cl
Maintenance The Showtec Phantom 75 LED Spot requires almost no maintenance. However, you should keep the unit clean. Otherwise, the fixture’s light-output will be significantly reduced. Disconnect the mains power supply and then wipe the cover with a damp cloth. Wipe the front glass panel clean with glass cleaner and a soft cloth. Do not use alcohol or solvents. The front glass panel will require weekly cleaning, as smoke-fluid tends to build up residues, reducing the light-output very quickly.
Fig. 8 3. 4. 5. 6. Loosen the service lid of the housing, by sliding it to the left/right. Gently tilt the head so the small metal housing will slide out more easy. Turn the gobo wheel, with the gobo you want to remove, to the upside. Gently lift up the gobo holder 10º and then gently pull out the gobo from its position. Fig. 9 7. Very carefully take the gobo out of the gobo holder with a pair of pliers. 8. Place the new gobo in the gobo holder.
Rotating Gobo-wheel Colorwheel 1 8 2 7 3 6 4 5 Fig. 10 Fig. 11 Troubleshooting No Light This troubleshooting guide is meant to help solve simple problems. If a problem occurs, carry out the steps below in sequence until a solution is found. Once the unit operates properly, do not carry out following steps. If the light effect does not operate properly, refer servicing to a technician. Response: Suspect four potential problem areas as: factory reset, the power supply, the LED, the fuse. 1.
Problem One or more fixtures are completely dead. Fixtures reset correctly, but all respond erratically or not at all to the controller. Probable cause(s) No power to the fixture Remedy • Check that power is switched on and cables are plugged in. Primary fuse blown. • Replace fuse. The controller is not connected. 3-pin XLR Out of the controller does not match XLR Out of the first fixture on the link (i.e. signal is reversed). • Connect controller.
Product Specification Model: Showtec Phantom 75 LED Spot Input Voltage: 100-240 VAC Continuous Power 170 Watt Fuse: F3A / 250V Dimensions: 338 x 247x 390 mm (LxWxH) Weight: 11 kg Operation and Programming Signal pin OUT: pin 1 earth, pin 2 (-), pin 3 (+) Set Up and Addressing: LED control panel Pan/Tilt resolution: 8-16 bit DMX Channels: 14 or 8 Signal input 3-pin XLR male Signal output 3 -pin XLR female Electro-mechanical effects LED source the shutter is electronic not mechanical.