User’s Manual 1
Foreword Thank you for purchasing this digital video camera. Before using it, please read the manual carefully and keep it in a safe place for future reference. The latest information is used for compiling the contents covered in the user’s manual. Screen display and pictures used in the manual are for the purpose of explaining the operations of the video camera in a more detailed and visual manner.
Built-in 550mAh lithium battery Mini USB port + TF card seat + tripod nut +HDMI port 120º wide-angle lens Movable detection function (movement mode and car-carrying mode) Overview of appearance 1.Indicator light 10.Speaker 2.Power/Shutter key 11.Reset port 3.1.5”HD panel 12.Microphone 4.Ok key 13.Micro SD card 5.Up key 14.Mini USB port 6.Down key 15.HDMI port 7.Menu key 16.Tripod nut 8.Mode key 9.Lens 17.
Start using 1. Prior to using the video camera for the first time, insert a micro SD or a micro SDHC card as shown in the following figure: A high-speed card above Class 4(included) is recommended, and a card of Class 10 is required when a professional mode is used for video recording. Turn off the camera before the card is inserted or pulled off. 2. Power on/off 2.1 Power on: Press Power key to start the screen and enter power-on state. 2.
turn yellow. 4.2 Charging indication: In power-off state, when it is connected to a computer, the indicator is in red, prompting the user that the camera is being charged. 5. Video recording mode 5.1 After power is on, it enters video recording mode automatically. 5.2 Press Shutter key to record video directly, and press it again to stop recording video.
. Movement mode 6.1 After power is on, press Mode key to shift to movement mode. 6.2 Movement mode has movable detection function. If you need to stop shooting, press Shutter key for once, and shooting will also be stopped if the camera does not move and the screen stands still for 5 seconds. During video recording, if the memory card is full or the camera is in low electrical quantity, it will stop shooting automatically and the file will be saved automatically. 6.
and shooting will also be stopped if the camera does not move and the screen stands still for 5 seconds. During video recording, if the memory card is full or the camera is in low electrical quantity, it will stop shooting automatically and the file will be saved automatically. 7.3 Press Up key or Down key for digital zoom. Press Menu key to open the menu, press Up key or Down key to select on the menu, and the items selected on the menu will be highlighted. Press OK key to confirm and exit from the menu.
拍照模式 拍照模式菜单 1 indicates that the current is shooting mode 2 indicates size resolution of current image 3 indicates that scenario selection is automatic 4 indicates number of photos that can be shot currently 5 indicates that an SD card has been inserted 6 indicates that the current is digital zoom 7 indicates current electrical quantity 8 indicates smile-face capture has been disabled 9 indicates that face detection has been disabled 10 indicates that anti-shake function for shooting has been ena
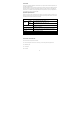
SN 1 Name of icon Description Indicate that current mode is to playback video files Video recording file Resolution of video Indicate resolution of video playback file 2 file Serial number of Indicate serial number of current file 3 current file 4 Total number of files Indicate total number of file shot in the SD card 5 Time for video file Indicate total time for current video file 6 Sign of battery 7 Icon of play Press shutter key to play video as per prompt of icon 8 Time for playing
Main menu Sub-menu Description This video Delete Delete current video All Delete all files Lock Protect Lock current files Unlock Unlock current files Lock all Lock all files Unlock all 9.3 Unlock all files Photo playback In playback mode, after a photo file is selected, press Up/down key to browse pictures leftwards or rightwards.
9.3.2 Photo playback menu setting In playback mode, press Menu key to open selection menu, then press Up/down key to select on the menu, press OK key to enter sub-menu option, press Up/down key selection sub-menu. After selection, press OK key to confirm and exit from the menu, the selected menu item will be highlighted.
Note: After files are set for protection on the menu, the protected files won’t be deleted. 10. Connect to HDTV 10.1. Connect this device to an HDTV with a HDMI connecting cable When images and sound in the video camera is to be output to the HDTV, insert the public terminal of HDMI cable into HDMI port of the video camera, and connect the other terminal of HDMI (output terminal) to HD input port of the HDTV as shown in the following figure: 10.2.
Using function of camera After the video camera is connected to the computer, press Shooting key and Power key to start the camera and enter camera mode. After the video camera is connected to the computer, enter camera mode and open My Computer, find “USB video device” in the list, and double click it to enter camera mode. Note: In case of PCCAM, generally XP SP3 version or above shall be used. Technical parameters Image sensor 5.
Warning: Changes or modifications to this unit not expressly approved by the party responsible for compliance could void the user’s authority to operate the equipment. NOTE: This equipment has been tested and found to comply with the limits for a Class B digital device, pursuant to Part 15 of the FCC Rules. These limits are designed to provide reasonable protection against harmful interference in a residential installation.
标准包装 camera user manual USB cable The installation CD 15