
User's Manual


10
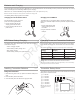
Receiver Operation
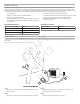
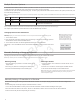
• Lock status is not changed by power cycles
• Tuner functionality and editing remains available
• The receiver power switch does not lock
Locking the Receiver Controls
Simultaneously press and hold the group and channel buttons to lock or
unlock the receiver.
• LK is displayed if a locked control is pressed
• UN is displayed momentarily to confirm the unlock command
link
mode autoaudio rf channel
group
rf channel
group
auto
link
mode audio
d B - 9
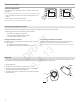
Use the Remote ID feature to identify linked transmitter and receiver pairs. When Remote ID is active, the receiver LCD will blink and display ID. The
status LED of the corresponding transmitter will alternately flash red and green for approximately 45 seconds.
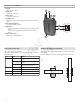
Audio Gain Adjustment
Transmitter gain has an adjustment range from -20 dB to +40 dB, in 1 dB
increments.
Tip: Try the 0 dB (unity gain) setting as a starting point, and then make gain adjustments if necessary.
1. Press and hold the mode button on the receiver until dB appears on the
display.
2. Press the up/down arrows to adjust the gain.
Note: The intensity of the green audio LED corresponds to the audio level.
The controls of the receiver and transmitter can be locked to prevent accidental or unauthorized changes to settings.
The following parameters are not affected by locking the controls:
To activate Remote ID:
1. Momentarily press the link button on the transmitter or receiver.
2. The display of the linked receiver will blink and show ID and the status
LED on the linked transmitter will flash red/green.
3. To exit Remote ID mode, momentarily press the link button or allow the
function to timeout.
I D
Locking the Transmitter Power Switch
Starting with the transmitter set to off, press and hold the LINK button
while turning on the transmitter. Repeat sequence to unlock.
Note: The transmitter status LED will flash red/green if a locked switch is set to the off position.
Locking and Unlocking the Controls
Remote ID
DRAFT
3.4.13