
Installation Instructions
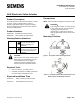


Document No. 129-561
Installation Instructions
June 15, 2016
Siemens Industry, Inc. Page 3 of 8
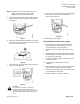
NOTE: Position the actuator to accommodate the
wiring. Hold the actuator in place while
tightening the actuator U-bracket bolt.
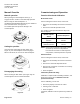
5. Tighten the U-bracket bolt using a 10 mm wrench
(or 4 mm hex wrench) to 5 Nm (44 in-lbs) torque.
See Figure 7.
Figure 7.
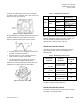
6. Rotate the manual adjuster clockwise to manually
extend the actuator shaft until it covers the head of
the valve stem See Figure 8.
Figure 8.
7. Close the stem connection plate securely over the
valve stem. See Figure 9.
Figure 9.
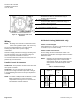
CAUTION:
Do not rotate the actuator on a Pressure
Independent Control Valve (PICV) once the
actuator and valve stem are connected. Doing so
will inadvertently adjust the flow setting of the
valve.
8. Secure the stem connection plate by tightening the
bolt, using a 10 mm wrench (or 4 mm hex
wrench). See Figure 10.
Figure 10.
The mounting is now complete.
Removing the actuator from a valve
1. Loosen the stem connection plate in the Valve
Stem Coupling by loosening the bolt, using a
10 mm wrench (or 4 mm hex wrench).
2. Open the stem connection plate over the valve
stem.
3. Manually retract the actuator shaft by turning the
Manual Adjuster counterclockwise until it reveals
the head of the valve stem.
4. Loosen the U-bracket using a 10 mm wrench (or
4 mm hex wrench).
5. Completely open the bonnet connection
U-bracket.
6. Push the valve stem to the fully retracted position.
Then, slide the actuator off the valve bonnet.
7. Remove the actuator from the valve, being careful
not to damage the valve stem.
8. Close the bonnet connection U-bracket.