
User Manual


LOGO! software
9.2 Connecting LOGO! to a PC
LOGO!
Manual, 04/2011, A5E03556174-01
315
9.2 Connecting LOGO! to a PC
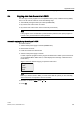
Connecting the PC cable (for LOGO! 0BA6 only)
To connect LOGO! to a PC, you need the LOGO! PC cable. See the Appendix "Order
numbers (Page 363)".
Turn the power off to the LOGO! Base Module. Remove the
cap, memory card, or combined
memory/battery card from your LOGO! and connect the cable to this socket. Connect the
other end of the cable to the serial port of your PC.
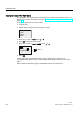
Connecting the USB PC cable (for LOGO! 0BA6 only)
You can also connect LOGO! to the PC with the LOGO! USB PC cable. For the cable's order
number, refer to the Appendix "Order numbers (Page 363)".
Remove the
cap or memory card, battery card, or combined memory/battery card from your
LOGO! and connect the cable to this socket. Connect the other end of the cable to a USB
port of your PC.
Switching LOGO! to PC ↔ LOGO! mode
Switch the LOGO! with/without display to STOP from your PC (refer to the LOGO!Soft
Comfort online help), or select the ESC / >Stop command on a device with display and
confirm the entry with 'Yes'.
When LOGO! is in STOP and online with the PC, the following PC commands are accepted:
● Switch LOGO! to RUN
● Read/write the circuit program
● Read/write the summertime/wintertime
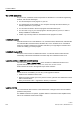
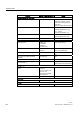
When you start the upload/download in STOP, the following display appears automatically:
3&ർ
/2*2