Actuating Terminal Equipment Controller (ATEC) Base VAV Start-up Procedures Building Technologies 140-1199 2015-05-06 Restricted
Table of Contents Before You Begin ............................................................................................................... 4 Verifying Power to the Controller ......................................................................................... 4 Setting the Application ......................................................................................................... 5 Enabling Actuators ......................................................................................
Before You Begin Verifying Power to the Controller Before You Begin NOTE: Update each controller at the field panel immediately after you have completed the controller start-up procedures and have made all other changes to the controller’s point database, including balancing, tuning, and so on. Generic Controller I/O Layout. See Wiring Diagram for application specific details.
Before You Begin Setting the Application Setting the Application Add the TEC to your job database and select one of the following applications. Application Description Application Number VAV Cooling Only 2520 VAV Cooling or Heating 2521 VAV Slave Mode 2486 After you set the application, the controller goes through a shut-down/load sequence as it switches from slave mode to the application selected. After the application loads, the calibration cycle begins.
Before You Begin Selecting Automatic Calibration Option NOTE: When MTR SETUP is changed, all enabled actuators will calibrate. Wait until each actuator has completed its calibration before continuing. Motor Enable/Reverse Values for MTR SETUP. Motor 1 Not Used Motor 1 Enabled Motor 1 Enabled and Reversed Motor 2 Not Used 0 1 3 Motor 2 Enabled 4 5 7 Motor 2 Enabled and Reversed 12 13 15 Verifying Actuator Setup 1. Command all actuators closed. Verify that they close and remain closed.
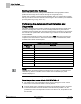
Before You Begin Setting Room Temperature Setpoints CAL SETUP Options. CAL SETUP (value) Description command before beginning the calibration routine. 2 4 (factory default value) Calibration occurs immediately after the override switch is pressed. Calibration occurs on the time interval set in the point CAL TIMER. Example: If CAL TIMER = 12, then the calibration period is 12 hours. Actual calibration is subject to a time delay based on the value of CTLR ADDRESS.
Before You Begin Setting Override Time – When the job specification requires a common heating and cooling temperature setpoint, use the following configuration: – Set DAY HTG STPT equal to DAY CLG STPT. This configures the setpoint deadband equal to zero. – If a setpoint deadband equals zero, then: CTL STPT equals RM STPT DIAL, and is limited by RM STPT MIN and RM STPT MAX.
Before You Begin Setting MIN and MAX Airflow Setpoints Box Manufacturer Flow Coefficients Manufacturer Sensor Type Value Anemostat 2-pipe without orifice 2-pipe with orifice Spider without orifice Spider with orifice 0.79 0.59 0.73 0.39 Carnes 2-pipe Flow cross 0.66 0.59 Carrier 0.59 E.H. Price/Siemens Industry Terminal Boxes 0.78 Environmental Technologies 0.79 Krueger 0.68 Metal Aire 0.72 Nailor Industries 0.69 Titus 0.60 Trane 0.
Before You Begin Setting Controller Address Setting Controller Address Set the controller address by setting CTLR ADDRESS to the appropriate number. (Addresses 00 through 98 are valid; 00 through 31 are typically used.) Update each controller at the field panel immediately after you complete the controller start-up procedures and have made all other changes to the controller’s point database (including balancing, tuning, and so on.).
Before You Begin Performing the Automated Fault Detection and Diagnostics 3. Contact your local Siemens Industry representative. Room setpoint dial failed—CHK STATUS = 2 1. The cable for the room temperature sensor may be unplugged or loose. Check both ends to ensure that the cable is securely seated. 2. The controller may be incorrectly set to use a setpoint dial with a sensor that does not have the dial. If the sensor has no dial, change STPT DIAL from YES to NO. 3.
Before You Begin Performing the Automated Fault Detection and Diagnostics 6. The box may not have been balanced correctly. Contact your local Siemens Industry representative. 7. The air velocity sensor may need calibration. Set CAL AIR to YES to run the calibration sequence. When CAL AIR returns to NO, indicating that the sequence is finished, run the checkout procedure again to see whether the problem has been corrected. Controller could not reach CLG FLOW MAX or above—CHK STATUS = 16 1.
Issued by Siemens Industry, Inc. Building Technologies Division 1000 Deerfield Pkwy Buffalo Grove IL 60089 Tel. +1 847-215-1000 Document ID 140-1199 Edition 2015-05-06 © Siemens Industry, Inc., 2015 Technical specifications and availability subject to change without notice.