
user manual

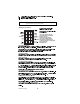


Table Of Contents
- Gigaset 2415
- Cordless Telephone System
- with Answering Machine
- Welcome!
- Diagram of Handset
- Diagram of Base
- Table of Contents
- Chapter 1
- Installation
- CONTENTS OF SYSTEM BOX
- INSTALLING THE BASE
- 1. Install the base AWAY from electrical appliances such as televisions, personal computers, micr...
- 2. Use the handset AWAY from microwave ovens and other cordless phone base units.
- 1. Locate the larger of the two connectors (RJ 45) and plug it into the back of base unit.
- 2. Plug AC power supply into a standard 110/120 VAC wall outlet.
- 3. The light on the base unit will illuminate.
- 4. Plug the smaller of the two connectors (RJ 11) into a wall telephone jack.
- INSTALLING THE HANDSET
- 1. Remove the 2 AA rechargeable Ni-Cd batteries from handset accessory kit.
- 2. Insert the batteries into handset as shown.
- 3. Remove the battery door cover from handset accessory kit and insert into grooves until it latc...
- 4. Place the cordless handset into base cradle. The handset may charge with the display facing in...
- 5. Fully charge the batteries for 8 to 12 hours before initial use.
- INSTALLING THE BELT CLIP
- Chapter 2
- Additional Handsets and Chargers
- 1. Place handset to be registered next to base. Both the base and the handset must be on.
- 2. The handset will display "Please Register." Press .
- 3. Enter System PIN and press . If you have not changed the PIN, it is 0000 (zeros). See next cha...
- 4. The display will read “Registering.” Press and hold down the Page/Registration key on the base...
- 5. When the base and handset connect, the handset display will allow you to select an intercom nu...
- 6. You will receive visual confirmation of registration: “Intercom X Registered.”
- 7. The handset is now ready for use.
- Charger for Additional Handsets
- Charger Reserve Compartment
- Optional Headsets
- Chapter 3
- Getting Started
- ANSWERING CALLS
- MAKING/ENDING CALLS
- ASSIGNING PINS
- 1. Press .
- 2. Scroll to “System Settings,” and press .
- 3. Enter existing PIN, and press . Note: Default system PIN is 0000 (zeros).
- 4. Scroll to “System PIN,” and press .
- 5. Enter the desired PIN. It must be 4 digits.
- 6. Confirm new system PIN, and press .
- 7. A successful entry will be acknowledged with a single beep.
- 1. Press .
- 2. Scroll to “Mobile Settings,” and press .
- 3. Scroll to “Local Settings,” and press .
- 4. Scroll to “Change PIN,” and press .
- 5. Enter existing PIN. Note: Default handset PIN is 0000 (zeros).
- 6. Enter the desired PIN. It must be 4 digits.
- 7. Confirm new handset PIN, and press .
- 8. A successful entry will be acknowledged with a single beep.
- REDIAL
- HOLD
- CALL WAITING
- Chapter 4
- Features
- AUTO BACKLIGHT
- CALL TIMER
- PULSE DIALING
- TEMPORARY TONE
- PREDIALING
- TRANSFER
- CONSULTATION CALL
- CALL PENDING
- 1. When an external call comes in, a tone will sound.
- 2. Other system handsets and non-system (parallel) phones will ring.
- 3. The handset display shows “Call Pending” with a softkey to “ACCEPT” on the handsets connected ...
- 4. Press the key or the “ACCEPT” softkey on the handset. Both parties of the intercom call are no...
- 5. Press to hang up. The intercom call must be reestablished.
- CALL BARGE IN
- ROOM MONITOR
- 1. Press .
- 2. Scroll to “Room Monitor”; press .
- 3. Select “Monitor Room”; press until a appears next to “Monitor Room.”
- 4. Select “Set Call Number”; press .
- 5. Enter the handset number (it must be one other than the handset you are using); press , or ent...
- 6. Select "Set Level," and press . There are three noise levels that will trigger a call. To set ...
- 7. Press then .
- 1. Press .
- 2. Select “Room Monitor”; press .
- 3. Scroll to “Monitor Room”; press until a appears next to “Monitor Room.”
- 4. Press to remove and then to return handset to idle state.
- THREE WAY CALLING (CONFERENCE)
- 1. Dial the external number or answer the call if it is an incoming call.
- 2. The second system handset presses to enter the call.
- 3. All three parties are now connected to the call.
- 4. Either party may drop out during the call by pressing and the remaining party will stay connec...
- 5. When finished, press .
- KEYPAD LOCK
- TELEPHONE LOCK
- 1. Press .
- 2. Scroll to “Telephone Lock” and press .
- 3. Enter handset PIN. Note: Default PIN is 0000 (zeros).
- 4. The handset is now locked.
- 1. Press
- 2. The display prompts “Call 911?”
- 3. Pressing or , causes the handset to dial 911 automatically.
- 4. By pressing or , causes the handset to return to the locked state.
- 1. Press .
- 2. The display shows “Telephone Locked.” Press .
- 3. Enter the handset’s PIN. Note: Default PIN is 0000 (zeros). Press .
- 4. The handset is now unlocked.
- TONES
- LOW BATTERY INDICATION
- LOCATE HANDSET
- Chapter 5
- Caller ID/Call Log
- Items Stored in the Call Log
- Call Log
- Accessing the Call Log
- 1. Press .
- 2. Select "Call Log" and press .
- 3. Use the and to view the Call Log entries.
- 4. To call a number from the Call Log, press when the name/number is on the screen.
- 5. To delete a number from the Call Log, press when the name/number is on the screen.
- 6. The "Call Log End" screen appears at the end of the Call Log.
- 7. Press or to return handset to the idle state.
- 8. The "Unavailable" screen appears if you do not subscribe to Caller ID or data was not received...
- Accessing the Call Log
- Accessing the Call Log Menu
- 1. Press while viewing a Call Log entry to display the Call Log menu.
- 2. If "Return Call" is chosen and an external line is available, the system calls the number. The...
- 3. If "Save to Directory" is chosen, the handset exits the Call Log and stores the number using t...
- 4. If "Delete Call Log" is chosen, you will be asked if you want to delete all entries. Press to ...
- 5. The "All Entries Deleted" screen will display if you select .
- Chapter 6
- Directory
- Create or Add Entries to the Directory
- Directory Access
- Working with Individual Entries
- Select an Entry
- Place a Call from the Directory
- Edit an Entry
- 1. Select "Edit Entry", and press . The name will start flashing, indicating you can change it.
- 2. To overwrite the whole name, use the key to delete the old name and start entering the new name.
- 3. To edit the number, press the key until the number starts flashing.
- 4. To overwrite the whole number, use the key to delete the old number and start entering the new...
- 5. When finished editing the entry, press .
- 6. Press again to "Save Entry."
- 7. Press .
- Delete an Entry
- Send an Entry
- 1. Select the entry to send and press .
- 2. Select "Send Entry" and press .
- 3. Enter the number of the handset to which the Directory should be sent, (e.g. Handset 2) and pr...
- 4. Handset 2 will start ringing.
- 5. Press on Handset 2. "Receiving Mode Enter PIN" will be shown in the display.
- 6. Enter Handset 2's PIN. "Data Transfer in Progress" will show on display.
- 7. To send additional entries, use the and keys to select entry and press “Send.”
- 8. Press on Handset 1when finished.
- Other Directory Functions
- Delete Directory
- Send Directory
- 1. Press .
- 2. Select "Directory" and press .
- 3. Select "Send Directory" and press .
- 4. Enter the number of the handset to which the Directory should be sent and press .
- 5. That handset will start ringing.
- 6. Press on the ringing handset.
- 7. Enter that handset's PIN and press .
- 8. The handset display will show "Data Transfer in Progress."
- 9. When finished, the originating handset display will show "Send Directory". Handset 2 will retu...
- Check Memory
- Chapter 7
- Answering System Features
- GETTING STARTED
- From the Handset:
- 1. Press 9. The display shows the current status of the answering system.
- 2. Select “OTHER”. The display shows the menu options.
- 3. Scroll to “7 TAD On/Off,” and press . Or, you may dial 7 on the handset keypad.
- 4. You will hear “Answering Machine On” or “Answering Machine Off” and the display shows the syst...
- 5. There are approximately 22 minutes of recording time.
- From the Handset:
- PLAY MESSAGES
- Play New Messages
- 1. Press 9. The display screen will indicate number of messages, “New” and ”All.”
- 2. Select NEW on left softkey and the display shows first the message number, time/date of call a...
- 3. Listen through the handset earpiece to hear message number, time received, date of call, and t...
- 4. At the end of each message, a single beep will sound. At that point, delete the message by pre...
- 5. Pressing followed by a numeric handset key permits:
- 6. When all new messages have been played, you will hear and see “End of Messages.”
- Play All Messages
- Record Announcement
- 1. Press 9. The display shows the actual status of the answering system.
- 2. Select “OTHER” for menu options.
- 3. Scroll to “Rec. Announcem,” and press . Or dial 4 on the handset keypad.
- 4. Select from “Announcement 1”, “Announcement 2”, or “Answer Only”, and press .
- 5. The handset will prompt you to Record Announcement. The display will indicate you have 30 seco...
- 6. Speak clearly into the cordless handset mouthpiece. A sample message:
- 7. Press when finished recording.
- 8. Your announcement will automatically be played back.
- 9. You may accept the announcement by pressing “OTHER”, scroll to “Set Announcement”, and press .
- 10. The answering system is now ready to accept messages.
- Specifying the Number of Rings
- Play New Messages
- RECORD MESSAGES
- 1. Press 9.
- 2. Select OTHER.
- 3. Select “Record Messages,” and press .
- 4. System prompts you to record message.
- 5. Speak clearly into the handset. When finished, press .
- 6. An acknowledgment tone sounds and the display will revert to the TAD status screen.
- Set Message Length
- 1. Press .
- 2. Scroll to “System Settings,” and press .
- 3. Enter system PIN. Note: Default system PIN is 0000 (zeros).
- 4. Scroll to “Answering Device,” and press .
- 5. Select “Message Length,” and press .
- 6. Select between “30 seconds,” “60 seconds,” “120 seconds,” or “Unlimited,” and press .
- 7. An acknowledgment tone sounds.
- Set Date/Time
- 1. Press .
- 2. Scroll to “System Settings,” and press .
- 3. Enter system PIN. Note: Default system PIN is 0000 (zeros).
- 4. Scroll to “Set Date/Time,” and press .
- 5. Using and softkeys and the handset keypad, set the date and time, and press .
- 6. Select “Save Entry” or “Cancel”, and press .
- 7. An acknowledgment tone sounds and the display shows “Entry Stored”.
- Set Call Screening
- Message Waiting Indicator
- Call Pickup
- Memory Full
- BASE UNIT FEATURES
- REMOTE ANSWERING SYSTEM FEATURES
- GETTING STARTED
- Chapter 8
- Personalizing Your System
- LANGUAGE
- 1. Press
- 2. Select "Mobile Settings" and press .
- 3. Select "Local Settings" and press .
- 4. Select "Language" and press .
- 5. Select "English", "Español", or "Français".
- 6. If you accidentally change to Spanish, you can revert back to English by pressing and selectin...
- 7. If you accidentally change to French, you can revert back to English by pressing and selecting...
- VOLUME SETTINGS
- Handset Volume
- Ringer Volume
- 1. Press .
- 2. Select “Mobile Settings” and press .
- 3. Select “Ringer Settings” and press .
- 4. Select either “Line 1 Ringer”, or “Intercom Ringer” and press . (Line 2 is used when the hands...
- 5. Select “Ringer Volume” and press . The handset will ring.
- 6. Use and to adjust the ringer volume. The handset sounds a sample tone at the chosen volume set...
- 7. Upon reaching the desired volume level, press .
- 8. An acknowledgement tone sounds and the handset returns to the previous menu.
- Ringer Pitch
- 1. Press .
- 2. Select "Handset Settings" and press .
- 3. Select "Ringer Settings" and press .
- 4. Select either "Line 1" or "Intercom Ringer" and press .(Line 2 is used when the handset is reg...
- 5. Select "Ringer Pitch" press . The handset will start ringing.
- 6. Use and change the pitch up and down. There are 16 positions.
- 7. Press when set to the desired pitch.
- 8. An acknowledgement tone sounds and the handset returns to the previous menu.
- ASSIGN NAMES
- 1. Press .
- 2. Scroll to “Base Settings”; press .
- 3. Select Base Station 1 or Base Station 2; press . Note: If you have only one base, its default ...
- 4. Select “Change Name”; press .
- 5. Enter a new name by using the handset keypad and press . (See below for instructions on enteri...
- 6. Select “Save Entry”; press .
- 7. Press to return the handset to idle.
- 1. Press .
- 2. Scroll to “System Settings”; press .
- 3. Enter System PIN. Note: Default system PIN is 0000 (zeros).
- 4. Select “Assign Name”; press .
- 5. Select the handset to be named. The screen will display a generic name for the handset, such a...
- 6. Enter a new name by using the handset keypad; press . (See below for instructions on entering ...
- 7. Select “Save Entry”; press .
- 8. Press to return the handset to idle.
- ENTERING LETTERS AND PUNCTUATION
- CALLER NUMBER, AREA CODES
- Long Distance Prefix
- 1. Press .
- 2. Scroll to “System Settings”; press .
- 3. Enter PIN; press . Note: Default system PIN is 0000 (zeros).
- 4. Scroll to Long Dist. Prefix; press .
- 5. Enter Access Number; press .
- 6. If required to insert a pause (which allows the phone company’s switch enough time to access t...
- 7. To Save, select Save Entry and press .
- 8. The screen will display “Entry Stored.”
- Deregistering a Handset
- 1. Make sure handset is ON and near the base.
- 2. Press .
- 3. Scroll to “System Settings” and press .
- 4. Enter System PIN. Note: Default system PIN is 0000 (zeros).
- 5. Scroll to “Deregister” and press .
- 6. Select the handset you want to deregister and press .
- 7. An acknowledgement tone sounds and a screen “Intercom X Deregistered” indicates deregistration...
- FACTORY DEFAULTS
- LANGUAGE
- Chapter 9
- Troubleshooting
- IMPORTANT SAFETY INSTRUCTIONS
- 1. Read and understand all instructions.
- 2. Follow all warnings and instructions including those marked on the product.
- 3. Unplug this product from the wall telephone jack and power outlet before cleaning. Do not use ...
- 4. Do not use the base unit near water. Examples include near a bathtub, wash bowl, kitchen sink,...
- 5. Do not place this product on an unstable cart, stand, or table. The product may fall, causing ...
- 6. Slots or openings in the cabinet and the back and bottom are provided for ventilation, to prot...
- 7. This product should be operated only from the type of power source indicated on the marking la...
- 8. Do not overload wall outlets and extension cords. This can result in the risk of fire or elect...
- 9. Never push objects of any kind into this product through cabinet slots as they may touch dange...
- 10. To reduce the risk of electric shock or burns, do not disassemble this product. Instead, take...
- 11. Unplug the desk station from the wall outlet and refer servicing to qualified service personn...
- a. If liquid has been spilled into the product
- b. If the product has been exposed to rain or water
- c. If the product does not operate normally by following the operating instructions. Adjust only ...
- d. If the product has been dropped or cabinet has been damaged
- e. If the product exhibits a distinct change in performance
- 12. Avoid using telephone during an electrical storm. There may be a risk of electrical shock fro...
- 13. Do not use the telephone to report a gas leak in the vicinity of the leak.
- 14. The antenna on the base unit does not retract. To prevent injury, do not place the telephone ...
- 15. Do not place metal objects on the antenna.
- 16. Do not install the base unit or cordless handset charger near microwave ovens, radio equipmen...
- 17. The base unit must be placed on a hard, flat surface and connected to both a phone wall jack ...
- 18. The cordless handset charger must be placed on a hard, flat surface and connected to an AC po...
- 19. Do not stick foreign objects into any of the holes on the base unit or cordless handset. You ...
- BATTERY SAFETY PRECAUTIONS
- 1. Only use type AA Nickel-Cadmium (Ni-Cd) or type AA Nickel-Metal Hydride (NiMH) rechargeable ba...
- 2. Always follow basic safety precautions when using and disposing of batteries. Do not dispose o...
- 3. DO NOT USE ALKALINE OR LITHIUM BATTERIES IN THE CORDLESS HANDSET BATTERY CHARGER OR RESERVE BA...
- 4. Periodically clean the charge contacts on both the charger and handset.
- 5. DO NOT mix old and new batteries in this product.
- 6. Position the positive (+) battery contact to match the diagram in the cordless handset and spa...
- 7. Charge the batteries provided with, or identified for use with, this product only in accordanc...
- 8. Exercise care in handling batteries in order not to short the batteries with conducting materi...
- 9. Do not open or mutilate the batteries. Released electrolyte is corrosive and may cause damage ...
- 10. Only use the same rechargeable battery type. DO NOT combine Ni-Cd and NiMH rechargeable batte...
- 11. During charging, batteries heat up. This is normal and is not dangerous.
- 12. Do not use non-Siemens charging devices. This could damage the batteries.
- 13. Do not place the batteries in contact with water or fire. DO NOT dispose of batteries in a fi...
- 14. The RBRC™ Battery Recycling Seal on the nickel-cadmium (Ni-Cd) batteries contained in the bat...
- FCC INFORMATION
- INDUSTRY CANADA CERTIFICATION
- LIMITED WARRANTY
- IMPORTANT SAFETY INSTRUCTIONS
- Capítulo 1: Instalación
- CONTENIDOS DE LA CAJA DEL SISTEMA
- INSTALACIÓN DE LA BASE
- 1. Instale la base en un LUGAR ALEJADO de otros electrodomésticos como televisores, computadoras ...
- 2. Cuando utilice el auricular, manténgalo separado de hornos microondas y de otras bases de telé...
- 1. Ubique el conector más grande (RJ 45) y enchúfelo en la parte posterior de la base.
- 2. Conecte la fuente de poder de AC a un tomacorrientes mural estándar de 110/120 VAC.
- 3. Se enciende la luz piloto de la base de la base indicando que el equipo está encendido.
- 4. Enchufe el conector más pequeño (RJ 11) en un enchufe telefónico de pared.
- INSTALACIÓN DEL AURICULAR
- 1. Retire las 2 baterías AA de NI-Cd recargables del conjunto de accesorios del auricular.
- 2. Introduzca las baterías en el auricular según se muestra en la figura.
- 3. Retire la cubierta de baterías del conjunto de accesorios del auricular e insértela en las ran...
- 4. Coloque el auricular inalámbrico en la base. El auricular se carga incluso si no esta orientad...
- 5. Cargue totalmente las baterías por un período de 8 a 12 horas antes de utilizar el teléfono po...
- INSTALACIÓN DEL CLIP PARA CINTURÓN
- Capítulo 2: Auriculares y cargadores adicionales
- 1. Sitúe cerca de la base el auricular que desee registrar. Tanto la base como el auricular deben...
- 2. El auricular mostrará en la pantalla “Please Register” (Por favor, registre el auricular). Pre...
- 3. Introduzca el PIN del sistema y luego presione . Si el PIN no ha sido modificado, éste es 0000...
- 4. La pantalla mostrará “Registering” (Registrando). Mantenga presionado el botón Page/Registrati...
- 5. Cuando se conecta con la base, la pantalla del auricular permitirá seleccionar un número de in...
- 6. La pantalla confirmará que el auricular ha sido registrado mostrando “Intercom X Registered” (...
- 7. El auricular ya está preparado para su uso.
- Cargador para auriculares adicionales
- Compartimiento de reserva de carga
- Audífones opcionales
- Capítulo 3: Preparación
- IDIOMA
- 1. Presione
- 2. Seleccione "Mobile Settings" (Configuración del móvil) y luego presione .
- 3. Seleccione "Local Settings" (Configuración local) y luego presione .
- 4. Seleccione "Language" (Idioma) y luego presione .
- 5. Seleccione "English", "Español" o "Francais".
- 6. Si cambia a English por accidente, puede volver a español presionando y seleccionando “System ...
- 7. Si cambia a francés por accidente, puede volver a español presionando y seleccionando "Config....
- CÓMO CONTESTAR LLAMADAS
- CÓMO HACER Y CONCLUIR LLAMADAS
- ASIGNAR PINS
- 1. Presione .
- 2. Desplácese hasta "System Settings" (Configuración del sistema) y luego presione (Aceptar) .
- 3. Introduzca el PIN actual . Nota: El PIN preprogramado es 0000 (ceros).
- 4. Desplácese hasta "System PIN" (PIN del sistema) y luego presione .
- 5. Introduzca un PIN nuevo. Este debe estar de 4 dígitos.
- 6. Corrobore el PIN y luego presione .
- 7. Se escuchará un solo bip cuando el sistema reconozca el PIN.
- 1. Presione .
- 2. Desplácese hasta "Mobile Settings" (Configuración del móvil) y luego presione .
- 3. Desplácese hasta "Local Settings" (Configuración local) y luego presione .
- 4. Desplácese hasta "Change PIN" (Modificar PIN) y luego presione .
- 5. Introduzca el PIN actual. Nota: El PIN preprogramado es 0000 (ceros).
- 6. Introduzca un PIN nuevo, este debe estar de 4 dígitos.
- 7. Corrobore el PIN, y luego presione .
- 8. Se escuchará un solo bip cuando el sistema reconozca el PIN.
- CÓMO EFECTUAR UN REDISCADO
- CÓMO PONER LLAMADAS EN ESPERA
- LLAMADA ENTRANTE EN ESPERA
- IDIOMA
- Capítulo 4: Funciones
- ILUMINACIÓN AUTOMÁTICA
- CONTADOR DE TIEMPO DE LLAMADA
- Tono temporal
- PREDISCADO
- CÓMO TRANSFERIR UNA LLAMADA
- LLAMADA DE CONSULTA
- LLAMADA PENDIENTE
- 1. Dos auriculares se encuentran en intercomunicación.
- 2. Cuando se reciba una llamada, sonará un tono.
- 3. Se escuchará la campanilla en los teléfonos no pertenecientes al sistema (paralelos).
- 4. El auricular muestra "Call Pending" (llamada pendiente) con un botón “ACCEPT” para aceptar.
- 5. Presione o “ACCEPT”.
- 6. Presione (FIN).
- INTERRUPCIÓN DE LLAMADA
- MONITOREO DE HABITACIONES
- 1. Presione .
- 2. Desplácese hasta "Room Monitor" (Monitoreo de habitaciones) y luego presione (Aceptar).
- 3. Seleccione "Monitor Room" (Monitor de habitaciones), presione hasta que aparezca una adyacente...
- 4. Seleccione "Set Call Number" (Especificar número) y luego presione (ACEPTAR).
- 5. Introduzca el número del auricular (diferente del que está usando) y presione (Aceptar) o intr...
- 6. Seleccione "Set Level" (Especificar nivel) y luego presione (Aceptar). Hay tres niveles de rui...
- 7. Presione (Aceptar) y luego (Fin).
- 1. Presione .
- 2. Seleccione "Room Monitor" (Monitoreo de habitaciones) y luego presione (Aceptar).
- 3. Desplácese hasta "Monitor Room" (Monitor de habitaciones), presione hasta que aparezca una ady...
- 4. Presione (Aceptar) para borrar la marca y luego (Fin) para apagar el auricular.
- LLAMADA A TRES VÍAS (CONFERENCIA TELEFÓNICA)
- 1. Marque el número externo o conteste la llamada entrante.
- 2. La segunda persona debe presionar en su auricular.
- 3. Las tres personas quedan conectadas simultáneamente.
- 4. Cualquiera de los participantes puede salirse de una llamada presionando y los demás quedarán ...
- 5. Al terminar la conversación, presione .
- BLOQUEO DEL TECLADO
- BLOQUE EL AURICULAR
- TONO DE LOS BOTONES
- ALERTA DE FUERA DE ALCANCE
- INDICADOR DE BATERÍA DESCARGADA
- CÓMO UBICAR UN AURICULAR
- Capítulo 5: Identificador de llamadas/Registro de llamadas
- Elementos almacenados en el registro de llamadas
- Registro de llamadas
- Cómo tener acceso al Registro de llamadas
- 1. Presione .
- 2. Seleccione "Call Log" (Registro de llamadas) y luego presione .
- 3. Utilice los botones y para ver el contenido del registro.
- 4. Para llamar a un número del registro, presione cuando el número o el nombre aparezcan en la pa...
- 5. Para borrar un número del registro, presione DEL (Borrar) cuando el número o el nombre aparezc...
- 6. Aparece la pantalla "Call Log End" (Fin del registro) al final del mismo.
- 7. Presione para desocupar el auricular.
- 8. Aparece "Unavailable”(Sin Información) en la pantalla cuando no se está suscrito al sistema de...
- Cómo tener acceso al Registro de llamadas
- Menú del Registro de llamadas
- 1. Para poder mostrar el menú, presione mientras ve un número del registro.
- 2. Si se selecciona "Dial Number" (Marcar número) y hay línea disponible, el sistema efectúa la l...
- 3. Si se selecciona "Save to Directry" (Grabar en directorio), el auricular desactiva el registro...
- 4. Si se selecciona "Delete Call Log" (Borrar Registro de llamadas) el sistema preguntará si se d...
- 5. Si selecciona aparecerá "All Entries Deleted" (Se han borrado todos los números).
- Chapter 6: Directorio
- Acceso al directorio
- Tratamiento de Registros individuales
- Cómo seleccionar un registro
- Cómo efectuar una llamada desde el directorio
- Cómo editar un registro
- 1. Seleccione "Edit Entry" (Editar registro) y luego presione . El nombre comenzará a destellar, ...
- 2. Para sobreescribir el nombre completo, simplemente introduzca el nuevo.
- 3. Para modificar el número, presione hasta que el número comience a destellar.
- 4. Para sobreescribir el número completo, simplemente introduzca el nuevo.
- 5. Al concluir, presione .
- 6. Presione nuevamente para grabar el registro.
- Cómo borrar un registro
- Cómo enviar un registro
- 1. Seleccione el registro a enviar y luego presione .
- 2. Seleccione "Send Entry" (Enviar registro). Presione .
- 3. Introduzca el número del auricular al que se enviará el directorio (Por ejemplo, "Auricular 2"...
- 4. Se escuchará la campanilla en el auricular 2.
- 5. Presione en dicho auricular. Aparecerá la frase próximo registro del directorio .
- 6. Presione en el auricular 1.
- Otras funciones del directorio
- Cómo borrar un directorio
- 1. Presione .
- 2. Seleccione "Directory" (Directorio) y luego presione .
- 3. Seleccione "Delete Directory" (Borrar directorio) y luego presione .
- 4. Cuando la pantalla muestre "Delete All Entries?," (¿Borrar todo?), presione .
- 5. Aparece en la pantalla la frase "All Entries Deleted" (Se han borrado todos los registros).
- 6. Presione .
- Cómo enviar un directorio
- 1. Presione .
- 2. Seleccione "Directory" (Directorio) y luego presione .
- 3. Seleccione "Send Directory" (Enviar directorio) y luego presione .
- 4. Introduzca el número del auricular al que se enviará el directorio y luego presione .
- 5. Se escuchará la campanilla en dicho auricular. Presione en el auricular que recibe la llamada.
- 6. Al concluir la transferencia, presione en el auricular que hizo la llamada.
- Cómo verificar la memoria disponible
- Cómo borrar un directorio
- Capítulo 7: Funciones de la contestadora telefónica
- PREPARACIÓN
- 1. Presione 9. La pantalla muestra el estado actual de la contestadora.
- 2. Seleccione "OTHER" (Otro) para ver las opciones del menú.
- 3. Desplácese hasta "7 TAD On/Off" (7TAD Activar/Desactivar) y luego presione .
- 4. Escuchará a través del auricular "Answering Machine On" (Contestadora activada) y la pantalla ...
- Cómo grabar un mensaje saliente
- 1. Presione 9. La pantalla muestra el estado actual de la contestadora
- 2. Seleccione "OTHER" (Otro) para ver las opciones del menú.
- 3. Desplácese hasta "Rec. Announcem" (Grabar mensaje saliente) y presione .
- 4. Seleccione una de las tres opciones (Announcement 1, Announcement 2, Answer Only) (Mensaje 1, ...
- 5. El auricular le indicará que está listo para grabar. La pantalla le indicará que cuenta con 30...
- 6. Hable claramente al micrófono del auricular.
- 7. Presione STOP (Detener) al terminar de grabar. Se reproducirá el mensaje automáticamente.
- 8. Seleccione "OTHER" (Otro), seleccione “Set Announcement” y luego presione .
- 9. La contestadora está lista para recibir mensajes.
- Cómo especificar el número de campanillas
- 1. Presione .
- 2. Desplácese hasta "System Settings" (Configuración del sistema) y luego presione OK (Aceptar).
- 3. Introduzca el PIN del sistema. Nota: El PIN preprogramado es 0000 (ceros).
- 4. Seleccione "Answering Device" (Contestadora) y luego presione .
- 5. Seleccione "Number of Rings" (Número de campanillas) y luego presione .
- 6. Seleccione una de las opciones siguientes: 2 rings, 4 rings or Auto 2/4 toll saver (2 campanil...
- 7. Se escuchará un tono de confirmación y la pantalla volvera al modo inicial.
- Cómo especificar la duración del mensaje
- 1. Presione .
- 2. Desplácese hasta "System Settings" (Configuración del sistema) y luego presione .
- 3. Introduzca el PIN del sistema. Nota: El PIN preprogramado es 0000 (ceros).
- 4. Seleccione "Answering Device" (Contestadora) y luego presione .
- 5. Seleccione "Message Length" (Longitud del mensaje) y luego presione .
- 6. Seleccione una de las opciones siguientes: 30 segundos, 60 segundos, 120 segundos o Ilimitado ...
- 7. Se escuchará un tono de confirmación y la pantalla volvera al modo inicial.
- Cómo especificar la Fecha/Hora
- 1. Presione .
- 2. Desplácese hasta "System Settings" (Configuración del sistema) y luego presione .
- 3. Introduzca el PIN del sistema. Nota: El PIN preprogramado es 0000 (ceros).
- 4. Seleccione "Set Date/Time" (Función Fecha/Hora) y luego presione .
- 5. Especifique la fecha y la hora utilizando los botones y y el teclado del auricular, y luego pr...
- 6. Seleccione "Save Entry" (Grabar registro) y luego presione .
- 7. Se escucha un tono de confirmación y la pantalla muestra "Entry Stored" (Registro grabado).
- CÓMO ESCUCHAR LOS MENSAJES
- Cómo escuchar mensajes nuevos
- 1. Presione 9. La pantalla le indicará el número de mensajes,”New” and “All”(los Nuevos y Todos).
- 2. Seleccione NEW (Nuevos) en el botón izquierdo.
- 3. Escuche el número del mensaje, la hora y fecha en que se recibió y luego el mensaje.
- 4. Al final del mensaje, se escuchará un solo bip. En este momento se puede borrar el mensaje pre...
- 5. El presionar y un botón numérico del auricular permite:
- 6. Cuando se hayan reproducido todos los mensajes, escuchará y verá en la pantalla "End of Messag...
- Cómo escuchar todos los mensajes
- Cómo grabar los mensajes
- INDICADOR DE MENSAJE EN ESPERA
- Cómo escuchar mensajes nuevos
- FUNCIONES DE LA BASE
- Activar/Desactivar la contestadora.
- Escuchar los mensajes
- 1. Si hay mensajes nuevos, sin escuchar, el botón ON/OFF destella.
- 2. Presione PLAY (Escuchar) o el botón ON/OFF rápidamente para escuchar los mensajes NUEVOS.
- 3. Presione y mantenga el botón PLAY (Escuchar) para reproducir TODOS los mensajes
- 4. Los mensajes escuchados quedarán grabados hasta que se borren.
- Borrar mensajes
- Detener
- Repetir mensajes
- Ignorar
- Avance rápido de mensajes
- Monitorear llamadas
- Controlar volumen
- Botón Modo
- FUNCIONES DE LA CONTESTADORA POR VÍA REMOTA
- 1. Marque el número. Al conectarse, se escuchará el mensaje saliente.
- 2. Presione * durante el mensaje.
- 3. Introduzca el PIN del sistema
- Menú por vía remota
- Escuchar mensajes
- Grabar mensaje
- Borra mensaje
- Grabar mensaje saliente
- Escuchar mensaje saliente
- Seleccionar mensaje saliente
- Activar/Desactivar la contestadora
- Estado/Ayuda
- PREPARACIÓN
- Capítulo 8: Personalización del sistema
- AJUSTE DE VOLUMEN
- Volumen del auricular
- Volumen de la campanilla
- 1. Presione .
- 2. Seleccione "Mobile Settings" (Configuración del móvil) y luego presione .
- 3. Seleccione "Ringer Settings" (Configuración de la campanilla) y luego presione .
- 4. Seleccione "External Ringer" (Campanilla externa) o "Intercom Ringer" (Campanilla del intercom...
- 5. Seleccione "Ringer Volume" (Volumen de la campanilla) y luego presione . Se escucha la campani...
- 6. Utilice los botones ] y para ajustar el volumen. Existen siete posiciones, incluyendo mute (si...
- 7. Presione cuando el volumen esté al nivel deseado. Se escuchará un tono de confirmación y la pa...
- Tono de la campanilla
- 1. Presione .
- 2. Seleccione "Handset Settings"(Configuración del auricular). Presione .
- 3. Seleccione "Ringer Settings" (Configuración de la campanilla). Presione .
- 4. Seleccione "External Ringer" (Campanilla externa) o "Intercom Ringer" (Campanilla del intercom...
- 5. Seleccione "Ringer Pitch" (Tono de la campanilla) y luego presione . Se escucha la campanilla ...
- 6. Utilice los botones y para modificar el tono. Existen 16 opciones.
- 7. Presione cuando se alcance el tono deseado. Se escuchará un tono de confirmación y la pantalla...
- ASIGNAR NOMBRES
- 1. Presione .
- 2. Desplácese hasta “Base Settings” (Configuración de la base) y luego presione (Aceptar).
- 3. Seleccione Base Station 1 ó Base Station 2 y presione . Nota: Si sólo tiene una base, su nombr...
- 4. Seleccione “Change Name” (Cambiar nombre) y luego presione (Aceptar).
- 5. Introduzca el nuevo nombre utilizando el teclado del auricular y luego presione OK (Aceptar). ...
- 6. Seleccione “Save Entry” (Guardar registro) y luego presione (Aceptar).
- 7. Presione (Fin) para apagar el auricular.
- 1. Presione .
- 2. Desplácese hasta “System Settings” (Configuración del sistema) y luego presione (Aceptar).
- 3. Introduzca el PIN del sistema. Nota: El PIN preprogramado es 0000 (ceros).
- 4. Seleccione “Assign Name” (Asignar nombre) y luego presione (Aceptar).
- 5. Seleccione el auricular a nombrar. En la pantalla aparecerá el nombre genérico del auricular; ...
- 6. Introduzca el nuevo nombre utilizando el teclado del auricular y luego presione (Aceptar). (Ve...
- 7. Seleccione “Save Entry” (Guardar registro) y luego presione (Aceptar).
- 8. Presione (Fin) para apagar el auricular.
- Introducción de mayúsculas y puntuación
- CÓDIGOS DE ÁREA Y NUMERO QUE LLAMA
- Prefijos De Larga Distancia
- 1. Presione .
- 2. Desplácese hasta “System Settings” (Configuración del sistema) y luego presione (Aceptar).
- 3. Introduzca el PIN y presione . Nota: El PIN preprogramado es 0000 (ceros).
- 4. Desplácese hasta “Long Dist. Prefix” (Prefijo de larga distancia) y presione .
- 5. Introduzca el número deseado y presione .
- 6. Si precisa introducir una pausa en la secuencia (para dar tiempo a la compañía telefónica para...
- 7. Para guardar los cambios, seleccione “Save Entry” (Guardar registro) y presione .
- 8. La pantalla muestra la frase “Entry Stored” (Registro guardado).
- Sacar un auricular del registro de la base
- 1. Presione
- 2. Desplácese hasta "System Settings" (Configuración del sistema) y luego presione .
- 3. Introduzca el PIN del sistema. Nota: El PIN preprogramado es 0000 (ceros).
- 4. Desplácese hasta "Deregister" (Cancelar registro) y luego presione .
- 5. Un tono de confirmación indica que se ha completado la cancelación.
- LIMITED WARRANTY
- AJUSTE DE VOLUMEN
Draft 11-12-99 72
/,0,7(':$55$17<
THIS LIMITED WARRANTY IS IN LIEU OF ALL OTHER WARRANTIES EXPRESS OR IMPLIED. ANY IMPLIED
WARRANTIES, INCLUDING BUT NOT LIMITED TO THE IMPLIED WARRANTIES OF MERCHANTABILITY AND FITNESS
FOR A PARTICULAR PURPOSE, SHALL BE LIMITED TO THE DURATION OF THIS WRITTEN LIMITED WARRANTY. WE
DISCLAIM ANY LIABILITY FOR DAMAGES FOR LOSS OF USE OF THE PRODUCTS, LOSS OF TIME, INCONVENIENCE,
INJURY TO ANY PERSON, OR DAMAGE TO PROPERTY CAUSED BY THE PRODUCT, LOSS OF REVENUE OR PROFIT, OR
DAMAGES FOR ANY FAILURE TO PERFORM. IN NO EVENT SHALL WE BE LIABLE FOR ANY SPECIAL, INCIDENTAL,
PUNITIVE OR CONSEQUENTIAL DAMAGES EVEN IF WE ARE ADVISED OF THE POSSIBILITY OF SUCH DAMAGES.