
Data Sheet for Product


5 / 14
Siemens QAX9x.4 – Wireless and battery-less room units with EnOcean interface CM2N1663en_04
Building Technologies 2015-12-23
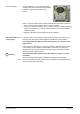
Mounting
You do not need to open the device for mounting.
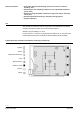
Claws
Mounting plate
Frame
The mounting plate is asymmetric! Make sure the claws are located on the sides.
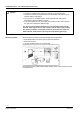
• Attach the mounting plate to the wall.
• Place the frame on top.
• The sensor can now easily snapped onto the mounting plate claws.
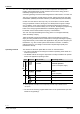
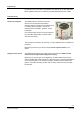
An adhesive pad (71 x 71 mm) is provided for mounting
on glass surfaces. In addition to secure placing, this
ensures visual protection for the device rear.
• Place the pad at the desired location.
• Remove the protective film and press down the pad
inside out. This prevents air bubbles that later will be
visible on the glass.
• Pull off the second protective film and firmly press down the entire room device
(including mounting plate and frame) on the pad.
Check the conditions for correct operation prior to attaching the adhesive pad.
Removing the adhesive pad is difficult and time-consuming.
A list of usable frames is available on the intranet at:
https://workspace.sbt.siemens.com/content/00001062/intranet/RA/supplier_for_
qax84or9x_4.doc
You can also use frames from various other manufacturers (clarify suitability
beforehand).
Remove the springs on the device rear when combined with Feller frames.
Wall mounting
Mounting on glass
surfaces
List of usable frames
Note