*9000471630* Ø Ú Û Þ â 9000471630 O Montageanleitung Installation instructions Instrucciones de montaje Notice de montage Istruzioni per il montaggio é ë ì î ô Installatievoorschrift Instrukcja montażu Instruções de montagem Инструкция по монтажу Montaj kılavuzu PLQ PD[ PLQ PLQ PD[ PLQ PLQ
D 9 9 a / 1 9 9
D de Ø Montageanleitung Sicherheitshinweise Lesen Sie die Gebrauchsanweisung für das Gerät, bevor Sie es installieren und benutzen. Die Abbildungen in dieser Anleitung dienen der Veranschaulichung. Der Hersteller ist jeglicher Verantwortung enthoben, wenn die Bestimmungen dieses Handbuchs nicht eingehalten werden.
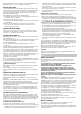
Bei Arbeitsflächen aus Holz firnissen Sie die Schnittflächen mit Spezialleim, um sie vor Feuchtigkeit zu schützen. Einbau des Geräts Je nach Modell kann die Klebedichtung bereits im Werk angebracht worden sein. Die Klebedichtung dann keinesfalls entfernen, sie verhindert Durchsickern. Wenn die Dichtung nicht werkseitig angebracht wurde, kleben Sie sie an den unteren Rand des Kochfelds. Abb. 3. Zur Befestigung des Geräts am Einbaumöbel: 1.
This appliance cannot be installed above fridges, washing machines, dishwashers or similar. An oven must have forced ventilation to install a hob above it. Check the dimensions of the oven in the installation manual. If an extractor fan is installed, you must follow the installation manual's instructions, always keeping a minimum distance of 650 mm to the hob. Preparation of the kitchen unit (fig. 1-2) Make an appropriate size cut in the work surface.
El cable de alimentación debe fijarse al mueble para evitar que toque partes calientes del horno o placa de cocción. Los aparatos con alimentación eléctrica deben conectarse a tierra obligatoriamente. No manipule el interior del aparato. Si es preciso, llame a nuestro Servicio Técnico. Antes de la instalación Este aparato corresponde a la clase 3, según la norma EN 301-1 para aparatos a gas: aparato encastrado en un mueble. Los muebles próximos al aparato deben ser de materiales no inflamables.
Avant toute action, coupez l'alimentation électrique et de gaz de l'appareil. Cet appareil n'a été conçu que pour un usage domestique ; son usage commercial ou professionnel n'est en aucun cas permis. Cet appareil ne peut pas être installé dans des yachts ou des caravanes. La garantie ne sera valable que si l'usage pour lequel il a été conçu a été respecté.
Attention ! À la fin, placez l'étiquette autocollante, en indiquant le nouveau type de gaz, près de la plaque signalétique. it â Istruzioni per il montaggio Indicazioni di sicurezza Leggere attentamente le istruzioni dell'apparecchio prima di procedere all'installazione e all'uso. Le immagini presenti in queste Istruzioni di montaggio sono indicative. Il fabbricante declina qualsiasi responsabilità in caso di mancata osservanza delle disposizioni del presente manuale.
A seconda del gas utilizzato dall'apparecchio, v. tabella III, agire di conseguenza: A: stringere a fondo le viti di bypass. B: allentare le viti di bypass fino alla corretta regolazione del gas in uscita dai bruciatori: verificare che regolando la manopola tra il massimo e il minimo, il bruciatore non si spenga, né si verifichino ritorni di fiamma. C: le viti di bypass devono essere sostituite da un tecnico autorizzato. D: non manipolare le viti di bypass.
pakket is beschikbaar bij onze technische dienst. Volg onderstaande stappen op: A) Vervangen van de inspuiters (afb. 7-7a): 1. Verwijder de roosters, hoedjes en verspreiders. 2. Vervang de inspuiters met de sleutel die beschikbaar is via onze technische dienst, met code 340847 (voor branders met dubbele of driedubbele vlam code 340808), zie tabel II. Zorg dat de inspuiter niet losraakt bij het verwijderen of bevestigen hiervan op de brander. Draai deze goed aan, om de lekdichtheid te garanderen.
Jeśli wymagane jest wykonanie złącza cylindrycznego, należy wymienić złącze kolankowe zamontowane fabrycznie na złącze znajdujące się w torebce z akcesoriami. Rys. 5a. Proszę pamiętać o założeniu uszczelki. : Niebezpieczeństwo ulatniania się gazu! Po przeprowadzeniu jakichkolwiek czynności przy elementach podłączenia gazu, należy sprawdzić szczelność połączeń. Producent nie ponosi odpowiedzialności w przypadku, gdy połączenie utraci szczelność na skutek wykonanych operacji. Podłączanie prądu (rys.
2. Encastre e centre a placa de cozedura. Faça pressão sobre os extremos até que se apoie em todo o seu perímetro. 3. Gire os grampos e aperte-os bem. A posição dos grampos depende da espessura da superfície de trabalho. Fig. 4. Desmontagem da placa de cozedura Desligue o aparelho das tomadas eléctrica e de gás. Desaparafuse os grampos e proceda de modo inverso ao da montagem. Ligação a gás (fig.
При монтаже вытяжного устройства необходимо следовать инструкциям соответствующего руководства по монтажу, следя за тем, чтобы расстояние от вытяжки до варочной панели по вертикали было не менее 650 мм. Данный прибор относится к классу “Y”: не допускается замена кабеля питания пользователем, это может делать только сервисный центр. Необходимо учитывать тип кабеля и его минимальное сечение. Подготовка тумбы (рис. 1-2) Адаптация к другому виду газа Проделайте в столешнице отверстие нужных размеров.
Bu cihaz sadece havalandırması iyi yerlere, havalandırma ile ilgili koşullar ve yürürlükteki kurallara uygun olarak kurulmalıdır. Cihaz, bir yanmış atık boşaltım mekanizmasına bağlanmamalıdır. Elektrik kablosu, fırın veya pişirme tezgahının sıcak kısımlarına temas etmemesi için mutfak mobilyasına sabitlenmelidir. Elektrik beslemesi ile çalışan cihazların tüm bağlantıları mutlaka topraklanmalıdır. Cihazın iç kısmını kurcalamayınız. Gerekirse Teknik Servisimizi çağırınız.
,, ,,, *$6 * * * * * * * * * * * * * * * * * * * * * * * * * * * * * * * * * * * * * * * * * * * * * * * * * * * * * * * * * * * * * * * * * * * * * * * * * * * * * * * * * PEDU