
Commissioning Instructions

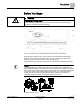
Table Of Contents
- Before You Begin
- Verifying Power
- Verifying Slave Mode Application Number
- Setting Controller Address
- Setting the Application
- Setting Display Units
- Testing the Operator Display Panel
- Setting Duct Area
- Setting Airflow Sensing Input
- Setting Flow Coefficients
- Automatic Calibration Option
- Setting Blank Display
- Setting Display Weight
- Setting Display Resolution
- Changing Exhaust Minimum
- Changing Exhaust Maximum
- Changing Face Velocity Setpoints and OCC Delay
- Setting Hi and Low Warn Limits
- Setting Hi and Low Alarm Limits
- Setting Alarm Timer
- Setting Emergency Setpoint
- Setting Emergency Timer
- Setting Remote Purge
- Fume Hood Specific Sash Setup and Calibration
- Setting External Face Area Input
- Setting Sash Area Alarms
- (Optional) Setting Damper Control — Application 2941
- Checkout of Damper — Application 2941
- (Optional) Setting Airflow Input Type
- (Optional) Calibrating the DP Transmitter without an Autozero Module
- (Optional) Calibrating with an Autozero Module
- AVS FAILMODE
- Setting Airflow Control — Application 2942
- Range of Airflow Control — Application 2942
- Configuring Airflow Control — Application 2942
- Setting AO2 Range
- Setting AO2 Voltage Minimum
- Start-up/Decommission Mode
- Loop Tuning Procedures
- Flashing Controller Firmware

Before You Begin
Setting Airflow Sensing Input
9
Siemens Industry, Inc. Start-up Procedures 140-1321
Restricted 2015-11-04
Setting Airflow Sensing Input
The controller allows the exhaust volume to be measured in several different methods.
Differential pressure on AVS-1 (default)
Differential pressure signal on AI3
Linear flow signal on AI3
When not using the default method, refer to the
Setting Airflow Input Type
section.
Setting Flow Coefficients
CAUTION
It is extremely important that the flow readings are accurate.
Inaccurate flow readings will cause control problems.
NOTE:
The
Laboratory Room Exhaust Air Terminal Technical Specification Sheet
(149-320),
has a full listing of the latest coefficients for multiple setups. Those coefficient values
are initial values only. Actual values must be verified by the balancer.
NOTE:
Make sure the airflow sensors are calibrated before determining flow coefficients.
This is done by setting CAL AIR to
YES
and waiting for it to switch back to NO on its
own.
1. Set FLO COEF to initial values that match your hardware configuration.
2. Work with a balancer to obtain the exact value(s) for FLO COEF using the following
formula to fine-tune the flow coefficient:
New Flow Coefficient = (Actual Volume ÷ Controller Volume) × Old Flow Coefficient
The actual volume is the value obtained from the balancer’s measurements. The
controller volume is the value obtained from EXH VOL. If the controller volume is not
within 5% of the actual volume, repeat the procedure until it is. Loose or kinked flow
sensor tubes, tubing connected backwards, and improper actuator and/or Damper or
Venturi Air Valve operation can cause inaccurate readings.
Automatic Calibration Option
This only functions when using the OAVS. To set CAL SETUP, select the automatic
calibration option that best meets the job’s requirements from the following table. It is
highly recommended that Option 4, the factory default mode, be used.
At the start of the calibration cycle, the controller automatically sets CAL AIR to YES.
When the cycle is complete, it sets CAL AIR to
NO.