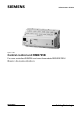
s Infrastructure & Cities Synco 700 Central control unit RMB795B For room controllers RXB/RXL and room thermostats RDG/RDF/RDU Basic documentation CE1P3122en 18.01.
Siemens Switzerland Ltd Sector Infrastructure & Cities Building Technologies Division Gubelstrasse 22 6301 Zug Schweiz Phone +41 41-724 24 24 www.siemens.com/sbt © 2004-2012 Siemens Switzerland Ltd Subject to change 2 / 144 Siemens Building Technologies Central control unit RMB795B CE1P3122en 18.01.
Contents 1 Overview ................................................................................................10 1.1 Central control unit RMB795B ................................................................10 1.2 Product range..........................................................................................10 1.3 Synco™ 700 topology.............................................................................12 1.4 Equipment combinations.............................................
6.2 Select language ......................................................................................40 6.3 Select temperature unit ...........................................................................41 6.4 Operator unit display contrast .................................................................41 6.5 6.5.1 6.5.2 6.5.3 6.5.4 Text entry.................................................................................................41 Device name .....................................
8.4 8.4.1 8.4.2 8.4.3 8.4.4 Setpoints and setpoint adjustments ........................................................69 Setpoints .................................................................................................69 Application example, setpoint priority, setpoint master...........................70 Summer/winter compensation ................................................................71 Relate setpoint adjustment using room unit QAW740 ............................72 8.
11.1 11.1.1 11.1.2 11.1.3 Overview .................................................................................................95 Direct application.....................................................................................95 Indirect application ..................................................................................96 Explanation example 2-pipe system .......................................................97 11.2 11.2.1 11.2.2 Function "Heat request" ...........................
15.2.3 15.2.4 15.2.5 15.2.6 15.2.7 15.2.8 Pulse valency ........................................................................................124 Overflow value ......................................................................................124 Setting and resetting meter readings....................................................125 Display meter readings .........................................................................125 Assign texts......................................................
/ 144 Siemens Building Technologies Central control unit RMB795B Contents CE1P3122en 18.01.
/ 144 Siemens Building Technologies Central control unit RMB795B Overview CE1P3122en 18.01.
1 Overview 1.1 Central control unit RMB795B What is the RMB795B central control unit? The RMB795B is a central control and operator unit for room control in connection with SyncoTM RXB/RXL and with room thermostats RDG/RDF/RDU. It significantly extends the field of use of the SyncoTM system. Note The room controller RXB/RXL and Synco room thermostats RDG/RDF/RDU are referred to below as individual room controller.
Extension modules Operator units Operator unit 1 Room thermostat RDG N3191 N3192 Room thermostat RDU N3172 Universal module RMZ787 N3146 Universal module RMZ785 N3146 Module connector RMZ780 N3138 Operator unit, plug-in type RMZ790 N3111 Operator unit, detached RMZ791 N3112 Type of room unit QAW740 N1633 Service tool N5655 OCI700.1 11 / 144 Siemens Building Technologies Central control unit RMB795B Overview CE1P3122en 18.01.
1.3 Synco™ 700 topology Use of RMB795B central control unit Web-Browser Internet Router Ethernet OZW772... RDG.. RX.. RMZ791 RMZ790 RDF/RDU RMZ792 RMS.. RMH.. RMK.. RMU.. RMZ78.. OCI700.1 Key RMU.. Universal controller RMK.. RMZ790 RMZ791 RMZ792 RMZ78.. RMS.. RMH Operator unit, plug-in type Operator unit, detached Bus operator unit Extension modules Switching and monitoring device Heating controllers RMB795B RX.. RDG.. RDF.. RDU.. OCI700.1 OZW772.. 1.
1.5 Supplementary information Product documentation In addition to this Basic Documentation, the product documents listed below provide detailed information about the safe and correct deployment and operation of Synco™ 700 products in building services plant. Type of document Range description: Synco™700 Basic documentation: Central control unit RMB795B Data sheet: Central control unit RMB795B Data sheet: Universal modules RMZ78..
Outfit / functions Precooling Fan only Boost heating Emergency heating Off Room operating mode output per room group Setpoint per room group RMB795B Summer/winter compensation. Setpoints (absolute) Setpoint readjustment via room unit QAW740 Setpoint priority for RMB or room controller Highest / lowest temperature supervision per room group Alarms Free fault inputs (digital or analog) Fault status signal relay.
Wiring When wiring the system, strictly segregate the AC 230 V section from the AC 24 V safety extra-low voltage (SELV) section to ensure protection against electric shock hazard! Storage and transport For storage and transport, observe the limits from the relevant data sheets at all times. If in doubt, contact your supplier or Siemens Building Technologies. Maintenance Synco™ 700 products are maintenance-free and require only cleaning at regular intervals.
2 Operation Synco™ 700 devices may only be operated by staffs who has been instructed by Siemens Building Technologies or their delegates and whose attention has been drawn to potential risks. 2.
Brief description 2.2 Operation with operator unit 2.2.1 Operator unit functions The operator unit is used to make all settings and readouts required for operating the RMB795B central control unit. All entries made on the operator unit are transmitted to the central control unit where they are handled and stored. The operator unit itself does not store any data. The information for the user is generated by the central control unit and forwarded to the operator unit where it is displayed. 2.2.
Backlit display Display examples When one of the operating elements is activated, the backlit display will automatically be switched on. It switches off and the start page appears when inactive for 30 minutes. The pictures below show a number of typical displays, including explanations: Display Explanation Wednesday 22.12.04 Welcome 14:52 Start page Information Main menu » Setting level Selection of a setting parameter, e.g. on the main menu of the user level. Main menu Room group 1... Inputs...
2.2.3 Operating levels Two operating levels There are 2 operating levels: • Info level • Setting level These 2 levels are always available, no matter which access level is active. Info level Important plant data can be queried in this level. Setting level The setting level is arranged in the form of a menu structure. It provides for reading and adjustment of data points. Using the INFO button, explanations relating to the menus with the individual data points can be displayed.
Changing the access level Switching from the current access level to some other access level: 1. Press the OK knob and the ESC button simultaneously: The Access levels menu is displayed. 2. Select the required access level by turning the OK knob and confirm by pressing the knob. 3. Enter number 7 to access the password level. 20 / 144 Siemens Building Technologies Central control unit RMB795B Operation CE1P3122en 18.01.
3 Room group philosophy 3.1 What is a room group? Room group A room group is a combination of 1 to maximum 63 individual room controllers (rooms) with the following features: • Same operating mode • Same setpoints and setpoint adjustments • Simultaneous release of night cooling • Same fire and smoke extraction zones For details, refer to Section 8 Function block: "Room group" Number of room groups On the RMB795B central control unit, up to 10 independent room groups can be released.
Floor plan, third floor The following floor plan shows usage of the rooms on the third floor by Logistics Ltd and Sport Ltd: D: 102 G: 4.2.1 D: 101 G: 4.1.1 Conference room D: 103 G: 3.1.1 Reception D: 104 G: 3.2.1 D: 105 G: 3.3.1 Office Office Conference room Company: Logistics LLC D: 114 G: 1.1.1 D: 106 G: 3.4.1 RMB795 D: 107 G: 3.5.1 D: 113 G: 2.4.1 Sport Ltd Office Office Office Office D: 110 G: 2.1.1 D: 109 G: 3.7.1 D: 112 G: 2.3.1 D: 111 G: 2.2.
ZU Conference Room group 1 Conference room D: 114 G: 1.1.1 D: 113 G: 2.4.1 Sport Ltd Office Office D: 112 G: 2.3.1 D: 111 G: 2.2.1 Office D: 110 G: 2.1.1 ZU Raumgruppe 2 2 Room group Key D = Device address, G = Geographical zone (Apartment . Room . Subzone). Room group definition On the KNX bus, several rooms are summarized in a room group via geographical zone addressing. This address comprises three parts: Geographical zone: Apartment . room . subzone (e. g. 2 . 1 .
For HVAC applications with RXB room controllers, use only the geographical zone (apartment) and the geographical zone (room). Extending the address by the geographical zone (room) results in room control by means of RXB room controllers. This in turn allows for individual operating interventions (from an operator unit and the control unit via the bus) such as room setpoint correction in any room or on any device.
The following example shows the completed protocol for the plant of Sport Ltd: Example for Sport Ltd Possible settings Information RMU RMH RMK OZW RMB RXB QAW Plant 1 Sport Ltd Main office Room number 1 X Room/Room group 3 X X - X RMU RMH, OZW RMB RMK 7.. RMZ 771... 795 Device type X KNX-ID (example ID: 00FD000016D5) 2 3 X X - X X - RXB QAW RMB795 .... 740 X - 307 308 308 308 Conference Main office Office Office Office Office RXB.. RMB795 [2] RXB.. RXB.. RXB..
4 Introduction Engineering and commissioning guidelines These guidelines describe the procedure to be followed when engineering and commissioning the RMB795B central control unit. Based on the HVAC plant concept, the RXB/RXL room controllers and Synco room thermostats RDG/RDF/RDU must be assigned to room groups.
Planning 1: Implement HVAC plant concept Steps required to implement the HVAC plant concept for the RMB795B central control unit: step 1 Procedure Decide on the device types, their number and application 2 Define device installation 3 RXB/RXL room controller and Synco room thermostats RDG/RDF/RDU combined into room groups Enter the devices on the floor plan 4 Notes Number of RXB/RXL..., RMB795B, QAW740, RMU7x, RDG/RDF/RDU, etc.
Complete planning and commissioning protocol These are the individual steps to be followed when completing the SyncoTM planning and commissioning protocol "Communication" (C3127): Step 1 2 3 4 5 6 7 8 9 10 11 12 13 14 15 Installation Procedure Enter general information about the plant and the device types Press button Menu > Update fields Notes Fields that need not be completed appear with hatched lines Enter the device addresses of all users To be adopted from the floor plans Define the names and roo
Commissioning Commission the plant line by line. And these are the individual steps to be followed: Step 1 2 3 4 Procedure Make addressing of the line couplers. Commissioning RXB/RXL room controller and Synco room thermostats RDG/RDF/RDU using the service tool OCI700.1 1. Select the application and adjust the setting values according to HVAC planning. 2. Set RXB/RXL communication data points according to the SyncoTM Planning and Commissioning Protocol C3127.
5 Commissioning 5.1 Before you start 5.1.1 Safety notes Preparation for use and commissioning of Synco™ 700 products must be undertaken by qualified staff trained by Siemens Building Technologies. • When the central control unit is in commissioning mode, control will remain off, that is, all outputs are set to a defined OFF state. • In that case, all internal safety functions of the central control unit will also be deactivated. Communication also stays inactive. 5.1.
Recommendation If, during "Economy" mode at night, power failures are to be expected, it is recommended to change RXB/RXL setting parameter "Veto time" (timer function) from 30 minutes to 0 minutes. This ensures that, after power-up, the RXB/RXL room controllers will not work in "Comfort" mode for 30 minutes. 5.2 Start commissioning 5.2.1 Start during initial power-up Starting The central control unit RMB795B automatically enters the commissioning menu when the AC 24 V power supply is applied.
5.2.2 Procedure To navigate from the main menu to commissioning: Step 1 2 3 5.3 Introduction Start from the main menu Action To select the Access level menu, press simultaneously the OK knob and the ESC button. Select operating line Password level and confirm with the OK knob. Enter the password (7). Select and confirm operating line Commissioning with the OK knob Result The password level is active.
5.3.2 Selection Assign extension modules The number of inputs and outputs of the RMB795B central control unit can be increased by attaching extension modules. Each central control unit RMB795B can be connected to these modules: Number Type 1 RMZ785 2 RMZ787 Activation and assignment Purpose Extension of inputs with 8 universal inputs.
5.4 Application examples The central control unit RMB795B can be adapted to the needs of the plant with the help of configuration diagrams, see Sec. 19.2 Configuration diagram. 5.5 Functions Create free configuration Wiring test A wiring test can be made after all peripheral devices are connected. We recommend testing after configuration and settings are complete. It provides the following functions: • Display read-only values for inputs. • Switching aggregates connected to the outputs, e.g.
5.6 Procedure Exit commissioning Exit the Commissioning menu as follows: Step 1 2 5.
5.8 Set user level On completion of commissioning, set the user level, i.e. access level for the plant operator. To do this, exit the main menu and proceed as follows: Step 1 2 5.9 Purpose Display values Exit password level Action Press simultaneously the OK knob and the ESC button Select the user level by turning the OK knob and confirm by pressing the knob. Result The Access levels menu is displayed. The selected user level is set and the previous menu reappears.
the Basic configuration menu, in front of type reference "B" on operating line "Plant type. In addition, on operating line "Plant type changed" of the "Device information" menu, the value is set to "Yes". Note The asterisk is set automatically when leaving the Extra configuration menu, even if nothing has been changed.
6 General settings 6.1 Time of day and date 6.1.1 Operating principle Yearly clock The central control unit has a yearly clock with time of day, weekday and date. 2 time formats available The following time formats can be selected: 24 h: • The date is displayed as dd.mm.yyyy (day.month.year). Example: 31.05.2005 • The time of day is displayed as hh:mm (hours: minutes). Example: 15:56 Am/pm • The date is displayed as mm/dd/yy (month/day/year).
6.1.2 Clock time operation Setting values clock time operation Communication Depending on the master clock , different sources for the time of day can be used. This can be selected on the RMB795B central control unit. Time of day and date can be exchanged via bus.
Recommendation System should always be run in synchronized mode, that is, in master-slave operation (1 master, all others as slaves). 6.1.
6.3 Setting values Select temperature unit On the RMB795B, the unit of temperature can be switched between °C /K and °F. Main menu > Commissioning > Settings > .... or Main menu > Settings > Device > Operating line Unit 6.4 Setting values Range Degrees Celsius, degrees Fahrenheit Factory setting °C Operator unit display contrast The contrast of the display can be matched to the environment.
Main menu > Commissioning > Settings > … or Main menu > Settings > Texts > Business cards Settings Operating line Business card line 1 Business card line 2 Business card line 3 Business card line 4 6.5.4 Range Max. 20 characters. Max. 20 characters. Max. 20 characters. Max. 20 characters. Factory setting Editable text Text can be assigned to the following elements: Maximum length of the text is 20 characters. • • • • • • • • • Inputs (see chapter 7.6.). Room groups (see chapter 8.2).
7 Inputs 7.1 Universal inputs (Xx) 7.1.1 General settings Connectable signals The following signals can be connected to universal inputs: • Digital signals • Passive analog signals. • Active analog signals. Number of universal inputs The following number of universal inputs is available: RMB795B: 6 inputs. If more inputs are required, the number can be increased by a maximum of 3 extension modules: RMZ785: 8 inputs. RMZ787: 4 inputs.
Configuration Main menu > Commissioning > Extra configuration > Input identifier > Operating line N.X1 Adjustable values / remarks Activation of function by assigning one of these identifier to the input: Outside air temperature, °C, %, g /kg, kJ /kg, W /m², m /s, bar, mbar, Pa, ppm, universal 000.0, universal 0000, digital, pulse. ... RMZ787(2).
Fault status messages No. 100 Text Simulation inputs active Effect Non urgent message; must not be acknowledged. The fault message remains active until "Simulation" is returned to "----". This is to make certain it will not be forgotten on the plant to reset the simulation. Note The simulated input terminal value is used only locally; it is not sent via bus to other controllers. 7.1.
Type Setting values If the unit is °C, the type is selectable. The following types are available: • Ni1000 • 2xNi1000 • T1 • Pt1000 • 0..0.10 V If the unit is not °C, the type is always 0...10 V. Main menu > Commissioning > Settings > … or Main menu > Settings > Inputs > ...X... Operating line Type 7.2.
Main menu > Commissioning > Settings > … or Main menu > Settings > Inputs > ...X... Setting values Operating line Correction 7.2.4 Factory setting 0K Connection examples for sensors You can connect a passive LG-Ni 1000 temperature sensor to the input. They must be connected according to the following diagram: G 3121A06 1 sensor LG-Ni 1000 Range − 3.0…+3.0 B... AC 24 V LG-Ni 1000 B G X...
Main menu > Commissioning > Settings > … or Main menu > Settings > Inputs > ...X... Setting values Operating line Type It is also possible to do averaging with 4 passive sensors. They must be connected according to the following diagram: G B... B... AC 24 V LG-Ni 1000 B G M B... LG-Ni 1000 B M B... LG-Ni 1000 B M LG-Ni 1000 B M X... G0 N G0 Input configuration Main menu > Commissioning > Extra configuration > Input identifier Operating line N.X1 Setting values 7.2.
7.2.6 Problem and solution Configuration Multiple use of sensors Not all sensor signals can be routed via bus to another device. For this reason, function "Multiple use of sensors" allows for wiring a passive signal at an input terminal directly to a Y-output and provide it as a DC 0…10 V signal. The signal can then be fed to other devices. Main menu > Commissioning > Extra configuration > Sensor multiple use Operating line Signal Y N.
7.3.4 Connection diagram Connection example Potential-free contacts can be connected to the digital inputs. The connection must be made according to the following diagram: 3121A09 G AC 24 V S... G X... M X... M G0 N G0 Input configuration Main menu > Commissioning > Extra configuration > Input identifier Operating line N.X2 Setting values Main menu > Commissioning > Settings > .... or Main menu > Settings > Inputs > ...X... Operating line Normally closed 7.3.
7.4 Pulse An input with this identifier can be used to connect a pulse counter. Pulses with the following specification can be received: • Mechanical sources (Reed contact) without Namur circuitry, max. pulse frequency of 25 Hz and a min. pulse duration of 20 ms. • Electronic pulse source with max. pulse frequency of 100 Hz and min. pulse duration of 5 ms. 7.4.
7.5 Outside temperature 7.5.1 Connection choices 2 possible signal sources For the outside temperature, the following 2 signal sources can be used: • Outside air temperature connected locally to the terminal, activated by the identifier "Outside temperature" • Outside temperature via bus. 4 variants In addition, it is important whether or not "Outside temperature" communication is active.
7.5.3 Prerequisites Outside temperature via bus The outside temperature can only be provided via the bus if communication is active and an outside temperature set. To enable different outside temperatures to be delivered via the bus (e.g. outside temperature on the northern side of the building for the air conditioning plant, and outside temperature on the eastern side of the building for heating zone "East", etc.), they must be assigned to specific outside temperature zones.
Fault status messages Only 1 outside temperature allowed per zone Fault status message Outside temperature via bus available? Fault status message No. 101… 224 Text [N.X1] sensor error.. [RMZ787(2).X4] sensor fault Effect Non urgent message; must not be acknowledged. For each Synco system, only one outside temperature can be sent within the same zone, i.e. only one outside temperature master.
Operating line RMZ787(1).X2 RMZ787(1).X3 RMZ787(1).X4 RMZ787(2).X1 RMZ787(2).X2 RMZ787(2).X3 RMZ787(2).X4 Range Max. 20 characters. Max. 20 characters. Max. 20 characters. Max. 20 characters. Max. 20 characters. Max. 20 characters. Max. 20 characters. Factory setting RMZ787(1).X2 RMZ787(1).X3 RMZ787(1).X4 RMZ787(2).X1 RMZ787(2).X2 RMZ787(2).X3 RMZ787(2).X4 55 / 144 Siemens Building Technologies Central control unit RMB795B Inputs CE1P3122en 18.01.
Connections 8 Function block: "Room group" 8.1 Overview The following illustration displays the function block "Room group 1"and its connections and selection fields as shown on the configuration sheet: x x x x Room group 1 x x x x SA EA Enable Setpoint prio Relay 1 2 Q Q The connections and functions are described in the following sections.
x x x x Y x x Y x x x N.X6 x Y x x SIGNAL Y SIGNAL Y N.X5 x Y x Y x x x x x x x SA EA SA EA Enable Setpoint prio Relay 1 2 Room group 1 SIGNAL Y N.X4 Digital Raumgruppe Room 2group 2 Enable Setpoint prio Relay 1 2 Q Q Q Q 3121Z01en x Y N.X3 Digital SIGNAL Y N.X2 Digital SIGNAL Y SIGNAL Y N.
Operating line Room group 6... Room group 7... Room group 8... Room group 9... Room group 10... "Room operating mode" menu Range Max. 20 characters. Max. 20 characters. Max. 20 characters. Max. 20 characters. Max. 20 characters. Factory setting Room group 6... Room group 7... Room group 8... Room group 9... Room group 10... 8.3 Room operating modes per room group 8.3.
Display values Main menu > Room group 1…10 > Room operating mode > Operating line State Cause 8.3.2 Comments Room operating mode contact, room operating mode selector, timer function, special day, holidays, time switch, external master, night cooling, preselection room group control. Room mode selection via digital inputs Purpose This function enables the user to make external interventions in the running program (e.g.
Configuration Main menu > Commissioning > Extra configuration > Room group 1…10 > Room operating mode > Operating line Timer function Adjustable values / remarks ---, N.X1, N.X2, ... (digital inputs only). Main menu > Commissioning > Settings > … or Main menu > Settings > Room group 1....10 > Room operating mode > Setting values Operating line Timer function Function diagrams Range 0...
Configuration Main menu > Commissioning > Extra configuration > Room group 1…10 > Room operating mode > Operating line Room operating mode input 1. Setting values Adjustable values / remarks ---, N.X1, N.X2, ... (digital inputs only). Main menu > Settings > Room group 1…10 > Room operating mode > Operating line Preselected room optg mode.
Recommendation The potential-free contacts for the digital inputs should be open when in the normal position, enabling the RMB795B central control unit to operate in automatic mode in the event of an open-circuit. 8.3.3 Room operating mode selection using room unit QAW740 Activate function A room operating mode preselection can be configured using a QAW740 room unit for each room group. It is active, if "QAW Zone (Apart.)" is set under communication (see Sec. 13.2.2 "Room group 1...
8.3.5 Assignment and function 7-day time switch Every function block "Room group" has its own 7-day time switch. This time switch is firmly coupled to the relevant room group. The 7-day time switch controls the change of the operating modes and the associated setpoints in accordance with the 7-day program entered. Different times from one week to another are not possible. Operation of the 7-day time switch is described in the operating instructions B3121.
Fault status messages No. 5102 ... 5192 8.3.6 Assignment and function Text >1 Time switch in room group 1 Effect Non-urgent message; must be acknowledged. >1 Time switch in room group 10 Non-urgent message; must be acknowledged. Holidays/special days For each room group, a specific holidays / special day program is available. This program is firmly coupled to the relevant room group.
Effect The holiday / special day program in this central control unit is active. Holiday / special day program also acts on all other devices where the holiday / special day program is switched off (slave) and which lie in the same holiday / special day zone. Diagram 3140Z09 Setting Master Note Settings for holiday/special day zone is described in Sec. 13.2.2 "Room group 1...
Annual holidays or special days Annually reoccurring holidays or special days can be entered by setting an asterisk "*" for the annual setting. Otherwise, the entries will automatically be deleted after the relevant days have been handled. Priority If 2 entries overlap, following applies: Special days have priority over holidays. Example of a special day during the holiday period: Stage play in the school building.
Troubleshooting Fault status messages When handling errors, a differentiation is made between the 2 following cases: Only one master may be set per holiday / special day zone (see Sec. 13.2.2 "Room group 1…10). If several devices are set as masters, a fault status message occurs. The device, that receives two holiday/special day signals, sends the message.
Configure operating mode relays 1 and 2 Main menu > Commissioning > Extra configuration > Room group 1…10 > Room operating mode Operating line Operating mode relay 1 Operating mode relay 2 Settings Adjustable values / remarks ---, N.Q1 ... (only free relays) / assignment of operating mode relays ---, N.Q1 ... (only free relays) / assignment of operating mode relays On the Settings menu, the operating mode relay to be energized can be defined for each room operating mode.
Display values The Outputs menu shows the state of the operating mode relays: Main menu > Room group 1…10 > Room operating mode > Operating line Operating mode relay 1 Operating mode relay 2 8.3.8 Purpose Setting values Off, On Functional check / wiring test During the wiring test, the room operating mode outputs of the room groups can be switched directly, enabling their function to be checked.
Impact on the setting values Setting values The values can be influenced as follows: • Per room group by summer / winter compensation (refer to the following subsection) • Individually on each RXB/RXL room controller by a QAX room unit, see functional description of RXB/RXL (Technical Handbook CA2A3899en) • The absolute heating/cooling setpoints can be changed individually on each room controller. It can be influenced accordingly with the setting setpoint priority.
8.4.3 Summer/winter compensation Activation For each room group, summer / winter compensation can be parameterized. It is active when the outside temperature is available. This function always acts independently of setting parameter "Setpoint priority". Operating principle Summer / winter compensation shifts the setpoint of the RXB/RXL room controllers according to the outside temperature.
8.4.4 Relate setpoint adjustment using room unit QAW740 A setpoint adjustment can be configured using a QAW740 room unit for each room unit.. It is active, if "QAW Zone (Apart.)" is set under communication (see Sec. 13.2.2 "Room group 1...10") and the same zone is preselected on the QAW740 room unit. Activate function Operating principle The setpoint readjustment via the QAW740 room unit acts on the relevant setpoint readjustments of the RMB room group.
Notes Passing on the setpoints from the RMB795B central control unit to the RXB/RXL room controllers takes place only if, during room group configuration, "Setpoint priority" has been set to "Yes". Additional setpoint readjustments can be made on the RXB/RXL room controller by means of the QAX room unit or the OCI700.1 service tool. These settings are not shown in the examples. 8.
Operating line temperature Zone (Apart.Room) Limit values Description Geographical zone address of the RXB/RXL room controller with the lowest room temperature, e.g. 2.4. For each room group, a high and a low limit value for the room temperature can be set. If one of the limit values is crossed, a fault status message will be delivered. Main menu > Commissioning > Settings > … or Main menu > Settings > Room group 1...10 > Room temp.
8.7.1 Activate function The function optimum start control can be activated for each room group. Setting values Main menu> Commissioning > Settings > … or Main menu > Settings > Room group 1..10 > Optimum start control > Operating line Area Factory setting Optimum start control.
The maximum precooling/preheating period can be limited. Main menu > Commissioning > Settings > … or Main menu > Settings > Room group 1..10> Optimum start control > Operating line Area Factory setting Forward shift on max 0...2880 min 360 min All plant elements are switched in accordance with the next operating mode during optimum start control. 8.7.3 Troubleshooting Optimum start control is not executed without a reference room temperature. 8.
Control function Cooling Night purge Precooling Off Test Emergency heating Fan only Free cooling Influence on RXB/RXL room controller Influence on RDG/RDF/RDU room thermostats Cooling only Individual room controllers can only cool. The heating sequences on the individual room controllers are locked. Note: This superposed control function is relevant to 4-pipe systems only. It does not impact the H/C changeover in a 2-pipe system! Air damper open to the max position, fan at Air damper open to max.
8.8.1 Priorities Priority sequence for individual room controller room operating mode/individual room control: 1. Smoke extraction 2. Fire alarm off 3. Room operating mode/control functions (combined) 4. Optimum start control 5. Night cooling 8.9 Purpose Night cooling The "Night cooling" function is used in the summer during non-occupancy times to cool down the rooms with cool outside air. Cooling energy can thus be saved during occupancy times. 8.9.
Switch-on conditions The switch-on conditions for the "Night cooling" function are the following: • Room temperature (OT actual value) > Comfort heating setpoint plus 1 K. • Outside temperature (OT actual value) > Outside temperature limit value (OT limit value). • Room temperature minus outside temperature > Room-outside temp delta.
8.10.1 Configuration Activate function The function is activated by configuring a digital input: Main menu > Commissioning > Extra configuration > Room group 1…10 > Fire and smoke extraction > Operating line Fire alarm off 8.10.2 Adjustable values / remarks ---, X1, X2, ... (digital inputs only). Operating principle N.X2 x Y x x x N.X3 x Y x x N.X4 Digital x Y x x N.X5 x Y x N.X6 x Y x x Y x x Q Q 8.10.
8.11 Function Function block "Room group" can be switched to "Smoke extraction" mode via 1 or 2 digital signals at its inputs "SA" and "EA". 8.11.1 Configuration Smoke extraction Activate function The function is activated by configuring at least 1 digital input Xx: Main menu > Commissioning > Extra configuration > Room group 1…10 > Fire and smoke extraction > Operating line Smoke extraction supply air Smoke extraction extract air 8.11.2 Adjustable values / remarks ---, X1, X2, ...
x x x x Y x x x Y x x x Y N.X6 x Y x x SIGNAL Y N.X5 SIGNAL Y N.X4 x Y x x x x x x x SA EA SA EA Enable Setpoint prio Relay 1 2 Enable Setpoint prio Relay 1 2 Raumgruppe 2 3121Z03en x Y N.X3 SIGNAL Y N.X2 Digital SIGNAL Y N.X1 SIGNAL Y Smoke extraction with extract air for the rooms in room groups 1 and 2 is triggered via the signal from digital input X2: SIGNAL Y Configuration example: Smoke extraction extract air Q Q Q Q x x x x Y x x x Y x x x Y x N.
9 Logic 9.1 Function C Purpose The logic block is used to make logical links to multiple input signals. 10 independent logic function blocks are available. Operation selector One operation selector can be activated per logic function block to allow the use to manually intervene at the upper main menu level. Auto, Off and On can be selected. The intervention acts on the output of the logic function block.
Note The logic function blocks are processed ascending from 1 to 10. The following logic tables show the settable logic functions AND, NAND, OR, NOR, EXOR and EXNOR using the example of 2 inputs.
[Logic A] function [Logic B] function [Logic C] function Logic relay Operation selector Time format AND, NAND, OR, NOR AND, NAND, OR, NOR AND, NAND, OR, NOR, EXOR, EXNOR ---, N.Q1, N.Q2, .../ (only free outputs) Yes, no h:m, m:s OR NOR AND --No m:s Notes The format "h:m" can be used if an advanced time format is required for the logic function (> 59.59 m:s). Important The changeover impacts all time-related parameters of the logic function block (switch-on/off delay and min. switch-on/off time).
9.4.2 Switch-on delay / switch-off delay For the logic output, a switch-on delay and switch-off delay can be set. Setting values Main menu > Commissioning > Settings > … or Main menu > Settings > Logic functions > Logic 1...10 > Operating line Switch-on delay Switch-off delay Range 00.00...59.59 m:s or* 00.00...23.50 h:m. 00.00...59.59 m:s or* 00.00...23.50 h:m. Factory setting 00.00 m:s 00.00 m:s * See reference on time format in Sec. 9.2.
Important note If the configuration of the operation selector is reset subsequently, you must first ensure that it is set to Auto. Otherwise, the output constantly remains "On" or "Off". 9.6 Wiring test During the wiring test, the logic block outputs can be directly switched via the control switch. During the wiring test, delay and on times are inactive. Wiring test Main menu > Commissioning > Wiring test > Outputs > Operating line Logic 1…10 9.7 Comments Off, On.
9.8 Application examples 9.8.1 Application example storage tank charging The following application example shows a solution for a self-holding function: • The measured value connected to logic A input 1 gives the switch-on command for storage tank charging. • The measured value at logic B input 1 terminates charging.
9.8.2 Application example RS flip-flop The following application example shows a solution for an RS flip-flop: N.X1 N.X2 Set NOR NOR Logic 1 N.Q1 C Logic 2 C N.Q2 Required configuration: Operating line Logic 1 > [Logic A] function Logic 2 > [Logic A] function Comments NOR NOR Truth table for the RS flip-flop: Setting 0 0 1 1 Reset Q Q State 0 1 0 1 X 0 1 X 1 0 Save Reset Setting Undetermined 89 / 144 Siemens Building Technologies Central control unit RMB795B Logic CE1P3122en 18.01.
Purpose 10 Function block: "faults" 10.1 Purpose and activation Function block "Faults" collects all fault status messages, evaluates them and responds to protect building and plant. Faults Activation To activate the function block, 1 of the inputs Aux1…Aux10 must be configured. Many faults are acquired automatically and need not be specifically configured in function block "Faults". These faults are described with the relevant function. Example: "Fire alarm off". 10.
• Limit value "Fault on": Limit value from which the fault status message is generated. • Limit value "Fault off": Limit value for the normal state (difference to "Limit value fault on" is the switching differential) Setting values Main menu > Commissioning > Settings > … or Main menu > Settings > Faults > Fault input 1…10 Operating line Fault status signal delay Alarm acknowledgement Fault priority Limit value fault on Limit value fault off Notes Range 00.00...59.55 m:s. Factory setting 00.
No. 9004 9005 9006 9007 9008 9009 9010 >1 fault input faulty Standard text Effect Ditto Ditto Ditto Ditto Ditto Ditto Ditto [Fault inp 4] fault [Fault inp 5] fault [Fault inp 6] fault [Fault inp 7] fault [Fault inp 8] fault [Fault inp 9] fault [Fault inp 10] fault The fault with the highest priority is sent over the KNX bus. If more than one fault input wants to report priority "Urgent", the message ">1 fault input faulty" is sent at the highest priority.
Configuration Main menu > Commissioning > Extra configuration > Faults Operating line Fault relay 1 Fault relay 2 Settings Setting values Adjustable values / remarks ---, N.Q1 ... ( free relays only) / assignment of fault relay. ---, N.Q1 ... ( free relays only) / assignment of fault relay. The following settings can be made separately for Fault relay 1 and 2: • Fault priority: Priority at which the relay is to be energized.
10.6 Wiring test Functional check / wiring test During the time the wiring test is made, the 2 fault relays can be activated directly: Main menu > Commissioning > Wiring test > Outputs Operating line Fault relay 1 Fault relay 2 Comments Off, On. Off, On. 94 / 144 Siemens Building Technologies Central control unit RMB795B Function block: "faults" CE1P3122en 18.01.
Types of application 11 Distribution zones 11.1 Overview With regard to the distribution zones, we differentiate between 3 types of application: • Direct application (normal situation) • Indirect application • 2-pipe system (or changeover system) The individual applications are depicted and described below. 11.1.1 Direct application Konnex TP1 RMH760 Controller 1 RMB795 Controller 3 Controller 2 RXB... Controller 4 RXB... Controller 5 RXB...
11.1.2 Indirect application Konnex TP1 RMH760 Controller 1 Controller 2 RMB795 RXB... Controller 3 2 Controller 4 RXB... Controller 5 RXB...
11.1.3 Explanation example 2-pipe system Konnex TP1 RMH760 Controller 1 RMB795 Controller 2 Controller 3 Manual changeover 1 Controller 4 RXB... Controller 5 RXB... Controller 6 2 2 1 T RXB... 3121Z12en RMU7...
Activation For the "Heat request" function to become activated, a heat distribution zone must be assigned to it on the consumption side: Main menu > Commissioning > Communication > Distribution zones Operating line Heat distribution zone 11.2.2 Request signals Range ----, 1…31 Operating principle The RMB795B central control unit receives the following types of request signals via bus: • Heat demand in %, e.g. from a room control system "RXB/RXL with heating coil" • Valve position in %, e.g.
The maximum flow temperature readjustment can be parameterized. With valve positions ≤ 90 %, the current flow temperature is: "Heating flow setpoint" – "Flow temperature reduction max". “Control action” To adapt the control system to the plant, the control action of the flow temperature can be adjusted to the setpoint shifts in 3 steps (fast, medium, slow). Request evaluation Setting "Request evaluation" is used to determine if the max value or the average of the requests is to be used.
11.3.3 Purpose Heat demand modulating In addition to the heat demand relay, the heat demand can be made available at a modulating output N.Yx for other devices. Main menu > Commissioning > Extra configuration > Heat demand Configuration Operating line Heat demand modulating Adjustable values / remarks ---, N.Y1, N.Y2, ... Activate output.
11.3.4 Purpose Setting values Communication Heat demand can be transmitted over the bus to other devices of a heat distribution zone on the generation side if communication is activated (see Sec. 13). A "Heat distribution zone source side" must be defined, see Sec. 13.2.3 "Distribution zones" menu item". Main menu > Commissioning > Communication > Distribution zones > Operating line Heat distr zone source side 11.3.
All these signals are handled simultaneously. Main menu > Commissioning > Settings > … or Main menu > Settings > Refrigeration request > Setting values Operating line Limit value request on Limit value request off Chilled water flow setpoint Flow temperature increase max Control action Request evaluation Factory setting 10 % 5% 6 °C 0…100 K 0K Slow, medium, fast. Average, maximum. Medium. Maximum.
"Refrigeration demand" signal generation 11.5 "Refrigeration demand" function block 11.5.1 Purpose The function block generates a "Refrigeration demand" signal that can be used by other devices. The refrigeration demand is provided in the form of the following signals: • Digital signal at output Q ("Refrigeration demand relay") • Analog signal at output Y ("Refrigeration demand modulating") • Bus signal ("Communication") Refrigeration demand Relay Q Y The 3 variants are described below. 11.5.
Explanations relating to the setting values "Setpoint at 0 V" determines the flow temperature setpoint at DC 0 V. "Setpoint at 10 V" determines the flow temperature setpoint at DC 10 V. "Limit value" denotes "Limit value for refrigeration demand": Temperatures above this level are interpreted as no refrigeration demand. As long as the flow temperature setpoint does not exceed the set limit value, DC 0 V output signal is issued.
Setting values Main menu > Commissioning > Wiring test > Outputs Operating line Refrigeration demand relay Refrigeration demand modulating Application Comments ---, 0...100 % (relay switches >= 1 %). ---, 0...100 % 11.6 Function block "H/C changeover" 11.6.1 Use and functions The function block heating/cooling changeover is used to changeover the operating mode (heating or cooling) in 2-pipe systems.
11.6.2 Activate function To activate the function, Yes must be set in operating line "2-pipe heating/cooling system". Configuration Main menu > Commissioning > Extra configuration > Heating/cooling ch'over Operating line 2-pipe heating /cooling system 11.6.3 Area No, Yes Factory setting No Preselected operating mode input H/C Changeover with operating mode selector.
Example: Changeover by outside temperature When value "Heating off/cooling on" is exceeded, the H/C changeover signal is changed to cooling. When value "Heating off/cooling off" is breached, the H/C changeover signal is changed to heating. "Attenuation can be set for the input signal.
5 bus 4 RXB RXB 1 T T T RMB795 2 Key Note Ref .
11.6.7 Heating/cooling ch'over relay If the H/C-signal is not to be sent to the bus but rather to a relay output to e.g. switch a valve or to be routed to a non-communicative device, the H/C changeover relay can be configured accordingly. Configuration Main menu > Commissioning > Extra configuration > Heating/cooling ch'over Operating line Heating/cooling changeover relay Area ---, N.Q1, N.
12 Volume flow balancing VAV Introduction Forced control signals on the ventilation unit to set maximum air volume is required to setup the air volume. You can override the volume flow controller (open) for the corresponding air distribution zone regardless of the current available energy demand signals for heating or cooling. Activating the "Simulation VAV supply air" or "Simulation VVS extract air" switches on the supply air or extract air fan respectively.
The fault message "Simulation VAV supply air" or "Simulation VAV extract air" are sent while simulating the volume flow controller. Fault status messages No. 3931 Text Simulation VAV supply air 3932 Simulation VAV extract air Effect Non urgent message; must not be acknowledged. Non urgent message; must not be acknowledged. A fault message "Smoke extraction" or "Fire" can be triggered on other decentralized air handling units (e. g.
13 Introduction See basic documentation "Communication via KNX bus" (order number: CE1P3127en) for a detailed description of communications. The following section only gives a description of the most important settings so that a basic plant can be commissioned. 13.
"Clock time operation" operating line If the system uses a common time of day, one of the devices must be defined as the master, all the other devices are slaves. Using "Remote setting clock slave = Yes", the time of day can be adjusted at the respective slave. This is then sent to the master, which passes it on to all the other devices. When set to "Autonomous", the neither sends nor receives the clock time.
Setting values Main menu > Commissioning > Communication > Room group 1…10 > Operating line Holidays/special day operation Range Autonomous, slave, master. Holidays / special day zone 1...
Function principle • Universal inputs, digital and analog outputs of the RMB795B can be used as send objects (to the send zones). • Universal inputs of the RMB795B can be used as receiving objects (in the receiving zones). • The data is exchanged as if the device terminals were hardwired. Number of transmission / reception zones A maximum of 32 transmission and reception zones each are permitted for each line (for the KNX bus, see N3127, P3127).
Overview Setting values Reception zones Inputs (N.X1…A7(2).X4) Main menu > Commissioning > Communication > LTE reception zones > Operating line N.X1…A7(2).X4 Setting values Transmission zones Inputs (N.X1…A7(2).X4) Digital outputs (N.Q1…A7(2).Q5) Analog outputs (N.Y1…N.Y2) Range ---, 1…4095 Factory setting --- Main menu > Commissioning > Communication > LTE transmission zones > Operating line N.X1…A7(2).X4 N.Q1…A7(2).Q5 N.Y1…N.
Example 2 A RMB795B logic output wants a second device to be made available as release command. A release command generated in device 1 is sent as transmission object via a digital output. Device 2 uses this command to start the rooftop fan. In the reverse direction, any operating message in device 2 is sent as a transmission via a digital output to device 1, where it is processes accordingly.
Device 2 In RMS705B, device 2 (rooftop fan), the following is configured: Main menu > Commissioning > Extra configuration > Input identifier > Operating line N.X1 Range Digital Factory setting Main menu > Commissioning > Communication > LTE transmission zones > Operating line N.Q1 Range 2 Factory setting Main menu > Commissioning > Communication > LTE reception zones > Operating line N.
What can be operated? 14 RXB/RXL operation 14.1 Operation of individual RXB/RXL room controllers The description of the data points applies to both RXB and RXL. Using menu item Operation RXB/RXL, a number of RXB/RXL data points can be read and written. These are specially selected values, such as: • Room number • Actual values and setpoints • Operating mode • Current heat and refrigeration requests, etc.
Operating line Local setpoint offset Heating/cooling output Fan output Heat demand signal Cooling demand signal Key: Description R/ W R R R R Positioning signal in % Calculated heat demand of the RXB/RXL in % Calculated refrigeration demand of the RXB/RXL in % R R = read, W = write 14.2 Special features of setpoint readjustment In the case of RMB795B setpoint priority As can be seen from the "Display values" table, the setpoints for Economy, Precomfort and Comfort can also be directly overwritten.
15 Data acquisition 15.1 Trend 15.1.1 Connections and application Connections The following illustration shows the function block connections as shown on the configuration sheet: Application The Trend function block is used for time-related recording of measured values. It provides 4 independent trend channels. A trend channel can record one measured value. Two trend channels can be displayed per Trend view: Primary channel plus extra channel as a reference.
15.1.3 Settings Trend function settings Main menu > Settings > Data acquisition > Trend > Trend channel 1...4 > Operating line Trend channel x Adjustable values / remarks Name of channel (editable text comprising 20 characters) Trend signal Geographical zone (apartment) Assign trend signal: ---, room temperature via bus, outside temperature via bus, N.X1, … A7(2).X4.
15.1.4 Trend signal not available Troubleshooting If a trend signal at the local inputs is no longer available (e.g. due to a faulty sensor), trends are no longer recorded. In that case, the fault status messages must be checked under: Main menu > Faults > Faults current > If the values are not available via bus, trends are no longer recorded.
15.2.1 Activate meters The meters are activated by assigning an input. Only inputs with input identifier "Pulse" can be assigned. Configuration Main menu > Commissioning > Extra configuration > Data acquisition > Meter 1…4 > Operating line Input n 15.2.2 Range ---, N.X1, N.X2, ... Factory setting --- Display format Datapoint "Displayed unit", is used to select the unit to be displayed. "Displayed format" defines the number of decimal places.
Unit and decimal place depend on unit and format displayed. Note Overflow value This value can only be changed via software tool OCI700.1. Operating line Range Factory setting Overflow value 0…999'999'999 99’999’999 kWh 15.2.5 Setting and resetting meter readings In case of deviations, service staff can adjust the pulse meter reading via operating line "Meter reading current". This value can only be changed via software tool OCI700.1.
15.2.8 Troubleshooting Some battery-powered or mechanical meters continue metering in the event of a power failure. During a power failure that affects the RMS795B, the pulses will not be counted. Restart occurs after exiting the "Extra configuration" menu or after power failure. Pulses received between the last storage operation and the restart are not counted. 126 / 144 Siemens Building Technologies Central control unit RMB795B Data acquisition CE1P3122en 18.01.
Purpose and function 16 Device supervision 16.1 Overview The device supervision checks the connections (bus communication) to the RXB/RXL room controllers and the RDG/RDF/RDU room thermostats. This serves the following purposes: • Checking the number of connected individual room controllers per room group. • Detecting the failure of 1 or several room controllers The individual room controllers are queried on a regular basis as per the generated device list.
Command "Create" Search process The "Create" command is used to generate a complete device list. For that, a search is made on the KNX bus aimed at finding individual room controllers that have the same "Geographical zone (apartment) When the RMB795B central control unit receives a reply from an individual room controller, it is entered on the device list. The search process takes several minutes, depending on the number of activated room groups.
If the RMB is operated in an interconnected device system with a line couple and is in another area, the corresponding line couples must be set to "Route all" / "route" (by the corresponding GeoZones). 16.5 Common fault status message Fault status messages If the connection to 1 or several individual room controller is interrupted, a common fault status message will appear for each room group: No.
Cause and effect 17 Help in case of faults 17.1 Error/fault code list The following list contains all codes and assigned texts that appear in the event of fault. Code no. 10 11 12 101 ...224 3880 ... 3889 3890 ... 3899 3931 3932 4501 ... 4591 4502 ... 4592 4503 ... 4593 4920 4930 4940 4950 4960 5000 5001 5002 5003 5102 Cause of fault Effect Outside temp sensor error >1 outside temperature sensor Outs sensor simulation active [N.X1] sensor error ... [RMZ787(2).
Significance of fault status messages Code no. Cause of fault Effect ... 5192 ... >1 Time switch in room group 10 " Ditto Ditto Code no. 5201 Cause of fault Effect Hol/spec day prog room group 1 ... 5291 5202 ... 5292 5801 ... Hol/spec day prog room group 10 >1 hol/spec day prog R’grp. 1 ... >1 hol/spec day prog R’grp. 10 H/C changeover signal failure 6001 7101 ... 7103 9000 9001 … 9010 >1 identical device address Fault extension module See 8.3.
17.2.2 No acknowledgement required Alarm acknowledgement This instruction applies to all fault status messages that require neither acknowledgement nor resetting. Example: If there is no signal for the outside temperature, a fault status message will be delivered. If the signal for the outside temperature returns, the fault status message disappears automatically and the plant will resume normal operation. Acknowledge This instruction applies to fault status messages that only require acknowledgement.
17.3 Questions and replies Troubleshooting The following list contains questions and replies relating to errors and fault status messages: Question Answer The wrong language was selected during commissioning. Where do I find my language? Press the ESC button and the OK knob simultaneously. Select the password level and enter number 112 as the password (same as international emergency call) and confirm by pressing the OK knob. The language changes to English.
Terminal connection concept 18 Electrical connections 18.1 Connection rules The following illustration shows the terminal base of the RMB795B central control unit including the connections: • Extra low-voltage side at the top • Mains voltage side at the bottom Passive sensor / signal source / contact sensing Konnex bus CE- CE- M CE+ CE+ X1 M X2 G1 X3 M M X4 G1 Active sensor / signal source M X5 Actuator DC 0...
18.2 Connection terminals 18.2.1 Central control unit RMB795B G X1 M X2 M G1 X3 M G0 G1 Y1 G0 G1 Y2 G0 Key G, G0 G1 M G0 X1...X6 X4 M G1 X5 M CE X6 M G1 CE Q12 Q11 Q23 Q33 Q53 Q14 Q24 Q34 Q54 3121G01 RMB795B AC 24 V rated voltage AC 24 V power supply for active sensors, signal sources or limiters Measuring neutral for signal input System neutral for signal output Universal signal inputs for LG-Ni 1000, 2x LG-Ni 1000 (averaging), T1, Pt 1000, DC 0...
19 Appendix 19.1 Abbreviations used To facilitate reading, the most common abbreviations are listed below in alphabetical order.
• Function blocks for supervision, heat and refrigeration demand, including the functions provided by the extension modules. Configuration diagram, use Planning engineers use the configuration diagram to draw connections between individual input and output functions (or their internal signals) and the assigned terminals.
Basic configuration Configuration Function Basic type • Basic type B: RMB plant (time programs with preselected setpoints and emergency control per room group) • RMZ785 R MZ 787 R MZ 787 Use of additional inputs and outputs with the extension modules RMZ785 and RMZ787. The functions of the central control unit can be configured to these inputs / outputs (1) • (2) Input specifying which modules are connected to the central control unit in which order (position) Input identifiers N.
faults Configuration Function • Fault inputs 1 through 10 • 10 universal fault signal inputs, fault signal delay, fault • Fault relays 1 and 2 (relays...) Faults acknowledgement (none, acknowledge, acknowledgement and reset), fault priority (urgent, not urgent) and fault effect (stop, no stop) can be set.
Siemens Building Technologies N.X2 Central control unit RMB795B Appendix N.Y1 N.Y2 Heat demand 23 H / C changeover N.X1 N.X3 N.Q1 N.X5 N.Q2 N.Q3 Refrigeration demand N.X4 N.Q5 Raumgruppe 7 Raumgruppe 2 N.X6 RMZ787 (1) Faults RMZ787 (2) 1 2 3 A 1 2 3 A C 1 2 B C 1 2 B 1 2 3 A 1 2 3 A C 1 2 B C 1 2 B 1 2 3 A 1 2 3 A C 1 2 B C 1 2 B 1 2 3 A 1 2 3 A C 1 2 B C 1 2 B 1 2 3 A 1 2 3 A C 1 2 B C 1 2 B RMZ785 19.2.
19.3 C3127_Planning and commissioning protocol To ensure successful planning of KNX communication between the RMB795B central control unit and the RXB/RXL room controllers or RDG/RDF/RDU room thermostats, a Planning and Commissioning Report has been made available. It is used to straightforwardly list and document all settings required for communication. Purpose The file name is: C3127_Planung+IBN-Protokoll_Komm.
Index 7 7-day time switch .................................................. 64 A Abbreviations used in this document.................. 138 Access levels ........................................................ 19 Acknowledge fault................................................. 17 Alarm acknowledgement .................................... 134 B Basic configuration Assignment of extension modules .................... 33 Selecting basic type B ....................................... 32 Business card ......
L Logic ..................................................................... 84 RS flip-flop......................................................... 91 Logics Activate.............................................................. 85 M Mark an intervention ............................................. 36 Meter Display format ................................................. 126 Meters................................................................. 125 Multiple use of sensors...............................
Siemens Switzerland Ltd Sector Infrastructure & Cities Building Technologies Division Gubelstrasse 22 6301 Zug Switzerland Tel. +41 41-724 24 24 www.siemens.com/sbt © 2012 Siemens Switzerland Ltd Subject to change 144 / 144 Siemens Building Technologies Central control unit RMB795B CE1P3122en 18.01.