SED2 EasyComm Startup and Operating Instructions Item Number 125-3360, Rev.
SED2 EasyComm Startup and Operating Instructions
NOTICE The information contained within this document is subject to change without notice and should not be construed as a commitment by Siemens Building Technologies, Inc. Siemens Building Technologies, Inc. assumes no responsibility for any errors that may appear in this document. All software described in this document is furnished under a license and may be used or copied only in accordance with the terms of such license. WARNING The Siemens Building Technologies, Inc.
Table of Contents Table of Contents How to Use this Manual ................................................................................................ 1 Manual Organization .................................................................................................. 1 Manual Conventions .................................................................................................. 1 Manual Notations ...............................................................................................
SED2 EasyComm Startup and Operating Instructions Understanding the Status Bar ....................................................................................28 Using Command Controls, Setpoint Field, and Actual Value Field .......................28 Using Device Status Fields ...................................................................................29 Using the Bus Address Field .................................................................................29 Chapter 5 - Basic Functions ....
How to Use this Manual How to Use this Manual Manual Organization Chapter 1 - SED2 EasyComm Overview provides an overview and list of features on the SED2 EasyComm product. Chapter 2 - Installation Requirements provides installation instructions for installing a PC connection kit and the EasyComm software. Chapter 3 - Starting EasyComm provides instructions to start up EasyComm. Chapter 4 - The EasyComm Screen discusses screen display, menus, and toolbar icon functions.
SED2 EasyComm Startup and Operating Instructions Manual Notations Notation Symbol Indicates that personal injury, or loss of life may occur if you do not perform a procedure as specified. WARNING: Indicates that equipment damage, or loss of data may occur if you do not perform a procedure as specified. CAUTION: NOTES: Meaning (no symbol) Provides other important information or helpful hints. Where To Send Comments Your feedback is important to us.
Chapter 1 – SED2 EasyComm Chapter 1 - SED2 EasyComm Overview SED2 EasyComm provides the following capabilities: • Storing drive parameter sets • Entering drive setpoints • Specifying drive parameters • Performing drive diagnostics • Download drive parameters EasyComm can toggle between online and offline operation and allows you to specify drive parameters in either operating mode.
SED2 EasyComm Startup and Operating Instructions Chapter 2 - Installation Software Installation Prerequisites EasyComm requires one of the following Microsoft operating systems and approximately 140 MB of hard disk space. • Windows 98 • Windows ME • Windows NT 4.0, Service Pack 3 • Windows 2000 • Windows XP To install EasyComm software, you will need a computer with at least a Pentium® 80486 processor and at least 128 RAM (256 RAM recommended).
Chapter 3 – Startring EasyComm Installation On a computer with a previous version of EasyComm installed, complete the following instructions: 1. Move any saved parameter sets (.dnl) files out of the Siemens\DriveMonitor folder and its subfolders. 2. Using the Control Panel Add or Remove Programs wizard, remove the previously installed version of EasyComm. 3. Using Windows Explorer, delete the folder C:\Siemens\DriveMonitor. 4.
SED2 EasyComm Startup and Operating Instructions 2. Select your installation language. Click Next. Figure 2. 3. Exit all other Windows Programs. Click Next. Figure 3. 6 Siemens Building Technologies, Inc.
Chapter 3 – Startring EasyComm If you agree to the license, click Yes. Figure 4. 4. Click Next. Figure 5. Siemens Building Technologies, Inc.
SED2 EasyComm Startup and Operating Instructions 5. Enter your name and your company name. Click Next. Figure 6. 6. It is recommended to install to the default directory of C:/Siemens. Click Next. Figure 7. Installation is completed. 8 Siemens Building Technologies, Inc.
Chapter 3 – Startring EasyComm 7. Click Finish. Figure 8. NOTE: Reboot the computer after EasyComm software installation. Siemens Building Technologies, Inc.
SED2 EasyComm Startup and Operating Instructions SED2-PC-KIT Connection Use a SED2-PC-KIT connection kit to attach a SED2 to a computer. The kit contains: 1. • Null modem cable (9.8 feet, 3 meters) • PC inverter connector module • Instruction sheet Set the DIP switches on back of computer inverter connector module as follows (see Figure 9): Switch 1 = ON (or up) Switch 2 = OFF (or down) 2. Remove the SED2 operator panel and set aside. Install PC inverter connector module. 3.
Chapter 3 – Startring EasyComm USB to RS232 Serial interface As more USB devices have become available, many PC manufacturers no longer supply a RS232 Serial Communications port by default but include multiple USB ports for ease of use. There are many manufacturers of USB to serial interfaces; this document is geared toward the SBT product (P/N: PXA-USBADAPTER) as this unit has been tested. However, these steps should work with any USB to serial interface.
SED2 EasyComm Startup and Operating Instructions 2. In the Control Panel, double click the System icon (see Figure 11). Figure 11. 3. In the System Properties window, select the Hardware tab (see Figure 12). 4. In the Device Manager section, press the Device Manager button (see Figure 12). Figure 12. 12 Siemens Building Technologies, Inc.
Chapter 3 – Startring EasyComm 5. In the Device Manager window, expand the Ports (COM & LPT) section (see Figure 13). Figure 13. 6. Right click the USB Serial Port, and select Properties. 7. From the Properties window, select the Port Settings tab (see Figure 14). 8. In the Port Settings tab, press the Advanced… button (see Figure 14). Figure 14. Siemens Building Technologies, Inc.
SED2 EasyComm Startup and Operating Instructions Depending upon your version of Windows operating systems, the Advance Settings windows may appear differently (see Figure 15 and Figure 16). A. If the Advance Settings windows is shown as in Figure 15, complete the following: 1. Make sure the Use FIFO buffers box is checked. 2. Make sure the Receive and Transmit buffers are set to High. 3. Select a Com Port Number of Comm4 or lower. 4. Press the OK button. Figure 15. B.
Chapter 3 – Startring EasyComm 1. Make sure the USB Transfer sizes for both Receive and Transmit are set to 4096. 2. Make sure the Serial Enumerator box is checked. 3. Press the OK button. 4. In the Properties window, press the OK button. 5. In the System Properties window, press the OK button. 6. Close the Device Manager window. 7. Close the Control Panel. 8. Open the SED2 EasyComm software. 9. From the main menu select Tools (See Figure 17). 10.
SED2 EasyComm Startup and Operating Instructions • In the Drive ES USSParam window, select the Interface tab (see Figure 19). • Change the Interface field to match the COM port number of the USB Serial Device as defined in the Device Manager (see Figure 19). • In the Drive ES USSParam window, press the OK button (see Figure 19). Figure 19. 16 • Exit EasyComm as changes made to the communications settings do not take effect until EasyComm is closed and reopened.
Chapter 3 – Startring EasyComm Chapter 3 - Starting EasyComm 1. To start EasyComm, double-click SED2 EasyComm on your desktop. The following window displays. Figure 20. 2. To begin with factory default parameter settings, do one of the following: − Click the upper left New parameter set with factory setting . − From the File menu, click New, Based on Factory Settings . NOTE: From the File menu, click New and then Empty Parameter Set to open a completely new parameter set with no settings.
SED2 EasyComm Startup and Operating Instructions The Drive Properties dialog box appears: The Quantity of PZD is normally set to 2 if a BOP is used. In case of an AOP, the Quantity of PZD must be set to 4. Click OK to continue. Figure 21. 4. Fill in the fields as follows. File Name – Use the suggested file name or enter a new file name. Save as Type – Use the Download Files (*.dnl) file type. A Save As dialog box appears: Figure 22. 5. Click Save to save the file.
SED2 EasyComm Startup and Operating Instructions Chapter 4 – The EasyComm Screen Overview The main EasyComm screen for a parameter set appears as follows: Figure 23. Similar to other Windows programs, you can minimize, maximize, and resize the EasyComm screen as well as select EasyComm functions via drop-down menus, toolbar icons, and the left-hand table of contents list. Siemens Building Technologies, Inc.
SED2 EasyComm Startup and Operating Instructions Toggling Between Several Opened Windows (Windows Menu) It is possible to toggle between windows of multiple parameter sets as follows: 1. From the Window menu, click Arrange 2. Select one of the possible arrangements: cascaded, horizontally, or vertically. To bring a window from the background to the foreground, click on it to make it the active window. Figure 24.
Chapter 4 – The EasyComm Screen Views of the Screen (View Menu) The View menu items toggle various portions of the screen from being shown or hidden as follows: View Menu Item Shows/Hides Parameter view Table of contents list at the left side of the screen. Toolbar Main toolbar at the top of the screen. Status bar Status bar at the bottom of the screen. Drive Navigator bar Drive Navigator toolbar at the top of the screen.
SED2 EasyComm Startup and Operating Instructions EasyComm Menus File View New Open Drive Properties Based on Factory Setting... Empty Parameter Set... Compare... Save Save As ... Compare to.. Full parameter set... Changes only... Print Generate CSV Free Parameterization Database... Parameterview Export Import Close Down Device Parameter sets last dealt with Basic device... Technology... Option Boards Firmware Drive Navigator Update Parameter Set Basic Device Complete...
Chapter 4 – The EasyComm Screen File Menu Menu/Icon New> Description Based on Factory Setting = In offline mode, generates a parameter set based on the factory settings. (In online mode, parameter values display as no connection.) Empty Parameter Set = In offline mode, generates an empty parameter set – a parameter list without values. (In online mode, parameter values display as no connection.
SED2 EasyComm Startup and Operating Instructions Menu/Icon Upload> Description Update Parameter Set = In online mode and if communications are OK, reads and uploads drive parameters that correspond to the parameter set being updated. The parameter set is overwritten with the uploaded parameter values. Base Device Complete = In online mode and if communications are OK, generates a parameter set by reading all base unit parameters.
Chapter 4 – The EasyComm Screen Drive Navigator Menu Menu/Icon Description Drive Navigator Displays Drive Navigator window. Direct to Parameter List Displays free parameterization window. (See Free Parameterization/Direct to Parameter List for more details.) Download Parameter File to Drive Downloads and saves a parameter set into the drive’s EEPROM. Save Drive Parameters to a File Uploads drive parameters into a user-specified file. (See Uploading a Parameter Set for more details.
SED2 EasyComm Startup and Operating Instructions Operate Menu Menu/Icon Description Control Word 1 Displays a list of choices for selecting the function of Control Word 1. Status Word 1 Displays a list of choices for selecting the function of Status Word 1. Diagnostics Menu Menu/Icon Description Errors Displays status of fault parameters (P0947, P0948, P0949, and P0952). States Displays status of drive state, control word, and status word parameters (r0002, r0019, r0052, and r0053).
Chapter 4 – The EasyComm Screen Help Menu Menu/Icon Description Help> Help Topics = Opens the EasyComm help topics. About SED2 EasyComm = Displays the software version of the last EasyComm software which was installed. Navigating the Parameter Definition Window The options in the Parameter and Diagnostics menus open an EasyComm parameter table for displaying and defining parameter values. The EasyComm parameter table includes the parameter number (P No.
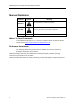
SED2 EasyComm Startup and Operating Instructions Understanding the Status Bar The status bar at the bottom of the EasyComm screen provides an overview of the drive status. NOTE: If multiple windows of parameter sets are simultaneously open, only the status bars of the non-active windows are continuously updated (not the parameter windows). Figure 27.
Chapter 4 – The EasyComm Screen 3. Scroll to Parameter P1000[001]. Double-click anywhere in the P1000 row. A P1000 Selection of Frequency Setpoint dialog box appears. Enter 4, USS on BOP Link and click OK. 4. Now you can start, stop, and command the SED2 using the EasyComm status bar controls. Enter a setpoint in the Setpoint field and then click on the green 1 (ON) button. The drive is powered-up and the actual value displays in the Actual Value field.
SED2 EasyComm Startup and Operating Instructions Chapter 5 - Basic Functions Modes of Operation The View menu and related toolbar icons allow you to select of the following three EasyComm operating modes: Offline – Parameter changes affect the parameter set file only. Parameter changes immediately affect the drive and are saved in RAM. Online-RAM – After cycling power (off and then on), the changes are lost.
Chapter 5 - Basic Functions • You cannot edit process data (for example, entering setpoints, controlling commands, and sensing actual values). NOTE: When setting parameters in offline mode, EasyComm monitors the allowable limit values (minimum and maximum values) for the drive, with the exception of those parameters that depend on the rated drive output. To change from offline mode to online mode, do one of the following: 1. From the View menu, click Online (Ram) or Online (EEPROM). 2.
SED2 EasyComm Startup and Operating Instructions To change from online mode to offline mode, do one of the following: 1. From the View menu, click Offline. 2. Click on the offline toolbar icon. Online (EEPROM) NOTE: Recommended Method of Operation Online operation with the drive is possible if communications have been established between the computer and drive. In online (EEPROM) mode, changes to parameter values are immediately and directly effective in the drive’s EEPROM.
Chapter 5 - Basic Functions Drive Identification To display information about a connected drive, including device or unit type, version, and bus address, do the following: From the Parameters menu, click Drive Identification. The Unit Identification dialog box displays. Figure 28. Possible device (drive) identification errors include: The version of the configured device does not match the version of the identified device (shown with an exclamation point in a yellow triangle).
SED2 EasyComm Startup and Operating Instructions Specifying Drive Properties 1. Do one of the following: − From the File menu, click Drive Properties. − Click the Drive Properties icon. The Drive Properties dialog box displays. Figure 29. 2. Fill in the fields as follows. When you are finished, click OK. − Unit Type – Set to SED2 Easy Drive. − Short Type – Not selectable.
Chapter 5 - Basic Functions 3. Check the drive’s properties: The Unit version depends on your SED2 firmware (check r0018 on the SED2 drive to determine firmware version). The Bus Address is normally 0, unless there is more than one SED2 connected. The Quantity of PZD is normally set to 2 if a BOP is used. In case of an AOP, the Quantity of PZD must be set to 4. Click OK to continue. Figure 30. Siemens Building Technologies, Inc.
SED2 EasyComm Startup and Operating Instructions Saving a Parameter Set Save a parameter set as follows: 1. Do one of the following: − From the File menu, click Save. − Click on the Save Parameter Set icon the location where it was last saved. or; on the toolbar. This function writes the parameter set to The Save As dialog box displays. This dialog box allows you to copy the file by renaming it, and also allows you to save the parameter set in a new location. Figure 31. 2.
Chapter 5 - Basic Functions Managing Parameter Sets A parameter set is a file that contains parameter numbers with corresponding parameter values. A parameter set can contain all SED2 parameters or just some of the SED2 parameters. In offline mode, parameter values can be read from and written to a parameter set, similar to programming parameters for a drive that is connected in online mode.
SED2 EasyComm Startup and Operating Instructions NOTE: The valid limit values (minimum and maximum values) for certain parameters depend on the maximum output of the drive (such as rated current and voltage). In offline mode, EasyComm does not of know the maximum output of the drive. Therefore, for these parameters, you must observe the limit values that must be maintained. For example: Scroll to Parameter P0700[001]. Double-click anywhere in the P0700 row.
Chapter 5 - Basic Functions Generating Parameter Sets Based on the Factory Setting A parameter set based on the factory settings contains all of the parameters and values that are set in a drive at the factory. This also includes parameters that cannot be changed (read-only parameters). If you work with a parameter set file in the offline mode, you will see the parameter values on the EasyComm screen, which were set when the drive was shipped or a drive where the factory setting were re-established.
SED2 EasyComm Startup and Operating Instructions Free Parameterization/Direct to Parameter List Free parameterization allows you to create a list of parameters for manipulation. An example of this feature would be to make a list of parameters for a typical start-up or an application. The values are not saved, just the list. When connected during start-up, free parameterization allows you to view only those parameters you wish to change.
Chapter 5 - Basic Functions 2. In the drop down list box, select New. 3. Enter a name for the free parameterization list. 4. Enter the desired parameter numbers in the P No. column and press ENTER after each entry. Figure 33. NOTE: When entering parameter numbers, do not enter leading zeroes. For example, for parameter r0002, enter 2; for parameter P0100, enter 100. To delete a parameter, use the DELETE key. Comments can be added by simply typing text into the P No. co,umn.
SED2 EasyComm Startup and Operating Instructions Modifying a Free Parameterization Set To open an existing free parameter set, click on the name in the drop-down box. To modify an existing free parameter set, do one of the following: − To remove a parameter line from the set (not removing the entire set), click on the line and press the DELETE key. − To add a parameter line, enter the desired parameter number in the P No. column at the end of the set. Figure 34. 1. Text can be entered. 2.
Chapter 5 - Basic Functions Free Parameterization Installation NOTE: SBT has created several Free Parameterization views for ease of use. These views can be added to your system automatically by obtaining the EC_FreeParm.zip file from Siemens Building Technologies, inc. Field Support. CAUTION: When the EC_FreeParm.zip file is installed, any existing Free Parameterizations that have been created previously will be DELETED.
SED2 EasyComm Startup and Operating Instructions 4. Ensure the Extract to: is set to the root of C:/ and NOT to C:/Unzipped or any other subfolder 5. Ensure the Overwrite existing files box and Use folder names, box is checked 6. Click on Extract. Figure 36. 44 Siemens Building Technologies, Inc.
Chapter 5 - Basic Functions Loading Standard Applications Standard applications have been created for North America. These applications are available on the EasyComm Installation CD-Rom (SED2-EasyComm). The standard applications can only be used while online with a SED2 VFD. When an application is selected, its stored description is displayed in the description field. This symbol identifies applications to which a script file is assigned.
SED2 EasyComm Startup and Operating Instructions Applications Installation 1. Run the EC_Scripts.zip file (available from Field Support). 2. From the Actions menu, select the “Select All” subitem. 3. Click this button to extract the files to your computer. Figure 38. 4. Ensure the Extract: is set to the root of C:| and NOT to C:\ Unzipped or any other subfolder. 5. Ensure the Overwrite existing files box and Use folder names box are checked. 6. Click on Extract. Figure 39.
Chapter 5 - Basic Functions Comparing Parameter Sets EasyComm provides two ways to compare parameter sets: Creating a new parameter set based on a comparison of two existing parameter sets. Comparing parameter values in two parameter sets. Creating a Parameter Set by Comparing Two Parameter Sets EasyComm can compare two existing parameter sets and put the result in a new comparison parameter set. All parameters of the beginning parameter set are compared with parameters of a selected parameter set.
SED2 EasyComm Startup and Operating Instructions Generating a Comparison Parameter Set Generate a comparison parameter set as follows: 1. Make sure you are in offline mode. From the File menu, click Open to select the beginning parameter set. For example, open SED2 Easy Drive_tmp.dnl with P0003=3. Figure 40. 48 Siemens Building Technologies, Inc.
Chapter 5 - Basic Functions 2. From the File menu, click New function. and then Compare… to initiate the comparison An Open dialog box displays. Select the parameter set for comparison. For example, open SED2 Easy Drive_tmp123.dnl with P0003=1. Figure 41. 3. A Save As dialog box appears to name the comparison parameter file. For example, save the comparison file as SED2 Easy Drive_tmp555.dnl. 4. Click Save . The comparison begins.
SED2 EasyComm Startup and Operating Instructions For example, the resulting comparison parameter set, SED2 Easy Drive_tmp555.dnl, shows P0003=3 (parameter value from the beginning parameter set, SED2 Easy Drive_tmp.dnl). Figure 42. Comparing Parameter Values in Two Parameter Sets EasyComm can compare two existing parameter sets and display the result. (For example, compare the existing drive parameter set to the factory settings.) The first parameter set is the comparison basis.
Chapter 5 - Basic Functions A comparison screen appears to select the comparison destination parameter set. 4. Click Select. When the Open dialog box displays, select the comparison destination parameter set. 5. Select the parameter set and click Open. Figure 43. A Show selection box allows you to display the comparison of all parameters (All), just those parameters that are different (< >), or just those parameters that are the same (=).
SED2 EasyComm Startup and Operating Instructions Uploading a Parameter Set In the online mode, you can create a parameter set by uploading (reading) the current parameter set in the drive. You can upload the entire parameter set or only a portion as follows: Read all parameters in the drive (Basic Device Complete). Read only the parameters which differ from the factory setting (Basic Device Changes Only).
Chapter 5 - Basic Functions As the parameter set is uploaded, a dialog box displays the progress. Figure 46. 2. After the upload, an information box displays whether all parameters have been read error-free. If the message Upload Successfully Completed displays, click OK. If individual parameters were not able to be read, click Details to see a list of parameters which were not read. Figure 47. Downloading a Parameter Set In the online mode, you can write a parameter set to a drive by downloading it.
SED2 EasyComm Startup and Operating Instructions 2. An Open dialog box appears to select the name of the parameter set to be downloaded. Select the name for to begin downloading the the file and leave the Save As Type as a *.dnl file extension. Click Open parameter set. As the parameter set is downloaded, a dialog box displays the progress. Figure 48. 3. After the download, an information box displays whether all parameters have been correctly downloaded.
Chapter 5 - Basic Functions Generating CSV The Generate CSV function works in offline mode only and produces a comma separated value (CSV) file with a format that can be easily imported into another application such as Microsoft® Excel. The CSV data can then be customized for hard copy output. When generating a CSV file, you can select whether you want to document the full parameter set or changes only. The full parameter set option uses all parameters.
SED2 EasyComm Startup and Operating Instructions 3. From the File menu, click Open to open the CSV file using Microsoft Excel. When the Open dialog box appears, select a File of Type that includes *.csv files. Locate the desired *.csv file and click Open Excel imports the file and you can modify the appearance and contents as needed. Figure 51. 56 Siemens Building Technologies, Inc. .
Chapter 5 - Basic Functions Printing Parameters The Print function works in offline mode only and produces a hard copy of a parameter set. In order to print a parameter set of a SED2, you must first upload it into EasyComm. When printing a parameter set, you can select whether you want to output the full parameter set or changes only. The print full parameter set option outputs all parameters (this could be a lot of pages).
SED2 EasyComm Startup and Operating Instructions Export/Import This function is not yet supported for North American operations. Operate Menu The Control Word 1 selection displays a list of choices for selecting the function of Control Word 1: Figure 52. The Status Word 1 selection displays a list of choices for selecting the function of Status Word 1: Figure 53. 58 Siemens Building Technologies, Inc.
Chapter 5 - Basic Functions Diagnostics (Faults, Errors) Errors To list information about drive fault conditions: From the Diagnostics menu, click Errors. Figure 54. States To list the states of control words and status words: From the Diagnostics menu, click States. Figure 55. Siemens Building Technologies, Inc.
SED2 EasyComm Startup and Operating Instructions Read-Only To list read-only parameters and their values: From the Diagnostics menu, click Read Only. Figure 56. 60 Siemens Building Technologies, Inc.
Chapter 5 - Basic Functions Scripting Functions Custom Script files can be created to facilitate start-up and troubleshooting of the SED2 Drive. These script files do not load simultaneously with the EasyComm software. However, the script files can be manually added to any EasyComm installation. To obtain the script files, please contact Siemens Field Support at 800-877-7545, press 2.
SED2 EasyComm Startup and Operating Instructions 3. The Drive Properties dialog box appears. Verify the drive firmware version and press OK to continue. Figure 58. 4. A Save As dialog box appears. Enter a File Name or use the file name the SED2 EasyComm software suggests. For the Save as type selection, use Download Files (*dnl). Click Save to save the file. Figure 59. 5. In the Extended functions section of the Drive Navigator screen, press the Load standard application icon.
Chapter 5 - Basic Functions Figure 60. 6. Right click User from the Available applications section. Figure 61. Siemens Building Technologies, Inc.
SED2 EasyComm Startup and Operating Instructions 7. Select New and enter a script file name to be used such as Factory Reset & Quick Commissioning. Figure 62. 8. Right click on the script file name (for example, Factory Reset & Quick Commissioning) and select Assign Script…. Figure 63. 64 Siemens Building Technologies, Inc.
Chapter 5 - Basic Functions 9. Browse to the location where the script file is stored and select the file name to assign. Click Open. This example assigns the script named FctryRstQuckCmmss.ssc. Figure 64. 10. The script is now added to the EasyComm software. Close EasyComm. When the following message box appears, press Yes to retain the script file in the EasyComm software. Figure 65.
SED2 EasyComm Startup and Operating Instructions Run Script Files To run a script, follow the steps below: 1. Open a new or existing parameter set with the EasyComm software. 2. Use a SED2-PC-KIT-1 connection kit to attach the EasyComm computer to a SED2 VFD. Figure 66. 3. Press the Online (EEPROM) icon to connect. Figure 67. 66 Siemens Building Technologies, Inc.
Chapter 5 - Basic Functions 4. Upon connection, from the Drive Navigator screen-click the Load standard application icon. Figure 68. 5. Select the script file (for example, Factory Reset & Drive Commissioning). Figure 69. Siemens Building Technologies, Inc.
SED2 EasyComm Startup and Operating Instructions 6. Either click the Load Application icon or double-click on the application name. Figure 70. 7. EasyComm prompts for verification that the script should run. Click Start. Figure 71. The script file will begin to run. Once started, most scripts will provide a brief description of what the file is going to do, and also prompt for an OK or Cancel. Verify the script file is what is intended and press OK, or press Cancel.
Chapter 5 - Basic Functions Tools The Tools menu allows you to set online settings, select EasyComm operating options, and assign the interface language. Online Settings Online Settings provides a dialog box with three tabs: Bus Type Interface Extended The Bus Type tab selects the communication bus between the computer and the drive. Set the Bus Type to USS and set the Task timeout(s) to 15.0 seconds. Figure 72. The Interface tab defines the computer port, baud rate, and RS-485 bus operation.
SED2 EasyComm Startup and Operating Instructions The Extended tab defines the communication attempts between the computer and drive. Set the Request Retries to 500 and set the Response Timeout to 200 milliseconds. Figure 74. Options The Options dialog box provides five areas for defining EasyComm operations: Drive Navigator Drive Window Preselection Parameter Selection Window Toolbar Show Info Window Figure 75. 70 Siemens Building Technologies, Inc.
Chapter 5 - Basic Functions Drive Navigator: Select Yes to open EasyComm with the Drive Navigator window. Select No (preselection parameter list) to open EasyComm according to the Drive Window Preselection setting. Drive Window Preselection: This option only functions if the Drive Navigator selection is No (preselection parameter list). Select None to open EasyComm with a blank screen. Select Parameter List Complete to open EasyComm with a complete display of the selected parameter set.
SED2 EasyComm Startup and Operating Instructions Language The Language dialog box selects the EasyComm interface language: English, French, German, Italian, or Spanish. Figure 76. 72 Siemens Building Technologies, Inc.
SED2 EasyComm Startup and Operating Instructions Siemens Building Technologies, Inc. Industry Sector 1000 Deerfield Parkway Buffalo Grove, IL 60089-4513 Tel: +1 847-215-1000 Fax +1 847-215-1093 Printed in the U.S.A. Siemens Building Technologies, Ltd. 2 Kenview Blvd. Brampton, Ontario Canada L6T 5E4 Tel: +1 905-799-9937 Siemens Building Technologies AG Gubelstrasse 22 CH-6301 Zug Tel: +41 41 724 24 24 Fax +41 41 724 35 22 Siemens Building Technologies Ltd.