
Operating Instructions


Chapter 4 – The EasyComm Screen
Siemens Building Technologies, Inc. 29
3. Scroll to Parameter P1000[001]. Double-click anywhere in the P1000 row. A
P1000 Selection of Frequency Setpoint dialog box appears. Enter 4, USS on
BOP Link and click OK.
4. Now you can start, stop, and command the SED2 using the EasyComm status
bar controls. Enter a setpoint in the Setpoint field and then click on the green 1
(ON) button. The drive is powered-up and the actual value displays in the
Actual Value field. Click on the red 0 (OFF) button and the drive is powered-
down.
NOTES: When done using EasyComm, change the P0700[001] setting back to 1,
BOP (Keypad), P0718 setting back to 0, Auto, and the P1000 setting
back to 1, MOP Setpoint.
An application has been created to complete these changes
automatically. Use the Cnfg HAND for BOP or Cnfg HAND for AOP
application.
Using Device Status Fields
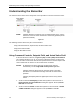
The device status field provides a color-coded indicator and a plain text display.
The color-coded indicator functions as follows:
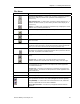
“ok” on green background (ok), the drive is online, and there is no alarm and no fault.
“F” on red background (F), the drive is online and signals a fault.
“W” on yellow background (W), the drive is online and signals an alarm.
White “O” on blue background (O), the drive is in offline mode.
White “nc” on black background (nc), EasyComm does not have a connection to the drive (the
drive can only be parameterized offline).
A plain text message also displays next to the device status indicator.
Using the Bus Address Field
The Bus Address field shows the node address of the selected drive when it is in
online mode. The communications connection between EasyComm and the drive can
be set by doing the following:
From the Tools menu, click Online Settings, and then Bus Type.
NOTE: Multiple drive operation is not supported for North American operations.