SED2 Advanced Operator Panel (AOP) Operating Instructions
SED2 AOP Operating Instructions 125-3206 Rev.
Rev. 1.0, September, 2002 NOTICE The information contained within this document is subject to change without notice and should not be construed as a commitment by Siemens Building Technologies, Inc. Siemens Building Technologies, Inc. assumes no responsibility for any errors that may appear in this document. All software described in this document is furnished under a license and may be used or copied only in accordance with the terms of such license.
European Low Voltage Directive The SED2 VFD product range complies with the requirements of the Low Voltage Directive 73/23/EEC as amended by Directive 98/68/EEC. The units are certified for compliance with the following standards: EN 60146-1-1 Semiconductor VFDs - General requirements and line commutated VFDs EN 60204-1 Safety of machinery - Electrical equipment of machine European Machinery Directive The SED2 VFD series does not fall under the scope of the Machinery Directive.
Table of Contents Table of Contents How to Use this Manual ...............................................................................................1 Manual Organization .................................................................................................1 Manual Notations.......................................................................................................2 Where To Send Comments .......................................................................................
SED2 AOP Operating Instructons AOP Setup & Configuration.........................................................................................24 Setup Menu ...............................................................................................................24 Backlighting ...............................................................................................................24 Screen Contrast................................................................................................
How to Use this Manual How to Use this Manual The Advanced Operator Panel (AOP) enhances the user interface and communications capability of the SED2 Variable Frequency Drives (“SED2 VFD”). Manual Organization This manual contains the following sections: − How to Use this Manual, describes the organization of this manual and symbols used throughout this manual. − AOP Overview, shows the AOP main menu and details the AOP function keys.
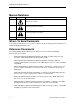
SED2 AOP Operating Instructons Manual Notations Notation Symbol Meaning DANGER: Indicates that personal injury or loss of life may occur if you do not perform a procedure as specified. WARNING: Indicates that equipment damage, or loss of data may occur if you do not perform a procedure as specified. CAUTION: Indicates that equipment damage, or loss of data may occur if you do not perform a procedure as specified. NOTES: (no symbol) Provides other important information or helpful hints.
AOP Overview AOP Overview AOP Menu Structure The menus available on the AOP display depend on the currently active operating mode. The following diagram shows the menu structure when the AOP is in either the Local or Master operating mode.
SED2 AOP Operating Instructions Key Functions NOTE: This symbol is used throughout this manual to indicate a special keypad function. Key/ Function Functional Description Stops the motor. OFF1 Press this button to stop the SED2 within the selected ramp-down time. As part of the factory setting, this function is enabled for manual mode. OFF2 Press this button twice (or once with sustained pressure) to cause the motor to coast freely to a standstill.
AOP Overview Key/ Function Change Single Parameter Digit Functional Description Quickly change a single digit of a parameter value as follows: 1. Ensure you are in the parameter value changing level. 2. Press 3. If desired, press and the right hand digit blinks. or to change the value of this digit. again and the next digit blinks. 4. Press 5. Perform steps 3 and 4 until the required value appears. 6. Press to leave the parameter value changing level. Siemens Building Technologies, Inc.
SED2 AOP Operating Instructions AOP Start-Up & Initialization Important Notes CAUTION: • You can mount or remove the AOP while power is applied to the SED2 VFD. • You must set Command Source P0700[1]=4 (USS on BOP link or AOP) before the AOP can start or stop an attached SED2 VFD. • On setting the AOP as the command source, you must set USS Telegram Off Time for Serial Interface BOP Link P2014[1]=5000 (5 seconds) to prevent unexpected drive operation.
AOP Start-Up & Initialization Language Selection 1. The AOP provides the capability to display information in five different languages. NOTE: Prior to language selection, the AOP has no control over the SED2 VFD. CAUTION: Memory Limitation: The delivered AOP supports five European languages: English, German, French, Spanish, and Italian. Due to internal memory limitations, you should delete one of these languages in order to upload the specified ten parameter sets that can be held on the AOP.
SED2 AOP Operating Instructions Quick Commissioning NOTE: Simultaneously press and , at any time, to display the main menu. The following table describes the main menu items. Menu Item 1. Description Operate Displays the current status of the SED2 VFD/motor. Diagnostics Displays a recent fault history. Parameters Allows you to select a parameter group (similar to Parameter Filter P0004) and to configure individual parameters.
AOP Start-Up & Initialization 4. 5. 6. Use Press and to scroll through the parameters and to highlight Command Source P0700. to confirm the selection and the cursor advances to the parameter index. Use Press and to scroll through the indexes for P0700 and to highlight P0700[1] (index 1). to confirm the selection and the cursor advances to the parameter value. Use Press and to set P0700[1]=4 (USS on BOP/AOP local link). to confirm the setting and the cursor returns to the parameter.
SED2 AOP Operating Instructions The AOP display the current status of the SED2 and motor. The following table explains information on this display. STOPPED r0000 I=0.0A M=0% Fn F=0.00Hz RPM=0 V=0.0V P Table 1. Status Information of an AOP Display with an Operating SED2. Data Description STOPPED Indicates the motor connected to the SED2 is not running (pulses disabled). RUNNING Indicates the motor connected to the SED2 is running (pulses enabled). FAULT Indicates a fault condition has occurred.
AOP Applications AOP Applications NOTES: 1. If the AOP is the command source for the SED2, set USS Telegram Off Time for Serial Interface BOP Link P2014[1]=5000 (5 seconds). To do this, first set P0003=3. The P2014[1]=5000 setting causes the drive to trip if communications with the AOP control source is lost. 2. If you have problems connecting to the SED2 drives, set the Auto Baud to OFF and the default baud rate to the same as the SED2.
SED2 AOP Operating Instructions 2. Configure the SED2 VFDs for network use. a. Set the Command Source P0700[1]=5 (USS on Com link). This sets the control over the USS link on the communications port. b. Assign each drive a unique RS-485 USS address in the range of 0 to 30. To do this set User Access Level P0003=3 (expert) and use USS Address for Serial Interface Com Link P2011[0] to assign a unique address to each SED2 VFD. c.
Editing Parameters Editing Parameters Parameter Access Levels You can edit SED2 VFD parameters via the AOP. Access levels control access to the SED2 VFD parameters. A higher access level corresponds to a more sophisticated level of control techniques available for the SED2 VFD applications.
SED2 AOP Operating Instructions 5. Press to confirm the new parameter value. The AOP returns to the parameter screen so you can select another parameter, if desired. to return to the r0000 display. Press again to return to the previous menu. Press for several seconds to return to the status screen (normal operating mode). The Press parameter value that has been changed is retained within the AOP’s internal memory, but not sent to the SED2.
Editing Parameters 6. Press to access the index value. Use highlight the desired index value. and to scroll through the index values and to to confirm the new index value. The AOP returns to the parameter selection screen 7. Press so you can select another parameter, if desired. 8. To edit another indexed parameter, repeat Steps 3 to 6. NOTES: 1. Simultaneously press and , at any time, to return to the main menu. 2. Simultaneously press and , at any time, to display the parameter help screens.
SED2 AOP Operating Instructions 2. In the Internal mode, scroll through the list of parameter sets until the AOP parameter set appears. Press to confirm the selection. 3. Press again to select All parameters. to access the internal AOP parameters. Internal parameters that display AOP 4.
Editing Parameters 1. From the main menu, use and to scroll through the list of options and to highlight the Upread item. to confirm the selection. Press to cancel the upload process. Press The AOP displays an upload/upread menu. NOTE: In master mode, the AOP prompts for selection of a specific SED2 VFD from a list of the networked SED2 VFDs. 2. Use and to scroll through the list of parameter sets and to highlight the parameter set into which information will be written. to confirm the selection.
SED2 AOP Operating Instructions 1. From the main menu, use and to scroll through the list of options and to highlight the Download item. to confirm the selection. Press to cancel the download process. Press The AOP displays a download menu. NOTE: In master mode, the AOP prompts for selection of a specific SED2 VFD from a list of the networked SED2 VFDs. 2. Use and to scroll through the list of parameter sets and to highlight the parameter set from which information will be copied.
AOP Operating Modes AOP Operating Modes Selecting an Operating Mode The mode menu allows you to select the desired AOP operating mode. The following table summarizes the AOP operating modes and lists associated main menu items.
SED2 AOP Operating Instructions 2. Press to confirm the selected operating mode (press NOTE: to return to the main menu.) To exit an operating mode, either follow the on-screen instructions or return to the main menu and select the mode menu to choose a different operating mode. Operating in Local Mode On initial power-up or after a reset, the AOP defaults to the Local operating mode. The Local mode operates only with one SED2. You can change the operating mode via the mode menu.
AOP Operating Modes Operating in Master Mode (Broadcast Operation) In master mode, the network controls the SED2 VFDs either individually or by broadcast operation. A broadcast operation can simultaneously start or stop all networked SED2 VFDs. While in broadcast operation, note the following AOP functions: • Since parameters can not be edited globally, • and still function in a broadcast operation.
SED2 AOP Operating Instructions Timer Function NOTES: 1. Before using the timer function as a control method, set the AOP real time clock as described in the Set Time/Date section. 2. Setting a timing event for ‘every day’, configures the same event for each day of the week separately. To clear an ‘every day’ event, you must clear the event individually from each day. 3. When multiple events must be cleared from the Timer function, it may be easier to reset the AOP as described in the AOP Reset section. 4.
Timer Function In general, use the following keys to set the timer: • • Press and to confirm the input. to scroll through input ranges. • Press 1. From the main menu, use and to scroll through the list of options and to highlight the Timer item. Press to confirm the selection. The AOP displays the timer screen. 2. Use to cancel the input and to return to the previous entry. and to enable (ON) or disable (OFF) the AOP timer function.
SED2 AOP Operating Instructions AOP Setup & Configuration Setup Menu Using the Setup option from the Main Menu of the AOP, you can personalize the following characteristics of the AOP: • Backlighting • Welcome Text • Screen Contrast • Parameter Set Names (Expert Level and above only) • Large Numbers • User Defined Text • Cursor Type • Set Time/Date (Service Level only) • Start Help • AOP Reset Use the following procedure to access the Setup menu: 1.
AOP Setup & Configuration 4. When you select ON for backlighting timer, the AOP displays a backlighting time setting screen. and to set the timer period of inactivity (in seconds). Use to confirm the setting and the AOP returns to the setup menu. Press NOTE: Simultaneously press and at any time to display relevant help screens. Screen Contrast 1. Use and to highlight the Screen Contrast option on the setup menu. to confirm the selection. Press The AOP displays a contrast screen. 2.
SED2 AOP Operating Instructions 2. Use and to select the desired cursor type (blinking underline or inverse-video [default]). Press to confirm the selection and the AOP returns to the setup menu. NOTE: Simultaneously press and at any time to display relevant help screens. Start Help NOTE: By default, the Start Help function is set ON. To change this setting, select Start Help from the setup menu. 1. Use and to highlight the Start Help option on the setup menu. to confirm the selection.
AOP Setup & Configuration 2. Use and to select an ON or OFF user text status. Press to cancel this selection and to return to the setup menu. to confirm the selection and the AOP displays a text screen with the first character Press highlighted. The text string can contain a maximum of 20 characters. and to scroll through the characters until the desired character is shown. 3. Use to accept the character and to advance to the next character. Press Repeat this step until the desired text is entered. 4.
SED2 AOP Operating Instructions 3. The AOP displays a set day/date screen and highlights the first field (day of week). Use and to scroll through and highlight the desired day of week. to confirm the entry. Press The cursor advances to the first date field (day of month). 4. Use and to scroll through the digits until the desired day of the month (01-31) displays. Press to confirm the entry. The cursor advances to the next date field (month [01-12], and then year [2000-2250]).
AOP Faults & Warnings AOP Faults & Warnings NOTE: If a fault/warning condition occurs on a SED2 VFD(s) to which an AOP connects, a fault/warning code displays with a description of the relevant fault/warning. For a list of fault/warning codes, see the SED2 VFD Operations & Maintenance Manual, Document No. 125-3202. Fault Indication/Fault Screen 1.
SED2 AOP Operating Instructions Multiple Faults If a SED2 VFD or network of VFDs reports more than one fault condition, the AOP displays all fault messages by cycling through them until they are all cleared. See Fault Indication/Fault Screen in this chapter to acknowledge each fault message.
AOP Faults & Warnings Siemens Building Technologies, Inc.
SED2 AOP Operating Instructions Siemens Building Technologies, Inc. 1000 Deerfield Parkway Buffalo Grove, IL 60089-4513 Tel: +1 847-215-1000 Fax +1 847-215-1093 Siemens Building Technologies, Ltd.. 2 Kenview Blvd. Brampton, Ontario Canada L6T 5E4 Tel: +1 905-799-9937 Siemens Building Technologies AG Gubelstrasse 22 CH-6301 Zug Tel: +41 41 724 24 24 Fax +41 41 724 35 22 Siemens Building Technologies Ltd.