Siveillance™ Video Client Manual 2019 R3
Copyright Copyright © 2019. Siemens Switzerland Ltd. All rights reserved. The information contained in this publication is company-proprietary to Siemens Switzerland Ltd. This publication and related software are provided under a license agreement containing restrictions on use and disclosure and are also protected by copyright law. Reverse engineering / copying of any Siemens Switzerland Ltd hardware, software, documentation, or training materials is strictly prohibited.
About this manual This user manual is mainly for Siveillance Video Client operators, but also for system administrators and integrators responsible for configuring, maintaining, and troubleshooting Siveillance Video Client. Most of the configuration, however, takes place in Management Client. See the Administrator manual.
Even if you are not a system administrator, there are things you can do to change the behavior of these features. In many cases, the help topics in the Operation section provides helpful links to the Configuration section, and vice versa. Troubleshooting Sometimes you run into problems. Try the Troubleshooting section if you cannot make things work before contacting support. Upgrade Information about when an upgrade is required.
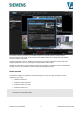
The interface allows you to tailor your viewing experience to specific working environments by selecting a light or dark theme. It also features work-optimized tabs and an integrated video timeline for easy surveillance operation. Using the MIP SDK, users can integrate various types of security and business systems and video analytics applications, which you manage through Siveillance Video Client. Siveillance Video Client must be installed on operators' computers.
Name Description Task-oriented tabs: Live Workspaces Playback Search Alarm Manager System Monitor Toggle between light and dark themes Toggle between a simplified and an advanced workspace Customize the general behavior and look of Siveillance Video Client, for example the availability of control panes and functions.
Name Alarm handling Description • Get a consolidated and clear overview of security and systemrelated alarms • Use the alarm list to respond to alarms and preview the incidents that caused the alarms • The alarm list and alarm preview are located on the Alarm Manager tab, but you can add them to any view • Filter and sort alarms, for example by priority or source • Search for alarms on the Search tab.
Name Export and print Hardware acceleration Hotspots Description • Export video in Siveillance Video format to allow authorities to view the exported video with Siveillance Video Client – Player.
Name Motion search and smart search Playback timeline Privacy masks Description • Search for recordings with motion on the Search tab • Search for recordings with motion in selected areas on the Search tab.
Name Smart map function Description • Get a geographical overview of cameras and navigation through Bing Maps, OpenStreetMap, and Google Maps services • Add geo-referenced shapefiles and CAD drawings, for example to illustrate city boundaries • Add buildings, levels, and floorplans allowing you to accurately position your cameras • Add location links to quickly jump to places of interest • Jump to custom overlays and cameras from various places in Siveillance Video Client • Select several camer
Name User interface languages Siveillance Video 2019 R3 Description • Supported languages: • Arabic • Bulgarian • Croatian • Chinese (simplified) • Chinese (traditional) • Czech • Danish • Dutch • English • Farsi • Finnish • French • German • Hebrew • Hindi • Hungarian • Icelandic • Italian • Japanese • Korean • Norwegian (bokmål) • Polish • Portuguese (Brazilian) • Russian • Serbian • Slovak • Spanish • Swedish • Thai • Turkish 11 SI SSP SH
Name Description Help languages • The help function (F1 key) is available in these languages: • Arabic • Czech • Chinese (simplified) • Chinese (traditional) • Danish • Dutch • English • French • German • Italian • Japanese • Korean • Polish • Portuguese (Brazilian) • Russian • Spanish • Swedish • Turkish Siveillance Video Monitoring Wall (explained) This feature is only available in certain surveillance systems.
Siveillance Video Access (explained) You can use Siveillance Video Access with access control systems from vendors where a vendor-specific plug-in for Siveillance Video Access exists. Siveillance Video Access integrates events from one or more access control systems with the features of the Siveillance Video management software. The incidents from an access control system generates events in the Siveillance Video system.
For an overview of the key features available on your particular system, Refer Administrator manual for more details Install Siveillance Video Client You must install Siveillance Video Client on your computer before you can use it. You download Siveillance Video Client from the surveillance system server and install it on your computer.
Add content to views (see Adding content to views or Monitoring Wall on page 30). Add overlay buttons (see Overlay buttons (explained) on page 42). Set the camera properties (see Camera settings (explained) on page 37). Create and manage views (see Views (configuration) on page 26). Add cameras to views (see Add camera to view on page 30). In setup mode, in the navigation pane, buttons and panes are highlighted in orange.
Name Default for video indicator Default for camera title bar Description Select whether to show or hide the green video indicator on the camera title bar. Lights up when connection to the camera is established. You can override this setting on individual cameras by adjusting camera properties in setup mode. Select whether to show or hide the camera title bar. The title bar displays the name of the camera and the colored indicators signifying events, detected motion, and video recordings.
Name Description Lets you select whether you want the mouse pointer to be hidden after a period of inactivity. You can specify how much time you want to elapse before hiding the mouse pointer. The default option is after 5 seconds. Options are: Never Hide mouse pointer After 5 seconds After 10 seconds After 20 seconds After 30 seconds If you move the mouse after a period of inactivity, it is enabled immediately. Snapshot Specify whether you want the snapshot feature to be available or unavailable.
Functions: Name Description Live > Camera playback The ability to play back recorded video from individual cameras on the Live tab. Live > Overlay buttons The ability to view and use overlay buttons on the Live tab for activating speakers, events, output, moving PTZ cameras, clearing indicators from cameras, etc. Live and Playback > Bookmark Select whether you want to add quick or detailed bookmarks from the view position toolbar or through ready-made overlay buttons on the Live or the Playback tab.
Name Description Incoming audio Select to show or hide incoming audio on the timeline Outgoing audio Select to show or hide outgoing audio on the timeline. Additional data Select to show or hide additional data from other sources. Additional markers Select to show or hide additional markers from other sources. Bookmarks Select whether to show or hide bookmarks on the timeline. Motion indication Select whether to show or hide motion indication on the timeline.
Smart map settings Enter the Bing Maps key or Google Maps client ID or key for the Bing Maps API or Google Maps API that you use. You can edit these settings only if your administrator has allowed you to in Management Client. Name Description OpenStreetMap geographic background Specify whether the OpenStreetMap service can be used as a geographic background. If you select Unavailable, Siveillance Video Client does not display it as an option.
Name Parameter Description If relevant, specify a parameter for the command or action. For example, if you want to specify the window and view position for the Copy the selected camera view item parameter, enter 2;1 to have the camera copied to the floating window (window 2), in the first view position (view position 1). Search settings The search settings let you customize the behavior of parts of the search functionality, mainly on the Search tab.
Name Description Dead zone setup: Pan/Tilt Specify the dead zone for the joystick's pan and tilt functions. The further you drag the slider to the right, the larger the dead zone becomes, and the more you will have to move the joystick handle before information is sent to the camera. Dragging the slider to the far left disables the dead zone (only recommended for high-precision joysticks). Use the Axis setup preview to test the effect of your dead zone settings.
Name Description Your system supports multicasting of live streams from recording servers to clients. If multiple Siveillance Video Client users want to view live video from the same camera, multicasting helps saving considerable system resources. Multicasting is particularly useful if you use the Matrix functionality, where multiple clients require live video from the same camera. Multicast Multicasting is only possible for live streams, not for recorded video/audio. Enabled: is the default setting.
Name Description Controls how many decoding threads are used to decode video streams. This option can help you improve performance on multi-core computers in live as well as playback mode. The exact performance improvement depends on the video stream. This setting is mainly relevant if using heavily coded high-resolution video streams like H.264/H.265—for which the performance improvement potential can be significant—and less relevant if using, for example, JPEG or MPEG-4.
Name Description Interlacing determines how an image is refreshed on a screen. The image is refreshed by first scanning the odd lines in the image, then scanning every even line. This allows a faster refresh rate because less information is processed during each scan. However, interlacing may cause flickering, or the changes in half of the image's lines may be noticeable. With Deinterlacing, you convert video into a noninterlaced format.
Name Description Select a predefined time zone or a custom time zone. The available options are: Time zone Local: the time zone of the computer running the Siveillance Video Client Master Server's time zone: the time zone of the server UTC Custom time zone: if you want a particular time zone, select this option and then select from the list of available time zones in the Custom time zone field.
Not all users may have access to all cameras on the surveillance system. Some of the features you include in your shared view may not be supported in earlier versions of Siveillance Video Client. Always make sure that the users you want to share with have the necessary rights and are running the same Siveillance Video Client version as yourself.
You can search for views that contain specific cameras or view item types. For example, if you want to see all views that contain PTZ cameras, cameras from a certain manufacturer or views that contain these view item types: Smart map Alarm Matrix HTML Name of camera in view Add-on products Finally, you can search for keywords. Create view groups • In setup mode, in the Views pane, select the Private or Shared top-level folder you want to add a group to.
Create view To view or play back video in Siveillance Video Client, first you must create a view, where you add the cameras you need. Requirements Before creating the view, you need a group that you can add the view to. For more information, see Create view groups on page 28. Steps: • In the right corner, click Setup to enter setup mode. • In the Views pane, select the group you want to add the view to. • Click • Select a layout.
Or right-click and select Rename. To delete a view, select the relevant view, and either click Delete. Or right-click and select Delete. Deleting a group will delete all views and any subgroups within the group as well. Adding content to views or Monitoring Wall Apart from cameras, there are other elements that you can add to the views or Monitoring Wall, for example alarms, hotspots, and maps. For more information, see Content inside views (explained) on page 99 or the topics in this section.
If the Monitoring Wall has more than one preset, select the relevant preset in the Preset list. Presets contain predefined settings that determine which cameras are displayed, and how content is structured on each monitor on the video wall. After selecting a Monitoring Wall and a preset, other users can select a different Monitoring Wall, preset, or both. Add image to view or Monitoring Wall You can display static images in a view, or on one or more Monitoring Walls.
1. Click Setup to enter setup mode. 2. In the System Overview pane, click and drag the Carousel item to the position in the view. 3. In the Carousel Setup window: 4. Go to the Cameras section. 5. Locate and double-click each camera you want to add to the carousel. 6. To define the sequence the cameras appear in the carousel, in the Selected cameras list, move the cameras up or down. 7. Enter the number of seconds each camera appears in the carousel.
To send the camera navigator to your Monitoring Wall, see Display camera navigator on Monitoring Wall on page 189. Add map to view or Monitoring Wall You can add existing maps to views or create new ones. 1. Click Setup to enter setup mode. 2. In the System Overview pane, drag the Map item to a position in the view. 3. In the Map Setup window that appears, select either Create new map or Use existing map. A triangle next to a map name indicates that the map might have one or more sub-maps.
Steps: 1. Click Setup to enter setup mode. 2. In the System Overview pane, click and drag the HTML Page item to the view. The Open URL window appears. 3. In the Open field, enter the location of the required HTML page (example: http://www.mywebsite.com/mywebpage.htm). -Or-If the HTML page is stored locally on your computer, do one of the following: 4. Specify its location on your computer (example: C:\myfiles\mywebpage.htm) 5. Click Browse to browse for the required HTML page 6. Click OK. 7.
1. Click Setup to enter setup mode. 2. Select the imported HTML page in the view. 3. In the Properties pane, change one or more of these properties: • URL: Click New to specify a new URL or location of the HTML page • Scaling: Select the scaling of the HTML page. The optimal scaling depends entirely on the content of the imported HTML page and how you want to display it As a rule, with a high scaling value such as 1280×1024, text on the HTML page will appear relatively small.
If you want to change the text of the overlay button, double-click the text, overwrite it, and then click the check mark button to save. To undo, click the cancel button scales to the largest possible size on the button. . When you save, the text Add alarms to views or Monitoring Wall By adding the Alarm List to your view or Monitoring Wall, you can share a list of prioritized alarms that people should address, or just an individual alarm to put focus on one particular incident. Steps: 1.
Add or edit views in simplified mode You can select or search for existing views or cameras in the Select view list. However, to add or edit views, for example renaming the view or changing a camera, you need to switch to advanced mode. Steps: 1. In the toolbar, click and then to switch to advanced mode. 2. Click Setup to enter setup mode. 3. To add a view, see Create view on page 29. 4. To edit a view: 5. Select the view. 6. Edit the view. 7. Click Setup again to save the changes.
Name Description Determines the quality of video when viewed, but also affects bandwidth usage. If your Siveillance Video Client is used over the internet, over a slow network connection, or if for other reasons you need to limit bandwidth use, image quality can be reduced on the server side by selecting Low or Medium. When selecting a reduced image quality, images from the selected camera are re-encoded to a JPEG format on the surveillance system server before being sent to the Siveillance Video Client.
Name Description Available only if the selected camera is a fisheye camera. Fisheye technology allows the creation and viewing of 360º panoramic images. The Siveillance Video Client supports up to four different viewpoints from a single fisheye camera. The Fisheye split mode list lets you select the required split mode: No split lets you view a single viewpoint. Fisheye split mode Two by two lets you view four different viewpoints at a time.
Name Description This feature is only available in certain surveillance systems. Refer Administrator manual for more details Being able to use this feature requires that notifications on events have been configured on the surveillance system server. Sound on event Sound notifications only work if video from the camera is actually displayed in your Siveillance Video Client. Sound notifications will thus not work if you minimize the window containing the camera in question.
Name Description This part of the Properties pane may not be visible. To view it, go to the Settings window's (see Settings window (explained) on page 15) Functions tab, and ensure that Setup > Edit video buffering is set to Available. If you require very smooth display of live video, without any jitter, it is possible to build up a video buffer. If possible, avoid using video buffering. Video buffering can significantly increase memory usage for each camera displayed in a view.
You can show/hide bounding boxes from individual cameras in Display settings in the camera properties. If bounding boxes are displayed on your screen, they also appear when you export (see Siveillance Video format settings on page 115) video in the Siveillance Video format or print (see Print report from single cameras on page 120) still images. Bounding box providers (explained) Requires that Show bounding box layer is selected.
FAQ: cameras Will I receive lots of sound notifications? If you select Always on, the number of motion-related sound notifications will depend on the motion detection sensitivity of the camera. If motion detection for the camera is highly sensitive, you may receive very frequent sound notifications. The camera's motion detection sensitivity is configured on the surveillance system server.
Name Camera indicator orientation Description Select Relative to selected camera if you want to display the location and orientation of the cameras as seen from the camera's perspective or Select Relative to map if you want the location and orientation of the cameras to always reflect the layout of the map as seen from above. The selected camera is always the centered one. Maximum preview cameras Select the maximum number of cameras that you want to display in your preview pane.
Name Description Select the microphone you want to listen to audio from. Microphones Mute If the Microphones list displays No microphone hardware, your computer does not have the required hardware for playing audio from the surveillance system. Typically, this occurs because your computer does not have an audio card installed. If the list displays No microphone sources, no microphones attached to cameras are available.
Add PTZ presets You can define additional PTZ presets: In the view, select the relevant PTZ camera that you want to give a new PTZ preset. On the camera toolbar, click the PTZ icon to open the PTZ menu. Click Manage PTZ presets to open the dialog box. Click to add a new preset entry. Select the PTZ preset entry and enter a new name for the PTZ preset. Use the PTZ buttons to navigate to the relevant position and click Update preset to save. Use the arrows to move a PTZ preset up or down in the list.
If the camera is not in the correct position, use the PTZ buttons to navigate to the required position and then click Update preset to save. Use the up or down arrows to arrange the PTZ presets on the list. Click Close. Delete PTZ presets To delete an existing preset, select it and click . Adding, editing, or deleting patrolling profiles Depending on your surveillance system (see Surveillance system differences on page 13), you can create, edit and delete patrolling profiles.
The new patrolling profile is added to the Patrolling profiles list. You can now specify the positions and other settings for the patrolling profile. Delete patrolling profile To delete an existing profile, select the profile and click • Edit patrolling profile • Specify positions in a patrolling profile • Select the patrolling profile: . • • Click below the Positions list to add a PTZ preset.
Specify the time on each position When patrolling, the PTZ camera by default remains for five seconds on each position specified in the patrolling profile. To change the number of seconds: • Select the patrolling profile in the Patrolling profiles list. • Select the PTZ preset that you want to change the time for in the Positions list: • Specify the time in the Time on position (sec) field. If required, repeat for other presets.
3. To enable detailed bookmarks for live video, select Add bookmark details in the Bookmark list for the Live tab. 4. To enable detailed bookmarks for recorded video, select Add bookmark details in the Bookmark list for the Playback tab. 5. Click Close. Alarms and events (configuration) Alarm preview settings If alarms or events have video associated with them, when you select a particular alarm in the alarm list, the alarm preview displays the recorded video from the selected alarm or event.
Name Max. rows to fetch Description Controls the maximum number of lines to fetch and display in the alarm list. By default, the alarm list displays up to 100 lines, that is up to 100 alarms or events at a time. This provides a good response time, since fetching and displaying larger numbers of alarms or events can take time.
devices, for example cameras, or custom overlays, for example shapefiles. For more information, see Custom overlays (explained) on page 55. To put custom overlays into focus, you can hide the geographic background. For more information, see Layers on smart map (explained) on page 54.
You can also use a commercial tile server. Siemens does not provide a tile server solution for OpenStreetMap. The tile server address can be specified in two ways: In Management Client - you set the tile server address on the Client profiles. The server address applies to all Client users assigned to the individual Client profiles In Siveillance Video Client - you set the tile server address in the Settings dialog (see Change OpenStreetMap tile server on page 53).
6. Click OK. The geographic background changes. For more information, see Changing OpenStreetMap tile server on page 52. Showing or hiding layers on smart map You can turn layers on and off on your smart map depending on what you want to see. Layers on smart map (explained) Use layers to filter the information that the smart map displays.
Manage default settings for smart map After adding a smart map to a view, and you have added the overlays, cameras, and links, you can specify the default settings for the custom overlays. You can also delete custom overlays to clean up. Steps: 1. Click Setup. 2. Click Manage default settings. 3. Do any of the following: 4. To show or hide an overlay, select or clear the check box To rearrange the order, use the drag handle in front of the overlay to drag it to a new position in the list.
The overlay and location are not linked. For example, you can delete or rename the location without changing the overlay, and vice versa. To turn on this feature, see Add locations to custom overlays (smart map) on page 56. Add custom overlay on smart map Increase the level of detail on your smart map by adding custom overlays. When you add a custom overlay, Siveillance Video Client creates a location with the same name as the overlay.
3. In the Create location when layer is added list, select Yes. 4. Close the dialog to save the changes. For more information, see Custom overlays and locations (explained) on page 55. Delete custom overlay on smart map 1. Select the view that contains the smart map, and then click Setup. 2. In the toolbar, click Manage default settings. 3. Hover the pointer over the custom overlay, and then click Delete. 4. Click Save to delete the custom overlay.
To resize or rotate the overlay: Click and drag a corner handle To rotate the overlay around a specific point, move the pivot point to that place on the map. Then click and drag a corner handle To move the overlay on the map, click and drag the overlay. To save the change, click Save. Adding, deleting, or editing cameras on smart map You can add cameras to a smart map in their actual positions in your environment.
Once the camera has been added to the smart map, you can change field of view and direction by adjusting the camera icon. If you are zoomed out on the map, you may have to zoom in until the field of view is displayed. 1. Select the view that contains the smart map you want to work with. 2. Click Setup to edit the camera icon. 3. Click the camera icon. 4. Use the rotate handle to point the camera in the right direction.
If the position of the camera has not been specified in Management Client, it will not appear on the smart map. Adding, deleting, or editing links on smart map Links on smart map (explained) You can add links that go to locations on your smart map, or go to the static maps in Siveillance Video Client. This lets you quickly visit locations, or display another type of map without changing to another view. You cannot link to another smart map.
4. Right-click the link and select Delete link 5. Select the link and press DELETE Adding, deleting, or editing locations on smart map Locations on smart map (explained) You can create locations at the points on the smart map that are of interest to you. For example, you can create locations for your home office, and satellite offices. Not only do locations give you a full picture of your environment, they are also useful for navigating the smart map.
1. Click Setup to enter setup mode. 2. To edit a location, right-click the location and select Edit location. 3. To delete a location, do one of the following: 4. Right-click the location and select Delete location 5. Select the location and press DELETE Linking between locations (explained) For example, you can create a patrol route by creating a series of links between locations. Create a link at location A that goes to location B, and a link at location B that goes to location C, and so on.
3. Click and place the cursor in the relevant position on the smart map. 4. Click again. A rectangle is added to the smart map. If zoomed out, the zoom level automatically increases. 5. If necessary, use the corner handles to adjust the shape and position of the actual building. 6. Click Setup again to exit setup mode. Edit buildings on smart map Once a building has been added to the smart map, you can change the name of the building, and adjust the position, the size, dimensions, and angles.
3. Do one of the following: 4. Right-click the building and select Delete, or press DELETE on your keyboard -Or5. Click Manage default settings. 6. Scroll down to the Buildings section. 7. Hover on the building you want to delete. The text Delete appears. 8. Click Delete and Save. The building disappears from the smart map.
4. Click Add level . 5. To edit the level name: 6. Click the dots and select Rename. 7. Enter a new name. 8. To delete a level, click the dots and select Delete. Cameras on this level stay in their geographical position, but are no longer associated with the level. 9. Click Setup to exit setup mode. 10. Change order of levels in buildings (smart map) Requirements: Smart map editing has been enabled on your Client profile in Management Client. Steps: 1. Navigate to the building on your smart map.
Add floorplans to levels (smart map) You can add custom overlays, for example floorplan images, to the levels in your building to help you illustrate the interior of a level inside a building. As you navigate the levels, automatically the associated floorplans are displayed. Requirements Smart map editing has been enabled on your Client profile in Management Client. Steps: 1. Navigate to the building on your smart map. If necessary, zoom in. 2. Select the building.
Smart map editing has been enabled on your Client profile in Management Client. Steps: 1. Navigate to the building on your smart map. If necessary, zoom in. 2. Select the building. A pane appears on the right-hand side showing you the levels of the building. 3. Click Setup to enter setup mode. 4. Select the level where the custom overlay is. 5. Right-click anywhere on the custom overlay and select Delete custom overlay. 6. Click Setup again to exit setup mode.
• Images For more information, see Custom overlays (explained) on page 55. Can I add multiple floorplans to the same level? Yes, you can add any number of floorplans to the same level, for example one for the north-wing and one for the south-wing. What if a camera in a building is not associated with any levels? In that case, the camera is visible an all levels. Dissociating a camera from the levels in a building is relevant, for example, if the camera is located inside an elevator.
Name Description Auto maximize map Select to automatically maximize the map to full screen in Live mode when the Siveillance Video Client has not been used for the number of seconds defined in Timeout. The maximum number of timeout seconds is 99999. On mouse over Select to display a live video preview when you move the mouse over a camera. Select to define that the preview window looks the same as your other views.
the view. The image file will still exist on the surveillance system, and can thus be used for creating a new map. You can also remove a map through the Map Overview. Add and remove elements from maps In setup mode, right-click the map and select Toolbox. In the toolbox, click the required element icon to open the Element Selector window. You can use the filter to quickly find a required element: enter a search criterion to narrow down the list of displayed elements to fit your search criterion.
The hot zone drawing tool makes straight lines only; if you want a rounded hot zone border, you must use several small straight lines. Click the hot zone starting point to complete drawing the hot zone. The hot zone is now outlined with a dotted line, indicating that no sub-map has been attached to the hot zone. You can alter the outline of a hot zone by pulling the hot zone anchors. To attach a sub-map to the hot zone, double-click the dotted hot zone to open the Map Setup window.
• Adjusting Opacity • Use the Opacity slider to adjust the transparency of the color fill. • Dragging the Opacity slider to the far right will make the color completely transparent, while dragging the Opacity slider to the far left makes the color completely solid. • Drag the Opacity slider to the required level, then click the map element to apply color and opacity. Advanced Color Change You can fill map elements with any color you like.
Edit and rotate labels on a map All elements on a map have a label, making it easy to identify them. If you have a great number of elements on a map, it can be difficult to have enough room for all the labels. You can edit the name of the devices, by selecting the label and then entering a new (shorter) name for the device. When you rename a label, you are only changing the label on the map, not the name of the camera or element in the system.
Name Description Connection Settings... Lets you specify the TCP port and Password for transferring Matrixtriggered video from the surveillance server to the Siveillance Video Client view. This is only available when Matrix position 1 is selected; other Matrix positions inherit the connection settings specified for position 1. By default, the TCP port used for Matrix is 12345. Consult your surveillance system administrator about which port number or password to use.
Apply a different preset You can select a different preset for the Monitoring Wall overview. However, changing the preset can change all monitors in the Monitoring Wall. If you want to apply a different preset, use the Select preset menu Other users can change the preset manually, or rules can change it automatically. Content in Monitoring Wall (explained) The image displays a Monitoring Wall overview with a 3x3 layout. Blue tiles in the Monitoring Wall overview are displaying content.
Click the tile to view the content in a Preview window. The toolbar in the Preview window provides options for printing the content, or sending it to another Monitoring Wall Adding content to Monitoring Wall Apart from cameras, there are other elements that you can add to Monitoring Wall, for example alarms, hotspots, and maps. For more information, see Adding content to views or Monitoring Wall on page 30.
Project pane (explained) A project in Siveillance Video Client – Player is a collection of files that are created when video is exported in database format from Siveillance Video Client. Your user settings, including information about your views, are stored as part of a project. The Project pane appears when you click Setup. In setup mode, you can: Change the name of the project. Create or open a project Assign passwords to projects - only people with permission can view a video.
In the System Overview pane, click Access Monitor and drag it to a view item. In the Access Monitor Settings (see Access Monitor Settings on page 78) dialog box that appears, specify the settings. Once you have selected a door, you can keep the default settings or change them if needed. Click OK and the access monitor is added to the view. When an access control incident occurs that triggers an event, it appears in the right side of the view item.
Place the command buttons directly by a door in the view item Add other command buttons than those specified in Access Monitor Settings on page 78 Steps: • On the Live tab, click Setup and select the view item you want to modify. • In the Overlay Buttons pane, click Access Control. • Locate the command you want to add and drag it to your view item. • Click Setup to return to live viewing. • The overlay button appears when you drag the mouse over the view item.
If using Basic authentication or Windows authentication, you can make the Siveillance Video Client login window open with a pre-filled server address and user name fields so users only have to enter a password to log in. If using Windows authentication (current user), you can make the Siveillance Video Client connect to the surveillance system automatically, based on the user's current Windows login.
Client.exe -ServerAddress="http://ourserver" -UserName="Tommy" -Password="T0mMy5Pa55w0rD" AuthenticationType="Simple" If you use Windows authentication, the example is: Client.exe -ServerAddress="http://ourserver" -UserName="Tommy" -Password="T0mMy5Pa55w0rD" AuthenticationType="Windows" If you use Windows authentication (current user), the UserName and Password parameters would not be necessary, and the example looks like this: Client.
For example, you may insert a clickable floor plan of a building, and you would be able to simply click a part of the floor plan to instantly switch to a view displaying video from the required part of the building. In the following, you will see examples of HTML pages for Siveillance Video Client navigation: a simple HTML page with buttons, and a more advanced HTML page with a clickable image map.
HTML page with buttons for navigating between views and tabs We have saved the HTML page locally, in this case on the user's C: drive. When the HTML page is to be used for navigation, saving the HTML page locally is necessary because of security features in Internet Explorer. When saving the HTML page locally, save it at a location to which an unambiguous path can be defined, for example in a folder on the user's C: drive (example: C:\ myfolder\file.htm).
HTML page with image map for navigating between views For this example, we divided the floor plan into four colored zones, and defined an image map area for each zone. Users can click a zone to go to the view displaying cameras from that zone. For instance, the red zone on our image map mirrors the Go to Shared Group2 View2 button from the previous example. If you click the red zone, you will go to View2 in Group2.
the user's My Documents folder will not work properly due to the way Windows constructs the path to such locations. Import the HTML page into the Siveillance Video Client views in which it will be used. Having imported the HTML page, select its position in the view, go to the Setup tab's Properties pane, and verify that Enable HTML Scripting is selected. Test that the navigation controls on the imported HTML page work as intended.
Follow the steps described in the next sections to examine your PC to make sure that all hardware acceleration resources are available. Check hardware acceleration settings Go to Settings > Advanced > Hardware acceleration. There are two settings for hardware acceleration: Auto and Off. Select the default setting Auto. Go to Video diagnostics overlay. To make the current status of the stream, including the GPU resource used for hardware acceleration visible, select Level 2.
In the menu, set Processors and Intel Quick Sync Video filter to Yes. Find your CPU in the list. Next, Examine the Device Manager on page 87. Examine the Device Manager Make sure that an Intel or NVIDIA display adapter is present in Windows Device Manager. You can connect your displays to any display adapter available.
available GPU resources for hardware accelerated decoding and rendering. Not all NVIDIA display adapters supports hardware acceleration. Check NVIDIA hardware acceleration support on page 88. If the Intel display adapter is not present, enable the Intel display adapter in the BIOS (see Enable the Intel display adapter in the BIOS on page 88). Next, Update the video driver on page 88 Check NVIDIA hardware acceleration support NVIDIA products have different compute capabilities.
NVIDIA Option 1: Manually find drivers for my NVIDIA products. Go to the NVIDIA download drivers website (https://www.nvidia.com/Download/index.aspx/). Enter the name of your product and the operating system. Manually download and install the driver. Option 2: Automatically find drivers for my NVIDIA products. Go to the NVIDIA download drivers website (https://www.nvidia.com/Download/index.aspx/). Click GRAPHICS DRIVERS. Your system is scanned. Download and update the driver.
Adaptive streaming improves the decoding capability and performance of the computer running Siveillance Video Client. This is useful when you view multiple live video streams in the same view. To take advantage of adaptive streaming, your cameras must have multiple streams defined with different resolutions. This enables Siveillance Video Client to automatically select the closest match to the resolution requested by the view item.
Go to Video diagnostics overlay. To make the current video resolution of the stream visible, select Level 2. This setting applies to all view items. The default setting is Hide. The video diagnostics overlay should now be Enabled. Try to resize the view window from small to large, large to small and check if the Video resolution value changes. If the value doesn't change, continue to examine your available live video streams from your cameras so you can enable adaptive streaming, if possible.
Monitor your system The System Monitor tab gives you an overview of the current status of your servers, connected devices, and the computer running Siveillance Video Client. For more information, see System Monitor tab (explained) on page 94.
When you log into Siveillance Video Client, you may be asked for additional logins to the access control systems, if they are configured to do so. Your login controls the parts of an access control integration, for example doors, that you can manage and operate. If you do not know your login credentials for an access control system, ask your system administrator. The system remembers your login credentials, so you only need to fill out your credentials the first time you log in or if the login has failed.
On the Playback tab, you can investigate recorded video by playing it back, start search from any camera or view, and then document what you find by exporting evidence. To protect the evidence from being deleted from the database, you can also add evidence locks to recorded video. The timeline gives you advanced features for browsing recorded video and jumping to a specific date and time.
Access Control tab (explained) On the Access Control tab, you can investigate access control events with search and filtering, and view the associated video recordings and access control data. You can also monitor door states, investigate cardholders and create reports. You can drag the Access Control tab to its own separate floating window, while you keep the main window in the background to watch multiple views simultaneously. You can also sort columns and drag the columns to different positions.
View video from specific cameras The ability to use features of the Siveillance Video Client can vary considerably from user to user. When connected to certain Video systems, user rights may even vary depending on time of day, day of week, and so on. For example, you may only be able to view video from a particular camera during certain hours Monday-Friday, but not outside these hours.
View video - view live video, or play back recorded video to investigate an incident. Select a different view to view video from other cameras or other types of content.For more information, see: Topic: Add or edit views in simplified mode on page 37 Get a closer look - tap or double-click a video to view it in full-screen mode. Tap or double-click again to exit the full-screen mode. Scroll to zoom in and out.
Browse using the timeline. See Timeline (explained) on page 106. Open a new search window with the camera preselected. See Search for video on page 121 Create an evidence lock. See Evidence locks (explained) on page 159. Export video in advanced mode on page 112 Perform various actions on the camera toolbar. See Camera toolbar overview on page 101. Enter setup mode. See Setup mode overview on page 14. View in full screen. Live tab overview The picture shows what the Live tab looks like in advanced mode.
Button Function More information For more information, see Camera 5 The camera toolbar. 6 Enter or exit setup mode to add cameras and other types of content to your views. 7 Application buttons. toolbar overview on page 101 For more information, see Setup mode overview on page 14 For more information, see Application buttons (explained) on page 102 Views (explained) The way video is displayed in Siveillance Video Client is called a view.
• Alarms - the alarm list and alarm preview you can also find on the Alarm Manager tab • Cameras - video feed from a live camera or video played back. The cameras appear under the site name, which is defined by your system administrator.
• Smart Map - a geographical world map based on existing online map services, for example Google Maps and OpenStreetMap. • Monitoring Wall - if Siveillance Video Monitoring Wall has been configured by your system administrator, you can add video walls to your views. See Siveillance Video Monitoring Wall (explained) on page 12 • Text - add text to you views Camera toolbar overview Search for video with motion on page 125 View recorded video independently of timeline on page 109 Add a bookmark.
Application buttons (explained) With the application buttons in the toolbar, you can select basic Siveillance Video Client actions: Status: Access the Status window. See Status window (explained) on page 102 Help: Access the help system, play online video tutorials or view version number and plug-in information. See Get help on page 95 and View version and plug-in information Log out: Log out Siveillance Video Client.
If servers are not available at the time you log in, you cannot use cameras or features belonging to those servers. Unavailable servers are displayed in red: The number of servers you see reflects the number of servers retrievable from the surveillance system at the time you logged in. Particularly if you connect to large hierarchies of servers, more servers may occasionally become available after you log in. The server list is a static representation of server status.
Press these keys To do this /+ENTER Change the camera in the selected view item to the default camera. /+/+ENTER Change the cameras in all view items to the default cameras. Change the selected view to the view with the matching shortcut number. Example: if the required view has the shortcut number 8, press *+ 8+ENTER. *++ENTER View shortcut numbers may not necessarily be used.
The round video indicator is placed in the upper right corner of the camera title bar. This indicator changes color to display the current status of the video in the view item. The list below describes the different colors: Green Red - A connection to the camera is established - Video from the camera is being recorded Yellow Gray - Playing back recorded video - The video has not changed for more than two seconds The motion indicator appears when motion is detected.
Once started, recording will continue for the number of minutes determined by your surveillance system administrator or you can click the icon again to stop manual recording. You can start recording the video stream from more than one camera simultaneously, although you must select them one by one. Take single snapshots As you are viewing live or recorded video, or searching for video, you can take an instant snapshot that you can share.
To view markers and colors from additional sources, Additional data and Additional markers must either be enabled in the timeline settings or server-side by your system administrator. See Timeline settings on page 18. For a legend of the color codes, to the far right, click the small question mark. Drag the timeline to the right or left to move in time, or use the scroll wheel of your mouse. To adjust the range of the timeline, press CTRL and use the scroll wheel at the same time.
Pause: When you click either Play backward in time or Play forward in time, the button turns into a pause button. This lets you pause playback without having to move your mouse pointer. : Adjust the speed. Drag it to the right to increase forward play speed. Drag to the left to increase backward play speed. - Play forward in time. - Move to the image just after the one currently viewed. Navigation buttons - Move to the first image in the database for the selected camera.
On the Playback tab, all cameras in a view display recordings from the same point in time, the master time . However, you can view and navigate recordings from individual cameras independently of the master time if this is enabled in the Functions settings on page 17. You can also use independent playback to view recorded video from the Live tab. If you are accessing your cameras through the tree structure in the Cameras pane, you can open individual cameras in a new window on the Playback tab.
When you play back video on the Playback tab, all recordings in the view are synchronized with the timeline. For individual cameras, you can play back video independently of the timeline. You can only use this feature for ordinary single-camera positions, not for hotspots, carousels, or Matrix positions. Requirements In the Settings window > Functions tab, the Independent playback option must be set to Available. Steps: Move your cursor to the bottom of the camera that you want to view recorded video from.
A dark checkerboard pattern indicates that no recordings have been requested and therefore it is unknown whether there are recordings Red shading indicates that there is a recording A light checkerboard pattern indicates that data has been requested for retrieval The timeline with dark checkerboard pattern where no recordings have been requested and therefore it is not known whether there are recordings and the lighter checkerboard pattern where video has been requested for retrieval Retrieve data from Si
For each camera you want to include in the export, select the associated check box. If the same camera appears more than once in a view, automatically all of them are selected. You can also include cameras from other views. If you change the view, you will not lose your export settings. Specify the start and end time. You can also set the time interval in the timeline by dragging the square brackets to the left or right. Click Export.
In the Export name field, enter a name for the export. The system automatically creates a name with the current date and time. You can change the name. Specify a path, a media burner, or both, for the destination of the export. Click the relevant tab to select one or more of the following formats to export to: Siveillance Video format - use the Siveillance Video database format, with the option to include the Siveillance Video Client – Player along with the export.
Steps: • In the Export window, click the Privacy mask button. A window appears. • Click the button, and then drag the pointer over the area that you want to mask. To mask more areas, repeat this step. • To unmask part of a privacy mask, click the button, and then drag the pointer over the area of the mask that you want to unmask. Repeat this step for each part to unmask. • You can temporarily switch between mask and unmask modes by pressing the CRTL button while you make a selection.
Name Description Path - You can specify a path yourself (the field may suggest a path Export destination for you). When you specify a path this way, the folders you specify do not have to be existing ones. If they do not already exist, they are created automatically. Media burner - Select a burner. You can specify a burner that you want to send the export to. In this way, you create the export and make sure it is written directly to an optical media in one go. Click to add privacy masks on the video.
Name Description Select to include a digital signature to your exported database. Depending on your surveillance system settings, the video or audio might already contain a signature. If this is the case, these signatures will be verified during export and if successfully verified, added to the export. If verification fails, the export for the device will also fail.
To the right of the timeline, click Export > Export to open the Export window. All selected items are displayed in the Item list, ready for export. Click Add item to add additional items. Click Delete All to clear the list. In the Export name field, enter a name for the export. The program automatically creates a name with the current date and time. You can change the name. Specify a path and/or media burner for the destination of the export. Click the relevant tab to select a format to export to.
Click the Details button in the upper right corner when the export is complete. A dialog box appears with a link to the output folder. Click the link to open the output folder. If you have exported video at a previous point in time: Go to the folder where you store export files. The default location is C:\Users\\Documents\Siemens\Video Export. You can check the folder location in the Export window. This works only if you always use the same export destination.
When exporting in the media player and Siveillance Video formats, you can—if your surveillance system supports this—include recorded audio in the export. Export in the database format is only available if connected to selected surveillance systems. When exporting in the JPEG (still image) format, you cannot include audio.
Print report from single cameras You can print single still images and related information from live cameras or from recorded video. Notes that you add are also printed. • To print a recorded still image, go to the Playback tab. • To print a live still image, go to the Live tab. 1. Open the view that contains the camera you are interested in. 2. Hover over the view item. The camera toolbar appears. 3. Click the icon. A window appears. 4. Add notes if required. 5. Click Print.
For each search result that you want to include in the report, hover over it and select the blue check box . In the blue action bar, click . A window appears. Change the default report name into something meaningful. In the report, the name is displayed as the page header. To change the folder that the report is saved to, in the Report destination section, click a different folder. and select To add a note, enter text in the Note field. Click Create.
Requirements The bookmarking feature is only available with selected Siveillance Video products. For an overview of the key features available on your particular system, Refer Administrator manual for more details Steps: Click the arrow to select a predefined time span, or define your own Custom interval. In the Selected cameras list, do one of the following to add cameras to your search: Use the search function to find cameras or views Manually select the cameras in the tree structure.
Motion, Bookmarks, Alarms, and Events are the standard search categories. Depending on the data available in your Video system, additional search categories may be available. For each search category that you add, you can refine the search by adding filters. For more information about filters, see FAQ: search on page 138. To preview the video of a search result, select the search result and, in the preview pane, click Siveillance Video 2019 R3 123 .
To play back the video sequence in full-screen mode, double-click the search result. To make the action bar appear, hover over the search results, one by one, and select the blue check box that appears. The blue action bar appears: Actions Export the search results - bookmark the search results - edit bookmarks - take a closer look at the cameras on the Playback tab in a new window.
- create a PDF report containing information about your findings, for example still images - create snapshots from the video in the search results Search for video with motion When you search for video recordings with motion, you can apply smart search filters to show only search results with motion in areas that you define. Example Use smart search to find video footage of a person entering through a doorway that is monitored by multiple cameras.
The sensitivity of the motion detection is defined by your system administrator in Management Client on individual cameras. However, you can use the slider to adjust the sensitivity. For more information, see Smart search and motion threshold (explained) on page 126. Automatically, the search is run. Click outside the dialog to return to the search results. To perform actions, for example bookmarking search results, hover over the search results and select the check box . The action bar appears.
• To preview the video sequence and bookmark details, select a search result and play back the video in the preview pane on the right-hand side. • To view the recording in full-screen mode, double-click the search result. • To perform other actions, for example editing the bookmark, hover over the search result and select the check box . The action bar is displayed.
Owner Server - Available only if you are using Siveillance Video Federated Architecture™ If you are using Siveillance Video Federated Architecture™, the Priority and State filters are applied across all connected sites. Search for video with events When you search for video recordings associated with events, you can apply filters to show only search results with certain events, for example events that come from a specific source or server.
If the marker that you select shows more than one search result, the first search result is marked. If a marker indicates more than 10 search results, a message will inform you about the number of search results and the number of associated cameras. What you can do with search results (explained) Besides searching, there are other things you can do based on the search results on the Search tab.
Certain actions are not visible in the action bar. To access them, click action bar. in the The actions available may differ depending on your user rights. Show or hide bounding boxes during search You can turn the bounding boxes on or off. During search, bounding boxes help you identify objects in the thumbnail images of your search results. Bounding boxes are based on motion detection. Steps: • Go to the Search tab and run a search.
Click to play back the video. To preview the video in full-screen mode, double-click the individual search results. Double-click again to return to the search results. Scroll with your mouse wheel to zoom in or out. You can even click and drag to zoom in on a specific area. The yellow marker in the timeline indicates the event time. Bookmark search results To document or share incidents that you have found by searching, you can bookmark multiple search results at the same time.
• Select the search results one by one to add details to the bookmarks and follow these steps: • To change the default time span, drag the handles in the timeline to a new position. Enter a headline and possibly also a description of the incident. If you want the same headline or description to apply to all the bookmarks, click: Apply headline to all in list Apply description to all in list Click OK to save the bookmarks. A progress bar informs you when the bookmarks are created.
Steps: On the Search tab, find the bookmarks that you want to edit. When you perform the search, make sure that you have selected Search for > Bookmarks. For each bookmark that you want to edit, hover over it and select the blue check box In the blue action bar, click . . A window appears. Select the search results one by one to edit the details, for example time span, headline, and description. Click OK to save your changes. A progress bar informs you when the changes are saved.
• To locate the snapshots on your computer, go to the location that is specified in the Settings dialog > Application > Path to snapshots. • Open search results in separate window • To investigate incidents that you have found by searching, you can open them on the Playback tab in a separate window. This is useful, for example, if you want to use the timeline to browse the video, or you want to drag the window onto another monitor.
• On the Search tab, configure your search. See Search for video on page 121. • Click • In the list that appears, click Save as. A window appears. • Select a name that will make it easy for you to find the search, and possibly also a description. Later, when you use keywords to find the search, the search includes both the Name and the Description fields. • To make the search visible only to you, select the Private search check box. • Click Save.
In the list that appears, click Open search. A window appears. Find and double-click the search that you want to open, or click Open. Immediately, the search is run. If many searches are listed, you can use keywords to find the search. The search includes both the Name and the Description field. You can modify the search, for example by adding cameras. Click > Save to save the changes. Edit or delete saved searches This feature is only available in certain surveillance systems.
• In the list that appears, click Manage searches. A window appears. • Find and select the search that you want to change. • Make your changes, for example the name of the search, and click Save. To delete a saved search: Open the Manage searches window as described in step 1.1-1.2. Find and select the search that you want to delete. Click Delete search. To change how a saved search is configured: On the Search tab, click to the right of Search filters. In the list that appears, click Open search.
To check other related cameras, click the Playback tab and select a view that contains the cameras that you are interested in. The timeline is now in sync with the search result. Views (operation) Views are located on the Live and Playback tabs and contain cameras and other types of content. If views have been assigned shortcut numbers (see Assign a shortcut number to a view on page 36), you can select a view by using keyboard shortcuts (see Keyboard shortcuts (explained) on page 103).
When you apply multiple filters, for example both Priority and State, you filter for results that match all the applied filters. When you select multiple values within one filter, for example High, Medium, and Low within the Priority filter, you filter for results that match at least one of those values. Why are some of the thumbnail images grayed out? A grayed out thumbnail image in the list of search results means that no recordings are available for the current camera at that time.
Searching for views and cameras (explained) You can search directly for available views and cameras. Not only by searching for names, but also by searching for description, type and keywords. You can find an overview of common keywords if you click next to the search field. You can see matching results for views and cameras while you enter text. When you search for cameras in live and playback mode, you can view the cameras in a temporary view that is optimized for the amount of cameras you select.
Swap cameras You can temporarily swap two cameras in a view. The camera in that position then exchanges places with the one you swap it with. You can only swap cameras with other cameras. This can be useful, for example, if you want to keep all your most important cameras in a certain position in your view. Steps: • Click the relevant camera title bar and drag it to a new position.
Shared views: Shared views may already have been created by the surveillance system administrator or by some of your colleagues. If shared views already exist, and you have access to them and the cameras they contain, you can begin viewing video in your Siveillance Video Client immediately. Why do I need to recreate my views? From time to time your surveillance system administrator may make changes to camera or user properties on the surveillance system.
Multiple windows (explained) You can send individual views to separate windows or displays, while keeping the main window of the Siveillance Video Client in the background, so you can watch several views simultaneously. The selected camera or item is always displayed with a blue border.
Floating window Shows the selected view, with the Live and Playback tabs. You can select a new view from the toolbar by clicking the dropdown button. You can toggle between displaying the floating window as a fullscreen with no tabs and as a smaller floating window with tabs by clicking the Toggle full screen mode icon: . You can also choose to link the floating window to the main window to synchronize time or to follow the Live or Playback tab. Example of a view sent to a Floating window.
There are two types of hotspots: Global hotspots, which display the selected camera regardless of whether the camera is in the main window or in a secondary display Local hotspots, which only display the selected camera of the local display It is a good idea to have a hotspot in one of the view's larger positions, for example, the large position in a 1+7 view: .
Use camera navigators Use cameras navigators to navigate between related cameras as they are laid out according to a map. Requirements The camera navigator must be configured and then added to a view, see Camera navigators (configuration) on page 43. Steps: On the Live or Playback tab, open the view that contains the camera navigator. Video from the default camera of the map is displayed. To view video from the other cameras on the map, click the camera icons that are currently not in focus.
You can maximize a carousel by double-clicking the carousel position. Video from cameras included in the carousel is by default displayed in full quality, regardless of your image quality selection. Digital zoom (explained) Digital zoom lets you magnify a portion of a given image so you are able to have a closer look at it. It works both in live and playback mode. Digital zoom is therefore a useful feature for cameras that do not have their own optical zoom capabilities.
Selecting a zoom level of 0% lets you view the full image again. Click the Home icon inside the virtual joystick to return to the normal zoom level. If your mouse has a scroll wheel, you can also use the scroll wheel to control the zoom level. FAQ: digital zoom What is the difference between optical and digital zoom? With optical zoom, a camera's lens physically moves to provide the required angle of view without loss of image quality.
If you don't want the camera toolbar to pop up when you move your mouse over the view, press and hold the CTRL key while moving the mouse. Bookmarks (operation) Bookmarks allow you to quickly find or share relevant video sequences with other users of the system. Detailed bookmarks make it easier to find the bookmarks after creating them. To enable details, see Enable detailed bookmarks on page 49. Bookmarks (explained) This feature is only available in certain surveillance systems.
Multiple bookmarks Siveillance Video 2019 R3 150 SI SSP SH LPS COS Video
Fields in the Bookmark window. Name Description Bookmark ID A number that automatically is assigned to the bookmark. Added by The person who created the bookmark. Although the bookmark time and the clip start and end time are specified by the system administrator, you can change these settings. To change the time, drag the indicators on the timeline (see Time navigation controls (explained) on page 107) to the required time.
Name Description Headline Lets you specify a headline containing a maximum of 50 characters. Apply headline to all in list Only visible if you are creating multiple bookmarks. Description Lets you specify a description. Apply description to all in list Only visible if you are creating multiple bookmarks. Click the text to use the same headline for all bookmarks. Click the text to use the same description for all bookmarks. Add or edit bookmarks You can add bookmarks to live and recorded video.
4. Click Yes to delete the bookmarks. There may be restrictions in your system preventing you from deleting certain bookmarks. In that case, you will be notified. FAQ: bookmarks How do I find bookmarked incidents? Go to the Search tab, set a timespan, select the cameras that may have recorded the incident, and then click Search for > Bookmarks. I cannot find a particular bookmark. Why? There may be several reasons why you cannot find the bookmark: Your user rights do not allow you to view it.
individual alarms or events), and, if available, a map position (for geographical display of alarm indicators). Click the Report button, to display relevant reports on the incidents (see View alarm reports on page 157). Alarm list (explained) The Alarm list displays incoming alarms by default, with the most recent alarms at the top of the list. Alternatively, the alarm list can display a list of MIP plug-in and analytic events, for example, access control or license plate recognition.
Enter filter criteria on any of the columns you want to filter on. For example, if you enter a user ID in the ID field, the list will only display alarms assigned to that particular user. You can combine filters, for example State name and Owner (assigned to). To return to the unfiltered alarm list, click the Clear filter button. To sort the alarm list's content, in the alarm list, click the title of the column.
Field Description Lets you print a report that contains information about the alarm, such as the alarm history and a still image from the time of the alarm, if an image is available. Print Acknowledge alarms When you have received an alarm, you can acknowledge it to record that you will do something about it. Steps: • In the alarm list, right-click the alarm and select Acknowledge. The alarm state changes to In progress. • You can only acknowledge new alarms.
• Select Print. A window appears. • To add a note, enter the text in the Note field. • Click the Print button. View alarm reports Alarm reports are available only if you are using Siveillance Video Pro, Siveillance Video Advanced, Siveillance Video Core Plus, or Siveillance Video Core.
To return to an alarm list mode where you can see alarms from more than just the one element, click the required server, priority or state in the alarm list. Events (explained) An event is a predefined incident on the surveillance system that can be set up to trigger an alarm. Events are either predefined system incidents or user-specified events (for example, analytics events, generic events, or user-specified). Events are not necessarily linked to an alarm, but they can be.
Evidence locks (operation) You can add, edit, and delete evidence locks, but you can also export them and play back video with evidence locks. Evidence locks (explained) With the evidence lock functionality, you can protect video sequences from being deleted, for example while an investigation or trial is ongoing. This protection also covers audio and other data from devices related to the selected cameras. Once an evidence lock is in place, the system protects the data from being deleted.
Select an evidence lock and click Details to see the cameras included in the evidence lock and other information. See Evidence lock settings on page 161 for more information. Edit evidence locks You can edit evidence lock, depending on your user rights, for example the time interval, the cameras, and how long the evidence lock should apply. Select the Playback tab.
Delete evidence locks When you delete an evidence lock, you do not delete the video sequences but do only remove the protection of them. If the video sequences are older than the system's default retention time, the system informs you about this and you can keep the evidence lock to prevent that the video sequences are automatically deleted by the system after the removal of the protection. Click the Playback tab. To the right of the timeline, click Evidence Lock and select View.
Name Description Expiry date Filter your evidence locks based on when they expire. Available options are today, tomorrow, next 7 days, all and custom interval. If you select custom interval, you select the start and end date in a calendar. Users Filter for evidence locks created by all users or just by you. Cameras Filter for evidence locks with data from any camera or select one or more cameras that must be included in the evidence locks.
This feature is only available in certain surveillance systems. Refer Administrator manual for more details You can use privacy masking to protect private or public areas in live and recorded video by blocking out certain areas in the field of view of a camera. For example, if a camera overlooks the windows of a private residence, you can apply privacy masks to the windows. In this example, privacy masks are applied to five windows in an adjacent building.
Lift and apply privacy masks This feature is only available in certain surveillance systems. Refer Administrator manual for more details It can sometimes be necessary to view the video beneath the areas covered by privacy masks. This is only possible for privacy masks that your system administrator has defined as liftable privacy masks in the Management Client and if you have the necessary user rights. If you do not have the necessary user rights, you will be asked for additional authorization.
If you do not have sufficient rights, a dialog box appears. Contact a person who has the rights to authorize you, so he or she can enter their credentials. Liftable privacy masks disappear and permanent privacy masks remain. The lift ends (times out) after 30 minutes, if your system administrator has not changed the default value, but you can apply the masks any time. On the application toolbar, click More > Apply privacy masks.
If you log out of Siveillance Video Client with lifted privacy masks and log in again, the masks will always be reapplied. PTZ and fisheye lenses (operation) PTZ and fisheye lenses are described in the same section, because they are closely related.
For an overview of the key features available on your particular system, Refer Administrator manual for more details PTZ images (explained) If your views (including those in a carousel or a map preview) contain PTZ camera images, you can control the PTZ cameras using the overlay PTZ navigation button. In Setup mode, on the Properties pane, you can define the PTZ click mode for the view item. You can choose between click-to-center and virtual joystick.
Starting, stopping, or pausing PTZ patrolling With certain Siveillance Video systems, you can manually start and stop a patrolling. You can always pause an ongoing patrolling. Stop PTZ patrolling A PTZ camera can continuously move between a number of PTZ presets according to a schedule. You can stop an ongoing system patrolling. Only stop system patrolling when there is an important reason to do so.
Example of a PTZ menu Select the patrolling profile you want to start. While the patrolling profile is running, there is a check mark in front of it for all users. The PTZ icon turns green for you and red for all other users, so they can see that someone controls the camera. • To stop the manual patrolling, select the profile again. • The system resumes its regular patrolling or the camera is made available for other users.
While patrolling is paused, there is a check mark in front of the Pause patrolling menu item for all users. The PTZ icon turns green for you and red for all other users, so they can see that someone controls the camera. If you start a manual patrolling, you lose the pause patrolling session. To stop pausing, select Pause patrolling again. The system resumes its previous patrolling or the camera is made available for other users.
You can operate the camera in a reserved PTZ session both from Siveillance Video Client and the Management Client. To reserve a PTZ session can be useful, if you need to make urgent updates or maintenance to a PTZ camera or its presets without being interrupted by other users. You cannot start a reserved PTZ session, if a user with a higher priority than yours controls the camera, or if another user has already reserved the camera. Reserve PTZ sessions On the Live tab, select the required view item.
Support for specific audio features may vary from system to system (see Surveillance system differences on page 13). Access to recorded audio, or certain recorded audio features, may be restricted depending on your user rights. Consult your surveillance system administrator if in doubt. The Siveillance Video Client supports both incoming and outgoing audio. You can listen to live recordings from microphones attached to cameras and use loudspeakers connected to cameras to talk to audiences.
Will audio from microphones attached to cameras be recorded? Incoming audio, from microphones attached to cameras, is recorded, even when no video is being recorded. Will what I say through speakers be recorded? The surveillance system can record incoming audio from microphones, even when no video is being recorded. However, outgoing audio transmitted through speakers can only be recorded, played back, and exported on some surveillance systems.
map. You can, however, link a smart map to maps. For more information, see Adding, deleting, or editing links on smart map on page 60. Zoom in and out If you have multiple cameras covering the different areas on the smart map, the cameras are grouped and displayed with icons. For example, this icon indicates that there are 6001 cameras within the area.
• Double-click a cluster of cameras. You can preview up to 25 cameras in a group. If one or more cameras are selected in the group, the preview window displays video only from the selected cameras To play back and investigate the video in more detail, do one of the following: In the Preview window, click the Independent Playback button.
• Select the location to go to that location on the smart map. • Jump to camera on smart map • If you want to view a camera in its geographic context, you can jump to the place on the smart map where the camera is. This is useful if, for example, you forgot the location of camera, or you want to check nearby cameras. Requirements You can jump to a camera only if the GPS coordinates of the camera have been specified.
Click next to the overlay you want to find. This will take you to the location on the smart map. Backtracking to previous locations (explained) When you go from one location to another, Siveillance Video Client keeps a history of the locations you visit. This lets you backtrack by clicking Back. The history is based on the locations that you click. That is, if you pan to a location, but do not click it, the location is not added to the history.
Map with camera elements and hot zone Maps do not have to be geographical maps, although they often are. Depending on your organization's needs, photos and other kinds of image files can also be used as maps. Maps are not the same as a smart map. For more information, see Differences between maps and smart maps (explained) on page 173.
Speakers Place your mouse over a speaker; press and hold the left mouse button to talk through the speaker. You cannot use speakers in map views in playback mode. Events Click an event on the map (see Alarms (explained) on page 153) to activate it, or right-click the event and select Activate Event. When left-clicking an event, the mouse pointer briefly changes to a lightning symbol to indicate that the event is being activated.
Indicator Description Attention needed - when an element requires attention, but is still working; for instance when a server is running out of disk space. Note that the device in question is not necessarily included on the map. The default display color is yellow. Not operational - when there is an error on the element, for example if a server cannot connect to a microphone or speaker. The default display color is orange. Alarms - when an element has an alarm attached to it.
surveillance system with many maps. If you are connected to a surveillance system that supports Siveillance Video Federated Architecture, you can only add maps from the surveillance system server you logged in to. Siveillance Video Federated Architecture is a system setup with related but physically separate surveillance systems. Such a setup can be relevant for, for example, chains of shops with many separate—but related—surveillance systems. See the Siveillance Video Comparison Chart on https://www.
elements, and the map centers on the clicked spot. Pan the map by clicking and dragging the map in any direction. To use the zoom function on a map, right-click the map and select Zoom In or Zoom Out as required. Or use the Zoom to Standard Size function to zoom back to normal size Alternatively, use your mouse's scroll wheel to zoom; scroll up to zoom in, scroll down to zoom out.
always ranked—one of the positions will be the primary Matrix position, another the secondary, and so on. When the first Matrix-triggered live video stream is received, it is automatically presented in the primary Matrix position. When the next Matrix-triggered video stream is received, a first-in-first-out principle applies: the previously received video stream is transferred to your view's secondary Matrix position, and the newest video stream is presented in your primary Matrix position, and so on.
To view the contents, you need to send the Monitoring Wall to a separate window, either on your main computer monitor, or to secondary computer monitors. See View Siveillance Video Monitoring Wall content on page 185. Examples where this is useful You are setting up a video wall for the first time, and want to display content in full-screen on the monitors.
If you want to review Monitoring Wall content without disturbing what others see on the video wall, you can click the Disconnect Monitoring Wall monitor button. Changes you make will not affect the shared view. At any time, you can reconnect to the server. View Siveillance Video Monitoring Wall content Your Monitoring Wall displays both live and recorded video depending on the tab you are standing on. User rights can prevent cameras from displaying video on your Monitoring Wall.
For more information about display options, see Viewing Monitoring Wall content in separate window (explained) on page 186. Viewing Monitoring Wall content in separate window (explained) The following table describes ways to view Monitoring Wall content in a separate window or secondary display. Option Description View content in full-screen on the display that you're currently viewing. Client remains open behind the Monitoring Wall content. You can minimize or resize the window.
Go to the Live or Playback tab. In the Views pane, select the view that contains the Monitoring Wall overview. In the Cameras pane, drag the camera to a tile in your Monitoring Wall overview. To view the contents of the Monitoring Wall, follow the steps described in View Siveillance Video Monitoring Wall content on page 185.
You have added a hotspot to your view as described in Add hotspot to view or Monitoring Wall on page 32. Steps: Go the view item that contains the hotspot. In the toolbar, click More > Send to Monitoring Wall and select the Monitoring Wall, monitor, and the tile where you want to display the hotspot. In the Monitoring Wall overview, click and select a display option, for example Primary Display. For more information, see View Siveillance Video Monitoring Wall content on page 185.
Your text editor must support drag and drop operations to perform this procedure. If your text editor does not, follow the steps described in Display text on more than one Monitoring Wall on page 189. Steps: • Select the view that contains your Monitoring Wall overview. • In your text editor, enter the text you want to display. • Select the text and drag it to the tile in the Monitoring Wall overview where you want to display it. The built-in text editor appears.
You have added a camera navigator to your Monitoring Wall as described in Add camera navigator to view or Monitoring Wall on page 32. Steps: • Go the view item that contains the camera navigator. • In the toolbar, click More > Send to Monitoring Wall and select the Monitoring Wall, monitor, and the tile where you want to display the camera navigator. • In the Monitoring Wall overview, click and select a display option, for example Primary Display.
You can share a prioritized overview of all alarms by adding the Alarm List to your Monitoring Wall. You can then double-click an alarm in the list to view and work with details about the alarm. For more information, see Viewing and editing details of an alarm on page 155.
Other users can manually change the content on a Monitoring Wall, and the content can change according to a schedule or rules. This means that the content that you remove can reappear later. To permanently prevent content from displaying, contact your system administrator. Remove the Monitoring Wall from a view: On the Views pane, select the view that contains the Monitoring Wall. Click Setup. In the view item that contains the Monitoring Wall overview, click the icon.
Send smart map to Monitoring Wall from the same view If Siveillance Video Monitoring Wall is set up in your system, you can share your smart map with others through Monitoring Wall. This topic describes how to do this if your view contains both a Monitoring Wall overview and a smart map. If your view does not contain a Monitoring Wall overview, follow the steps described in Send smart map to Monitoring Wall when not in the view on page 193. Steps: • Go to your view.
Siveillance Video Client – Player (explained) Siveillance Video Client – Player is a light version of Siveillance Video Client that can be included with exported video data. Siveillance Video Client – Player lets the recipient view the exported files without having surveillance software installed. An Siveillance Video Client – Player is also automatically included in video archives and recording database folders to ensure availability of recordings if the disk with the recordings is removed.
Start search in a new search window with the cameras in the current view preselected. Search in Siveillance Video Client – Player On the Search tab, you can search the recordings included in the export, for example if you want to search a subset of the cameras. You can search for recordings, motion, and bookmarks. The timespan is set automatically based on the export timespan. You can define your own timespan, for example Custom interval. Add the cameras that you want to search.
Verify digital signatures If you are reviewing video evidence in Client – Player, and the exported material has digital signatures, you can verify that the recording has not been tampered with since it was recorded, or since the export was made, or both. Digital signing does not work for Siveillance Video Client 2017 R1 or earlier versions that logs into a 2017 R2 or newer system and the export will not succeed.
A database can be verified, partially verified (if some of the files have not had signatures attached), or not signed. View database or previously exported evidence The Open Database wizard lets you open a database from an archive or previously exported material. You can use this wizard to open a database and add it to your project, for example, if you want to view an archived database or previously exported material. The Open Database wizard also repairs corrupted databases automatically.
From the map toolbox that appears, click Add Access Control. In the list that appears, drag the relevant access control unit, for example a door, onto the map. A door icon appears on the map. Click Setup to change to live viewing. When a person requests access, the door unlocks. The door unlocks because someone grants access via a command button on the access request notification or even on the map itself. Once the access is granted, the door icon turns green and appear as an open door.
Events list (explained) On the Access Control tab, when you select an event, the preview on the right lets you view the related video sequence for the event. The preview camera title bar shows the camera related to the unit that triggered the event.
Monitor and control door states The Doors list provides a list of the doors, access points and other access control units in each access control system, and their current state. This is useful if you, for example, need to know the state of a specific door. There are several ways you can filter the doors list, so it displays the data that you are interested in. On the Access Control tab, select Doors list. Click any of the filters at the top of the list and specify the criteria.
You can combine the filters or enter your criteria in the search field to search for cardholders. Alternatively you can right-click a cardholder or a type within the list and filter using that value. Any filters you apply are immediately reflected in the list. What can you filter on? Cardholders list Description Name Select one of the available cardholders to view detailed information about this person. Type Select one of the available cardholder types to view the list of cardholders with this type.
To carry out other actions, use the command buttons to the right of the microphone and speaker buttons. The most typical action is to unlock a door for a person requesting access, but could also be to turn on the lights in the area close to the relevant entry. Cardholder information may be available if your access control system provides such information to the Siveillance Video system. Examples of cardholder information: Cardholder's ID number, name, department, phone number, and authority level.
Failed to connect. Check the user name and password. It was not possible to log in with the specified user name and/or password. To resolve this issue: Verify that you have entered your user name correctly, then enter your password again to ensure it does not contain errors. User names and passwords are case sensitive. For example, there may be a difference between entering Amanda and amanda. Failed to connect. Maximum number of clients are already connected.
o Open the SmartClient-Player.exe file on a 64-bit Windows computer. o Open the export with a 32-bit version of Siveillance Video Client. To do this, follow these steps: o Open this link: https://www.siemens.com/siveillance-vms/. o Select Product, for example Siveillance Video Video Pro, Version, and Language. o Click Siveillance Video Client 32-bit to download the application. o When installed, go to the export folder and open the Client Files folder. o Double-click the Exported Project.
Siveillance Video Monitoring Wall (troubleshooting) Some of the solutions will require help from your system administrator. My monitors do not display the layout that I specified for my Monitoring Wall Typically, this occurs because your system administrator did not activate the preset for the monitor. Ask your system administrator to verify that the preset is active in Management Client. My camera is not part of a preset.
Issued by Siemens Schweiz AG Smart Infrastructure International Headquarters Theilerstrasse 1 a CH-6300 Zug, Switzerland Tel. +41 41 724 24 24 Cyber security disclaimer Siemens provides a portfolio of products, solutions, systems and services that includes security functions that support the secure operation of plants, systems, machines and networks. In the field of Building Technologies, this includes building automation and control, fire safety, security management as well as physical security systems.