Dishwasher SN.../SX... VLHPHQV KRPH EVK JURXS FRP ZHOFRPH en Instruction manual 5HJLVWHU \RXU SURGXFW RQOLQH
5HVHW VHF K PLQ 6WDUW 5HVHW VHF Setup 3 sec.
en Table of contents enI nst r uct i on manual 8 Intended use . . . . . . . . . . . . . . . . 5 ( Safety instructions. . . . . . . . . . . . 5 Before you switch ON the appliance . . . . . . . . . . . . Delivery. . . . . . . . . . . . . . . Installation. . . . . . . . . . . . . In daily use . . . . . . . . . . . . Door lock . . . . . . . . . . . . . Button lock . . . . . . . . . . . . Damage . . . . . . . . . . . . . . Disposal . . . . . . . . . . . . . . . . . . . . . . . . . . . . . . . . . . . . . .
en 1 Operating the appliance . . . . . . 30 Programme data . . . . . . . . . . . . . . . .30 Changing the settings . . . . . . . . . . . .30 AquaSensor . . . . . . . . . . . . . . . . . . . .30 Sensor setting . . . . . . . . . . . . . . . . . .30 ExtraDry . . . . . . . . . . . . . . . . . . . . . . .31 Auto Power Off . . . . . . . . . . . . . . . . .31 EmotionLight . . . . . . . . . . . . . . . . . . .31 Changing start programme . . . . . . . .31 Tone volume . . . . . . . . . . . . . . . . . . .
Intended use en 8 Intended use I nt e n d ed u s e ■ ■ ■ This appliance is intended for use in the home and domestic environments. Use the dishwasher only in the home and only for its designated purpose: for washing domestic dishes. This appliance is intended for use up to a maximum altitude of 4000 metres above sea level.
en Safety instructions Installation ■ ■ ■ ■ ■ ■ ■ ■ 6 Following installation, ensure that the back of the dishwasher is not freely accessible (protection against contact due to hot surface). Install and connect the appliance according to the installation and assembly instructions. Prior to installation, disconnect the dishwasher from the power supply. Ensure that the protective conductor system of the domestic supply has been correctly installed.
Safety instructions en ■ ■ ■ Please note that the insulation material of the dishwasher power cord may melt next to heat sources (e.g. heating / hot water installations) or hot appliance parts. Make sure that the power cord of the dishwasher never comes into contact with heat sources or hot appliance parts. After installing the appliance, ensure that the plug is easily accessible. ~ "Electrical connection" on page 51 For some models: The plastic housing on the water connection contains an electric valve.
en Safety instructions Open the door with activated child-proof lock (door lock) as follows: 1. Press the catch of the child-proof lock to the right (1). 2. Open the door (2). Deactivate the child-proof lock (door lock) as follows: 1. Press the catch of the child-proof lock to the right (1). 2. Press the catch of the child-proof lock backwards (2). The childproof lock is deactivated.
Safety instructions en Damage ■ ■ The appliance may be repaired and opened up by a technician only. To do this, disconnect the appliance from the power supply. Pull out the mains plug or switch off the fuse. Turn off the tap. If the appliance is damaged, especially the control panel (cracks, holes, broken buttons), or the door function is impaired, stop operating the appliance. Pull out the mains plug or switch off the fuse. Turn off tap, call customer service. Disposal 1. 2.
en Safety instructions : Warning Risk of explosion! Do not add any solvents to the rinsing compartment. Danger of explosion! : Warning Risk of scalding! Open the door carefully when the programme is still running. There is a risk of hot water spraying out of the appliance. : Warning Risk to children! ■ If fitted, use the childproof lock. ■ Do not allow children to play with or operate the appliance. ■ Keep children away from detergents and rinse aid.
Environmental protection en 7 Environmental protection Both the packaging of new appliances and the old appliances themselves contain valuable raw materials and recyclable materials. Please dispose of the individual parts separated according to type. Please ask your dealer or inquire at your local authority about current means of disposal. Envi r onment al pr ot ect i on Old appliances Please follow the safety instructions under “Disposal of your appliance” ~ Page 9.
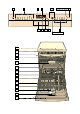
en Getting to know your appliance * Getting to know your appliance Diagrams of the control panel and the interior of the appliance can be found at the front of the manual. Individual positions are referred to in the text. Get i ng t o know your ap l i ance Control panel See Fig.
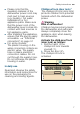
Getting to know your appliance en Overview of menu 4. Adjust the setting using the buttons The dishwasher has been preset with certain settings for your convenience. The settings can be found in the individual chapters. You can change these factory settings. 5. Press and hold the ‹ button Here’s how to change the settings: 1. Switch on ON/OFF switch (. 2. Press and hold the ‹ button for 3 seconds. In the display window @ you will see •:‹... and ‘ . 3.
en Getting to know your appliance Setting up Factory setting Description †– Tone volume * †–:‹ƒ Volume of the signal. ›–:‹ƒ Volume when using button. ©:‹‚ / On At the end of the Eco programme the door opens automatically. ¢:“† Confirm with + Reset to the factory setting. †–:‹‹ - †–:‹„ ›– Button volume * ›–:‹‹ - ›–:‹„ © Eco drying ©:‹‹ - ©:‹‚ §“ Factory setting * depending on the configuration of your specific dishwasher -------- Eco drying Your dishwasher features the Eco drying function.
Water softening system/special salt en + Water softening system / special salt To ensure good rinsing results, the dishwasher requires soft water, i.e. water which is low in lime, otherwise limescale will be deposited on the utensils and interior container. Tap water above 7° dH (1.2 mmol/l) must be softened. The water is softened with special salt (regeneration salt) in the water softening system of the dishwasher.
en Water softening system/special salt Using special salt Top up the special salt as soon as the salt refill indicator )* lights up in the control panel. Always top up the special salt immediately before switching on the dishwasher. This ensures that overrun special salt solution is immediately rinsed out and that corrosion in the washing tank cannot occur. Caution! Detergent will destroy the water softening unit! Never pour detergent into the dispenser for special salt.
Rinse aid en Setting amount of rinse aid , Rinse aid The rinse aid ensures stain-free dishes and clear glasses. Use only rinse aid for domestic dishwashers. As soon as the rinse aid refill indicator h lights up in the control panel, there is still a rinse aid reserve of 1-2 rinse cycles. Top up the rinse aid. Ri nse ai d Top up the rinse aid as follows: 1. Open dispenser 9"; press lug on the lid (1) and lift (2). 2 1 2. Add rinse aid up to the max. mark.
en Utensils Using detergent with a rinse aid component In general, you can use detergent with a rinse aid component up to a water hardness level of 21 °dH (37 °fH, 26 °Clark, 3.7 mmol/L) without adding rinse aid. Above a water hardness value of 21 °dH, use additional rinse aid. Det er gent wi t h a r i nse ai d component Switching off rinse aid refill indicator If the rinse aid refill indicator h bothers you (e.g.
Utensils en Loading the dishwasher 1. Remove large food remnants. It is not necessary to prerinse utensils under running water. 2. Place the utensils so that – they are secure and cannot tip over. – all utensils with their openings face down. – parts with curves or indentations are at an angle, thereby allowing water to drain. – does not obstruct rotation of the two spray arms 1: and 1J. Very small utensils should not be washed in the machine, as they may fall out of the baskets.
en Utensils Tip: Heavily soiled utensils (pans) should be placed in the lower basket. The more powerful spray jet provides a better dishwashing result. You can take out the cutlery drawer. Tip: Other examples, such as the best way of loading your dishwasher, can be found on our homepage. These can be downloaded free of charge. The corresponding Internet address can be found on the back page of these instructions for use.
Utensils en Etagere * Folding spikes * Et ager e Fol di ng spi kes The etagere and the space underneath can be used for small cups and glasses or for larger items of cutlery, such as wooden spoons or serving cutlery. If you do not require the etagere, it can be folded up. * Depending on the features of your dishwasher, the spikes can be folded down. This facilitates arrangement of pots, bowls and glasses. Fold down the spikes as follows: 1. Press lever forwards (1). 2. Fold down spikes (2). &/,&.
en Utensils Knife rack * Baking sheet spray head * Kni f e r ack Baki ng she t spr ay head * Depending on the features of your dishwasher, the upper basket is fitted with a knife shelf. Long knives and other utensils can be placed in the knife shelf. * depending on the features of your dishwasher Large trays or grilles as well as large plates (gourmet plates, pasta plates, dinner plates) can be cleaned with this spray head. Insert the spray head as follows: 1. Remove upper basket 12. 2.
Utensils en Unloading the dishwasher To prevent water from dripping off the upper basket onto the utensils in the lower basket, it is recommended to empty the appliance from the bottom up. Tip: Hot utensils are sensitive to shock! Therefore, when the programme ends, leave the utensils to cool down in the dishwasher until they can be handled. Note: When the programme ends, water droplets can still be seen inside the appliance. This does not affect the drying of the utensils.
en detergent Upper basket with side levers 1. Pull out upper basket 12. 2. Hold the sides of the basket along the upper edge. This prevents it from suddenly dropping. 3. To lower the upper basket; press in both levers on the left and right on the outside of the basket. The upper basket lowers. 4. To lift the upper basket; grip the sides of the upper basket along the upper edge and lift. 5. Ensure that both sides of the upper basket are at the same height. 6. Push in upper basket.
detergent en Adding detergent 1. If the detergent dispenser 9* is still closed, actuate locking bar 92 to open it. 2. Pour detergent into the dry detergent dispenser 9* only (insert tablet flat, not on its edge). 3. Dosage: see manufacturer’s instructions on the packaging. Use graduated detergent dispenser. Usually 20 ml–25 ml are adequate for normal soiling. If using tablets, one tablet is adequate. 50 ml 25 ml 15 ml 4. Close cover on the detergent dispenser. Cover “clicks” into position.
en detergent Combination detergent Apart from conventional detergents (Solo), a number of products are offered with additional functions. These products contain not only the detergent but also rinse-aid and salt replacement substances (3in1) and, depending on the combination (4in1, 5in1, ...), additional components such as glass protection or stainless steel cleaner. Combination detergents function only up to a specific degree of hardness (usually 21°dH). Over this limit salt and rinse-aid must be added.
Overview of programmes en / Overview of programmes The max. possible number of programmes is illustrated in this overview. The corresponding programmes and their arrangement can be found on the fascia.
en Overview of programmes Type of dish Type of soiling mixed utensils and cutlery part dried, common household food remnants mixed utensils and cutlery part dried, common household food remnants Programme Possible additional options Programme sequence Extra Dry Shine and Dry Time-optimised: Cleaning 65° Intermediate rinse Final rinse 70° Drying Extra Dry Shine and Dry Time-optimised: Cleaning 65° Intermediate rinse Final rinse 70° Drying Extra Dry Shine and Dry Time-optimised: Cleaning 45° Int
Additional functions en 0 Additional functions Ï intensiveZone * Perfect for a mixed load. You can wash very soiled pots and pans in the lower basket together with normally soiled utensils in the upper basket. The spray pressure in the lower basket is intensified, the rinsing temperature is increased slightly. i nt ensi veZone * Depending on the features of your dishwasher, you can select different additional functions `.
en Operating the appliance 1 Operating the appliance Oper at i ng t he ap l i ance Programme data The programme data (consumption values) can be found in the quick reference guide. They refer to normal conditions and the set water hardness value •:‹…. Different influencing factors such as water temperature or line pressure may result in deviations. Changing the settings The dishwasher has been preset with certain settings for your convenience. You can change these factory settings.
Operating the appliance en ExtraDry EmotionLight (Interior lighting) * The final rinse uses a higher temperature which improves the drying result (be careful if you have delicate tableware). The running time may increase slightly. You can switch the function ExtraDry on š:‹‚ or off š:‹‹. * depending on the configuration of your specific dishwasher EmotionLight 1" is the interior lighting for your dishwasher. You can switch the interior lighting on “:‹‚ or off “:‹‹.
en Operating the appliance Button volume Switching on the appliance When you are operating the dishwasher, a signal sounds whenever a button is pressed. You can adjust the volume of the tone from ›–:‹‹ - ›–:‹„. If the signal tone is annoying, set the value to ›–:‹‹ (button volume off). 1. Turn tap fully on. 2. Switch on ON/OFF switch (. Eco drying If you have selected the Eco 50° programme, the door opens automatically when the programme ends. This ensures a particularly economical drying result.
Operating the appliance en Time preselection * Switching off the appliance Ti me pr esel ect i on Shortly after the end of the programme: 1. Switch off ON/OFF switch (. 2. Turn off water supply (does not apply to appliances with Aqua-Stop). 3. Remove the utensils when they have cooled down. * depending on the configuration of your specific dishwasher You can delay the start of the programme by up to 24 hours. Here’s how to set up the delay: 1. Switch on ON/OFF switch (. 2.
en Cleaning and maintenance Interrupting the programme Caution! Expansion (overpressure) may cause the appliance door to jump open and/or water to escape! If the door was opened on an appliance which has a hot water connection or is heated, always leave the door ajar for several minutes and then close it. 2 Cleaning and maintenance A regular inspection and maintenance of your machine will help to prevent faults. This saves time and prevents problems. Cl eani ng and mai nt enance 1.
Cleaning and maintenance en Notes ■ Only clean the appliance with special detergents/appliance cleaners which are suitable for use with dishwashers. ■ Regularly wipe the door seals using a damp cloth and a little washing-up liquid. This will keep the door seal clean and hygienic. ■ Leave the door open slightly if the appliance will not be used for a while. This will prevent an unpleasant odour from developing. ■ Never clean the dishwasher using a steam cleaner.
en Cleaning and maintenance Notes ■ Remove any coarse soiling in the interior using a damp cloth. ■ Run the programme without dishes, and in combination with a machine cleaning detergent. ■ Use a special machine cleaning detergent, and not dishwasher detergent. ■ Observe the safety instructions and the instructions for use on the machine cleaning detergent packaging.
Fault, what to do? en Spray arms Limescale and contaminants in the rinsing water may block nozzles and bearings on the spray arms 1: and 1J. 1. Check outlet nozzles on the spray arms for blockages. 2. Unscrew the upper spray arm 1: (1) and remove downwards (2). 3. Remove the lower spray arm 1J upwards. 3 Fault, what to do? Experience has shown that you can rectify most faults which occur in daily operation yourself. This ensures that the appliance is quickly available to you again.
en Fault, what to do? Waste water pump 6. Check impeller wheel and remove Large food remnants or foreign objects which were not captured by the filters may block the waste water pump. The rinsing water will then be above the filter. 7. Place pump cover in the original : Warning Danger of cutting! Sharp and pointed objects or glass fragments may block the waste water pump. Always carefully remove foreign objects. Clean the waste water pump as follows: 1. Disconnect the dishwasher from the power supply.
Fault, what to do? en Fault table Fault Reason Remedial action “Check water supply” display lights up. Supply hose kinked. Install supply hose without kinks. Water supply turned off. Turn on water supply. Water supply jammed or calcified. Turn on water supply. Flow rate must be at least 10 l/min. when water supply is open. Filter in the water supply blocked. Switch off the appliance and pull out the mains plug. Turn off water supply. Unscrew water connection. Clean filter in the supply hose.
en Fault, what to do? Fault Reason Remedial action Fault code “:ƒ… is lit. Waste-water hose kinked or blocked. Install hose without kinks, remove any residue. Siphon connection still sealed. Check connection to siphon and open if required. Cover on the waste water pump loose. Lock cover correctly. ~ "Waste water pump" on page 38 Fault code “:ƒ† is lit. Waste water pump blocked or Clean pump and lock cover correctly.
Fault, what to do? en Fault Reason Remedial action Utensils not dry. Not enough rinse aid in the dispenser, or none at all. Refill rinse aid. Programme without drying was selected. Select programme with drying. ~ "Overview of programmes" on page 27 Water collecting in depressions on the utensils and cutlery. Arrange utensils in a sloping position, arrange affected utensils as sloping as possible. The combined detergent used has a poor drying performance.
en Fault, what to do? Fault Reason Remedial action Food remnants on the utensils. Utensils placed too closely together, utensils basket overfilled. Arrange utensils with adequate clearance between them ensuring that the spray jets can reach the surface of the utensils. Prevent contact points. Spray arm rotation obstructed. Arrange utensils so that the spray arm can rotate without obstruction. Spray arm nozzles are blocked. Clean the spray arm nozzles.
Fault, what to do? en Fault Reason Remedial action Detergent residue Detergent dispenser cover 9* Utensils must not be placed above the blocked by utensils and therefore tablet collecting tray 1B. These may does not open fully. block the lid of the detergent dispenser and prevent it from opening fully. ~ "Upper basket" on page 19 Do not place utensils or fragrance dispenser in the tablet collecting tray. Detergent dispenser cover 9* blocked by the tablet. Tablet must be inserted flat and not upright.
en Fault, what to do? Fault Reason Remedial action White, stubborn coatings; limescale on the utensils, container or door. Detergent substances are Change detergent brand. deposited. These coatings cannot Clean appliance mechanically. usually be removed with chemicals (appliance cleaner, ...). Hardness range incorrectly set or Set water softening system according to water hardness greater than 8.9 instructions for use or top up salt. mmol/l. Tea or lipstick residue on the utensils.
Fault, what to do? en Fault Reason Remedial action Plastic parts discoloured. Too low rinsing temperature. Select programme with higher washing temperature. Utensils precleaned too intensely; sensors therefore decide on weak programme sequence. Stubborn soiling cannot be completely removed. Do not prerinse utensils. Remove only large food remnants. Increase sensitivity of the sensors. Recommended programme Eco 50° Too much rinse aid. Set rinse aid amount to lower setting.
en Fault, what to do? Fault Reason Remedial action Appliance cannot be switched on or operated. Malfunction. Disconnect appliance from the power supply; pull out the mains plug or switch off the fuse. Wait at least 5 seconds, then connect the appliance to the power supply. Appliance does not start. The mains fuse has tripped. Check mains fuse. Power cord not inserted. Ensure that the power cord is plugged all the way into the back of the appliance and into the socket.
Fault, what to do? en Fault Reason Remedial action Door cannot be closed. Door lock has been activated. Close door with increased force. Door cannot be closed due to installation. Check appliance installation: Door or attached parts must close without obstruction. Cover on the detergent dispenser cannot be closed. Detergent dispenser or cover Remove detergent residue. guide blocked by sticky detergent residue Detergent residue in the detergent dispenser 9* or in the tablet collecting tray 1B.
en Customer service 4 Customer service If you are unable to rectify the fault, please contact your customer service. We will always find an appropriate solution in order to avoid unnecessary visits by engineers. Contact information for your nearest customer service can be found on the back of these instructions for use or on the enclosed customer service list. When calling, please state the appliance number (E-Nr.
Installation and connection en Delivery Installation Your dishwasher has been checked thoroughly in the factory to ensure that it is in working order. This may cause small water stains. These will disappear after the first wash cycle. The required installation dimensions can be found in the installation instructions. Level the appliance with the aid of the height-adjustable feet. Ensure that the appliance is situated securely on the floor.
en Installation and connection Drinking water connection 1. Fasten the drinking water connection to the tap according to the installation instructions using the enclosed parts. Ensure that the drinking water connection is not kinked, crushed or twisted. 2. When replacing the appliance, always use a new water supply hose. Water pressure: at least 0.05 MPa (0.5 bar), maximum 1 MPa (10 bar). At a higher water pressure: connect pressure-reducing valve ahead.
Installation and connection en Electrical connection ■ ■ ■ ■ ■ ■ Connect the appliance to an alternating current only, ranging from 220 V to 240 V and 50 Hz or 60 Hz via a correctly installed socket with protective earth conductor. See rating plate for required fusing 9:. The socket must be near the appliance and freely accessible following installation.
$48$ 6723 JXDUDQWHH HQ GRHV QRW DSSO\ WR DSSOLDQFHV ZLWKRXW $TXD 6WRS ,Q DGGLWLRQ WR ZDUUDQW\ FODLPV DJDLQVW WKH VHOOHU EDVHG RQ WKH SXUFKDVH FRQWUDFW DQG LQ DGGLWLRQ WR RXU DSSOLDQFH ZDUUDQW\ ZH ZLOO SD\ GDPDJHV XQGHU WKH IROORZLQJ FRQGLWLRQV ,I RXU $TXD 6WRS V\VWHP LV GHIHFWLYH DQG FDXVHV ZDWHU GDPDJH ZH ZLOO PDNH JRRG WKH GDPDJH IRU SULYDWH XVHUV 7R HQVXUH ZDWHU GDPDJH SURWHFWLRQ WKH DSSOLDQFH PXVW EH FRQQHFWHGWR WKH SRZHU VXSSO\ 7KLV OLDELOLW\ JXDUDQWHH LV YDOLG IRU WKH VHUYLFH OLIH R