
Operation Manual

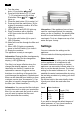


9
en
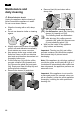
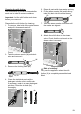
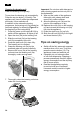
1� Turn the rotary
knob (13) to position
2� Press and hold buttons B (11) and
A (12) simultaneously for at least
5 seconds� The set water hardness is
indicated by the number of LEDs that
now light up�
3� Now press the start button (10) repeat-
edly until the required water hardness
is indicated, e� g�, for water hardness 3,
LEDs D, E and F will light up�
4� Press and hold the start button (10)
for at least 5 seconds� The set number
of LEDs will light up to indicate that
the selected water hardness has been
saved successfully�
Important: If a water lter is used (see
“Accessories”), proceed as follows, see
“Water lter”.
Note: If no button is pressed within
90 seconds, the appliance switches to
stand-by mode without saving the new
settings� In this case, the previously saved
water hardness setting is retained�
Automatic switch-off
Here you can set the period of time after
which the appliance should switch off
automatically following the last drink
preparation� A time between 15 minutes and
4 hours can be set� To save power you can
specify a shorter period�
1� Turn the rotary
knob (13) to position
2� Press and hold buttons B (11) and
A (12) simultaneously for at least
5 seconds� The time after which the
appliance should switch off is indicated
by the number of LEDs that now light up�
3� Now press the start button (10) repeat-
edly until the required number of LEDs
light up to indicate the switch-off time:
D = 15 minutes
D and E = 30 minutes
D, E and F = 45 minutes
D, E, F and G = 1 hour
D, E, F, G and H = 2 hours
D, E, F, G, H and I = 4 hours
4� Press and hold the start button (10) for
at least 5 seconds� The set number of
LEDs will light up to indicate that the
selected switch-off time has been saved
successfully�
Note: If no button is pressed within
90 seconds, the appliance switches to
stand-by mode without saving the new
settings� In this case, the previously saved
switch-off time is retained�
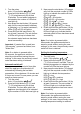
Setting the brewing temperature
The brewing temperature can also be set�
1� Turn the rotary
knob (13) to position
2� Press and hold buttons
B (11) and
A (12) for at least 5 seconds� The set
brewing temperature is indicated by the
number of LEDs that now light up�
3� Now press the start button (10) repeat-
edly until the required number of LEDs
light up to indicate the temperature:
LED
D = low
LED D and E = medium
LED
D, E,and F = high
4� Press and hold the start button (10) for
at least 5 seconds� The set number of
LEDs will light up to indicate that the
selected temperature has been saved
successfully�
Note: If no button is pressed within
90 seconds, the appliance switches to
stand-by mode without saving the new
settings� In this case, the previously saved
brewing temperature setting is retained�