Turbo & Turbo Max Steam Presses SSP-4015 & SSP-5015 INSTRUCTION MANUAL
INTRODUCTION Thank you for choosing Sienna for your household pressing needs. With our consumers in mind, we have created steam press products that provide an affordable way to have a professional look without draining your wallet. You have begun the first step into saving time and money on trips to the cleaners. Our steam press provides a clean; quality look with a substantially larger pressing surface larger than most hand-held irons. It boasts over 100 lbs.
SAFETY GUIDELINES The Turbo (SSP-4015) and Turbo Max (SSP-5015) Steam Presses are for indoor domestic use only. Any commercial use will void warranty. They are designed for pressing garments and not intended for any other use. Safety Instructions: WARNING: Be sure to read and follow all safety instructions before using your steam press. Proper care and maintenance will help to expand the life of your press. When using an electrical appliance, basic precautions should always be followed.
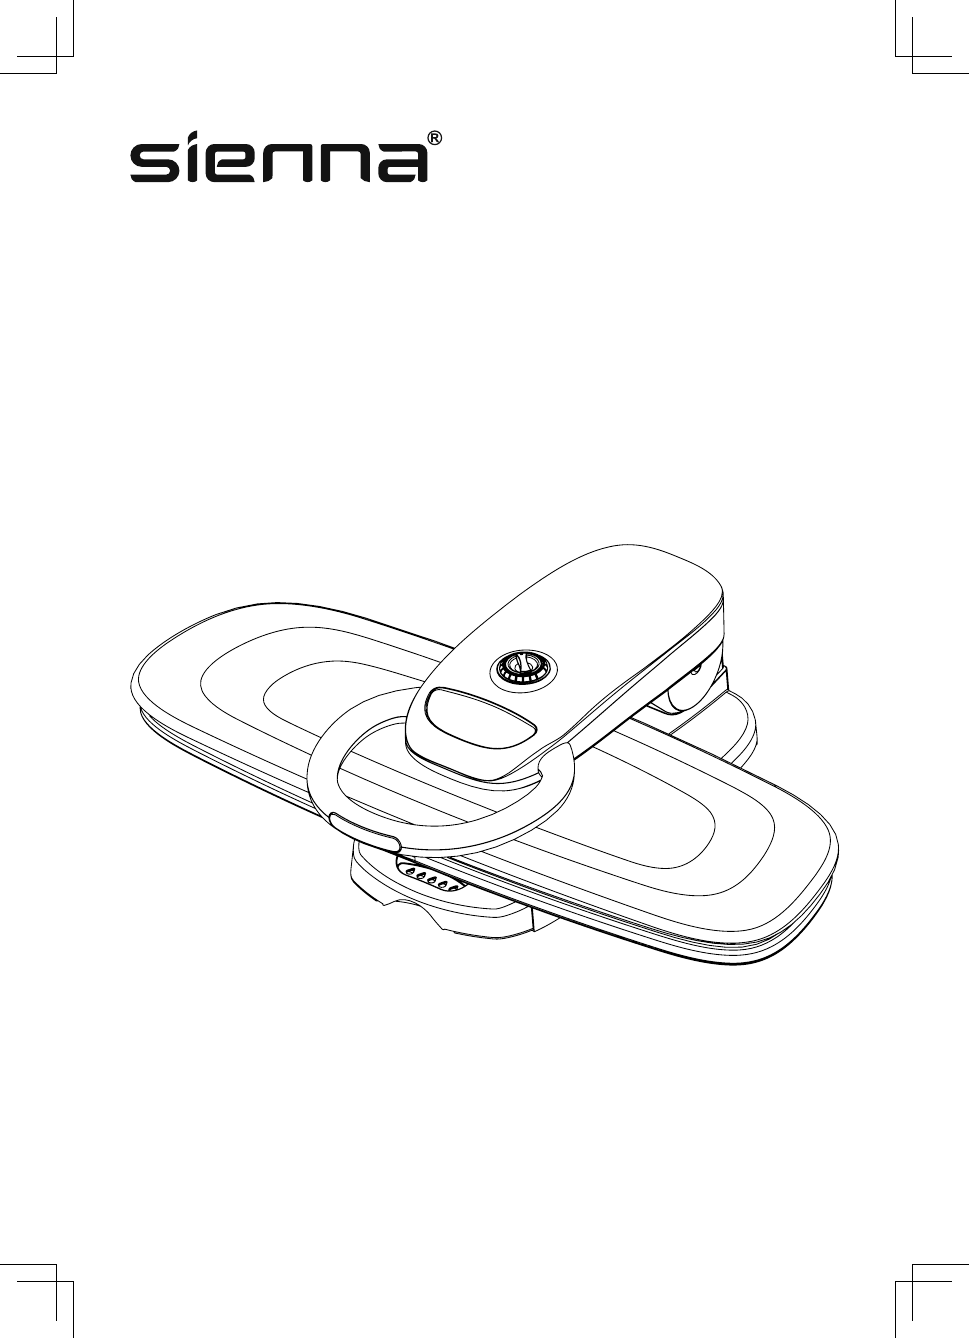
TURBO & TURBO MAX KEY FEATURES A. B. C. D. E. F. G. H. I. J. K. L. M. N. O. FABRIC TEMPERATURE SELECTION ARROWS LOCKING KNOB (USE WHEN STORING) ADJUSTABLE STEAM CONTROL DIAL LED ILLUMINATING LIGHT BUTTON POWER ON/OFF BUTTON STEAM READY LIGHT HEATING INDICATOR LIGHT POWER ON INDICATOR LIGHT PRESSING HANDLE STEAM BURST BUTTON PRESSING PLATE IRONING BOARD COVER IRONING BOARD WATER TANK WATER CONTAINER P. Q.
ASSEMBLY AND USE 1) Set press on a flat, level surface. Warning: The automatic vacuum suction will force the air thru the ironing board and out the back of the press leaving your surface area moist and wet. It is recommended that you place the press on a surface that will not be affected by the moisture. For example, avoid using press on wood or laminate surfaces where the steam and moisture may damage the finish. NOTE: It is recommended to use a pressing stand when using your steam press.
Warning: During initial use or after a long period of time without use, press the steam burst button continuously for several seconds to clear pressing plate of residual water or calcium buildup in system before use. CAUTION: Be sure to examine garment label before selecting a fabric setting. If you cannot determine a fabric type, select lowest setting and increase as needed. It is best to start with the most delicate fabrics first to avoid damage to your fabric.
9 10) Use adjustable steam control dial (C) to control the amount of steam, low to high, you use. CAUTION: Do not hold down press for longer than 5 seconds. If using steam burst button, do not fully close press down onto fabric. If you hold down the press for too long, you may cause your garments to wrinkle because they are too hot. If this should happen, spray down garment with water and start over. CAUTION: When using steam, do not hold steam button for longer than 3 seconds.
plate of residual water or calcium buildup in system before use. NOTE: Some garments have details such as darts, curved seams, and shoulder pads which should not be pressed flat. Use pressing cushion provided for use in these areas. Warning: Do not attempt to lower the pressing plate to its lowest position or lock the press with the pressing cushion in between. You may damage your press by doing so.
Crotch Area- Place the inside of the crotch area on the board facing up. Align with the slanted left side of the board. Press. Legs- Place top of pant leg half way on the ironing board. Press front crease. Then, place bottom of the pant leg half way on the ironing board. Allow the hem or cuff to hang off the end of the board. Press. Follow the same method for pressing back crease. Note: The hems of the pants can be pressed by placing them both on the ironing board and applying a small amount of pressure.
face down on the board or turn it inside out. Pleated Skirt: Place pressing cushion under waistband and press. Rotate skirt until entire waistband is pressed. Slip the skirt over the board. Arrange the pleats. Press. Pleats may need to be pinned to the ironing board cover. Do not use plastic head pins when using the press. Rotate skirt until all pleats are pressed. Jacket: Sleeves without creases- Fold the sleeve on the seam line and place the seam line flat on the board.
CLEANING Fill water tank using water container provided. 2) Place the pressing cushion in the center of the ironing board. 43 0m l MA X 43 0m l 43 0m l 1) 2 1 3) Place a clean towel over the pressing cushion and the ironing board. 4) Set the fabric temperature selection control to the highest setting (Linen). When the steam light illuminates, gently lower the pressing plate onto the pressing cushion. 4 5) Press the steam burst button 6 to 7 times.
6) Once the pressing plate has cooled down you can clean the surface with a damp cloth. DO NOT use any abrasives on the pressing plate. This pressing plate has a non-stick coating that will assist in cleaning. 7) The ironing board cover is removable and can be rinsed with mild detergent and warm water. You may purchase replacement covers on our website at: www.siennadirect.com.
TROUBLESHOOTING CAUTION: Prior to using or maintaining your steam press, isolate the unit by removing the cord from the power socket. PROBLEM SOLUTION LED is not on • Ensure press power cord is correctly plugged into a 120V AC power outlet only. • Ensure circuit breaker is operational. • Try operating press from another power outlet. No heat • Make sure temperature has been selected. • Pressing plate has been left in raised position for more than 20 minutes and automatic shut-off has engaged.
ONE YEAR LIMITED WARRANTY Our Sienna product warranty extends only to the original customer purchaser of the product. It is warranted by the manufacturer to be free from all defects in materials or workmanship for a period of one year from the date of original purchase. This warranty is subject to the following conditions, exclusions and exceptions.
Customer Service will give you further instructions for returning a defective product. When returning a defective product, carefully pack the item to avoid damage in shipping, the manufacturer cannot assume responsibility for loss or damage during incoming shipment. Be sure to include the following items with your product: any accessories related to the product, completed warranty form, and a copy of your sales receipt or other proof of purchase to determine warranty status. C.O.D.