
SIGRC880EGARFB-Manual

19
Note: A Dremel® Tool, or similar powered hand-tool, with an
assortment of sanding bits is without a doubt the best tool to use for
making holes in the fiberglass cowling. However, if you do not have
access to such a power tool, you can cut the opening with a drill, a
hobby knife, and a file - by first drilling a series of almost touching holes
inside the pattern lines (1/8” dia. works well); then using the knife to
cut through the connecting material between each hole; and finally
finishing the edges of the opening with the file or a sanding block.
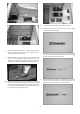
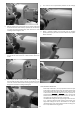
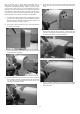
a) First test fit the cowling on the fuselage. Carefully adjust the exact
position of the cowling. Make sure you have adequate clearance
between the front of the cowl and the back of the propeller, and
that the prop shaft is centered in the hole.
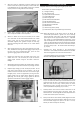
b) Remove the cowl and tape two 1/2” by 4” strips of tag board to
each side of the fuselage.
c) Use a 1/16" bit to drill holes in the firewall for the cowl mounting
screws, through the tag board.
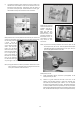
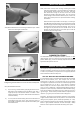
d) Slide the cowl back into position with the four pieces of tag board
on the outside of the cowl. Carefully reposition the cowl and tape
it in place with low-tack masking tape. Now drill the four cowl
mounting holes through the cowl.
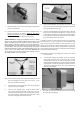
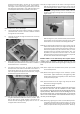
e) Remove the tape, cowl, and tag board from the fuselage. Screw
each of the four cowl screws into a hole and then remove the
screws.
f) Add a drop of thin CA to each of the four cowl mounting screw
holes to harden the holes. Using a 7/64” bit, re-drill the four holes
in the cowl. This will allow the cowl mounting screw to easily pass
through the cowl without cracking the fiberglass.
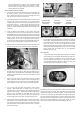
g) The cowl can now be permanently mounted to the fuselage.
h) Mount a suitable propeller (not furnished) and the included
spinner (optional) on your motor. Be sure to balance the propeller
before installation.