
Instruction manual


8
5. After composing the picture, press the shutter button.
◆ This function may vary depending on camera model. For more details please refer to “FE lock”
instructions of your camera manual.
MODELING FLASH
If useing the Modeling flash, you can check the lighting and shadow effects before taking the picture.
(This function is limited to cameras which are compatible with modeling flash. For more details, please
refer to the instruction manual of your camera)
When the camera is set to modeling flash, the Flash panel will display the symbol automatically.
EXPOSURE COMPENSATION
You can use flash exposure compensation in combination with normal exposure compensation to
control the background exposure level. Flash exposure compensation can be set to ±3 stops in 1/3
stop increments (or in 1/2 stop increments with some cameras).
◆ This mode cannot be used with EOS 620, 650, 700, 850 and 1000 cameras.
1. Press the SEL button and select .
2. Press the
+
or
-
button to set the desired flash exposure
compensation amount.
3. Press the SEL button until the display stops blinking.
4. Focus on the subject.
5. Check that the subject is within the flash range as displayed on
the EF 610 DG Super’s LCD panel.
6. You can take the picture after confirming that the Ready Light of the flash is illuminated.
◆ To cancel exposure compensation, please start from step 1 and choose + 0 on display.
FB (Flash Exposure Bracketing)
With FB, you can get bracketed flash shots of the subject while the ambient exposure level remains
constant. The bracketed flash shots can be taken in the sequence of correct exposure, under
exposure and over exposure, up to ± 3 stops in 1/3EV increments
(or 1/2EV increments with some cameras).
1. Press the SEL button until blinks.
2. Press the
+
or
-
button to set the flash exposure bracketing
amount.
3.
will be displayed after pressing the SEL button again.
4. Adjust the focusing.
5. Please check that the subject is within the flash range displayed on the EF- 610 DG Super’s LCD
panel.
6. Check the mark is displayed in the virefinder and take the picture.
7. If it is necessary, repeat steps 4 to 6.
◆ This function will be cancelled automatically after making the third exposure.
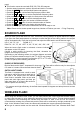
MULTI FLASH MODE
While the shutter is open, the flash will fire repeatedly. By doing so a series of images of the subject
will be exposed in one frame. A bright subject with a dark background shows more effectively in this
mode. It is possible to set the firing frequency between 1Hz and
199Hz. Up to 100 flashes can be fired continuously. The maximum
number of flashes varies, depending on the flash’s power output
and firing frequency settings. (Please refer to table 3 on the last