F18N10081 ELECTRONIC FLASH EF-610 DG SUPER INSTRUCTIONS NA-iTTL
1 3 5 6 2 7 4 8 9 10 11 13 14 15 18 19 20 17 16 12 ENGLISH The CE Mark is a Directive conformity mark of the European Community (EC).
ENGLISH Thank you very much for purchasing the Sigma EF-610 DG SUPER NA-iTTL Electronic Flash. This product is specifically developed for the Nikon SLR series cameras. Depending on the camera model, functions and operation may vary. Please read this instruction booklet carefully. To add to your enjoyment of photography, this flash has a variety of features.
DESCRIPTION OF THE PARTS EXTERNAL PARTS 1.Flash Head 2.AF Auxiliary Light 3.Bounce Angle; Up and Down 4.Bounce Angle; Right and Left 5.Bounce Lock and Release Button; Up and Down 6.Swivel Lock and Release Button; Right and Left 7.LCD Panel 8.Battery Cover 9.Shoe Ring 10.Shoe 11.Catch Light Panel 12.Wide Panel CONTROLS 13.MODE Button 14.SEL SELECT Button 15. + Increment Button 16. - Decrement Button 17.ZOOM Button 18.TEST Button 19.LIGHT Button 20.Ready Light 21.
3. Close the cover. 4. Slide the Power Switch to the ON position. After few seconds the Ready Lamp will light, indicating that the flash unit can be fired. 5. Please press the “Test Button” to be sure that the flash is working properly. AUTO POWER OFF To conserve battery power, the flash unit automatically turns itself off when the flash is not used within approximately 80 seconds. To turn the flash on again, depress the TEST button or the camera shutter button halfway.
WIDE PANEL This flashgun is equipped with a built-in wide panel, which can provide an ultra wide 17mm angle of coverage. Slide out the wide panel and catch light panel and flip it down to cover the flash’s head. (Be careful to slide the panels out smoothly.) Then put the catch light panel back in its place. The coverage angle setting of the flash will be set to 17mm automatically. ◆ If the built-in wide panel comes off accidentally, the ZOOM button will not function.
Depending on the combination of the camera, lens and selected exposure mode, the method for shooting the subject with flash may be different. Please see chart “A” and set the “F”-number by referring to the manual for your camera. 6. Confirm the Ready Light is on and press the shutter release button.
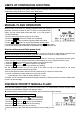
LIMITS OF CONTINUOUS SHOOTING To prevent overheating of the flash’s circuitry, do not use your Flash unit for at least 10minutes after continiously using the flash as shown in the table below. Mode TTL, M(1/1,1/2) M(1/4, 1/8) M(1/16-1/32) Multi Number of Flash Exposures 20 Continuous Flash Shots 25 Continuous Flash Shots 40 Continuous Flash Shots 10 Cycle MANUAL FLASH OPERATION Manual flash is provided for shooting subjects when the correct exposure is difficult to obtain in the TTL mode.
When using with cameras other than the above 1.Please follow the first 2 steps as above and press the SEL button several times to make the aperture display blink. 2.Press the + button or – button to set the F-stop display. 3.Press the SEL button to stop the display blinking. 4.Set the aperture value on the lens or camera, make sure that the flashgun is charged before firing. ◆ Distance-priority manual can be used together with exposure compensation. 1.
Use your camera’s exposure compensation control button or dial to make exposure compensation to both foreground and background. (Please refer to your camera’s instruction) Exposure compensation on M mode When using the camera on M mode, you can change the aperture value on the camera, or change the flash power level, after setting the exposure compensation.
8. Press the + or – button to set the desired number of flashes. 9. Press the SEL button until the display stops blinking. 10. When the ready light of the flash is illuminated, the unit is ready to use. Note: Please set the shutter speed longer than; Number of Flashes you want ÷ Firing Frequency How to set the correct flash power level Page 18 <> combination of 1 Read out the subject distance from the focus ring on the lens.
WIRELESS FLASH When using the “Wireless Flash” mode, you can take pictures with a more three-dimensional feeling with shadow, or you can produce natural images with shadow depending on the flash position without any extension cord connecting the camera body to the flash. In case of the EF-610 DG SUPER NA-iTTL, communication between the camera body and the flash will be achieved by the light of the flash. In the “Wireless Flash” mode, the camera will calculate the correct exposure automatically.
set the required amount, then press the SEL button to set compensation. If M mode is selected, press the + or – button to set the flash output amount. If MULTI is selected, exposure will switch to Multi Flash Mode. Setting the Flash Mode on the slave flash unit The following has to be programmed into the master unit. This will set the mode for the slave unit. 10. Press the + or – button and select a slave group number. 11.
9. Place the slave unit in the desired location. Do not place the slave unit within the picture area. 10. After confirming that all flash units are fully charged, press the shutter button to take the picture. ◆ When the EF-610 DG SUPER NA-iTTL is fully charged, the AF Auxiliary Light will blink. ◆ The flash will not fire if the EF-610 DG SUPER is attached to the camera body whilst in Slave Mode setting.
SPECIFICATIONS TYPE : Clip-on type serial-controlled TTL auto zoom electric flash GUIDE NUMBER : 61 (ISO 100/m, 105mm head position) POWER SOURCE : Four AA type alkaline batteries or, Four AA type Ni-Cd batteries or, Four AA type Ni-MH Nickel-Metal Hydride RECYCLING TIME : about 7.0 sec. (Alkaline batteries) : about 5.0 sec.
[Table1] GN (ISO100・m) 1/1 1/2 1/4 1/8 1/16 1/32 1/64 1/128 17mm 23.0 16.3 11.5 8.1 5.8 4.1 2.9 2.1 24mm 34.0 24.0 17.0 12.0 8.5 6.0 4.3 3.0 28mm 35.0 24.7 17.5 12.4 8.8 6.2 4.4 3.1 35mm 36.0 25.5 18.0 12.7 9.0 6.4 4.5 3.2 50mm 46.0 32.5 23.0 16.3 11.5 8.1 5.8 4.1 70mm 52.0 36.8 26.0 18.4 13.0 9.2 6.5 4.7 85mm 56.0 39.6 28.0 19.8 14.0 9.9 7.0 5.0 105mm 61.0 43.1 30.5 21.6 15.3 10.8 7.6 5.5 28mm 24.7 21.9 20.6 17.5 15.5 13.8 14.8 12.4 10.9 10.1 9.8 8.8 7.8 7.1 6.9 6.2 5.5 5.1 4.9 4.4 3.9 3.6 3.5 3.