
Operating instructions


8.6.1 “Calibrate” function settings (CALIB menu)
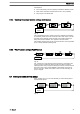
Continuous
display
B0093
Fig. 37
The pump can also be operated in the calibrated state. In this case, the
corresponding continuous displays then indicate the metering volume or
the capacity directly. The calibration is maintained when the stroke length
is altered by up to ±10 scale divisions (for a set stroke length of 40 % this
corresponds to a range from 30 % ... 50 %). If the stroke length is changed
by more than ±10 scale divisions, the yellow warning light illuminates, the
continuous display flashes and the flashing identifier
“Calib”
appears.
–
Do not allow the stroke length to fall below 20 %!
Otherwise the calibration becomes inaccurate.
–
The calibration becomes more accurate, the more
strokes the pump makes during calibration. Recommen‐
dation: at least 200 strokes.
CAUTION!
Danger with dangerous feed chemicals
Provided the following handling instructions are followed,
contact with the feed chemical is possible.
– If the feed chemical is dangerous, take appropriate
safety precautions when carrying out the following han‐
dling instructions.
– Observe the feed chemical safety data sheet.
1. Lead the suction hose into a measuring cylinder containing the feed
chemical - the discharge hose must be installed in a permanent
manner (operating pressure, ...!).
2. Prime the feed chemical (press both arrow keys simultaneously),
should the suction hose be empty.
3. Record the level in the measuring cylinder and the stroke length.
4. Select the
“CALIB”
menu and press the
[P]
key to change to the
first menu option.
5. With an arrow key select
“ON”
and press the
[P]
key to change to
the next menu option.
6. To start the calibration, press the
[P]
key. The pump starts to pump
and indicates the stroke rate - at certain intervals
“STOP”
appears.
The pump works with the stroke rate set under
“MANUAL”
.
7. After a reasonable number of strokes, stop the pump with the
[P]
key.
8. Determine the required metering volume (difference initial volume -
residual volume).
9. Enter this amount under the next menu option and then press the
[P]
key to change to the next menu option.
10. Under menu option
“UNIT”
select the units (
“L”
or
“gal”
) using the
arrow keys and press the
[P]
key.
ð
The pump is calibrated.
Calibration
Adjustment
46