
Operating instructions


6. After a successful test, screw the transparent cover onto the dia‐
phragm rupture sensor and then continue at the top by fitting the
diaphragm.
Electrical diaphragm rupture sensor
1. Press the piston of the diaphragm rupture sensor with a blunt,
smooth object into the dosing head (approximately 4 mm) until the
monitor triggers alarm.
CAUTION!
Feed chemical may escape
If the expandable flap of the diaphragm is damaged,
then feed chemical can escape when there is a dia‐
phragm rupture.
The piston must not be scratched, it must remain com‐
pletely smooth so that during operation it does not
damage the expandable flap of the diaphragm.
2. Repeat the test.
3. If the monitor does not trigger an alarm both times, replace the
membrane rupture sensor.
4. After a successful test, continue at the top by fitting the diaphragm.
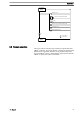
4
2
1
5
3
13
P_SI_0038
Fig. 45: Cross-section through the liquid end
1 Suction valve
2 Metering diaphragm
3 Discharge valve
4 Dosing head
5 Backplate
13 Safety diaphragm
Repairs
60