
Installation Sheet


5Granite Composite Sink Installation Instructions
INSTRUCTIONS
For this installation it is assumed that the
counter-top has been cut to the dimensions
of the sink. We recommend consulting a
professional if you are unfamiliar with this
type of installation. Signature Hardware
accepts no liability for any damages to the
floor, walls, plumbing or for personal injury
during installation.
Unpack and inspect the product for any
shipping damages. If you find damages, do
not install. Contact Customer Service at
1-866-855-2284. If you need assistance or
have questions while installing your sink,
contact Customer Service.
TOOLS AND MATERIALS:
Read entire installation instructions.
Observe all local building and safety codes.
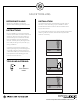
BEFORE INSTALLING INSTALLATION
1. Disassemble the sink drain assembly and lay the parts
aside, in the same order in which they were removed. See the
illustration as a reference if needed.
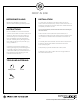
2. Apply a bead of 100% neutral cure silicone sealant to the
underside of the strainer body.
3. Insert the strainer body into the kitchen sink. Firmly press
the flange into the drain hole to create a proper seal. Wipe
away any excess sealant around the drain using a damp cloth.
4. From underneath your sink, slide on the rubber washer,
followed by the friction washer, followed by the strainer cup.
Hold in place, pressed against the sink.
5. Thread the lock nut onto the strainer body. Hand-tighten
until secure, then finish tightening with a basin wrench.
Important: Do not overtighten, as it can crack or break your
sink.
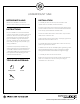
6. Secure the strainer body to your P-trap using the plastic
washer and compression nut.
DRAIN INSTALLATION
Basin Wrench