ENGLISH ESPAÑOL OWNER’S MANUAL ELECTRIC CONVECTION BUILT-IN OVEN UPWD3034ST MFL51224511_04 www.thesignaturekitchen.
table of contents TABLE OF CONTENTS 3 IMPORTANT SAFETY INSTRUCTIONS 26 SMART FUNCTIONS 8 PRODUCT OVERVIEW 29 MAINTENANCE 8 Accessories 29 Self Clean 9 Oven Overview 29 Setting Self Clean 10 Control Panel Overview 30 Setting Self Clean with a Delayed Start 11 FEATURES 11 Clock 31 SpeedClean™ 1 2 Timer ON/OFF 1 2 Convection Auto Conversion 1 3 Oven Temperature Adjustment 1 4 Language 31 Cleaning Tips 32 SpeedClean™ Instruction Guide 33 Cleaning the Exte
important safety instructions 3 Read and follow all instructions before using your oven to prevent the risk of fire, electric shock, personal injury, or damage when using the oven. This guide does not cover all possible conditions that may occur. Always contact your service agent or manufacturer about problems that you do not understand. Download this owner's manual at: www.thesignaturekitchen.com This is the safety alert symbol.
important safety instructions SAFETY PRECAUTIONS (CONT.) yy Keep oven vent ducts unobstructed. The oven vent could become hot during oven use. Never block this vent and never place plastic or heat-sensitive items on or near the vent. Metal bottom trim (Vent) NOTE: For proper operation vent trim must be installed. WARNING yy NEVER use your appliance for warming or heating the room. yy DO NOT use water on grease fires. Should an oven fire occur, leave the oven door closed and turn the oven off.
important safety instructions 5 ENGLISH ELECTRICAL SAFETY yy Protective Liners. Do not use aluminum foil or any other material to line the oven bottoms. Improper installation of these liners may result in a risk of electric shock or fire. yy Do Not allow aluminum foil or the meat probe to contact heating elements. WARNING No Aluminum foil • DO NOT place aluminum foil directly on the oven bottom.
important safety instructions CHILD SAFETY WARNING yy Children should be kept away from the oven. yy Accessory parts will become hot when the broiler is in use. CAUTION yy Children should not be left alone or unattended in an area where the appliance is in use. Children should never be allowed to sit or stand on any part of the appliance. yy DO NOT leave small children unattended near the appliance. During the selfcleaning cycle, the outside of the oven can become very hot to the touch.
important safety instructions 7 To protect against food-borne illnesses, cook meat and poultry thoroughly. The USDA has indicated the following as safe minimum internal temperatures for consumption: yy Ground beef: 160 °F yy Poultry: 165 °F yy Beef, veal, pork, or lamb: 145 °F yy Fish/seafood: 145°F CALIFORNIA SAFE DRINKING WATER AND TOXIC ENFORCEMENT ACT WARNING: This product contains chemicals known to the State of California to cause cancer and birth defects or other reproductive harm.
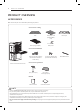
PRODUCT OVERVIEW PRODUCT OVERVIEW ACCESSORIES Make sure that all parts are included after purchasing this product.
PRODUCT OVERVIEW ENGLISH OVEN OVERVIEW Make sure to understand the name and function of each part. * Throughout this manual, the features and appearance may vary depending on your model. Door switch (2 ea) - One on upper oven and one on lower oven.
PRODUCT OVERVIEW CONTROL PANEL OVERVIEW 10 12 9 1 Name 12 2 3 4 5 6 7 13 8 Description 1 Cook Time *Clock - Press button and turn the Time/Temp knob to set the desired amount of time for food to cook. The oven shuts off when the set cooking time runs out. - Press and hold the button for three seconds to set the time of day. 2 Start Time *Setting - Press button and turn the Time/Temp knob to set the delayed start time. The oven starts at the set time.
features 11 ENGLISH FEATURES CLOCK The clock must be set to the correct time of day in order for the automatic oven timing functions to work properly. 1. Set both Oven Mode knobs to the OFF position. 2. Press and hold COOK TIME for 3 seconds. 3. Turn the upper or lower Time/Temp knob to select the desired time. Turn the knob clockwise to increase the time and counterclockwise to decrease the time. 4. Press START to enter the time and start the clock.
features TIMER ON/OFF CONVECTION AUTO CONVERSION The upper or lower TIMER ON/OFF serves as an extra timer in the kitchen that beeps when the set time has run out. It does not start or stop cooking. The TIMER ON/OFF feature can be used during any of the other oven control functions. The upper and lower timers can be operated independently of each other. When cooking using the convection mode (Conv. Bake, Conv. Roast, and Crisp Conv.), the oven temperature is automatically reduced by 25°F(14°C).
features This oven may cook differently than the one it replaced. Use the oven for a few weeks to become more familiar with it before changing the thermostat settings. If the oven consistently undercooks or overcooks follow these instructions to adjust the thermostat. Adjusting the Upper Oven Temperature 1. Set both Oven Mode knobs to the OFF position. 2. Press and hold START TIME for 3 seconds. Then press START TIME repeatedly until U_AJ appears in the display.
features LANGUAGE BEEPER VOLUME The default language of the display is English. It can be The beeper volume can be adjusted to three possible volume levels, Hi, Low and Off. changed to Spanish or French. 1. Set both Oven Mode knobs to the OFF position. 2. Press and hold START TIME for 3 seconds. Then press START TIME repeatedly until Lng appears in the display. 3. Turn the Time/Temp knob to set the desired language. 1. Set both Oven Mode knobs to the OFF position. 2.
features The Lockout feature automatically locks the oven door and prevents most oven controls from being turned on. It does not disable the clock, timer or the interior oven light. 1. Set both Oven Mode knobs to the OFF position. 2. Press and hold PROBE for 3 seconds. 3. The lock melody sounds, OVEN LOCKOUT appears in the display and DOOR LOCKED will flicker in the display. 4. Once the oven door is locked, the DOOR LOCKED indicator stops flickering and remains on along with the lock icon. 5.
features COOK TIME (TIMED COOK) (for both upper and lower oven) The oven turns on immediately and cooks for a selected length of time. At the end of the cooking time, the oven turns off automatically. Setting the Timed Cook Function The following example is to Bake at 300°F for 30 minutes. 1. Set the clock for the correct time of day. 2. Turn the upper or lower Oven Mode knob to select BAKE. 350°F appears in the display. 3. Set the oven temperature.
using the oven BEFORE USING THE OVEN ENGLISH USING THE OVEN 17 Rack and Pan Placement E D NOTE • If you turn the lower oven knob while setting the upper oven, the setting for the upper oven will be lost. • The temperature registered by an oven thermometer may differ from the actual set oven temperature. • It is normal for the convection fan to run while preheating during a regular bake cycle. • The convection fan motor may run periodically during a regular bake cycle.
using the oven BAKE Use BAKE to prepare foods such as pastries, breads and casseroles. The oven can be programmed to bake at any temperature from 170°F (80°C) to 550°F (285°C). The default temperature is 350°F (175°C). Setting the BAKE mode 1. Turn the upper or lower Oven Mode knob to select the BAKE mode. 2. Set the oven temperature. For example, turn the Time/Temp knob clockwise until 375°F appears in the display. 3. Press START. The word PREHEATING and 100°F appears in the display.
using the oven 1. Turn the upper or lower Oven Mode knob to select the CONV. BAKE mode. 350°F (175°C) appears in the display. 2. Set the oven temperature. For example, turn the Time/Temp knob clockwise to set the temperature to 375°F. 3. Press START. The display shows CONV BAKE and the converted temperature starting at 100°F (35°C). As the oven preheats, the display shows increasing temperatures in 5-degree increments. Once the oven reaches the desired adjusted temperature, a tone sounds.
using the oven CONVECTION ROAST The Convection Roast mode is designed to give optimum cooking performance for roasting meats and poultry. Preheating is not necessary for meats and poultry. Heated air circulates around the food from all sides, sealing in juices and flavors. Foods are crispy brown on the outside while staying moist on the inside. Convection Roast is especially good for large tender cuts of meat. Displays for the CONV. ROAST mode lower oven only Setting the CONVECTION ROAST Mode 1.
using the oven 1. Turn the upper or lower the Oven Mode knob to select the CRISP CONV. mode. 350°F (175°C) appears in the display. 2. Set the oven temperature. For example, turn the Time/Temp knob clockwise to set the temperature to 375°F. 3. Press START. The display shows CONV and the temperature, starting at 100°F (35°C). As the oven preheats, the display shows the increasing temperature in 5-degree increments. Once the oven reaches the adjusted set temperature, a tone sounds.
using the oven Smoking RECOMMENDED BROILING GUIDE Due to the intense heat associated with broiling, it is normal to experience smoke during the cooking process. This smoke is a natural by-product of searing and should not cause you to worry. If you are experiencing more smoke than you are comfortable with, use the following tips to reduce the amount of smoke in your oven. The size, weight, thickness, starting temperature, and your preference of doneness will affect broiling times.
using the oven 23 ENGLISH Broiling Chart Food Rack Position First Side Time (min.) Second Side Time (min.) 1 lb. (4 patties) 1/2 to 3/4” thick E 4-6 3-4 1” thick 1 to 1-1/2 lbs. D D D 6 7 8 2–3 2–3 3–4 Rare Medium Well Done 1-1/2” thick 2 to 2-1/2 lbs. D D D 10 12 14 4–6 4–8 8–10 Chicken 1 whole cut up 2 to 2-1/2 lbs., split lengthwise 2 Breasts C 20 6–8 C 20 6–10 Lobster Tails 2–4 10 to 12 oz. each C 12-14 Do not turn over. Cut through back of shell. Spread open.
using the oven WARM PROOF The WARM mode maintains an oven temperature of 200°F (93°C) or less. Use the Warm mode to keep cooked food at serving temperature for up to three hours after the end of the cooking cycle. Do not use the Warm mode to try to cook food or reheat cold food. The Warm mode can be used alone or after Timed Cook The Proof feature maintains a warm environment for rising yeast-leavened products before baking. or Delayed Timed Cook cycles.
using the oven The meat probe accurately measures the internal temperature of meat, poultry and casseroles. It should not be used during the broiling, self cleaning, warming or proofing mode. Always unplug and remove the meat probe from the oven before removing food. Before using, insert the probe into the center of the thickest part of meat or into the inner thigh or breast of poultry, away from fat or bone. Place food in the oven and connect the meat probe to the jack.
SMART FUNCTIONS SMART FUNCTIONS Application Installation Search for the SIGNATURE KITCHEN SUITE application from the Google Play Store on a smart phone. Follow instructions to download and install the application. USING THE WI-FI FUNCTION Communicate with the appliance from a smart phone using the convenient smart features. Using the Application 1. Select the appliance in the application and connect it to a Wi-Fi network. 2. Select the menu on the upper right side to access settings and features.
SMART FUNCTIONS To obtain the source code under GPL, LGPL, MPL and To obtain the source code under GPL, LGPL, MPL, and other open source licenses, that is contained in this product, please visit http://opensource. thesignaturekitchen.com. In addition to the source code, all referred license terms, warranty disclaimers and copyright notices are available for download.
SMART FUNCTIONS USING SMART DIAGNOSIS™ Should you experience any problems with the appliance, it has the capability of transmitting data to a smart phone using the SIGNATURE KITCHEN SUITE application or via the phone to the SIGNATURE KITCHEN SUITE call center. Smart Diagnosis™ can not be activated unless the appliance is connected to power. If the appliance is unable to turn on, then troubleshooting must be done without using Smart Diagnosis™. SMART DIAGNOSIS™ USING A SMART PHONE 1.
MAINTENANCE SELF CLEAN The self clean cycle uses extremely hot temperatures to clean the oven cavity. While running the Self Clean cycle, you may notice smoking or an odor. This is normal; especially if the oven is heavily soiled. During Self Clean, the kitchen should be well-ventilated to minimize the odors from cleaning. CAUTION • DO NOT leave small children unattended near the appliance. During the Self Clean cycle, the outside of the oven can become very hot to touch.
MAINTENANCE CAUTION DO NOT force the oven door open when the lock icon is displayed. The oven door will remain locked until the oven temperature has cooled. Forcing the door open will damage the door. Setting Self Clean with a Delayed Start 1. Remove all racks and accessories from the oven. 2. Turn the upper or lower Oven Mode knob to select the SELF CLEAN mode. The oven defaults to the recommended four-hour self clean for a moderately soiled oven.
MAINTENANCE 31 ENGLISH SpeedClean™ SIGNATURE KITCHEN SUITE'S new oven with SpeedClean™ enamel technology provides two cleaning options for the oven interior. The SpeedClean™ feature takes advantage of SIGNATURE KITCHEN SUITE'S new enamel to help lift soils without harsh chemicals, and it runs using ONLY WATER for just 10 minutes in low temperatures to help loosen LIGHT soils before hand-cleaning.
MAINTENANCE SpeedClean™ INSTRUCTION GUIDE 1. Remove oven racks and accessories from the oven. 2. S crape off and remove any burnt-on debris with a plastic scraper. Suggested plastic scrapers: • Hard plastic spatula • Plastic pan scraper • Plastic paint scraper • Old credit card 3. F ill a spray bottle with 1¼ cups (10 oz or 300 ml) of water and use the spray bottle to thoroughly spray the inside surfaces of the oven. 7. A tone will sound at the end of the 10-minute cycle.
MAINTENANCE Broiler Pan and Grid Painted and Decorative Trim For general cleaning, use a cloth with hot soapy water. For more difficult soils and built-up grease, apply a liquid detergent directly onto the soil. Leave it on for 30 to 60 minutes. Rinse with a damp cloth and dry. Do not use abrasive cleaners. Stainless Steel Surfaces Do not store a soiled broiler pan and grid anywhere in the oven. To avoid scratches, do not use steel wool pads. 1.
MAINTENANCE CHANGING THE OVEN LIGHT The oven light is a standard 10-watt halogen bulb for ovens. To replace lamps located on the side wall: • Make sure oven and bulb are cool. 1. Unplug oven or disconnect power. 2. Remove oven racks. 3. Slide a flat blade screwdriver between the housing and the glass light cover. 4. Support the glass light cover with two fingers to prevent the cover from falling to the bottom of the oven. 5.
MAINTENANCE 1. Firmly grasp both sides of the door at the top. CAUTION • The door is very heavy. Be careful when removing and lifting the door. • DO NOT lift the door by the handle. • DO NOT hit the glass with pots, pans, or any other object. • Scratching, hitting, jarring or stressing the glass may weaken its structure, causing an increased risk of breakage at a later time. Removing the Oven Door 1. Fully open the door. Pull the hinge locks away from the oven interior, until they are fully unlocked.
TROUBLESHOOTING TROUBLESHOOTING FAQs My new oven doesn’t cook like my old one. Is there something wrong with the temperature settings? No, Your oven has been factory tested and calibrated. For the first few uses, follow your recipe times and temperatures carefully. If you still think your new oven is too hot or too cold, you can adjust the oven temperature yourself to meet your specific cooking needs.
TROUBLESHOOTING Make sure that the oven is not in Lockout mode. The lock symbol will show in the display if Lockout is activated. To deactivate Lockout, press and hold the PROBE button for three seconds. The unlock melody will sound and UNLOCKING will appear in the display until the controls are unlocked. My oven is still dirty after running the SpeedClean™ cycle. What else should I do? The SpeedClean™ cycle only helps to loosen light soils in your oven to assist in hand-cleaning of your oven.
TROUBLESHOOTING BEFORE CALLING FOR SERVICE Before you call for service, review this list. It may save you time and expense. The list includes common occurrences that are not the result of defective workmanship or materials in this appliance. Problem Oven control beeps and displays any F error code. Oven will not work Possible Causes / Solutions yy Electronic control has detected a fault condition. Touch any button and turn any knob once to clear the display and stop the beeping. Reprogram oven.
TROUBLESHOOTING 39 Possible Causes / Solutions Food does not bake or roast properly yy Oven controls improperly set. - See the instructions for setting Bake, Convection Bake, Roast, and Convection Roast modes, pages 18-21. yy Rack position is incorrect or the rack is not level. - See Rack and Pan Placement, page 17. yy Incorrect cookware or cookware of improper size being used. - the tips on pages 17, 18, and 20. yy Oven sensor needs to be adjusted. - See Oven Temperature Adjustment, page 13.
TROUBLESHOOTING Problem Possible Causes / Solutions Oven not clean after a self clean cycle yy Oven controls not properly set. - See the self-clean section, page 29-30. yy Oven was heavily soiled. - Clean up heavy spillovers before starting the clean cycle. Heavily soiled ovens may need to self-clean again or for a longer period of time. DOOR LOCKED icon is on when you want to cook yy The oven door is locked because the temperature inside the oven has not dropped below the locking temperature.
warranty 41 WARRANTY (USA) SIGNATURE KITCHEN SUITE will repair or replace your product, at SIGNATURE KITCHEN SUITE'S option, if it proves to be defective in material or workmanship under normal use, during the warranty period set forth below, effective from the date of original consumer purchase of the product. This limited warranty is good only to the original purchaser of the product and effective only when used in the U.S.A.
ESPAÑOL MANUAL DEL PROPIETARIO HORNO ELÉCTRICO DE CONVECCIÓN EMPOTRADO UPWD3034ST P/No.: MFL51224511_04 www.thesignaturekitchen.
2 ÍNDICE ÍNDICE SEGURIDAD 24 Calentar 24 Leudar 25 Sonda para carne 8 DESCRIPCIÓN GENERAL DE LOS PRODUCTOS 26 SMART FUNCTIONS (FUNCIONES INTELIGENTES) 8 Accesorios 9 10 Descripción general de la cocina Descripción general del panel de control 29 MANTENIMIENTO 3 IMPORTANTES INSTRUCCIONES DE 11 CARACTERÍSTICAS 1 1 Reloj 1 2 Timer on/off (Temporizador encendido/ apagado) 1 2 Conversión automática de convección 1 3 Ajustes para la temperatura del horno 1 4 Idioma 1 4 Lu
IMPORTANTES INSTRUCCIONES DE SEGURIDAD 3 IMPORTANTES INSTRUCCIONES DE SEGURIDAD Este es el símbolo de alerta de seguridad. Este símbolo lo alerta sobre los posibles riesgos que pueden causar daños a la propiedad y/o lesiones físicas graves o la muerte. Todos los mensajes de seguridad estarán precedidos por el símbolo de alerta de seguridad y la palabra «ADVERTENCIA» o «PRECAUCIÓN».
4 IMPORTANTES INSTRUCCIONES DE SEGURIDAD PRECAUCIONES DE SEGURIDAD (CONT.) yy No caliente recipientes de comida sin abrir. La presión acumulada puede hacer que el recipiente explote y provoque lesiones. yy Mantenga despejados los conductos de ventilación del horno. La ventilación del horno puede calentarse durante el uso del horno. Nunca obstruya esta ventilación y nunca coloque elementos de plástico o sensibles al calor sobre o cerca de la ventilación.
IMPORTANTES INSTRUCCIONES DE SEGURIDAD 5 SEGURIDAD ELÉCTRICA ADVERTENCIA Papel de aluminio • NO coloque papel de aluminio directamente en la parte inferior del horno yy NO recubra las paredes, bandejas, fondo o cualquier otra pieza del horno con papel de aluminio o cualquier otro material. Hacerlo afectará la distribución de calor, producirá un horneado pobre y provocará un daño permanente al interior del horno (el papel de aluminio se derretirá hacia la superficie interna del horno).
6 IMPORTANTES INSTRUCCIONES DE SEGURIDAD SEGURIDAD DE LOS NIÑOS ADVERTENCIA yy Los niños siempre deben estar alejados del horno. yy Los accesorios se calientan cuando la bandeja está en uso. PRECAUCIÓN yy No hay que dejar a los niños solos o desatendidos en el área donde se está utilizando el aparato. Nunca debe permitirse que los niños se sienten o se paren en cualquier parte de este electrodoméstico. yy NO deje niños pequeños desatendidos cerca del aparato.
IMPORTANTES INSTRUCCIONES DE SEGURIDAD 7 COCINAR BIEN LA CARNE Y LAS AVES ACTO DE REFORZAMIENTO DE LA INGESTA SEGURA DE AGUA LIBRE DE TOXICOS ADVERTENCIA: Este producto contiene químicos conocidos por el estado de California por causar cáncer, de nacimiento u otros daños reproductivos. cáncer. malformaciones Lávese Lávese bien las manos después de su manipulación. ESPAÑOL Para evitar enfermedades transmitidas por los alimentos, cocine bien la carne y las aves.
8 DESCRIPCIÓN GENERAL DE LOS PRODUCTOS DESCRIPCIÓN GENERAL DE LOS PRODUCTOS ACCESORIOS Asegúrese de que todas las piezas estén incluidas antes de comprar el producto.
DESCRIPCIÓN GENERAL DE LOS PRODUCTOS 9 DESCRIPCIÓN GENERAL DE LA COCINA ESPAÑOL Asegúrese de entender los nombres y función de cada pieza. * A lo largo de este manual, las características y apariencia del producto pueden variar dependiendo de su modelo. Interruptor de la puerta (2 cada uno) - Uno en el horno superior y otro en el horno inferior.
10 DESCRIPCIÓN GENERAL DE LOS PRODUCTOS DESCRIPCIÓN GENERAL DEL PANEL DE CONTROL 10 11 9 1 12 2 Name 1 C OOK TIME (Tiempo de cocción) *CLOCK(Reloj) 3 4 5 6 7 13 8 Description - Presione el botón y gire la perilla Time / Temp para establecer la cantidad de tiempo deseado para los alimentos se cocinen. El horno se apaga cuando el tiempo de cocción se agote. - Mantenga el presionado el botón por 3 segundos para fijar la hora del día.
CARACTERÍSTICAS 11 CARACTERÍSTICAS Debe configurarse el reloj con la hora correcta del día en el orden correcto para que las funciones de temporización automática del horno funcionen correctamente. 1. Colocar ambas perrillas de modo del horno inferior y superior en la posición OFF. 2. Mantenga pulsado COOK TIME durante 3 segundos. 3. Gire la perilla Time/Temp superior o inferior para seleccionar el tiempo deseado.
12 CARACTERÍSTICAS TIMER ON/OFF (TEMPORIZADOR ENCENDIDO/APAGADO) CONVERSIÓN AUTOMÁTICA DE CONVECCIÓN TIMER ON/OFF superior o inferior sirve como temporizador adicional en al cocina y emitirá una señal acústica cuando se haya agotado el tiempo. No se inicia o deja de cocinar. La función TIMER ON/OFF se puede usar durante cualquiera de las funciones de control del horno. El temporizador superior e inferior se puede utilizar de forma independiente para cada uno de ellos.
CARACTERÍSTICAS AJUSTES PARA LA TEMPERATURA DEL HORNO NOTA No utilice termometros, como los que se venden en las tiendas, para verificar la configuracion de temperatura del horno. En su lugar, empezar por subir o bajar el termostato (8 ° C) 15 ° F. Pruebe el horno durante una semana con el nuevo ajuste y ajuste de nuevo si es necesario, utilizando el primer ajuste como un indicador. Ajustar la Temperatura del Horno Inferior 1.
14 CARACTERÍSTICAS IDIOMA VOLUMEN DE LA ALERTA SONORA El idioma predeterminado de la pantalla es el inglés. Puede cambiarse a español o francés. El volumen de la alarma se puede ajustar a tres posibles niveles de volumen, Alto, Bajo y Apagado. 1. Colocar ambas perrillas de modo del horno inferior y superior en la posición OFF. 2. Mantenga presionado por tres segundos START TIME. Después presione START TIME varias veces hasta que Lng aparezca en la pantalla. 3.
CARACTERÍSTICAS BLOQUEO 1. Colocar ambas perrillas de modo del horno inferior y superior en la posición OFF. 2. Mantenga presionado PROBE por 3 segundos. 3. La melodía de bloqueo se escuchará, OVEN LOCKOUT aparecerá en la pantalla y DOOR LOCKED parpadeará en la pantalla. NOTA • Para cancelar la función COCCIÓN TEMPORIZADA RETARDADA, gire la perilla OVEN MODE hasta la posición OFF. • Para cambiar el horario de cocción, repita los pasos 3-4 y presione START.
16 CARACTERÍSTICAS TIEMPO DE COCCIÓN (COCCIÓN TEMPORIZADA) (Para los hornos inferior y superior) El horno se enciende inmediatamente y cocina los alimentos durante un período de tiempo seleccionado. Al finalizar el tiempo de cocción, el horno se apaga automáticamente. Configuración de la función COCCIÓN TEMPORIZADA El ejemplo siguiente es para hornear a 300 ° F durante 30 minutos. 1. Ajuste el reloj en la hora correcta del día. 2.
USO DEL HORNO USO DEL HORNO NOTA • Si se activa la perilla de la parte de abajo del horno mientras se ajusta la parte superior del horno, los ajustes para la parte superior del horno se perderan. • La temperatura registrada por un termómetro de horno puede diferir del ajuste de la temperatura real del horno. • Es normal que el ventilador de convección funcione mientras se precalienta durante un ciclo de horneado regular.
18 USO DEL HORNO BAKE (HORNEADO) (Para los hornos inferior y superior) BAKE se usa para preparar alimentos tales como pastelería panes, cazuelas. Puede programarse el horno para que hornee a cualquier temperatura desde 170° F (80° C) hasta 550°F (285° C). La temperatura predeterminada es de 350° F (175° C). Configuración de la función BAKE 1. Gire la perrilla de modo del horno inferior o superior en la posición BAKE. 2. Fije la temperatura.
USO DEL HORNO Configuración de la función CONVECTION BAKE 3. Presione START (iniciar). En la pantalla podrá verse CONV BAKE (Convección para hornear) y la temperatura convertida comenzando a 100°F(35°C). A medida que se precalienta el horno, la pantalla mostrará la temperatura en aumentos de 5 grados. Una vez que el horno alcance la temperatura deseada, sonará una alarma. La pantalla mostrará la temperatura del horno auto convertida(reducida por 25 ° F o 14 ° C). 4.
20 USO DEL HORNO CONVECTION ROAST (ASADO POR CONVECCIÓN) Esta característica de rostizado por convección se encuentra diseñada para brindar un desempeño de cocción óptimo para rostizar carnes de res y de ave. No es necesario utilizar el precalentamiento para carnes de res y de ave. El aire caliente circula alrededor de los alimentos por todos los lados, sellando los jugos y sabores. Las comidas quedan doradas y crujientes por afuera y jugosas por dentro.
USO DEL HORNO Ajuste del modo de Convección tostar 2. Ajuste la temperatura. Por ejemplo, Gire la perilla Time/Temp en dirección de las manecillas del reloj hasta 375°F. 3. Presione START (iniciar). En la pantalla podrá verse CONV. y la temperatura convertida comenzando a 100°F. A medida que se precalienta el horno, la pantalla mostrará la temperatura en aumentos de 5 grados. Una vez que el horno alcance la temperatura deseada, sonará una alarma.
22 USO DEL HORNO Humo Debido al calor intenso relacionado con el asado, es normal notar humo durante el proceso de cocción. Este humo es un resultado natural del sellado y no debería preocuparle. Si usted nota una cantidad de humo que lo hace sentir incómodo, siga los siguientes consejos para reducir la cantidad de humo en su horno. 1. Utilice siempre una asadera. No utilice sartenes para saltear o bandejas para horno convencionales por cuestiones de seguridad. 2.
USO DEL HORNO 23 Cuadro de Asado a la Parrilla Cantidad y/o Grosor Posición de la bandeja Primer lado Tiempo (min.) Segundo lado Tiempo (min.) Carne picada Bien cocida 1 lb. (4 hamburguesas) Grosor de 1/2 a 3/4” DoE 5–7 4–5 Grosor de 1" 1 a 1-1/2 lbs. D D D 6 7 8 2–3 2–3 3–4 Jugoso Medio Bien cocido Grosor de 1-1/2” 2 a 2-1/2 lbs. D D D 10 12 14 4–6 6–8 8–10 Pollo 1 entero cortado 2 a 2-1/2 lbs., cortado a lo largo 2 pechugas C 20 6–8 C 20 6–10 Colas de langosta 2–4 10 a 12 oz.
24 USO DEL HORNO CALENTAR LEUDAR La función WARM mantendrá la temperatura del horno menor a los 200°F (93°C). Utilice el modo de calentamiento para mantener los alimentos cocinados a temperatura de servicio de hasta tres horas después del final del ciclo de cocción. No utilice el modo de calentamiento para tratar de cocinar alimentos o calentar alimentos fríos. El modo de calentamiento se puede usar sola o después de Cocción programada o ciclos Cocción programada diferidas.
USO DEL HORNO SONDA PARA CARNE cuando saque la comida. Antes de utilizarla, introduzca la sonda en el centro de la parte más gruesa de la carne de res o dentro del muslo o pechuga de la carne de ave, alejada de la grasa o huesos. Coloque la comida en el horno y conecte la sonda para carne en el enchufe. Mantenga la sonda lo más lejos posible de una fuente de calor. Cierre la puerta del horno.
26 SMART FUNCTIONS(FUNCIONES INTELIGENTES) FUNCIONES INTELIGENTES USO DE LA FUNCIÓN WI-FI Instalación de la aplicación Uso de la aplicación Busque la aplicación de SIGNATURE KITCHEN SUITE en Google Play Store con un smartphone. Siga las instrucciones para descargar e instalar la aplicación. REGISTRO DEL PRODUCTO 1. Ejecute la aplicación de SIGNATURE KITCHEN SUITE en un smartphone. 2. Cree una cuenta e inicie sesión. 3. Seleccione Registrar. 4. Seleccione Horno. 5.
SMART FUNCTIONS(FUNCIONES INTELIGENTES) Información del aviso de software de código abierto SIGNATURE KITCHEN SUITE también le proporcionará código abierto en CDROM por un importe que cubre los gastos de su distribución (como el soporte, el envío y la manipulación) previa solicitud por correo electrónico a opensource@ thesignaturekitchen.com. Esta oferta es válida durante tres (3) años a partir de la fecha de adquisición del producto.
28 SMART FUNCTIONS(FUNCIONES INTELIGENTES) USO DE SMART DIAGNOSIS™ Si tiene algún problema con el aparato, este puede transmitir datos a un smartphone utilizando la aplicación de SIGNATURE KITCHEN SUITE o llamando por teléfono al centro de atención de SIGNATURE KITCHEN SUITE. Smart Diagnosis™ no puede activarse a menos que se conecte el aparato a la alimentación eléctrica. Si el aparato no enciende, deberá resolver el problema sin usar Smart Diagnosis™. SMART DIAGNOSIS™ CON UN TELÉFONO INTELIGENTE 1.
MANTENIMIENTO MANTENIMIENTO El ciclo de auto-limpieza utiliza temperaturas extremadamente elevadas para limpiar la cavidad del horno. Al ejecutar el ciclo de Auto-Limpieza, puede percibir humo u olores. Esto es normal; especialmente si el horno está muy sucio. Durante la Auto-Limpieza, la cocina debe estar bien ventilada para minimizar los olores de la limpieza. PRECAUCIÓN • NO deje a niños pequeños sin supervisión cerca del electrodoméstico.
30 MANTENIMIENTO PRECAUCIÓN NO fuerce la puerta del horno para abrirla cuando aparezca en la pantalla el ícono de bloqueo. La puerta del horno continuará bloqueada hasta que haya descendido la temperatura del horno. Si fuerza la puerta para abrirla, se dañará la puerta. Configuración de la Auto-limpieza con un Inicio Retardado 1. Extraiga todos los estantes y accesorios del horno. 2. Gire la perilla de modo del horno superior o inferior para seleccionar la función SELF CLEAN.
MANTENIMIENTO 31 SpeedClean™ Cuando sea necesario, su estufa sigue ofreciendo la opción de auto-limpieza (Self Clean) durante más tiempo, recomendada para la limpieza completa del horno, suciedad acumulada y difícil de remover. Mientras que SpeedClean™ es rápido y efectivo para pequeñas y LIJERAS suciedades, la función de auto-limpieza (Self Clean) puede ser usada para remover suciedades PESADAS acumuladas.
32 MANTENIMIENTO GUÍA DE INSTRUCCIÓN SpeedClean™ 1. Retire bandejas y accesorios del horno. 2. T alle y remueva cualquier resto quemado con la espátula de plástico. Espátulas de Plástico Sugeridas: • Paleta de plástico duro • Espátula de plástico de cocina • Espátula de plástico para pintura • Tarjeta de crédito antigua 3. Llene el rociador con 1 ¼ de taza (10 oz o 300 ml) de agua y úselo para rociar completamente las superficies internas del horno. 4.
MANTENIMIENTO LIMPIEZA EXTERIOR 33 Asadera y Rejilla Revestimiento Pintado y Decorativo Superficies de Acero Inoxidable Para evitar rayones, no utilice esponjas de lana de acero. 1. Coloque una pequeña cantidad de limpiador de electrodomésticos de acero inoxidable o lustre en un paño húmedo o paño de papel. 2. Limpie un área pequeña, frotando en el sentido del grano del acero inoxidable, si corresponde. 3. Seque y sacuda con un paño de papel limpio y seco o un paño suave. 4.
34 MANTENIMIENTO REEMPLAZO DE LA LUZ DEL HORNO LLa luz del horno es una bombilla halógena estándar de 10 vatios para hornos. Para reemplazar las lámparas ubicadas en la pared lateral: • Asegúrese de que el horno y la bombilla no estén calientes. 1. Desenchufe el horno o desconecte la energía. 2. Quite las bandejas del horno. 3. Deslice un destornillador plano entre la carcasa y la tapa de vidrio de la luz. 4.
MANTENIMIENTO SACAR Y VOLVER A COLOCAR LA PUERTA DEL HORNO Y EL CAJÓN 35 Volver a colocar la puerta del horno PRECAUCIÓN • La puerta es muy pesada. Tenga cuidado al remover y levantar la puerta. • NO levante la puerta de la manija. Bloqueo Bloqueo otro • NO golpee el vidrio con ollas, sartenes o cualquier Ranura Desbloqueo Ranura objeto.
36 RESOLUCIÓN DE PROBLEMAS RESOLUCIÓN DE PROBLEMAS PREGUNTAS FRECUENTES Mi nuevo horno no cocina como el viejo. ¿Hay algún problema con la configuración de la temperatura? No, Su horno está previamente probado y calibrado de fabrica. Para los primeros usos, siga los tiempos y temperaturas de sus recetas cuidadosamente. Si usted todavía cree que su nuevo horno es demasiado caliente o demasiado frío, usted puedes ajustar la temperatura del horno para cumplir con las necesidades de cocción que requiera.
RESOLUCIÓN DE PROBLEMAS ¿Por qué no funcionan los botones de funciones? Mi estufa sigue sucia después de ejecutar el ciclo SpeedClean™. ¿Qué más debo hacer? El ciclo SpeedClean™ sólo ayuda a aflojar la suciedad ligera del horno de su estufa con el fin de ayudar a la limpieza manual de su horno. Esto no elimina automáticamente todas las manchas después del ciclo. Después de ejecutar el ciclo SpeedClean™ se requiere tallar el horno de su estufa.
38 RESOLUCIÓN DE PROBLEMAS ANTES DE LLAMAR AL SERVICIO Antes de acudir al servicio, revise esta lista. Esto le podría ahorrar tiempo y gastos. La lista incluye los incidentes más comunes que no son el resultado de defectos de materiales o fabricación de este artefacto. Problema El control del horno emite un pitido y muestra un error de código F. El aparato no funciona. Causas / Soluciones posibles yy El control eléctrico ha detectado una condición de falla.
RESOLUCIÓN DE PROBLEMAS Problema Los alimentos no se hornean o rostizan correctamente 39 Causas / Soluciones posibles yy La posición de la bandeja es incorrecta o no está nivelada. - Ver rack y Pan de Colocación, página 17. yy Se están utilizando recipientes de cocción incorrectos o de tamaño inapropiado. - Ver bandeja y recipiente de horneado en las páginas 17, 18, 20. yy El sensor del horno debe ajustarse. - Ver Ajuste la temperatura del horno, página 13.
40 RESOLUCIÓN DE PROBLEMAS Problema Causas / Soluciones posibles El horno no queda limpio después de un ciclo de autolimpieza yy Los controles del horno no están configurados correctamente. - Ver la sección auto-limpieza, página 29-30. yy El horno estaba muy sucio. - Limpie los derrames más rebeldes antes de iniciar el ciclo de limpieza. Los hornos muy sucios pueden necesitar una nueva auto-limpieza o una limpieza más prolongada.
GARANTÍA 41 GARANTÍA (EE. UU.) SIGNATURE KITCHEN SUITE reparará o reemplazará su producto, a discreción de SIGNATURE KITCHEN SUITE, si se comprueba que los materiales o su confección presentaban defectos con el uso normal, durante el período de garantía establecido a continuación, vigente a partir de la fecha de compra del producto por parte del comprador original. Esta garantía es válida únicamente para el comprador original del producto y tendrá validez únicamente cuando se use en los EE. UU.
Customer Information Center For inquires or comments, call; 1-855-790-6655 USA Printed in Korea