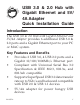
USB 3.0 & 2.0 Hub with Gigabit Ethernet and 5V/ 4A Adapter Quick Installation Guide Introduction The USB 3.0 & 2.0 Hub with Gigabit Ethernet and 5V/4A Adapter provides 6 additional USB 3.0 & 2.0 ports and a Gigabit Ethernet port to your PC or MAC system. Key Features and Benefits • • • • 04-0832A Provides 2 USB 3.0, 4 USB 2.0 ports and a Gigabit 10/100/1000Mb/s Ethernet port Compliant with Universal Serial Bus 3.0 Specification & IEEE 802.3, 802.3u, and 802.3ab compatible Supports SuperSpeed USB 3.
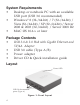
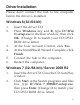
System Requirements • • • Desktop or notebook PC with an available USB port (USB 3.0 recommended) Windows® 8 (32-/64-bit) / 7 (32-/64-bit) / Vista (32-/64-bit) / XP (32-/64-bit) / Server 2008 & 2003 (32-/64-bit) / Server 2008 R2 MAC OS 10.6.x or later Package Contents • • • • USB 3.0 & 2.0 Hub with Gigabit Ethernet and 5V/4A Adapter USB 3.0 cable (Type A/B) Power adapter Driver CD & Quick installation guide Layout Power LED USB 2.
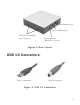
Ethernet port Power adapter jack USB 3.0 downstream ports (Type-A) Upstream port (Root port, Type-B) Figure 2: Rear Layout USB 3.0 Connectors Type-A connector Type-B connector Figure 3: USB 3.
Hard ware Installation Important: The USB 3.0 & 2.0 Hub with Gigabit Ethernet and 5V/4A Adapter only works at USB 3.0 speed when connected to a USB 3.0 host controller. Otherwise it will work as a USB 2.0 or USB 1.1 hub when connected to USB 2.0 or USB 1.1 host controller, respectively. 1. Connect the Type-B connector of the included USB 3.0 cable to the Upstream port (Root Port, Type-B) of the USB 3.0 & 2.0 Hub with Gigabit Ethernet and 5V/4A Adapter. 2.
Driver Installation Please don't connect the hub to the computer before the driver is installed. Windows 8 (32-/64-bit) 1. 2. 3. 4. 5. 6. Insert the driver CD. Press Windows key and R, type D:\Win 8\setup.exe in the Run window, then click OK. (Change D: to match your CD\DVDROM drive letter) At the User Account Control, click Yes. At the InstallShield Wizard Complete, click Finish. Connect the hub to the computer. Restart the computer. Windows 7 (32-/64-bit) / Server 2008 R2 1. 2. Insert the driver CD.
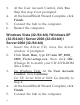
3. 4. 5. 6. At the User Account Control, click Yes. Skip this step if not prompted. At the InstallShield Wizard Complete, click Finish. Connect the hub to the computer. Restart the computer. Windows Vista (32-/64-bit) / Windows XP (32-/64-bit) / Server 2003 (32-/64-bit) / Server 2008 (32-/64-bit) 1. 2. 3. 4. 5. 6 Insert the driver CD, close the driver window if prompted. Click Start, Run, type D:\win XP_2003_ 2008_Vista\setup.exe, then click OK. (Change D: to match your CD\DVD-ROM drive letter) For Win
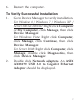
6. Restart the computer. To Verify Successful Installation 1. 2. Go to Device Manager to verify installation. For Window 8 / Windows 7 / Windows XP / Server 2003 & 2008 R2: Right click Computer or My Computer, click Manage, then click Device Manager. For Windows Vista: Right click Computer, click Manage, click Continue, then click Device Manager. For Server 2008: Right click Computer, click Manage, double click Diagnostics, then click Device Manager. Double click Network adapters. An ASIX AX88179 USB 3.
Mac OS Installation 1. 2. 3. 4. 5. 6. 7. 8. 9. 8 Insert the driver CD. Double click the Drivers icon on desktop, or go to Drivers, select MAC folder, then double click AX88179.dmg. At the prompted window, double click AX88179_v1.1.0 file. At Introduction, click Continue. At Installation Type, click Change Install location if you want to change the default folder; otherwise, click Install or Upgrade. Enter Name and Password, then click OK or Install software. Click Continue Installation.
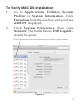
To Verify MAC OS Installation 1. 2. Go to Applications, Utilities, System Profiler or System Information. Click Extensions from the side bar, and you'll see AX88179 displayed. Click System Preference, then click Network. The bullet before USB Gigabit... should be green.
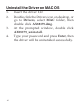
Uninstall the Driver on MAC OS 1. 2. 3. 4. 10 Insert the driver CD. Double click the Drivers icon on desktop, or go to Drivers, select MAC folder, then double click AX88179.dmg. At the prompted window, double click AX88179_uninstall. Type your password and press Enter, then the driver will be uninstalled successfully.
Technical Support and Warranty QUESTIONS? SIIG’s Online Support has answers! Simply visit our web site at www.siig.com and click Support. Our online support database is updated daily with new drivers and solutions. Answers to your questions could be just a few clicks away. You can also submit questions online and a technical support analyst will promptly respond. SIIG offers a 5-year manufacturer warranty with this product.
About SIIG, Inc. Founded in 1985, SIIG, Inc. is a leading manufacturer of IT connectivity solutions (including Serial ATA and Ultra ATA Controllers, FireWire, USB, and legacy I/O adapters) that bridge the connection between Desktop/ Notebook systems and external peripherals. SIIG continues to grow by adding A/V and Digital Signage connectivity solutions to our extensive portfolio.