
Installation guide


5
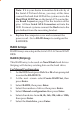
Note: If it is your desire to monitor disk activity of
the Serial ATA hard drives, you may at this time
connect the hard disk LED of the system case to the
Hard Disk LED Pins on the Serial ATA controller,
see Board Layout on page 2 for the location of the
pins. All four Serial ATA Connectors activate the
LED. For most systems connect the Red wire to the
pin farthest from the mounting bracket.
6. Replace the computer cover and reconnect the
power cord. Go to RAID Arrays to configure the
RAID BIOS.
RAID Arrays
RAID Arrays are setup in the Serial ATA 4-Channel RAID
BIOS.
RAID 0 (Striping)
This RAID array to be used on New/Blank hard drives.
Striping will destroy existing data on the hard drive.
For Manual Configuration
1. As the BIOS boots press Ctrl+S or F4 when prompted
to enter the RAID BIOS.
2. At the next screen select Create RAID Set, then
press Enter.
3. Select RAID0, then press Enter.
4. Select the number of drives then press Enter.
5. Select Manual configuration then press Enter.
6. Select chunk size from 4k, 8k, 16k, 32k, 64k or 128k,
then press Enter.
7. Select the first drive, press Enter.