
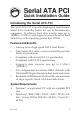
Installation guide


7
Windows NT4.0
For New Windows NT4.0 Installation
A new installation of Windows NT4.0 requires a floppy
disk for the driver installation. To make this floppy disk,
copy the contents of the NT4 folder, found on the driver
CD, onto a blank floppy disk then follow the directions
below.
1. Install the board and follow Microsoft procedures
to install Windows NT4.0 accordingly.
2. At the Windows NT Setup screen, press F6 to
specify and add the driver.
3. Press S, select Other, then press Enter.
4. Insert the driver diskette then press Enter.
5. Select Silicon Image... for Windows NT 4.0 and
2000 and press Enter.
6. Press Enter to continue, then follow the on-screen
instructions to complete Windows NT4.0
installation.
For Existing Windows NT4.0 Installation
1. Install the board and boot up Windows NT4.0.
2. Double click My Computer/Control Panel/SCSI
Adapters, then click the Drivers tab.
3. Click Add..., then click Have Disk....
4. Insert the driver CD, type D:\NT4, then click OK.
(Change D: to match the drive letter of your
CD-ROM)
5. Highlight Silicon Image in the left column, then
select Silicon Image SiI... SATALink Controller,
and click OK.
6. Click OK, remove the driver CD and restart NT4.0 to
complete the installation.