
Installation Guide


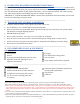


Table Of Contents
- 1) SYSTEM & INSTALLATION OVERVIEW
- 2) ESTIMATING REQUIRED SILVERMINE MATERIALS
- 3) TRANSPORTING, STORING & HANDLING
- 4) RECOMMENDED TOOLS & EQUIPMENT
- 5) OTHER MATERIALS
- 6) PREPARING FOR INSTALLATION:
- 7) FASTENING
- 8) CUTTING
- 9) INSTALLING INITIAL COURSES:
- 10) SUBSEQUENT COURSES (WORKING YOUR WAY UP THE WALL)
- 11) SUPPLEMENTAL FLASHING & TRANSITIONS
- Step Flashing Defined
- Flashing & Installing Outside Corners
- Flashing & Installing Inside Corners
- Flashing Vertical Transitions
- Flashing Horizontal Cladding Transitions with Stone below
- Flashing Horizontal Cladding Transitions with Sills below
- Under Openings (Trim removable, Sills or Panels Below)
- Sills Under Windows w/out Removable Trim
- Under Fixed Trim Situations (trim not removable, tight eaves, frieze boards, etc.)
- Over Trimmed Openings
- Flashing Soffit Terminations
- Flashing & Installing Light and Electrical Boxes
- Flashing & Installing Vents
- 12) CARE & MAINTENANCE
- 13) DEALING WITH COMPLIMENTS
- APPENDIX A - STONE ESTIMATION SHEET
- APPENDIX B –DRAWINGS
- Fig. B-1 Flat Panel
- Fig. B-2 Initial Course Over Foundation Wall Base
- Fig. B-3 Initial Course Over Water Table Trim
- Fig. B-4 Outside Corner w/ Step Flashing
- Fig. B-5 Inside Corner w/ Step Flashing
- Fig. B-6 Vertical Transition w/ Step Flashing
- Fig. B–7 Panels Below Siding
- Fig. B–8 Panels Below Trim
- Fig. B–9 Sills Below Siding
- Fig. B-10 Panels/Sills Below Openings w/ Removable Trim
- Fig. B-11 Sills Below Window w/out Removable Trim
- Fig. B-12 Panels Under Fixed Trim
- Fig. B-13 Initial Course Above Trimmed Openings
- Fig. B-14 Panels Below Soffit
- Fig. B-15 Electrical & Light Box Installation
- Fig. B-16 Vent Installation

3
1) SYSTEM & INSTALLATION OVERVIEW
INSTRUCTIONS
a
- This manual will guide you through every element of the installation process. Carefully
read all installation instructions before starting your project, paying close attention to all safety precautions.
The videos at www.SilvermineStone.com are a great resource for instructions and helpful hints for installation.
SAFETY - The foremost responsibility you have as you complete your installation is to observe all
Silvermine
’
s safety instructions and follow safe tool operating instructions provided by tool manufacturer.
b
SILVERMINE PANELS - Panels are 6 inches high by 24 inches wide and weigh 13.5 lbs. Aluminum flashing
is imbedded into the panel during casting. (See APPENDIX B –DRAWINGS - Fig. B-1 Flat Panel)
SILVERMINE SHINGLING SYSTEM - The aluminum flashing works with the stone panels to
prevent water from getting to the underlayment through the panel seams. By design, Silvermine’s
integrated panel flashing does not run all the way to the edge of the stone, creating periodic
“breathe” holes in the flashing behind the panels (see Figure 1). Installing courses of stone, sills
and accessories with 4 inch minimum vertical seam offsets is critical.
LOCAL CODES - The instructions found in this manual are specific to the Silvermine product.
Care should be taken to make sure your installation complies with all local codes and requirements.
STRUCTURE - A successful stone installation starts with a sound foundation that has been properly wrapped
and flashed as prescribed by local building codes. This ensures a protected substrate to which the stone flashing
can be easily secured.
Silvermine’s stone veneer panels should be applied over wood framing, spaced 16 inches on center, that has
been sheathed with 7⁄16 inch OSB or ½ inch plywood sheathing
c
. Consult an architect or building engineer for
wall design requirements on applications over 30 feet. Design wall framing to limit out-of-plane wall deflection
to L/240. Sheath corners to meet local building code requirements and mitigate the effects of wall racking.
Install roofing and interior wallboard prior to starting installation. Plumb walls to within ¼ inch per 10 lineal
feet.
FLASHING - Although Silvermine’s patented flashing system provides 95% of the waterproofing
requirements, properly flashing certain areas (around windows & doors, vertical & horizontal transitions from
Silvermine Stone to other sidings, around vents, around outlet and light boxes, etc.) is critical to preventing
water from getting behind Silvermine’s siding and for overall water protection. It is essential to ensure all
required supplemental flashing is installed as instructed throughout this manual. Building code
requirements may vary, please check with local authorities to determine requirements for your area.
STEP FLASHING - Called out specifically as it is more common in roofing than in siding. As Silvermine’s
system is a shingling system, using step flashing on all vertical transitions and corners is critical. Step flashing
is where the integrated aluminum flashing is flashed one course at a time as described in Section 12.
STAYING LEVEL - The key to a beautiful installation is to start and stay level. Check every piece before and
after fastening, then check course for level before installing the next piece. This ensures panels fit snugly
together without leaving an unsightly gap. Each course depends on the previous course being level.
INSTALL SUMMARY - If the structure is prepared properly with flashed corners and transitions as called for
in the manual with level courses, applying Silvermine Stone is as easy as stacking and fastening it to the wall.
a
No instruction booklet can anticipate everything. We have focused on the tools and techniques necessary to complete a typical
installation. If you encounter a situation not covered or have questions, please call the Silvermine Help Line at 1-715-835-7595.
b
PROPOSITION 65 WARNING - This product contains Crystalline Silica. Dusts from cutting or sawing may create possible
cancer hazard. Dusts of this product may cause irritation of the nose, throat, and respiratory tract. Avoid prolonged or repeated
inhalation of dusts from this product. Refer to OSHA cutting standards for further information. Wash hands and face with soap and
warm water immediately after handling this product
c
If your building has framing more than 16” on center, consult your architect or engineer.
Figure 1