
Installation Guide


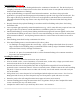
Table Of Contents
- 1) SYSTEM & INSTALLATION OVERVIEW
- 2) ESTIMATING REQUIRED SILVERMINE MATERIALS
- 3) TRANSPORTING, STORING & HANDLING
- 4) RECOMMENDED TOOLS & EQUIPMENT
- 5) OTHER MATERIALS
- 6) PREPARING FOR INSTALLATION:
- 7) FASTENING
- 8) CUTTING
- 9) INSTALLING INITIAL COURSES:
- 10) SUBSEQUENT COURSES (WORKING YOUR WAY UP THE WALL)
- 11) SUPPLEMENTAL FLASHING & TRANSITIONS
- Step Flashing Defined
- Flashing & Installing Outside Corners
- Flashing & Installing Inside Corners
- Flashing Vertical Transitions
- Flashing Horizontal Cladding Transitions with Stone below
- Flashing Horizontal Cladding Transitions with Sills below
- Under Openings (Trim removable, Sills or Panels Below)
- Sills Under Windows w/out Removable Trim
- Under Fixed Trim Situations (trim not removable, tight eaves, frieze boards, etc.)
- Over Trimmed Openings
- Flashing Soffit Terminations
- Flashing & Installing Light and Electrical Boxes
- Flashing & Installing Vents
- 12) CARE & MAINTENANCE
- 13) DEALING WITH COMPLIMENTS
- APPENDIX A - STONE ESTIMATION SHEET
- APPENDIX B –DRAWINGS
- Fig. B-1 Flat Panel
- Fig. B-2 Initial Course Over Foundation Wall Base
- Fig. B-3 Initial Course Over Water Table Trim
- Fig. B-4 Outside Corner w/ Step Flashing
- Fig. B-5 Inside Corner w/ Step Flashing
- Fig. B-6 Vertical Transition w/ Step Flashing
- Fig. B–7 Panels Below Siding
- Fig. B–8 Panels Below Trim
- Fig. B–9 Sills Below Siding
- Fig. B-10 Panels/Sills Below Openings w/ Removable Trim
- Fig. B-11 Sills Below Window w/out Removable Trim
- Fig. B-12 Panels Under Fixed Trim
- Fig. B-13 Initial Course Above Trimmed Openings
- Fig. B-14 Panels Below Soffit
- Fig. B-15 Electrical & Light Box Installation
- Fig. B-16 Vent Installation

6
• Walls must be sheathed with either 7/16" OSB or 1/2" plywood that is in good condition and properly
fastened as per manufacturer’s instructions and building codes.
• Wall framing must be designed to limit out-of-plane wall deflection to a minimum of L/240.
• Structure must be able to handle stone panel weight of 15 lbs./sq ft exclusive of any other external loading
(i.e., wind or seismic load).
• Wall must be plumb and flat within 1/4" over 10' in any direction - Using a string along the wall, measure
the deflection of the wall (from lower point of the wall to the string).
• Corners must be square.
• Per building code requirements and to protect the structure from vapor transmission a house wrap must be
installed as per the manufacturer’s instructions, prior to installation of Silvermine products.
• Buildings must be properly sheathed with house wrap and openings flashed per local building codes.
• A second layer of WRB is NOT necessary as Silvermine meets international building codes
m
without a
second layer of WRB if it is installed per Silvermine installation instructions.
Interior Applications
• Install minimum 7/16 inch or greater OSB or plywood substrate to wood studs, following the
manufacturer’s instructions. If there are any questions as to the structural integrity of the sheathing or
framing, contact a qualified contractor or building inspector.
• House wrap and flashing are not required.
• Panels can be installed in contact with level floor, or baseboard trim. No clearance is necessary.
WARNING: DO NOT INSTALL SILVERMINE DIRECTLY TO DRYWALL.
______________________________________________________________________________
7) FASTENING
Fastening Unmodified
n
Panels (Flats, corners, and pillars) using the Integrated Flashing
• Each piece should be fastened as instructed below.
• GLUING - apply a 3/8 inch thick, quarter sized dollops of construction adhesive (every 6 to 8 inches) to the
aluminum flashing each panel will cover. Glue should be ~2 inches above the bottom of the panel.
o Glue all panels in high wind load areas
o Glue all initial course panels
• FASTENER SPECIFICATIONS - For aluminum flashing, use only fasteners that meet the
specifications below and drive them 90
o
to face of structure (See Figure 2)
o Head Types: Pancake Head, Modified
Truss Wafer Head, Washer Head
o Size: #10x1-1/2” or longer
o Head size: 12mm or larger
o Material: Quality Multiple-Coated Steel
or stainless steel
o Threads/Inch: 12 or less, fully threaded
o Head : shaft angle: 90° shaft.
• Using any fasteners that do not meet Silvermine’s specifications or driving any fastener at an angle
can damage the flashing and result in water damage and/or reduced performance in wind conditions.
m
ICC-ESR #
n
“Unmodified panels still have the integrated flashing in place
Figure 2