
User guide
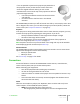


Ceiling Mounting
Invert the projector and suspend it from the ceiling using a specific bracket.
• To fit the bracket unscrew and remove the 3 rubber feet (Do not use the
rubber feet to fix the bracket to the projector).
• Attach bracket by using 3 x M6 screws not exceeding 15 mm in length
For ceiling mounting use only SIM2-approved ceiling brackets and adhere
to the installation instructions and safety guidelines provided with the
bracket. Do not over-tighten the screws.
Orientation
By default, the SUPERLUMIS is configured for a Front installation (projector installed
upright and in front of the screen). If the projector is installed behind the screen or
inverted, you can use the image orientation function of the projector (see
“Orientation” on page 30)
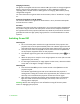
Vertical Lens Shift
Ideally, the projector should be positioned at a right angle to the screen and in such a
way that:
• the lens center and screen center are aligned with each other
• the projected image fills the screen perfectly
3 Installation SUPERLUMIS
User Guide
15